The Sharpest Tack in the Box: How to achieve sharp focus in tricky shooting situations

One of the most important elements of an image is focus, and even an untrained viewer can tell immediately when a key part of the image is not in sharp focus.  The stakes are even higher when we consider that poor focus is nearly impossible to correct in post-processing.  Most of us rely on our camera’s autofocus functionality to help us achieve tack-sharp focus while shooting, but as with every other automated system in a camera, even very sophisticated autofocus mechanisms can go awry, especially when we’re faced with tricky shooting situations.  Here’s a quick guide to minimizing focus problems and achieving sharp focus in nearly every shot.

Scenes with low contrast, such as in this image of ice floes on the Barents Sea in Svalbard after sunset, can fool even sophisticated autofocus systems.  Override your camera’s autofocus system and instead shoot manually in these conditions.  Buy this photo

  1. Make sure to select the part of your image that you want to be in sharp focus.  It sounds like a no-brainer, but surprisingly frequently the reason an image’s main subject is not in focus is because the photographer never told the camera’s autofocus system what to focus on.  Remember that as with any assistive technology, a camera’s autofocus system is just a collection of hardware and software designed to make a best guess about what the user wants.  If you leave your camera set to full autofocus mode, it does its best to identify what its software determines is likely to be your intended subject.  A human face, for example, is likely to be what you want to have in sharp focus, so the camera focuses on that.  But often the camera does not guess correctly.  Nearly every camera, including the one in your smartphone, allows you to manually select your desired focus point, often by simply touching the desired part of the image on the screen.  Be sure to check what your camera is doing and correct it by manually selecting the focus point if it guesses wrong.
  2. Recognize that your camera’s autofocus system will likely not work in certain tricky conditions. Most autofocus systems work by looking for areas of the image where the contrast is changing, such as at the outlines of a person or a building.  But in very dim lighting, or when the main subject is badly backlit, or in scenes with very low contrast (think of a stormy sky or the waves of an ocean), the autofocus does not work.  Recognize these deficiencies and be prepared when shooting in these conditions to take manual control.  Every camera has a mechanism to manually select focus, and you need to know how to use that feature.
  3. Choose the autofocus method best suited to your shooting needs.   Most advanced or professional cameras allow you to choose among several different types of autofocus methods.  Often, the first choice is between single-focus mode or continuous-focus mode.  Choose single-focus mode when your subject is relatively stationary and you must have precise focus achieved before releasing the shutter.  For subjects that are moving quickly or where you need to time your shot exactly, even at the expense of not yet having perfect focus, you should choose continuous-focus mode.  Within each of these modes, your camera may offer sub-choices, such as letting you manually choose the exact focus point you want or choosing a range of points from which the camera selects focus based on the motion of the subject.  This is rocket-science technology, but fortunately it is pretty straightforward to choose the desired method once you understand what each one does.  Read your camera’s manual and always practice in the different focus modes before going on any important shoots, especially on a major trip.
  4. Circumvent the whole problem by choosing a wide depth of field.  Sometimes the best artistic choice requires a narrow depth of field so that only the main subject is in sharp focus, and sometimes the light is too dim to choose a narrow aperture, but if you can make the shot work with a wide depth of field (in other words, using a small aperture, represented by a high f-stop number), then you don’t have to worry about focus at all.  In most situations, universal focus from several feet away from your lens through infinity is achieved at apertures of about f/16 or smaller.

Capturing tack-sharp images of fast-moving wildlife like the cheetah requires selection of an autofocus mode capable of dynamically refocusing on the moving subject.  For this shot of a cheetah in Serengeti National Park in Tanzania, there was the added challenge of having low contrast between the animal and the background.  I chose my camera’s continuous-focus mode with predictive focus so the camera would anticipate where the cheetah was moving and focus ahead of the shutter.  Buy this photo

By using these tips, you can achieve tack-sharp focus where you want it in nearly all of your images, whether you’re shooting with a simple point-and-shoot or phone camera, or the most advanced professional camera.  Any camera frequently makes the wrong guess about where the focus point should be, so do not rely blindly on autofocus.  It’s worth investing some time to learn how to configure autofocus appropriately for any shooting situation, and how to turn it off and instead focus manually when required.  Happy shooting!

How do you achieve sharp focus in tricky conditions?  Please share your thoughts in the comment box at the end of this post.

Want to see more articles about techniques?  Find them all here: http://www.to-travel-hopefully.com/category/techniques/.

Total Eclipse of the Heart: Techniques for photographing solar eclipses

Prof. Jay Pasachoff and his student set up scientific gear for observing the total solar eclipse in Svalbard in 2015.  Buy this photo

If there’s a more thrilling experience anywhere on our planet than observing a total solar eclipse, I’ve not yet found it.  The experience of observing the moon slowly move in front of the sun, obscuring our view of the sun one nibble at a time until day turns into night, the temperature drops, the stars come out in the middle of the day, and the delicate corona of the sun is exposed, is like nothing else we earthlings can feel.  An eclipse is a singular event, each a bit different from any other that has ever occurred, and an exclusive event that often can be observed only from a narrow swatch of land and in very remote corners of the planet.  I’ve stood in the umbra (shadow) of the moon during three total solar eclipses thus far in my life: first in Virginia Beach in the USA when I was 7 years old, then in the mountains above Anji in China in 2009, and most recently in 2015 in Svalbard well above the Arctic Circle.  I plan to be in Salem, Oregon in the USA in 2017 when the next total solar eclipse occurs.  These events are truly life-changing, and once you’ve experienced an eclipse you will want to seek out others.

Photographing an eclipse takes all of the normal challenges of travel photography and throws a few special ones into the mix.  To start with, an eclipse can take place anywhere on the planet, and often the best location from which to view one is very remote with little or no travel infrastructure.  The eclipse I experienced last year in Longyearbyen, high in the Arctic on the island of Svalbard, was a transformative event, but the extreme cold coupled with the lack of infrastructure made getting there and photographing the eclipse a special challenge.  And of course, during an eclipse the already challenging conditions are stressed even further due to the tremendous crush of visitors who rush in from all over the world to try to view the solar event.

I recommend you travel with an expert in managing the complicated logistics required to stage a successful eclipse trip.  I always go with A Classic Tours Collection (http://aclassictour.com/travel-company/solar-eclipse-tours-expeditions-total-eclipse/).  Run by travel logistics guru Mark Sood and with scientific consulting from Professor Jay Pasachoff, a world expert in eclipses and the human being who has stood in the shadow of the moon more times than any other, this company has delivered an unprecedented track record of successful eclipse trips since 1980.

Special challenges in photographing a total solar eclipse, like this one in Svalbard in 2015, include remoteness, lack of infrastructure, extreme conditions, the risk of poor weather, and the need for specialized photographic gear.  Go with an expert or risk missing the action.  Buy this photo

Assuming you are able to get all the right gear to the best possible location to observe the eclipse, and then the weather cooperates, the actual technique required to capture remarkable images of this phenomenal event is fairly straightforward.  Here’s what you need to do:

Gather the right gear.  You will need at least one (and I prefer to have two) DSLR or ILC camera bodies with a long telephoto lens or two.  I use a Nikon D810 with a Sigma 150-500mm super-telephoto zoom lens.  For each lens you will need a specialized solar filter to block 99.999% of the sun’s light to enable you to shoot the sun safely during the partial stages of the eclipse.  The solar filter blocks much more of the sun’s light than a standard photographer’s neutral density filter, so don’t try to find this item at your local camera shop.  Instead, you will need to order it from a specialized astronomy company such as Thousand Oaks Optical (http://www.thousandoaksoptical.com/solar.html).  Be sure to order a black polymer threaded camera filter in the proper diameter for your specific lens.  Without a properly fitted solar filter on each lens you plan to shoot with, it is not safe for your eyes or for your camera’s sensor to attempt to photograph a solar eclipse.  You will also need a heavy-duty professional tripod with a good ball head and mounting plate to hold your camera and lens steady during the eclipse.  Also be sure to pack a remote shutter release with extra batteries, the tripod collar that came with your lens (if included), a mini flashlight for checking your camera’s settings, extra memory cards, and extra batteries and chargers for your camera.

Super-telephoto zoom lens with tripod mounting collar.  Don’t forget to order a solar filter to fit your lens(es).


Heavy-duty professional tripod.


Remote shutter release.

Test your gear.  Before the trip, test your full setup at home by shooting the sun with your solar filter on the lens, and by shooting the full moon without the solar filter.  These two scenarios will allow you to test your gear in conditions similar to the partial stages of the eclipse and to totality, respectively.

Prepare your gear the evening before the eclipse.  Charge all batteries, format all memory cards, make all camera and lens settings (per my instructions below), and check all your equipment.  Remove the UV filter you ordinarily keep on your lens(es), because they will interfere with the solar filter you will use during the partial stages.  On eclipse day, have in your pocket your flashlight, extra camera batteries, extra remote batteries, and extra memory cards.  It will be dark during totality and you will be excited, so best to have everything well planned in advance and within easy reach on eclipse day.

Configure your camera’s and lenses’ settings in advance of the eclipse.  Shoot in RAW + JPEG mode using the highest quality setting available on your camera.  I recommend using an ISO setting of 400, and be sure to turn your camera’s Auto ISO setting off.  The exposure changes constantly throughout the eclipse, so I do not recommend manual exposure mode; instead, choose aperture priority mode with the aperture set at f/11.  You may want to choose highlight-weighted metering if your camera has this option; otherwise, select center-weighted metering.  Choose single-frame shooting mode.  I like to turn on exposure bracketing to shoot bursts of 3 frames, each 1 stop different from the previous one, so as to have higher likelihood of getting proper exposure on each series of shots.  Turn your focus mode to manual, because autofocus will not work during or near totality.  Tape your lens’s focus ring to infinity to be sure it won’t move during the eclipse.  Take a deep breath.  You’re almost ready for the eclipse.

Set everything up at the eclipse viewing site.  Place your camera on the heavy-duty tripod and install your remote control.  Remove your regular UV filter and attach your special solar filter.  As the first contact between sun and moon occurs, start to shoot.  Remember to shoot in bursts of 3 (or 5 or 7) if you have turned on exposure bracketing.  Due to the rotation of the earth, you will have to recenter the sun in your viewfinder periodically (unless you are shooting through a telescope with an equatorial mount).

This image shows the early partial stages of the Svalbard total solar eclipse.  Shoot periodically during all the partial stages, and remember to reposition your shooting angle so the sun remains in the center of your field of view.  Buy this photo

Remove your solar filter only during the period of totality.  When the diamond ring effect signals the start of totality, and the world around you is suddenly plunged into darkness, quickly take off your lens’s solar filter.  You won’t need it during totality.  The brightness of the sun during totality is similar to that of the full moon, so viewing and photographing the sun during totality will not be dangerous.  This is the most exciting time, and it will last for only about 1-4 minutes, so enjoy the spectacle of the sun’s corona revealed!  Remember to spend some of the time just looking and not shooting.  This is an experience you will want to remember not only through your camera!

For the brief but exhilarating period of totality, remove your solar filter.  This image captures the diamond ring effect that ushers in the period of totality.  The sun’s delicate corona can be seen around the edge of the photosphere.  Buy this photo

Put your solar filter back on after totality.  The partial stages that follow the period of totality, just like the partial stages that came before totality, are not safe to view or photograph without the special solar filter.  Keep shooting those later partial stages because you will want a complete record of the eclipse to show a compelling narrative and to create montages of the images.

Shoot some landscapes and people images, too.  Don’t forget to use a second camera–either a second DSLR or ILC body you brought for the occasion or your smartphone’s camera–for landscape and people shots during the eclipse.  You don’t want all of your images to be close-up portraits of the sun and moon only.  You will need a solar filter on the second camera, too, if you plan to include the sun itself in these shots.

Remember to shoot some images, with a second camera, of yourself and your travel companions during the eclipse.  Here’s a shot of my family standing in the umbra during totality at the China eclipse of 2009.  Buy this photo

Return all settings to normal after the eclipse.  You will have made quite a few special adjustments in order to capture the eclipse properly.  Don’t forget to restore your usual settings after the eclipse has ended.

Get creative with your eclipse images once you return home.  There are many ways to compile and share your images to give the world a sense of the thrill you experienced while in the shadow of the moon.

Once home from the eclipse trip, get creative about how to share your experience.  Here I have put together a montage of some of my favorite images from each stage of the Svalbard eclipse.  Using Photoshop, I created a composite image showing the sequence of stages from partial to total and back again.  Buy this photo


To Travel Hopefully is Taking the Day Off: Please consider purchasing some photos, browsing for some gear, or looking at an ad

Dear Reader,

To Travel Hopefully is taking the day off, but don’t worry, we’ll be back with fresh new content tomorrow.  In the meantime, please support this site by purchasing some of my photos, browsing for some great gear via the Amazon links, or clicking on some of the ads that interest you.  Thank you for visiting To Travel Hopefully!  Without your support, this project cannot continue providing you with daily content including inspiring travel photos and tips and tricks for making great images.

Warm regards,

Kyle Adler

People Pictures Beyond the Selfie: Why selfies don’t make great images, and how to get really good pictures including yourself

Several times in the pages of “To Travel Hopefully,” I’ve emphasized the importance of including yourself and your travel companions in some of your images.  Not only will you and your friends enjoy seeing yourselves captured in these travel photos, but the inclusion of people in travel images gives a sense of scale to the places you visited and tells a more compelling narrative than would be possible in photos without people.

The standard way of including yourself in a photo these days is to use your phone’s selfie camera, but there are a number of reasons why taking selfies is not the best way to capture your own likeness in an image.  First, the sensor in the front-facing (“selfie”) camera on your phone very likely has a much lower resolution than does the phone’s regular camera, so the picture quality is lower.  Second, it’s difficult to properly compose a photo when holding the camera out at arm’s (or selfie stick’s) length, let alone to smoothly release the shutter.  Third, the perspective imparted to the image when the camera is held above in selfie fashion is distorted and often unflattering.  It’s really quite unlikely that you’ll get professional quality images of people using the selfie technique.

A selfie doesn’t allow you to properly compose your image, is awkward to shoot, and uses a low-quality image sensor.  Instead, mount your camera on a tripod, compose the image exactly the way you want it, and release the shutter remotely or with the camera’s self-timer.  Or enlist the help of another photographer.  Buy this photo

Fortunately, there are better ways of including yourself in your photos, and they’re not difficult to implement.  The two most straightforward methods are placing the camera on a tripod and triggering the shutter with a self-timer or remote release, and setting up the camera for another person to shoot handheld.

The basic setup is the same for either method.  Have the other people you want included in the photo stand in the desired location.  If you’re the only person present, make a note of where your body will be placed in the composition.  Then compose your image from the best vantage point, with the camera either mounted on a tripod or handheld.  Configure your camera’s settings (focus, exposure, flash, etc.) the way you prefer, and test the settings by shooting a few frames without yourself in the image.  Then move into your predetermined position in the frame and either fire the shutter remotely with the self-timer or remote release, or ask another person to push the shutter button for you.

If you do choose to have another person press the shutter release button for you, you need to be thinking about two things: 1) ensure they know how to operate the camera and won’t run away with it, and 2) be aware that in many countries and regions the person who pushes the button owns the copyright for the image even if they did not contribute artistically to making it.  I prefer to use a tripod whenever practical, so as to have a higher likelihood of capturing the image I envision and to avoid any question as to who owns the copyright.

Do you have a favorite method for including yourself in your photos?  Please share your ideas in the comment box.

Want to see more posts on how to shoot while traveling?  See them all here: http://www.to-travel-hopefully.com/category/travel/shoot/.


Every Day I Write the Book: Even in the digital world, there’s a place for a hardcover photo book from your trip

In the brave new digital world, we have a lot of ways to share our travel photos after (and sometimes even before) we return from the trip: social media, on-screen slideshows, video montages, and of course the enduringly popular paper print.  Even with all of these very immediate sharing options, one of my favorite formats for preserving my travel images is the hardcopy photo book, and today there are more choices than ever before regarding how to create these wonderful keepsakes.

Our living room bookshelf and coffee table are home to more than a dozen photo books, each one showcasing the images and preserving the often fleeting memories of the details of a major trip we’ve taken.  Here’s why I love this method of sharing travel photography and how to create your own photo books.

img_3497

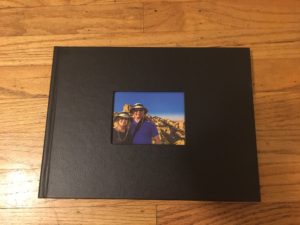
The leather cover of a photo book showcasing our recent travels in Turkey.

Why create a photo book?  Over time, new digital formats replace existing ones, and the very old ones become obsolete.  Within about 20 years, it is quite likely that none of our present formats of storing data will still be readable.  The printed page has much more staying power.  It is estimated that photos printed on high quality paper using high quality inks, and stored away from direct sunlight, can last for 100 years.  I’m a big fan of framed prints, as well, but a photo book is more cost-effective and space-efficient as a means to preserve many more photos than we could easily hang on our walls.  And because photo books can include customized captions to accompany the included images, they’re a great reference source for refreshing our memories about what we saw, when, and where.  Finally, photo books look great and are fun conversation-starters to tell the story of our travels when friends and family come to visit.

How do you create a photo book?  There are a number of methods, but unless you are a scrapbooker or handy with bookbinding, all of them involve sending your specifications and images to a vendor that will print the book, bind it, and mail it to you.  Some software packages, including Lightroom, have built-in modules for creating photo books.  And most photo sharing websites, including SmugMug (a fabulous site used by many professionals including me), Snapfish, Shutterfly, and Apple Photos, allow you to create and purchase photo books from your images.  These services vary in features, price, and quality, so shop carefully.  Most of my past photo books were created using Snapfish, but I am transitioning to using Lightroom’s and SmugMug’s services instead.  I will report on the results in a future post.

img_3493

Good book-creation software should allow you to choose from a wide range of formats on each page to display one or several photos plus text.

The basic process works similarly for any of these services.  You specify the book size, cover material, paper quality, printing quality, and other basic parameters for your book.  Then, you fill the pages of the book with your photos, specifying the layout you want for each page.  You can add captions for individual images or series of images, and you may be able to add various special effects.  At the end of the process, you place your order for the book to be printed and mailed to you.  Using the service offered by Blurb, which is available via SmugMug and Lightroom, you can self-publish a large or small print run of books and make them available for sale on Amazon or directly on your own website.

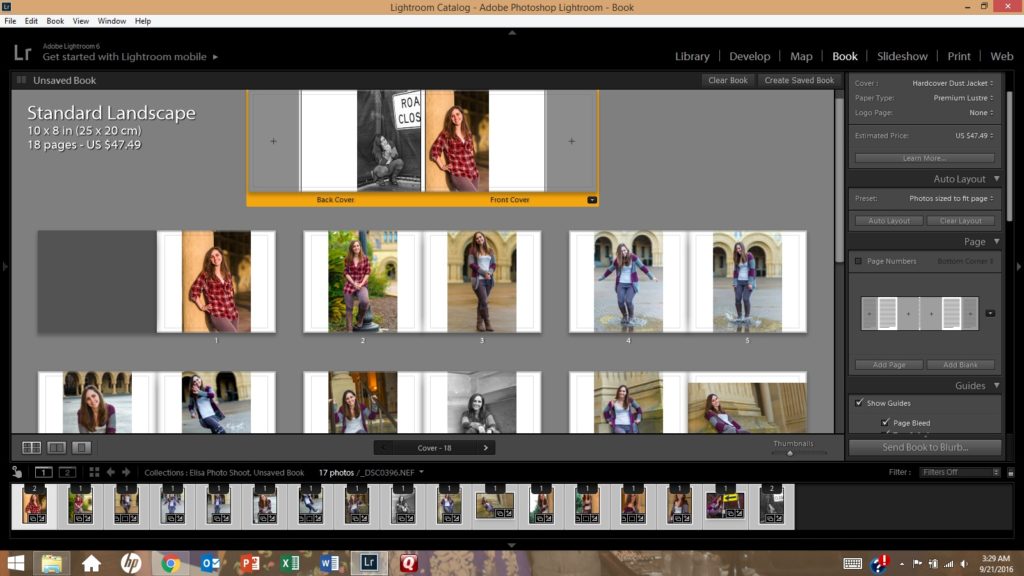
lightroom-book-moduleThe process of creating a photo book using Lightroom’s Book module (shown here) is fairly straightforward.  It’s even more intuitive using an online service such as Snapfish or Shutterfly.
When you receive your photo book a few days after placing your order, you’ll have a keepsake suitable for sharing with visitors and for preserving your own precious travel memories.

img_3494

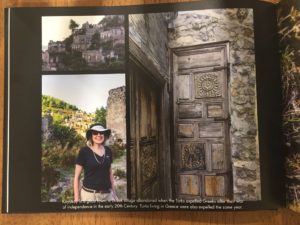
A two-page spread in our Turkey photo book showcases several images of the incredible rock formations in the Cappadocia region.

Have you created photo books from your travel images?  Which service did you use and how was your experience?  Please share your thoughts here.

Interested in reading more posts about sharing your travel images?  Click here to see them all: http://www.to-travel-hopefully.com/category/travel/share/.


News Flash–RAW Capture on iOS Devices: Apple has quietly released the capability to shoot in RAW mode on iPhones and iPads

With the quiet recent announcement that Apple will support RAW image file capture on iPhone 6 and above (only with iOS 10 and only using certain third-party capture apps, not the built-in Apple camera app), smartphone photography becomes an even better option for serious photographers.  Of course, users of certain Android devices have had the capability of capturing RAW images for almost two years, but for those of us who use the iOS devices, this is big news.

To learn more about the benefits of shooting in RAW mode on any camera, read this post: Post on RAW Capture.  Because compressed image file formats like JPEG are destructive (every time they are edited and saved, more information is lost forever) and because these formats initially throw away much of the data from the camera’s sensor, RAW files allow photographers much more control over how our images look.  The addition of RAW capture to iPhones is a significant step for photographers seeking to make the best possible images using their mobile device’s built-in camera.

In order to use RAW capture, there are several conditions that must be met.  You must have a late-generation iPhone, specifically a Generation 6 or later model (6S, 6S Plus, or when available, the new iPhone 7).  You must be using the newly released iOS 10.  And you must install an app that supports RAW capture on your phone’s camera, because Apple’s built-in camera app does not yet support RAW shooting.  I use the excellent app called “Manual,” available for $3.99 via the App Store: Manual Camera App.  In addition to allowing you to capture both RAW and JPEG files for each shot you make, this app also gives you full manual control over your camera’s basic features, including focus, ISO, and shutter speed.

I made a few images using both RAW and JPEG capture, so we can compare them.  The upper image is the JPEG, and the lower one is the RAW file.  Both were processed the same way in Lightroom.  At the size and resolution shown in this post, you may not notice a huge difference in quality, but the differences would become very apparent if we were to magnify or crop the image, or if the image were shot under very challenging lighting conditions.  Even so, to my eye the RAW file shows more subtlety in the rendition of texture and color, and the transitions between areas of sky or water are more natural looking.

lrwm-3472

The JPEG version of the image has more jarring transitions between areas of different colors or textures.  

lrwm-0045

The RAW version of the same image, post-processed in the same way, shows more evenness and subtlety.  These differences would become much more apparent with larger images or those shot under challenging lighting conditions.

Please review this post for more information about making the best images possible when using your smartphone’s camera: Post on Using Your Phone’s Camera.  With the addition of RAW image capture, the phone’s camera becomes even more attractive as a tool for serious photography, although it still isn’t a full substitute for an excellent quality interchangeable lens camera with a larger, better sensor.

Have you worked with RAW capture on your iOS device?  Any tips or tricks about how to streamline workflow?  What do you like or dislike about the process?  Please share your experiences here.