Focus on Mardi Gras SF [Encore Publication]: New Orleans and Latin American colors and sounds in San Francisco

Anyone who reads “To Travel Hopefully” at least occasionally knows that I’m a major lover of street fairs and festivals.  Nowhere else can you capture the colors, sounds, flavors, and feel of a city’s local culture as readily.  I’m fortunate to live in the San Francisco Bay Area, where there are literally hundreds of diverse and fascinating festivals each year.  Probably my favorite of all is the annual Carnaval celebration, a pan-Latin outpouring of samba dancing, music, color, culture, and even cars.  Anyone in San Francisco can tell you that Carnaval here takes place in late May, thanks to the rather chilly weather that prevails during the more traditional carnival season around Mardi Gras in February.  But Carnaval SF has a lesser-known cousin, Mardi Gras SF, that does indeed take place at the same time Mardi Gras is celebrated in New Orleans, Rio de Janeiro, Martinique, and other places around the world.  Today’s post focuses on yesterday’s Mardi Gras celebrations all around the city of San Francisco, during which the music, traditions, costumes, and dancing of the world’s more famous carnivals comes to California for one crazy night.

New Orleans style mummers dance along with the dixieland music in a parade in San Francisco’s Hayes Valley neighborhood.  I wanted to capture a sense of the chaos even while making a portrait of just these two revelers, so I used a shallow depth-of-field to throw the closer woman into slightly softer focus.  Buy this photo

At this time of day there was enough natural light remaining to make this portrait without any fill flash.  During post-processing in the Lightroom application, I adjusted the contrast and exposure, enhanced the vibrance, and used just a touch of post-crop vignetting to bring out the main subject.  Buy this photo

The classic Victorian townhouses known as “painted ladies” attest that this scene is taking place in San Francisco, but the foreground subject is pure French Quarter.  To gain this perspective on the scene, I climbed on top of a bench and used a wide-angle lens.  I was careful to keep the camera level so as not to distort the image, and I further corrected the perspective during post-processing.  Buy this photo

I rushed across town to the Mission District, an historically Latino neighborhood, where a different sort of parade was beginning.  This parade is styled as much on the Latin American carnival traditions as on the New Orleans creole traditions.  This portrait documenting the preparations of one of my favorite Carnaval groups, Viva la Diva, was made as the parade was forming.  I used an off-camera fill flash with its power dialed down by one stop to saturate the colors and set off the main subject from the background.  Buy this photo

I loved this reveler’s carnival mask, so I asked her if I could make a portrait.  I used a classic 85mm portrait lens and got in close to minimize clutter in the background, using a bit of off-camera fill flash.  Buy this photo

Another example of a portrait shot close to the subject using a touch of fill flash.  I use an effective and inexpensive cord to tether my speedlight to the camera’s hot-shoe, while I hand-hold the flash off to the side and away from the camera.  To learn more about this gear and technique, read this earlier post: Post on Off-Camera Flash.  Buy this photo

I have been working with the group Viva la Diva for several weeks already to document their preparations for San Francisco’s big Carnaval parade in late May, so I made certain to capture these lovely ladies during the smaller Mardi Gras celebrations.  Once again, the secrets to making a stunning portrait are to establish rapport with your subject, use a moderate and fast portrait lens, get in close, use a wide aperture to throw the background into soft focus, throw in a touch of fill flash to isolate your subject even more, and shoot several frames to ensure you capture just the right moment.  It takes practice, but it really isn’t that difficult, and the results are truly eye-catching.  Buy this photo

Kids are great fun to photograph.  This group of youngsters from a nearby school wanted to dance with the Viva la Diva samba dancers.  I got down low so as to shoot them from their eye level, and I held the flash up high so as to light them evenly and without harsh shadows.  Buy this photo

Viva la Diva!  Even though by this time of the evening there was effectively no ambient light, I was still able to capture a portrait of the Divas without the glaring artificial color cast that is typical with images lit mostly by flash.  The keys to success here are to use a diffuser on the flash head, get the flash off-camera, hold it very close to your subject to soften the lighting further, and adjust in post-processing.  Buy this photo

Do you have favorite local events you love to shoot?  Which ones, and what techniques do you use?  Please share your stories here.

Want to read more posts about what to shoot while traveling or close to home?  Find them all here: Posts on What to Shoot.


Planning a Shoot: A case study in planning and executing a photo shoot

Whether traveling or near home, some of our best photo opportunities occur spontaneously.  Serendipity is part of the fun of photography, but another big part of the photographer’s craft is to carefully plan and professionally execute a photo shoot.  Using a recent shoot in which I collaborated with professional dancer Molly as a case study, in this post I’ll cover the essential elements of planning and conducting a shoot.

Good planning is key to ensuring a fun, safe, and efficient shoot as well as obtaining the desired artistic outcome.  Buy this photo

Elements to Consider When Planning a Shoot:

  • What is the theme or mood?  The artistic concept will inform all the other elements of the shoot.  For the shoot with Molly, we decided on an edgy, urban theme.  Based on that choice, the decisions about location, timing, gear, technique, and post-processing all flowed consistently.

We chose a gritty, urban theme for this shoot, and all other decisions flowed from that choice.  Buy this photo

  • Where is the location?  Often one of the most challenging aspects of planning a shoot is scouting for a suitable location.  The location, of course, should support the theme of the shoot.  It also needs to be accessible, safe (for this shoot, we rejected shooting on or near railroad tracks for safety reasons), and suitable for making the type of images desired.  There are also legal considerations, as in most cases permission is required to shoot on private property and even some public spaces require permission for commercial uses.  Molly and I eventually decided on using the old barracks at the decommissioned Presidio of San Francisco and the adjacent Crissy Field recreation area.  This space was accessible, relatively safe, provided a gritty and urban mood, and afforded sufficient working room for both dancer and photographer.
  • When should the shoot be scheduled?  Obviously, the date and time scheduled need to work for all parties involved.  These parties include not only the model(s) and photographer, but also other client(s) and often an assistant.  Equally important is ensuring the timing supports your artistic choices.  The season of the year and the time of day should offer the best chances of obtaining the lighting you desire.  The scheduled time should also work as well as possible with respect to other considerations such as opening hours of the chosen space, traffic and volume of other people in the location, and even tides, snowfall amounts, or other environmental factors.  Molly and I chose to shoot in the “golden hour” just before sunset on a Sunday to ensure good lighting and access to the location.
  • What gear and techniques should be used?  After choosing the theme and the supporting logistical elements, it’s time to select the techniques desired to capture the images and the gear required to execute.  Elements to consider include lighting (I prefer to work with available light and reflectors/diffusers whenever possible, but sometimes speedlights or portable studio lights are required), lenses (it’s often best to bring a range of lenses for different perspectives), props, and accessories (will you need to stabilize with a tripod, or perhaps you’ll require neutral density filters to obtain the shutter speed and/or aperture you want?).  In the shoot with Molly, I used the camera handheld at mostly fast shutter speeds and low camera angles with fast prime lenses to get that edgy look.

To capture the fast motion of the dancing and to support the urban theme, I worked handheld with fast prime lenses and low camera angles.  Buy this photo

  • How should the images be post-processed?  Again, the overall artistic concept should inform decisions about post-processing.  For this shoot, I aimed for a high-contrast, slightly grainy look and also converted several of the images to black-and-white.
  • How will the images be distributed and used?  All parties should agree before the shoot on how the images will be shared and/or sold.  To protect both model and photographer, it’s a good idea to sign a model release.  For more information on model releases, see this post: Post on Model Releases.

With attention to planning and execution, a photo shoot will be more enjoyable and productive and the artistic results will be better.  Buy this photo

Do you have tips and tricks you use when preparing for your shoots?  Please share your thoughts here.

Want to read more posts about planning your photography?  Find them all here: Posts on Planning.

It’s All in the Telling [Encore Publication]: Sharing images as a photo essay can help tell a story

When we share our images from a trip or from an event close to home, we become more than photographers; we become storytellers.  An individual image can tell a powerful story all by itself, and most of the best ones do.  But presenting a series of related images in the form of a photo essay is a great way to share a story with your viewers.  Each image serves a purpose in the structure of a photo essay, just as each sentence or paragraph does in a written essay.  In this post, I will revisit last weekend’s Sacramento Super Spartan Race (see Post on Spartan Race), taking the same 12 images from the earlier post but rearranging them in the form of a rudimentary photo essay.  We’ll discuss the purpose of each major type of image in creating the essay.  [Note: I am borrowing some of the organizational concepts presented in CUNY’s Photojournalism course materials at this site: http://photo.journalism.cuny.edu/week-5/.]

Establishing Shot: Usually the first image in a photo essay, the establishing shot should draw in the viewer by presenting the big picture.

The establishing shot sets the context of the essay.  Here I use an image of large contingents of athletes running over the hills.  I shot from a distance, using a telephoto lens to compress the perspective and emphasize the massive scale of the race.  Buy this photo

Alternatively, we could use the starting line image as our establishing shot.  Some essays lend themselves well to a chronological telling, in which case it’s good to start at the beginning.  In the case of this specific event, I prefer the establishing shot to be a big-picture overview of many athletes in the middle of their course.

The starting line is a good place to set the stage for your photo essay if you will be using a chronological method of telling the story.  Buy this photo

Portraits: Often the biggest portion of the photo essay, portraits tell the story through images of some of the people who are involved.  The portraits can be tight head-shots, full-body shots, or environmental portraits that show the setting as well as the person.  I like to use a combination of all of these compositional methods.  And it’s also fine to use a mix of posed shots and candids.  Variety can improve some photo essays, although in other cases you may opt for a consistent look-and-feel for many of your images so the mash-up of styles doesn’t distract the viewer from the story.

This environmental portrait shows the athlete in the context of the monkey bars obstacle, with other athletes and the background included in the frame.  Buy this photo

Portraits of athletes don’t have to be in the cliche pose of standing, legs apart, on the ground flexing their biceps.  Athletes are happy to pose in the midst of whatever they’re doing when they see a photographer nearby.  Buy this photo

Not all portraits have to show the subject’s face.  This environmental portrait works because it shows us what the athletes are doing from their point of view.  Buy this photo

This posed portrait is framed rather tightly, showing the power and the elation of the athletes after finishing the race.  The background, while bright and busy, is not overly distracting.  Buy this photo

For powerful portraits, I like to seek out people who have something special to say.  This racer stopped for a moment so I could make a portrait.  His flag makes a nice counterpoint to the rolling hills and featureless sky in the background.  Buy this photo

Interaction: Most photo essays can benefit from at least one shot showing the interaction between different people in the story.

Although Spartan Race athletes are fierce competitors, they also make an effort to support one another and cheer their fellow racers on.  I enjoy capturing these interactions because these moments often tell a strong story visually.  Buy this photo

This shot of kids playing in the shower area at the end of the race shows another type of interaction.  Buy this photo

Close-Up: It’s helpful to include some images that show the little details.  In the case of this particular event, I don’t have many close-up shots, so I’ll include this one fairly tight portrait as a placeholder.  It would be great to include a true close-up shot showing just the athlete’s gloved hands as she grasps the rope, perhaps with part of her face in the background, for example.  This could be done by tightly cropping this image.

This tight portrait shows great action and emotion.  While it’s not a true close-up image, which ordinarily would show only a few details rather than the full person, it can serve a similar function in the essay by focusing the viewer’s attention on a small specific part of the race.  Buy this photo

Closer: This will be the last image in the photo essay, so it needs to be a strong one.  It could be a climactic moment or, if the story is being told chronologically, an image made at the end of the race.  I’ll include two possible closing shots here.  The first captures an athlete jumping over the fire at the finish line; it’s both dramatic and symbolizes the end of the event.  The second shows a classic Spartan Race moment, where the athletes have to carry heavy buckets of sand along a muddy, hilly course; this image could make a good closer because it evokes a quintessentially Spartan Race sense of emotion.

The finish line itself is a dramatic vantage point.  In this particular race, athletes must jump over a line of fire to finish the course.  Buy this photo

An iconic Spartan Race image.  I captured the strenuous activity of carrying buckets filled with sand by shooting from a distance with a telephoto lens.  Buy this photo

Have you presented your images in the form of a photo essay?  How did you structure it?  What advice can you share for fellow photographers who would like to use this format?

Want to read more posts about sharing your images?  Find them all here: Posts on Sharing.

Every Day I Write the Book [Encore Publication]: Even in the digital world, there’s a place for a hardcover photo book from your trip

In the brave new digital world, we have a lot of ways to share our travel photos after (and sometimes even before) we return from the trip: social media, on-screen slideshows, video montages, and of course the enduringly popular paper print.  Even with all of these very immediate sharing options, one of my favorite formats for preserving my travel images is the hardcopy photo book, and today there are more choices than ever before regarding how to create these wonderful keepsakes.

Our living room bookshelf and coffee table are home to more than a dozen photo books, each one showcasing the images and preserving the often fleeting memories of the details of a major trip we’ve taken.  Here’s why I love this method of sharing travel photography and how to create your own photo books.

img_3497

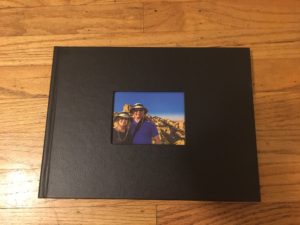
The leather cover of a photo book showcasing our recent travels in Turkey.

Why create a photo book?  Over time, new digital formats replace existing ones, and the very old ones become obsolete.  Within about 20 years, it is quite likely that none of our present formats of storing data will still be readable.  The printed page has much more staying power.  It is estimated that photos printed on high quality paper using high quality inks, and stored away from direct sunlight, can last for 100 years.  I’m a big fan of framed prints, as well, but a photo book is more cost-effective and space-efficient as a means to preserve many more photos than we could easily hang on our walls.  And because photo books can include customized captions to accompany the included images, they’re a great reference source for refreshing our memories about what we saw, when, and where.  Finally, photo books look great and are fun conversation-starters to tell the story of our travels when friends and family come to visit.

How do you create a photo book?  There are a number of methods, but unless you are a scrapbooker or handy with bookbinding, all of them involve sending your specifications and images to a vendor that will print the book, bind it, and mail it to you.  Some software packages, including Lightroom, have built-in modules for creating photo books.  And most photo sharing websites, including SmugMug (a fabulous site used by many professionals including me), Snapfish, Shutterfly, and Apple Photos, allow you to create and purchase photo books from your images.  These services vary in features, price, and quality, so shop carefully.  Most of my past photo books were created using Snapfish, but I am transitioning to using Lightroom’s and SmugMug’s services instead.  I will report on the results in a future post.

img_3493

Good book-creation software should allow you to choose from a wide range of formats on each page to display one or several photos plus text.

The basic process works similarly for any of these services.  You specify the book size, cover material, paper quality, printing quality, and other basic parameters for your book.  Then, you fill the pages of the book with your photos, specifying the layout you want for each page.  You can add captions for individual images or series of images, and you may be able to add various special effects.  At the end of the process, you place your order for the book to be printed and mailed to you.  Using the service offered by Blurb, which is available via SmugMug and Lightroom, you can self-publish a large or small print run of books and make them available for sale on Amazon or directly on your own website.

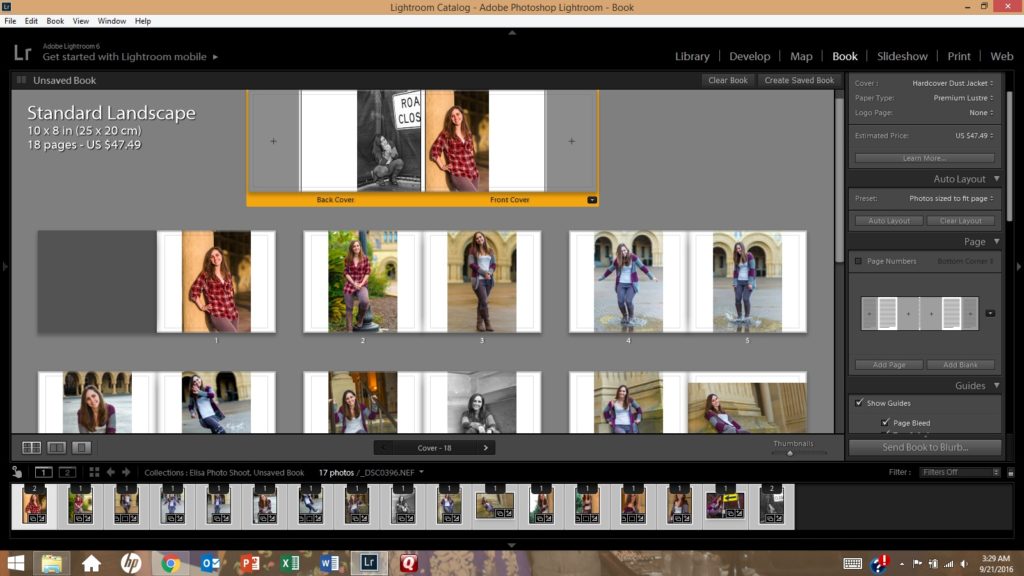
lightroom-book-moduleThe process of creating a photo book using Lightroom’s Book module (shown here) is fairly straightforward.  It’s even more intuitive using an online service such as Snapfish or Shutterfly.

When you receive your photo book a few days after placing your order, you’ll have a keepsake suitable for sharing with visitors and for preserving your own precious travel memories.

img_3494

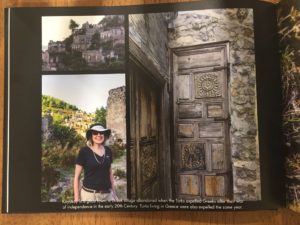
A two-page spread in our Turkey photo book showcases several images of the incredible rock formations in the Cappadocia region.

Have you created photo books from your travel images?  Which service did you use and how was your experience?  Please share your thoughts here.

Interested in reading more posts about sharing your travel images?  Click here to see them all: http://www.to-travel-hopefully.com/category/travel/share/.

Camera Pixels App Review: A great concept but still needs work


I’ve posted repeatedly about the importance of understanding how to take manual control of your camera in order to make images that are properly exposed and focused.  Whether you are using a professional DSLR, an advanced full-frame mirrorless ILC, a compact point-and-shoot, or the camera built into your smart phone, there is no way you will get consistently acceptable results if you leave the camera’s settings to its auto mode.  See this post for an overview: Post on Beyond the Auto Mode.

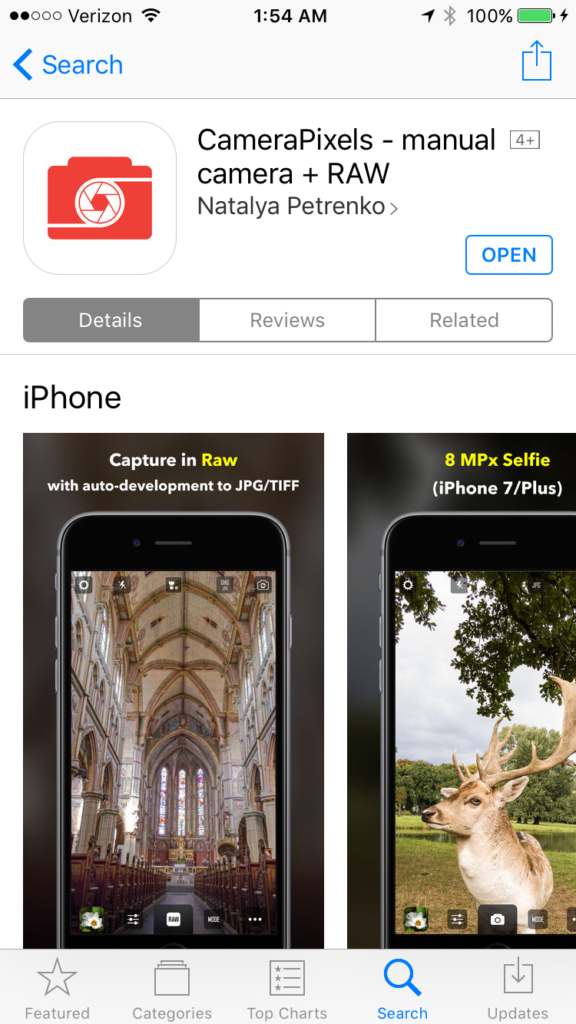
For the past two days I have been testing an iPhone app called “Camera Pixels”.  Full Disclosure: The developer of Camera Pixels requested I test their new app and offered me a free download for trial, but to preserve my independence I paid for the download myself.

Like the “Manual” camera app that I’ve been using for years and the “ProCam 4” app that has been my go-to camera control app for the past several months, the new “Camera Pixels” app allows the manual selection of ISO, shutter speed, exposure compensation, and focus distance (note that the iPhone camera’s lens has a fixed aperture, so F-stop cannot be manually set).  Also like the Manual app, ProCam 4 allows images to be captured using RAW mode, which has a great many advantages over capture in JPEG format (see this post for more information: Post on RAW Capture).  And all three of these camera apps display a histogram to assist in setting exposure properly.  

In addition, both Camera Pixels and ProCam 4 (but not Manual) offer some very useful advanced camera control capabilities, including the following:

  • Shutter Priority: You can choose an exposure mode in which you select the shutter speed first and the app will set the appropriate ISO.
  • Exposure Bracketing: You can shoot a series of four shots at different exposures to increase the likelihood that one of them will be at the best exposure for the lighting conditions.  The series of shots can also be combined using HDR tools found in Lightroom, Photoshop, and other editing software into a single image with a higher range of tones from very dark to very bright.
  • White Balance: You can adjust white balance in the app, which is often preferable to having to adjust it in your RAW files during post-processing.
  • Virtual Horizon: The display can show you when the horizon is level.
  • Slow Shutter Options: You can select long fixed shutter speeds as well as bulb mode to keep the shutter open for as long as you’d like.
  • RAW+JPEG: You can choose to store the image in both RAW and JPEG formats.

With all this incremental functionality, your little phone’s camera begins to behave a lot like a more advanced standalone camera.  While the iPhone’s camera, with its small sensor and its tiny fixed-aperture non-interchangeable lens, still cannot compare to a professional or enthusiast DSLR or ILC camera, the results using an advanced manual camera control app such as Camera Pixels or ProCam 4 are vastly improved compared to using the phone’s native camera app.  At iTunes Store pricing of $3.99 for Camera Pixels or $4.99 for ProCam 4, either of these apps is a great buy and a serious enhancement to the iPhone’s built-in camera.

There are some significant differences between Camera Pixels and ProCam 4.  ProCam 4 offers advanced image editing capabilities, while Camera Pixels does not.  However, Camera Pixels offers more flexible exposure bracketing options, the ability to separate exposure point from focus point, a better histogram, and more advanced RAW and video shooting options.  And a significant advantage of the new Camera Pixels app over ProCam 4 is its user interface for setting and resetting the manual camera control features such as exposure compensation, shutter priority, and ISO priority.  In fact, the Camera Pixels app comes the closest I’ve ever found to the user interface of an advanced DSLR or mirrorless camera.

Unfortunately, in its current state I cannot unreservedly recommend the Camera Pixels app.  I encountered too many glitches during my brief testing to be able to give this app a glowing review at this time.  Here are a few of the issues I noted:

  • The “viewfinder” (image preview on the screen) flickers intermittently, which can be very distracting when trying to compose images.
  • The bracketing exposure settings are sometimes incorrectly spaced, i.e., instead of being exposed at -3, -2, -1, 0, +1, +2, and +3; the sequence may be exposed at -3, -2, -1, 0, +1, +1, and +1.
  • It can be hard to tell if manual overrides are set, leading to incorrect exposures.
  • The very useful feature to separate the exposure point from the focus point doesn’t always work.

In summary, the new Camera Pixels app is a great concept that comes closest of any camera control app I’ve found to the look-and-feel of an advanced standalone camera; however, there are significant bugs in the current version that hamper the shooting experience.  With further development to fix the problems, Camera Pixels could become an excellent option for iPhone users wishing to control the phone’s built-in camera like an advanced DSLR or mirrorless standalone camera.  I will eagerly await the next revision of this app.

Here’s the link to the Camera Pixels app on the Apple App Store: Camera Pixels app.

You can find the ProCam 4 app here: ProCam 4 app.

What app do you use to control your phone’s camera?  What do you like and dislike about it?  Please share your thoughts here.

Want to read more posts about photography gear?  Find them all here: Posts on Gear.

Portrait Photography Gear [Encore Publication]: Affordable kit for making great portraits

Whether in my home town or traveling around the world, I love to shoot portraits.  There is something magical about creating an image that captures the essence of a person.  It can be daunting for many photographers to describe what gear they think is required to make professional-quality portraits: we often visualize a fully equipped studio with tens of thousands of dollars’ worth of high-end lights, modifiers, and backgrounds.  The reality is that we can make portraits of publication quality, shot on location and using kit that costs far less.  Here I outline a basic setup that is portable enough to pack on nearly any trip and costs only a few hundred dollars (not including your basic DSLR or mirrorless camera body).

Really all you need to get great people photos is a good portrait lens and a little know-how.  Make sure to set exposure and focus on your subject’s face.  I often use my camera’s Spot metering mode to get the correct exposure in tricky lighting conditions, such as when the subject is backlit.  In these conditions, it can also be helpful to fill in any harsh shadows on the subject’s face by using a touch of flash with a diffuser attached or a reflector.  That’s really all the gear you need: camera with portrait lens, flash unit, and a reflector kit.  Let’s look at the gear and basic techniques.

My indispensable portrait lens is the Nikon 85mm f/1.8G lens.  I shoot at least three-quarters of all my portraits, whether in the studio or on location, using this one piece of glass.  This is a classic portrait lens and provides a flattering perspective and great image quality when your subject is a person.  But this lens also shines for nature and action photography where you don’t need a really long focal length.  It renders really lovely “bokeh,” or the soft quality of the out-of-focus parts of the image.

This portrait of a grandmother and granddaughter at Carnaval San Francisco was made with natural light using an 85mm lens at a wide aperture to throw the background into soft focus.  Because no flash or reflector was used, there are some shadows on the subject’s faces, but I like the shallow depth of field that really emphasizes the subjects, and this would have been difficult to achieve with the slower shutter speed required to synchronize with a flash.  Also, carrying a reflector through the hustle and bustle of a chaotic street fair can be impractical.  I’m very pleased with this image even with a few shadows.

This portrait was shot using natural light only.  Some shadows are visible on the faces, but the effect is not unpleasant, and the soft focus from shooting without a flash is very effective.  Buy this photo

Your camera most likely has a built-in flash, and in many cases it is good enough to provide some fill-in lighting for backlit subjects or even to serve as a main light in very dark situations.  But for more control over how much light you want, the quality of that light, and where that light comes from and goes to, you likely want to have a separate flash unit.  I use the Nikon SB-910, which is powerful and flexible enough for most settings.  It has been discontinued and replaced by the Nikon SB-5000, but the older model is often still available.

Whatever flash you use, it is best to attach a diffuser of some sort to soften the otherwise very harsh light of the flash.  I also keep my camera set to lower the flash output by 1 stop, and I only override this setting occasionally.  Flash is often best when used sparingly.

This next image was shot at the same location as the previous one, but here I used an off-camera flash with diffuser to provide fill lighting on the subjects’ faces, thus reducing the shadows.  The only downside of using flash on location is that a slower shutter speed (typically about 1/160 of a second or slower) must be used, which in turn requires a smaller aperture (here it is f/8), and this can lead to more distraction from in-focus backgrounds.  I could have mitigated this problem by attaching a neutral density filter to block some of the light and allow a larger aperture.

This group portrait was made under similar conditions to the previous image, but here a fill flash was used to soften the shadows.  Buy this photo

An inexpensive accessory can provide the best of both worlds for on-location portraiture.  For less than $20 you can purchase a reflector kit with a variety of different colored reflectors and diffusers.  The reflectors are used to bounce some of the sun’s light back onto the face of the subject, thereby filling in any harsh shadows, while allowing you to shoot at any combination of aperture and shutter speed you choose in order to soften the background.  Each color of reflector imparts a different mood to the image.  An added bonus is that you can preview the precise effect the reflector has in your viewfinder or on your LCD screen.  Really the only downside of using a reflector in the field is that they are bulky to carry and often require an assistant to hold in place while you shoot.

This is the reflector kit I carry with me to most portrait shoots.  It’s high quality, very portable, and affordable.

This portrait was made by metering off the face of the model, choosing a wide aperture to blur the background, and bouncing some sunlight onto her face using the gold reflector from the kit mentioned above.

Using a reflector to bounce sunlight onto your subject’s face can reduce shadows while allowing you to retain full control over your aperture and shutter speed.  Buy this photo

There you have it: my formula for getting professional-looking portraits in the field with relatively inexpensive gear that’s easy to carry and use.

What is your favorite gear for portraiture?  Please share your thoughts in the comment box at the end of this post.

Interested in other posts about photography gear?  See them all here: http://www.to-travel-hopefully.com/category/gear/.

Focus on Dia de los Muertos [Encore Publication]: When a local festival takes you around the world

Sometimes you can attend a local event and feel as though you’re transported to a far-off part of the world, or even feel like you’re traveling across a wide cultural tableau of a whole region.  That’s how I felt while shooting today’s Dia de los Muertas (Day of the Dead) celebrations in downtown San Jose.  Although I had traveled only half an hour from my house, this festival celebrating life and honoring departed relatives took me on a cultural and historic journey across all of Latin America and beyond.  In today’s post I will present a simple photo essay featuring some of my favorite images from this festival.
An Aztec dancer helps convene the day’s celebrations.  Buy this photo

The Aztec fire dance’s origins date back to pre-Columbian times.  Buy this photo

This shrine, erected on the back of a pickup truck, is dedicated to the memory of the owner’s deceased father and brother.  Buy this photo

The “elegant skull” face painting is an element of Day of the Dead celebrations in several Latin American countries.  Buy this photo

These lovely ladies awoke at 5 AM to paint their own faces and those of their family members.  Buy this photo

More wonderful face art.  Buy this photo

I love the cultural juxtaposition of Hello Kitty with Day of the Dead.  Buy this photo

Although this portrait of a couple also worked well in color, I love the dramatic impact it makes when converted to a high-contrast black-and-white image.  Buy this photo

Elegant and beautiful!  Buy this photo

I hope you’ve enjoyed this brief compilation of images from today’s festival and that it inspires you to seek out Day of the Dead celebrations near your own home.

What are some of your favorite cultural traditions?  Have you captured these traditions using your camera?  Please share your experiences in the comments box.

Want to see other posts about what to shoot while traveling and near home?  Find them all here: http://www.to-travel-hopefully.com/category/travel/shoot/

Focus on Yellowstone and Grand Teton [Enore Publication]: The oldest national park in the US remains one of the best photographic destinations

My last visit to Yellowstone National Park and its nearby cousin Grand Teton National Park was in June of 2011, and I am long overdue for a return trip.  These two gems of the US National Park system are among the world’s best photographic destinations.  Featuring an amazing array of mountain scenery, geothermal activity, wildlife, and human cultural records, Yellowstone and Grand Teton are, simply put, indispensable destinations for travel photographers.  In today’s post, let’s look at a few of my favorite images from the 2011 trip and discuss how they were made.  While the parks haven’t changed too much over the past six years, the state of the art of photographic gear certainly has changed a great deal.  Today’s cameras and lenses will afford photographers even more options for capturing the remarkable beauty of these parks.

Yellowstone N.P. has more geothermal activity than any other region of the world, and this activity manifests itself in many fascinating ways.  The Mammoth Terraces area of the park is known for its gloriously delicate and colorful silica terraces, including the one in this image.  For a great landscape image, it’s best to combine the main subject (here, the silica terraces) with striking foreground and/or background elements (here, the Teton Mountain Range, behind).  I used a circular polarizing filter to bring out the drama in the sky and the highlights in the mountain range, but I dialed back the polarizing effect a bit so as not to eliminate the gorgeous reflections in the pools.  Buy this photo

Yellowstone and Grand Teton N.P.’s are filled with fascinating wildlife, including American bison, elk, wolf, coyote, marmot, osprey, and many other mammal and bird species.  Here I’ve captured (in images, of course) an intrepid coyote that cut across our hiking trail.  For striking wildlife portraits, it’s best to use a medium to long telephoto lens so as not to have to get so close as to stress the animal (or risk your own safety).  Tack-sharp focus is important, and I always strive to frame the subject with as uncluttered a background as possible.  Buy this photo

Photographs that tell stories are perennial favorites.  I love the humor apparent in this image, which tells the story of a standoff between a large male bison and two park rangers attempting to shepherd a convoy of park visitors across the field to an interpretive nature program and barbecue dinner.  At the time this photo was made, the bison was winning.  Buy this photo

Just as in a portrait of a person, a wildlife portrait should capture the spirit of the subject.  This large marmot was sitting up as if to get a better look at us.  His expression is both comical and wise.  To maximize the chances of capturing just the right expression and position, frame the subject first, set the proper focus and exposure, and then shoot continuously for several seconds.  Buy this photo

The quaint Chapel of the Transfiguration, located amidst some of the world’s most lovely mountain scenery in Grand Teton N.P., is a wonderful photographic subject.  Here I framed the Tetons in the chapel’s window and fired an off-camera speedlight to illuminate the walls and altar of the church.  Buy this photo

The iconic Moulton Barn sits on a field in Grand Teton N.P. with the glory of the Teton Mountain Range arrayed behind it.  This landscape image was made with great care to ensure a pleasing composition including barn, mountains, and cloudy sky, as well as to expose for the wooden texture of the barn.  A small aperture (high F-stop number) was used to keep the entire scene in focus.  I used a polarizing filter to bring out the drama in the sky and mountains, as well as to concentrate the lovely green and blue colors.  The scene was further enhanced to achieve a pleasing balance through tone and saturation adjustments in post-processing.  Buy this photo

I was drawn to the texture and patterns of the cracked muddy ground in a geothermal area of Yellowstone N.P.  Composing the image to include just enough of the pattern as well as leading lines to draw the eye downrange, I converted it to black-and-white and made adjustments to contrast and tonal range in post-processing.  Buy this photo

Yellowstone’s Grand Prismatic Spring is a breathtaking feature that is almost impossible not to photograph well.  That said, there are techniques to capture it in all its glory.  Grand Prismatic Spring is one of the world’s few iconic subjects that is best photographed in the harsh light of mid-day, when the reflection from the direct sun most vibrantly brings out the array of colors.  Unless you can shoot it from above, looking directly down on the spring, it is best to include some foreground and background elements other than the spring itself, to provide context.  Here, I framed the spring through some lodgepole pine trees and included some forests and mountains in the background.  Buy this photo

Every visitor to Yellowstone N.P. will stop to observe some geyser eruptions.  But instead of just shooting straight on during mid-day into the eruption of a famous geyser like Old Faithful, seek out some of the lesser-known geysers at sunrise and sunset, and compose to include compositional elements other than the eruption itself.  This image, a favorite of mine, was made on a geyser basin at sunset.  I set up the camera on a steady tripod, set the exposure for a wide depth-of-field, and composed the scene to include the cracked earth and and the reflection of the sunset and eruption within the pools of sulfurous water.  Buy this photo

I can hardly wait to return to Yellowstone and Grand Teton National Parks!  I’m even more eager to visit during the winter than during the much more crowded summer months.  The rich array of scenery, wildlife, and otherworldly geothermal features elevate these parks to the pinnacle of travel photography destinations.

Have you visited Yellowstone and Grand Teton?  What did you find most remarkable?  What do you recommend your fellow travel photographers shoot while there, and what techniques do you use?  Please share your comments here.

Want to read other posts about travel photography destinations around the world?  Find them all here: Posts on Destinations.

To Travel Hopefully is Taking the Day Off: Please help support this site

Dear Reader,

To Travel Hopefully is taking the day off, but don’t worry, we’ll be back with fresh new content soon.

In the meantime, please take a look at the helpful travel photography tips and inspiring images in our archived posts.  Just select a category (Destinations, Gear, Techniques, Travel, etc.) from the right nav bar, or choose a month under Archives, and browse to your heart’s content.

While you’re here, take a moment to tell your friends and family about us.  Anyone who enjoys travel and wants to improve their photography will find great daily content here, including inspiring images from around the world and tips and tricks for making the best possible photos.  You can email any post or share it via social media with the click of one of the buttons at the end of each post.  And if you enjoy To Travel Hopefully, please click in the right nav bar to subscribe via email or RSS feed, so you won’t miss a single post.

Please consider supporting this site by purchasing some of my photos, browsing for some great gear via the Amazon links, or clicking on some of the ads that interest you.

My holiday special promotion ended on Dec. 31, but I have lowered most of my regular prices considerably.  Fine art prints and novelty items are available in a wide variety of sizes and price ranges for nearly every image in my portfolio.  Please take a look at Featured Photos to see a sampling of my images available for purchase.

And finally, take a look at my upcoming photography tour of the Pacific Northwest, including the Great American Total Solar Eclipse, one of the most incredible astronomically events of our lifetimes.  I hope you can join us on this amazing tour this coming summer.

Thank you for visiting To Travel Hopefully!  Without your support, this project cannot continue providing you with daily content including inspiring travel photos and tips and tricks for making great images.

Warm regards,

Kyle Adler


Not My Circus, Not My Monkeys [Encore Publication]: How to shoot a live performance with fast action and challenging lighting

Last night I had the opportunity to shoot a live performance by Circus Automatic, a talented young San Francisco-based circus troupe.  Indoor performances, where the action is fast and the lighting dim and unpredictable, can be extremely challenging to shoot.  In this post I share some images from the circus show as well as a few tips on how to make the best of these difficult conditions.

The first tip is to use a fast lens and a high ISO setting.  Since you will need a shutter speed of 1/200 second or faster in order to freeze most of the action, and given that the light is often very dim, you will likely have to use an ISO of at least 1600 and perhaps quite a bit higher, even when using a fast f/1.8 or f/2.8 lens wide open.  All of these images were made shooting wide-open with my favorite portrait lens, the Nikon 85mm f/1.8.  ISO ranged from 800-3200, and shutter speeds ranged from 1/160 to 1/800 second.

To capture this striking image of the aerialist, I shot wide-open with a fast prime lens and used a high ISO setting in order to obtain a fast enough shutter speed to freeze her action.  Buy this photo

The second tip is to seek the drama present in all aspects of the show.  Sometimes the most interesting subject is not the star performer.  In this image I captured the expressions of the rest of the cast as they watched the star of the final act.

Part of the fun of a circus is getting to know the cast members, who tend to be very interesting and photogenic characters even aside from their remarkable performing abilities.  Look for the “side shows” as well as the “big top” acts.  Buy this photo

During our “intermission,” let’s review some basic rules for shooting an indoor performance: 1) Get permission from the producer before you bring your camera to the show; 2) never use flash (it annoys your neighbors and can cause injury or even death by blinding an unsuspecting aerialist); 3) use your camera’s quietest shutter mode and disable its LCD display so as not to distract those around you; and 4) don’t attempt to use a tripod or monopod unless you’ve obtained special permission.

My next tip is to look for those moments when the action subsides naturally.  In most kinds of fast-action performances, including dance, sports, and yes, circus acts, there are brief moments of stasis when the motion is swinging from one direction to another.  Even a juggler balancing on a teeter-totter placed precariously atop a pile of four metal cylinders will reach moments of relative rest.  Here I fired the shutter at the exact instant when two of the batons are in his hands while the third has just reached its apogee.  This image encapsulates all of the excitement of the act but has almost no perceptible motion blur.

Find those brief moments when the fast action settles into a natural lull.  Buy this photo

Another tip is to shoot in RAW mode.  That’s a good practice for nearly all types of photography, but for indoor performances the color of the lighting is often very tricky and rapidly changing, so using RAW files allows much greater control over the color temperature during post-processing.  The venue for last night’s show used awful single-colored LED lights that cast a very strange temperature over many of my images.  Some I could correct in post-processing, but others remain unnatural looking and cold.  Regrettably, these LED lights are becoming very popular so this is a common challenge when shooting live indoor events.  Other useful post-processing techniques for these types of shows include noise reduction (required due to the high ISO settings) and image sharpening.

The final tip is to keep shooting, because you rarely can tell in advance when something remarkable may happen!

Parting shot: The acrobat dismounts dramatically to end the show.  Buy this photo

Now it’s your turn.  Please share your experiences and advice for shooting live performances.

Want to read more posts about photographic techniques?  Find them all here: Posts on Techniques.

Sweet Release [Encore Publication]: What is a model release and when do you need one?

We photographers are passionate about many aspects of our trade.  We love the artistic expression, that feeling of capturing a special moment that otherwise would be lost to time, even the gear we use to make images.  But one aspect of the trade that few of us–professionals and amateurs alike–enjoy thinking about is the legal side of making and selling images.  And one legal element about which we need to be knowledgeable is the model release.  Unless you never plan to make any images in which any person is recognizable, you should learn what a model release is and when you may need to use one.

First, a disclaimer: I am not an attorney and the advice I provide in this post is not intended to replace consultation with a competent lawyer.  What I provide here is just some practical advice I’ve acquired over the years, in which course I’ve made plenty of mistakes.  And you should also be aware that laws governing when you can photograph a person and how that image can be used vary from country to country and even among states or provinces within some countries.  With these points made, let’s explore the basic concept of a model release and when you may need one.

In the simplest terms, a model release is a legal agreement between a photographer and any person who will be recognizable in images made by the photographer.  It spells out the conditions under which the image can be published and often specifies the compensation to which the model is entitled.  In the US, a valid model release must be signed and dated by the photographer, the model, and a witness.  If the model is a minor child, a parent or legal guardian also must sign.  This agreement protects the photographer against being sued for defaming or cheating the model, but equally it protects the model from being taken advantage of.


When I work with a professional model, like Laura here, I always obtain a signed release before the photo shoot.  This practice ensures she will be properly compensated and protected against inappropriate uses of her likeness, while I and any publisher will be protected against defamation claims by the model.  Having the release means I have more flexibility as to how the image can be used later.  Buy this photo

So, when do you need a model release?  Here are some situations (not an exhaustive list) in which you should have one:

  • A person can be recognized in your image.  Note that personally identifiable information doesn’t derive only from a direct likeness of the person’s face.  He or she could also be recognized from a special feature such as a tattoo or from the context such as a clearly identifiable location.
  • … AND … one or more of the following statements is true:
    • You may wish to sell the image for commercial purposes such as advertising or use in a business’s publicity or promotion.
    • You may wish to enter the image in a competition or contest.  Check the specific competition’s rules; some require a model release whenever a person is clearly identifiable in the photo, while others do not.
    • You may wish to provide the image (even if you’re not compensated) for other people to use in a context you can’t control.  A model release protects you and those who obtain a license to use your image from being sued by the model for using their likeness in a way that they don’t approve.

In contrast, there are plenty of situations in which you don’t need to have a signed model release.  Some of these include:

  • One or many people appear in the image but none is recognizable.  The subjects may be far away from the vantage point or they may all be obscured or facing away from the camera.  As long as they cannot be identified individually, there is no need for a model release.
  • You plan to use the image only for your own portfolio.
  • You plan to use the image only for editorial purposes.  If your photo is published in a newspaper, magazine, or website where the primary purpose is editorial rather than commercial, a release is not required.  Imagine if every reporter had to get a signed release before publishing the likeness of every person appearing in any news outlet.  This would have a chilling effect on journalism, which is a pillar of a free and democratic society.  So in most cases, if your photo will be used for editorial purposes (that is, it will appear in a newspaper or magazine’s news section rather than in an advertising section), then you and the outlet’s publishers don’t need a release.
  • The images can be considered fine art photography.  Photos can be published and sold without express permission from the person appearing in them if the primary purpose is fine art.  In the US, case law upholds artistic expression as a form of First Amendment free speech in most cases.

Kashgar, China
Images with news value, such as this one made of a Uighur girl in Kashgar’s Old Town days before her home was to be demolished by the Chinese government, may be published and sold for editorial purposes with no requirement for a signed model release.  Buy this photo

When you do believe that a model release would be helpful given your intended future use of an image, it is quite a simple task to obtain one.  Some photographers carry printed forms with them so they can ask a subject to sign their release as needed.  I use an app on my smartphone called “Easy Release,” which you can purchase for $9.99 on the iTunes Store: Easy Release app for iPhone.  This app simplifies the process of creating a model release, getting it signed by your model and yourself, sending it to others, and storing and managing it for future use.

Because “To Travel Hopefully” primarily treats the subject of travel photography, I want to share my own philosophy when it comes to asking for a model release while traveling.  Even if you understand the laws of the country in which you are shooting, there are potential ethical issues in asking your subject to sign a legal document that he or she probably can’t understand.  You may be able to get the text of the document translated into your subject’s local language, but even then the context of the agreement may not make sense to somebody from a very different culture than our own.  I try to exercise good judgment when it comes to compensating the people I photograph when traveling overseas and to how I use the images later.  You may want to read or reread my pillar post on photography as a bridge to local culture: Post on Travel Portraiture.

Many photographers, models, and publishers misunderstand the conditions under which a model release is or is not required, so there’s a lot of misinformation out there.  Please consider my points here as just a starting point for learning more about this topic.

What are your best practices regarding when and how to use a model release?  Please share your thoughts here.

Want to read more posts about what to shoot while traveling?  Find them all here: Posts on What to Shoot.


Revisiting Your Old Friends [Encore Publication]: Take a fresh look at your older images with new postprocessing

In today’s digital photography world, images are made as much in post-processing as they are in the camera.  We only get one chance at creating the image in the camera: the choices we make to compose the image, focus, expose, and fire the shutter at just the right moment are behind us the instant the shutter is released.  But the choices we make after the fact, using image processing software such as Adobe Lightroom, can be revisited as many times as we wish.  Because Lightroom is a non-destructive editor, meaning it keeps the original image file intact and just records the editing choices we make in its catalog, we can return to the image again and again, making slightly or entirely different choices.

When I return from a trip, I try to select the best raw image files and apply some post-processing within a few days.  That’s so I don’t agonize endlessly about creative choices, which would severely increase the turnaround time for sharing the images with the world.  But increasingly I find it is a good practice to return with a fresh eye to images I made some time ago, applying some different post-processing choices to render the image differently.

There are three scenarios under which I often revisit my older images:

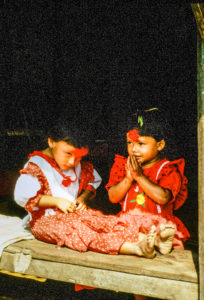
      • The images are very old and were shot using film in the pre-digitial era.  In this scenario, scan the transparency (slide), negative, or print and then apply post-processing to the digital scan.

lr-00559_s_r13akqwcgmq0559

Here’s the original scan of a 35mm color slide (transparency) shot during a 1991 trek in Nepal’s Anapurna region.  The image is grainy and the background behind the girls’ heads is distracting.  I decided to clean it up a bit using Lightroom.

NepalWith just a few minutes of tweaking using Lightroom, I was able to crop the image for more dramatic impact, render a true black background, reduce the grainy noise in the shadow areas, and enhance the saturation of the colors.  Buy this photo

    • The images were shot digitally but were made before I started routinely using image-processing software such as Lightroom.  In these cases, I like to apply post-processing to see what artistic options I may have missed in the earlier digital years.

This old Scandinavian stave church was shot as a color image in 2005.  It is so high-contrast that it appears nearly monochromatic on the display screen.  It’s a striking image, but looking at it today I wondered how much more effective it would be as a true black-and-white photo, so I decided to revisit the image using Lightroom.

Here’s the same digital image file, but converted to black-and-white using Lightroom’s color channel processing module.  I boosted the contrast even further and then adjusted each color’s saturation in the black-and-white mix to achieve the exquisite texture of the snow on the ancient building’s roof.  Buy this photo

  • The images are more recent, but I want to make some new creative choices.  Here the idea is to render the image in a different way to achieve a different end result.  For example, an image I initially processed in color may turn out to make a lovely black-and-white photo.  Or perhaps I crop a crowd scene to emphasize just one or a few of the people within it.  The choices are nearly limitless.

Reviewing my favorite images from a recent trip to New Orleans, I saw this shot of a characteristic French Quarter balcony and realized it would be even more powerful if certain colors were more saturated.

A brief session in Lightroom’s Develop module was all it took to boost the saturation of the blue and red channels and to adjust the shadow and black point tonalities.  The resulting image more closely reproduces the emotional experience I recall when viewing this scene live.  Buy this photo

Take a look at some of your older images.  Which ones would you like to revisit and give a fresh new look?  Do you regularly return to work on your library of existing images?  Please share your thoughts here.

Want to read more posts about post-processing your images?  Find them all here: Posts on Post-Processing.

Focus on Yosemite National Park [Encore Publication]: A photographer’s dream, Yosemite offers so much more than the postcard views

Those of us who live in the San Francisco Bay Area can count many blessings, but one I am most thankful for is our fairly close proximity to Yosemite National Park.  The second oldest national park in the US, Yosemite is a photographer’s dream.  Since the days when Ansel Adams helped make the park famous through his masterful landscape photography, shutterbugs of all stripes have been flocking there to try to capture some of its indescribable beauty.  Most of us will never be an Ansel Adams, but that doesn’t stop me from returning to Yosemite at least once per year to give it my best shot, as it were.

Without doubt, there are many iconic views in the park that are relatively easy for even novice photographers to render.  There is majesty in the panorama over Yosemite Valley as seen from the famous Tunnel View lookout.  One doesn’t even have to venture off the main park road to shoot a nice image of Half Dome or El Capitan.  But Yosemite offers so much more to the photographer who’s willing to look a bit more closely, to hike a little instead of jumping out of a car to shoot, or to come to a spot at unusual times, including the middle of the night.

In this post, I’ll share a few images I made in Yosemite National Park over the past year, but none of them will be a postcard-type shot that you’ve seen 1000 times before.  And we’ll talk a bit about how to find and capture these less discovered views.

While hiking in the Tuolumne Meadows area, 5000 feet above Yosemite Valley, we were caught in a freak hailstorm at the remote Dog Lake.  Instead of throwing a rain cover over my gear and running for shelter like a normal person would do, I set up my kit and started shooting.  This image plays off the contrasts between the peaceful and violent sides of nature and between the light and the shade.  It is a composite of several different shots made at different exposures, put together in Lightroom’s HDR (high dynamic range) merging tool.

Yosemite offers unusual and dramatic views to those willing to get away from the roads and brave some harsher conditions.  Buy this photo

Another less-visited attraction in the park is the wonderful Chilnualna Falls.  The lower waterfall is actually quite an easy hike from the parking area at the trailhead, and its little swimming hole makes for a refreshing break on a hot summer’s day.  Here’s a shot of my younger daughter enjoying a dip in the swimming hole just under the falls.  To blur the water, I used a slow shutter speed, which could only be achieved in the harsh mid-day light by attaching neutral-density filters to the lens.  Neutral-density (ND) filters are an essential accessory for the landscape photographer, because they block most of the available light from reaching the camera’s sensor, allowing you to use a slower shutter speed to blur motion and/or a wider aperture to throw the background out of focus.

These reduce the amount of light that reaches the camera’s sensor, so you can use slower shutter speeds to blur motion, or so you can use a wider aperture to get a shallow depth-of-field, even in bright sunlight.

A neutral-density filter allows a nicely blurred shot of the waterfall at Chilnualna Falls.  Buy this photo

Another lovely hike in the high country of Tuolumne Meadows is Cathedral Lakes.  On our way back from these pristine and remote lakes, we passed this granite rock dome.  I used a polarizing filter on a wide-angle lens to bring out the details on the surface of the rock and to lend more drama to the sky.  Then, in post-processing, I converted the image to black-and-white to emphasize the remarkable texture of the granite slab’s surface.  For more discussion about converting images to black-and-white, take a look at my earlier post: B&W Photography post.

Using a polarizing filter can darken and add drama to skies, reduce unwanted reflections, and render stunning detail on shiny surfaces.  Converting an image to black-and-white can bring out the textures and patterns that may be less prominent when viewed in a color image.  Buy this photo

Just because a place is glorious in its own right doesn’t mean we can’t include people in our photos.  Putting humans in a landscape adds a personal touch, provides a sense of scale, and often tells a more compelling story than would an image of the same place without people.  Here I’ve included my daughters in a landscape from the incomparable summit of Sentinel Dome.

Including people in landscapes layers a human narrative on top of the natural story.  I like the added color, and humor, from the addition of my daughters in their college logo hats.  I’ve chosen a wide aperture to soften the focus on the lovely background.  Buy this photo

You don’t have to stop shooting when the sun sets.  Some of the most wonderful images of Yosemite are made after dark.  I came to this spot not far from the edge of the meadow in Yosemite Valley, and right on the bank of the Merced River, quite late at night when the sky was very dark.  I set up my camera and wide-angle lens on a tripod and made a 25-second exposure at a high sensitivity (ISO) setting.  The resulting image shows the spectacle of the Milky Way arched above the terrestrial grandeur of Half Dome and other Yosemite landforms.  For more discussion of capturing the Milky Way, visit this post: Milky Way photography post.

A favorite image of mine: The Milky Way above Half Dome.  Note that not every landscape image needs to be in “landscape orientation”.  Buy this photo

Next time you are fortunate enough to visit Yosemite National Park, try to discover some new places, visit favorite places less visited times of the day (or night), and include some people for a human component to the story.  Your images will stand out from the millions of others made in this glorious park!

Do you have a favorite photographic experience from Yosemite to share?  Please leave a comment to let us know.

Want to see more posts on great travel photography destinations?  See them all here: http://www.to-travel-hopefully.com/category/destinations/.

Flashback [Encore Publication]: A simple and cheap accessory to improve your lighting

IMPORTANT UPDATE ON AUGUST 11, 2017:

Dear Readers,

I must retract my support for the Vello off-camera flash cord.  It is cheaply made and recently and suddenly failed, disabling my camera during an important client shoot.  I ended up paying over $300 to have the failed Vello accessory removed from my camera, and I lost use of my camera for more than a month while the repairs were being done.

Since this failure occurred, I’ve been very happily using a genuine Nikon brand off-camera flash cord:

The Nikon unit costs more than the Vello unit, but in my estimation it is much more solid and reliable.  I strongly urge all photographers to stay away from the Vello cord.

Here is the original post for reference, but please understand that I retract my support for this product.

=======

When it comes to gear, a lot of photographers will spend a lot of cash on a camera body, lens, or tripod head that they hope will magically elevate the quality of their images.  I’ve said it before, and I’ll say it again: great images are made by great photographers, regardless of the gear they use.  I find that in most cases, spending a lot of money on a new piece of kit will not result in dramatically improved images, at least not right away.  But sometimes it’s a little, inexpensive accessory that can immediately transform our images.  A good polarizing filter, for example, can almost magically improve landscape images by enhancing skies and mountains and reducing unwanted reflections.  In today’s post, I sing the praises of another inexpensive accessory that can make a big difference: the off-camera flash cord.
CubaThis portrait of a student at a Cuban school is compelling for its subject’s poise and its strong color scheme, but the lighting from the hot-shoe mounted speedlight is a bit harsh.  Buy this photo

Using your camera’s built-in flash or a speedlight mounted to the camera’s hot-shoe provides lighting that is aimed directly toward your subject from the plane of the camera’s sensor.  This light will bounce off the subject and come directly back to the camera, which makes for quite harsh lighting, often severe shadows, and red-eye or other unwanted effects.  These often undesirable characteristics can be mitigated a bit by using the flash unit’s tilt head to bounce the light off a wall or ceiling, or by dialing back the power of the flash’s output, but direct flash lighting is rarely the most attractive.

Instead, get the flash unit off the camera to enhance the lighting.  By purchasing an inexpensive off-camera flash cord, you can connect the flash to the camera’s hot-shoe while having the freedom to hold the flash away from the camera and to aim it any way you like.  I usually hand-hold the flash in my left hand while holding the camera in my right, but occasionally it is necessary to have both hands on the camera, in which case a bracket or stand can be used to hold the flash.  Depending on the situation, I will either aim the flash head toward the subject or bounce the flash off another surface such as a ceiling, wall, or even my own clothing.  With the off-camera flash cord, there is much more flexibility in how to position and aim the flash.

NOTE: I RETRACT MY SUPPORT FOR THIS ACCESSORY.  SEE THE NOTE AT THE TOP OF THIS POST.  Here is the flash cord I use.  It’s an independent brand (not made by Nikon, my camera’s and flash unit’s manufacturer), but I’ve found it to be at least as reliable, usable, and durable as the manufacturer’s own cord.  Best of all, this accessory costs less than $20, making it one of the best bargains I’ve encountered in the photographic accessory space.

The results from getting the flash unit off of the camera can be dramatic.  This image from Carnaval San Francisco is striking for the subject’s vibrant color and energetic sense of motion.  There are few visible shadows on her face, and the lighting is natural looking and even.

USAGetting the flash unit off of the camera’s hot-shoe yields even and natural lighting that is free from the harsh appearance and unflattering shadows often found in flash photography.  Buy this photo

There are other methods you can use for off-camera flash.  These days, many photographers use wireless triggers for the camera and flash to communicate.  If this setup works for you, great, but I’ve found a good old-school flash cord to be more reliable than wireless.

Try getting your flash off of the camera with a cord or wireless setup.  I think you’ll be very pleased with the results and the return on investment is likely to be higher than with most other gear purchases.

How do you use flash in your photography?  Any indispensable little accessories in your bag?  Please share your thoughts here.

Want to read more posts about photographic gear?  Find them all here: Posts on Gear.


Join Me on a Photography Tour Next Summer!: From the Great American Total Solar Eclipse through the most scenic locations of the Pacific Northwest, this is a trip not to be missed

Dear Readers:

There are still a few spaces available on the Eclipse and Pacific Northwest photography tour this coming summer.  Please let me know if you are interested in learning more about it.

Kyle Adler

=======

If there’s a more thrilling experience anywhere on our planet than observing a total solar eclipse, I’ve not yet found it.  And the next one will be cutting a path across the USA on August 21.  I am partnering with a prominent solar eclipse tour company to lead a photography tour that begins in Salem, Oregon with this awe-inspiring event and continues through Oregon and Washington states to photograph some of the Pacific Northwest’s most scenic locations.  From Aug. 19-22 we will be part of a larger group of eclipse chasers, accompanied by leading eclipse expert Prof. Jay Pasachoff, preparing for, observing, and photographing this remarkable natural display in Salem.  Our small group of about 15 will then embark on a travel and photographic journey that will take us to the Santiam Wilderness, Bend, Newberry Volcano National Park, John Day Fossil Beds, Wallowa Mountains, Mt. Hood, Portland, Olympic National Park, and Seattle, among other memorable destinations.

Almost nothing can rival the stunning beauty and sheer excitement of observing and photographing a total solar eclipse.

I will be providing photography instruction for interested participants via daily workshops and in-the-field learning.  During our optional low-key workshops, we’ll review our recent images, plan our shot list for the upcoming locations, and cover techniques to make the best images possible.  While the drama of the eclipse and the breathtaking landscapes of the US Pacific Northwest will be obvious magnets for our photographic pursuits, we will also seek opportunities to make memorable images of the people we meet and of the wildlife and other attractions of the region.  Photographers of any level from advanced beginner through semi-professional will see their images improve, and non-photographer friends and family are welcome to either attend the daily workshops (even a smartphone camera can make great images) or enjoy a few minutes of extra time on their own.   You can enjoy this trip and make memorable images using whatever camera gear you wish to bring; it is not necessary to invest in specialized gear (although for the eclipse itself, a DSLR or mirrorless interchangeable lens camera equipped with an inexpensive solar filter will be helpful).

This tour begins in Salem, OR on Aug. 19 and ends in Seattle, WA on Sep. 2.  Find more details here: Eclipse and Pacific Northwest Photography Tour.  Please let me know if you have questions or are interested in participating on the trip.  Mary and I hope that you can join us for this rare opportunity to experience a total solar eclipse right here in North America and to visit the spectacular attractions of Oregon and Washington states!


A Shot in the Dark: Night photography opens up a whole new world of image possibilities

The state of the art in photography gear has improved to the point where creating breathtaking nighttime images is now within the range of most enthusiast photographers.  Until recently an expensive and technically complicated ordeal, making images in very low light can now be done quite easily and with reasonably priced gear.  Today’s post discusses what you need and how to do it.

This image was made at the outskirts of Svalbard’s only population center, Longyearbyen, several hours after sunset.  To capture the scene in nearly total darkness, I used a sturdy tripod, a relatively wide aperture (f/4), and a long shutter speed.  Buy this photo

Because nighttime scenes feature very dim lighting (typically coming from the moon or stars, or occasionally from a bit of reflected ambient sunlight or city lights indirectly illuminating the scene), it is usually essential to mount your camera on a sturdy tripod and to use a high ISO setting.  Sometimes a fast lens can be used to obtain a wide aperture (low f-stop number), in order to reduce the length of the required exposure time.  I like to bracket my exposures (shoot multiple images, each with a slightly different exposure) for most night scenes, so as to maximize the chance of obtaining just the right exposure.  You can read more about exposure bracketing in this post: Post on Bracketing.  To minimize camera shake during these long exposures, use a remote shutter release or your camera’s self-timer to trigger the shot.  My go-to shutter release is inexpensive and very reliable:

To make this image of the Milky Way over Yosemite National Park, I used a very long shutter speed and very high ISO setting.  Both long exposures and high ISO sensitivities will tend to introduce digital noise to the image file.  Fortunately, these sources of noise can usually be effectively controlled during post-processing.  Buy this photo

Night photography requires special attention during post-processing.  Because long exposure times and high ISO sensitivity settings tend to introduce digital noise (random errors in the brightness and/or color rendition of pixels in the image), it is important to pay careful attention to these effects while working in Lightroom, Photoshop, or other post-processing software applications.  I find Lightroom’s tools to be very effective in reducing both sources of noise.  In Lightroom’s Develop Module, play with the Luminance slider under the Noise Reduction tools area until the noise is just controlled, but not so far as to cause unrealistic rendition of color or sharpness.  Note that some cameras also allow you to reduce high ISO noise and/or long exposure noise via menu settings in-camera.  I tend not to use these tools because they slow down the shooting process, and their effect can be replicated easily in post-processing.  Post-processing is also the time to adjust the color rendition and sharpness/contrast of the Milky Way or other stars appearing in the image to make these astronomical features really pop.

This image of Pigeon Point Lighthouse in Pescadero, California combines many of the night photography techniques discussed in this post.  The lighting here was tricky because the brightness of the lighthouse beacon was much greater than the available light on the foreground and background objects.  Bracketing exposure helps in these situations.  Buy this photo

I hope this post inspires you to make your own nighttime images.  With a decent DSLR or mirrorless ILC camera, a relatively fast lens, and a tripod, every photographer can now be equipped to shoot in very low light.

Now it’s your turn.  Please share your own experiences with creating low-light images by leaving a comment here.

Want to read more posts about photographic techniques?  Find them all here: Posts on Techniques.

Focus on Ireland [Encore Publication]: The Emerald Isle offers unique landscapes and culture

We’re recently returned from a two-week adventure in Ireland and Scotland.  Our itinerary sandwiched a week of hiking in the glorious southwestern regions of Ireland (Counties Kerry and Cork) in between brief stays in the major cities of Dublin and Edinburgh.  The photographic opportunities in these regions are remarkable, with lovely landscapes, historic architecture, and a generous friendly culture evident everywhere.  I provide an overview in the form of a photo essay in today’s post, and upcoming posts will feature more details on specific places or types of subjects from the trip.

The Irish pub remains a central focus of life on the Emerald Isle.  In cities and tiny rural villages, the pubs are places for people to come together and catch up with old friends, make new friends, listen to live traditional music, and of course drink a pint or two.  This image was made in Dublin’s famed O’Donoghue’s Pub, where in the 1960s bands such as the Dubliners sparked the Irish folk music revival.
To make portraits in pubs, where the lighting is dim and the use of flash is out of the question, use a fast lens and a high ISO setting.  You need a shutter speed of at least 1/80 of a second to get a reasonably sharp image of musicians at work.  Buy this photo

It may come as a surprise (or not) to learn that Ireland’s most popular attraction is the Guinness Storehouse tour in Dublin.  Here my wife pulls a perfect pint of the “black stuff,” which we then enjoyed in the Gravity Bar atop the storehouse with views overlooking all of Dublin.

Another low-light shot, this image was made with ambient light only, using a fast lens and relatively high ISO.  Remember to capture some shots of your traveling companions.  Buy this photo

I highly recommend a visit to the very remote Gougane Barra peninsula.  There’s only one hotel, which offers outstanding food and views over a tiny island with a picturesque church and the ruins of a Sixth Century monastery.  A photographer’s paradise!

St. Finbarr’s Church stands on a tiny island on the Gougane Barra Peninsula.  To make this image, I shot in the early morning when the quality of light was compelling, got down low to include the rushes in the lake, and used a polarizing filter to bring out the textures in the water and sky.  Buy this photo

Don’t put away your gear when the sun sets!  On a rare clear night in rural Ireland, the photography is stunning.  Here’s an image of the Milky Way sprawling above the ruins of St. Finbarr’s Abbey, a Sixth Century monastery.

To capture the Milky Way, use a sturdy tripod and a relatively fast lens with a high ISO setting.  In most cases, a shutter speed of 20-25 seconds is best, but here I used a somewhat shorter exposure to avoid having the cross appear washed out in the site’s artificial light.  Buy this photo

We then hiked a portion of the long-distance Sheep’s Head Way.  You’ll rarely encounter completely clear skies while walking in Ireland, but the changeable conditions can create opportunities for glorious landscapes.  This lovely image was made just as the rain let up and the sun poked out, generating a vivid rainbow that spanned over the green fields and ancient walls.

Here I used my go-to landscape lens, the Nikon 16-35mm f/4 lens, fitted with a good circular polarizing filter.  I adjusted the angle of the polarizer carefully to enhance the sky without weakening the refraction of the rainbow.  I got down low to the ground to include the leading line from the old wall.  Other compositional elements include the sheep in the field and the dramatic clouds in the sky.  Buy this photo

At the end of the Sheep’s Head Way sits the lovely Bantry House, owned by the family since 1750.  Climb the hill behind the house to capture the house and its gardens with the harbor behind.  Buy this photo

On our way to the start of our next day’s hike in Killarney National Park, we stopped at a viewpoint called Priest’s Leap for this lovely view.  I’ve said it before and I’ll say it again: remember to include yourself and your travel companions in some of your images.  Set up the camera and either mount it on a tripod or show another person how to release the shutter.  For more on how to make images including yourself, read this post: Post on Including Yourself

This image at Priest’s Leap was made using a normal lens with polarizing filter, stopped down to maximize depth-of-field.  Buy this photo

Ireland is filled with forests that exude a sense of mystery and magic.  Look for the little things as you walk: a flower or shamrock, a moss-covered tree, a tiny stream.  All that rain has the happy side-effect of making Ireland the greenest place I’ve ever seen.

Slow down and seek out the little natural details around you, like this moss-covered tree in Killarney National Park.  Buy this photo

The legendary Gap of Dunloe outside of Killarney stretches for eight miles through mountains and valleys, along streams and by ancient farmhouses.  It can be traversed by horse-drawn carriages called “jaunting cars,” but the intrepid photographer will want to hike it instead.

The Gap of Dunloe offers compelling photographic subjects like this stream flowing in a valley surrounded by mountains.  A good wide-angle lens with a polarizing filter brings out the color and texture in such a landscape, even on a “soft day” like this one.  Buy this photo

We spent every evening in Ireland visiting a pub or two.  These pubs differ in character, but all reflect the generous and friendly local culture, and many offer live music.

At a pub in Killarney, I was chatting with this fiddler during a break between sets, and made this portrait using natural light with a fast portrait lens, a wide aperture, and a high ISO.  Buy this photo

My essential portrait lens:

We were fortunate to stay two nights in Killarney at the wonderful Lake Hotel.  The hotel grounds include the ruins of an ancient castle situated on a lake with mountains behind.  During breakfast on our second morning, I noticed the cloud cover had lifted but there was still mist hanging on the side of the hills around the lake.  I ran up to our room, grabbed my thirty pounds of camera gear, and rushed outside to capture the ruins with the mist enshrouding the lake and mountains.

There was no time to set up a tripod as the warming sun was burning away the magical mist on the lake, so I shot this image handheld.  Buy this photo

Our final day’s hike was the beautiful Wild Atlantic Way from Ventry to Dunquin.  The lovely views of the Atlantic are punctuated with green fields dotted with odd “beehive huts,” some dating back to the Neolithic Period.
To make this landscape incorporating ancient stone beehive huts and walls, I shot down across the fields to the sea, being sure to keep the horizon level.  Buy this photo

The picturesque Blasket Islands were home to a community of Irish-speaking farmer-fishermen until they were forced to evacuate in 1953.  This is one of Ireland’s most gorgeous stretches of coastline, captured here using a wide-angle lens with polarizer.  Rotate the filter until the sky is dark and dramatic.  Buy this photo

After Ireland, we spent a few days in Edinburgh, Scotland.  This image was shot along the Royal Mile.

Be on the lookout for unusual perspectives.  This image juxtaposes the different colors and textures of  the statue in the foreground with the cathedral in the background.  Buy this photo

Dining is an essential part of any trip, and Edinburgh offers many opportunities to savor the new Scottish cuisine.  This lovely smoked salmon plate (with accompanying wee dram of whisky) was captured at the Tower Restaurant atop the Scottish National Museum.

For more about how to shoot food images, read this post: Post on Food Photography.      Buy this photo

I hope this post inspires you to visit Ireland and Scotland.  Look for posts over the next few days with more details about the trip and images.

If you’d like to read more posts about photographic destinations, you can find them all here: http://www.to-travel-hopefully.com/category/destinations/

Have you visited Ireland?  What did you find most memorable?  Any tips on photographing this enchanted place?  Please share your thoughts in the comment box after this post.

Photography as a Bridge to Local Culture [Encore Publication]: Your camera is a great tool for meeting local people and learning about culture

I’ve heard certain travelers grumble that photography inhibits deep cultural learning and interaction when we visit new places.  Our cameras, this line of reasoning goes, isolate us from the local people we’re trying to get to know.  The lens, they believe, acts as a distancing device to turn locals into subjects and travelers into tourists.

I disagree emphatically!  Your camera is a great tool for meeting local people and learning about culture, immersing yourself even more deeply in the spirit of the place and the lives of the people who live there.  But only if you use it in the right way.  Allow me to explain.

While the local customs and even the laws governing whom it is acceptable to photograph, and when or where it is okay to make an image of them, do vary from place to place, there are a few common-sense guidelines that will help us travelers engage in a friendly, curious manner instead of upsetting people and causing social discord.  Here are a few key guidelines to keep in mind.

    • The Golden Rule: If it’s not okay in your home country, it’s probably not okay in other parts of the world.  Would you appreciate a stranger running up to you on your front lawn and shoving a lens in your face?  I’m guessing, no.  So please don’t behave in that way toward people in other places.
    • Make a portrait, don’t take a portrait: Get to know your subject first as a person, even if just for a brief exchange.  While there are occasionally situations where the moment or the expression will be lost by approaching your subject before shooting, I find that most of the time I make better images as well as have more meaningful interactions, when I say hello and ask the person first.

USA

I chatted for a while with these samba dancers as they were celebrating just after San Francisco’s Carnaval parade.  Getting to know them first made it easy to ask permission for a portrait. Buy this photo

    • Approach children with sensitivity: Kids can be amazing photographic subjects!  They are often uninhibited in front of the camera and they portray cultural practices and lifestyle in a relatable, endearing way.  But it’s especially important to understand when it’s okay to make a portrait with them.  While traveling in South Africa, I saw first-hand what can happen when travelers misunderstand social norms.  A fellow traveler in my group saw a young boy playing near where we were waiting for a border crossing.  She shouted excitedly, “Soooo cute!,” and rushed up to the child, camera extended toward his face, to take his picture.  In an instant the boy’s father ran over, irate, and yelled at me (he mistakenly thought I was the fellow traveler’s father), “How would you like it if we came to your country and started taking pictures of your children?”  A few minutes later I explained privately to the offending traveler why her actions caused a negative reaction.  She had no idea this behavior wasn’t okay.  When in doubt, refer to the Golden Rule, above.

Kashgar, China

We visited the old town in Kashgar just before the Chinese government began demolishing the homes there and relocating the mostly ethnic Uighur people.  It was and remains a complicated social situation, but I was fortunate to be able to make this memorable portrait of a young Uighur girl in traditional clothing sitting in front of her soon-to-be-destroyed family house.  I approached her mother first to make sure it was okay to photograph the girl.  Her expression of pride mixed with apprehension is what I feel makes this image strong.  Buy this photo

    • Getting to know you: It may seem difficult to talk with a stranger from a very different culture who likely speaks a very different language from our own.  For us introverts, it seems like even more of a challenge.  But I’ve learned a few tricks and tips that make it much easier to get to know a person before photographing them.  Learn a few words of the local language.  Just saying “hello” or “good day” can be a great icebreaker.  It’s a fairly universal gesture to point to your camera and extend your arm gently toward your hopeful subject to inquire, “Is it okay if I take your picture?”  Just as happens in our home countries, a subject may say no, but most of the time people are happy to be photographed if you are polite, respectful, and try to interact with them first.  A trip leader, guide, or local friend can often be a great help by introducing you to the person you’d like to photograph.

Turkey

At the start of our trip through Turkey, I asked our trip leader to introduce me to people we felt would be good portrait subjects.  With his help I was able to overcome the language and cultural difference and capture this striking portrait of an employee at a carpet weaving cooperative.  Buy this photo

    • How close is too close?: In most situations it is fine to make an image that includes a large group of people, none of whom will be too prominent in the photo.  For close-up images, though, in which an individual person or small group of people will be the obvious subject, it is best to ask first.
    • Money matters: When there is a commercial transaction between you and your subject, it often paves the way to ask to make their portrait.  I’ve had good experiences photographing local street vendors, musicians, artisans, and shopkeepers after purchasing their wares or tipping them for their services.  And of course it is usually fine to photograph singers, dancers, and musicians in a performance you have paid to attend, as long as local rules about photography are obeyed (sometimes you will have to pay extra for a license to photograph, and frequently flash is not permitted).  But it can become a slippery slope when people begin to expect to be paid just for having travelers photograph them.  In Peru we had many people, including young children, dress in traditional costumes and approach us to pose in photos for money.  In an Argentinian mountain village we were even asked to pay to photograph a gentleman’s Saint Bernard dogs.  In these situations, you’ll have to exercise your best judgment.
    • When can you shoot first and ask questions later?: It’s rare, but on occasion you will encounter situations when the “decisive moment” will be lost if you ask for permission to shoot.  This is another judgment call.  Just like when shooting street photography at home, I consider several factors when deciding whether to make an image of a stranger in a different part of the world.  When I do see an amazing expression, gesture, or moment and decide to capture it before getting to know the subject, I will usually approach them and show them the image on the camera’s display, attempting to query whether it’s okay.  A smile and an easygoing, open gesture can help when approaching.  If the response is clearly negative, I delete the image on the spot and in front of the subject. Again, see the Golden Rule, above, and keep in mind that courtesy and respect make all the difference.

Cuba

This was one of those situations when I shot first and asked questions later.  The proprietor of Maria’s Cafe in an eco-village in Cuba’s rural Vinales Valley was standing on a balcony above the cafe surveying the activity below.  I loved the way her contemplative expression and relaxed gesture were framed by the saturated Caribbean colors of the doorway, so I made this image right from our table.  Later, when Maria came down to talk with customers, I showed her the photo and she was pleased with it.  Buy this photo

Beyond these general guidelines, there are local variations.  Do get to know the customs that prevail in the countries and regions you plan to visit.  For example, in some cultures it is acceptable to stand very close to others when conversing, while in other cultures the social boundaries are much more pronounced.  Sometimes it is fine to approach a child directly, but in other cases the first contact should be made with the parent or teacher.  There’s quite a bit of local variation in the amount of small-talk people engage in before getting down to business.  Knowing the local customs not only helps you make better portraits of the people you meet, but will also encourage deeper interactions and mutual respect.

In my experience, the camera is a wonderful bridge that enhances, rather than detracts from, making meaningful cultural connections with people while traveling.  Just try to do it the right way!

Want to read other posts about what to shoot during your travels?  Find them all here: http://www.to-travel-hopefully.com/category/travel/shoot/

Do you have a good story to share about your experiences, positive or otherwise, in photographing people you met during your travels?  What’s your approach to making portraits while abroad?  How has photography enhanced your cultural interactions?  Please post your thoughts in the comment box.

A “Fixer” for the Rest of Us [Encore Publication]: How you can leverage local resources to shoot like a pro

How do professional travel photographers on assignment create those amazing, make-your-jaw-drop images?  You know, the photos we see when browsing the pages of a major travel magazine or website?  There are several advantages the pros have, including technique honed over decades of practice, state-of-the-art equipment (with prices to match), and the ability to spend a lot of time at the same location, returning again and again until the time of day, lighting, weather conditions, and subject matter are perfectly aligned for a great shot.  But one advantage available to the pros can be borrowed, at least in part, by the rest of us who love travel photography, too.  That is the use of a “fixer,” a local expert who knows the region, the language, the culture, and the way to get things done, and whose expertise helps the travel photographer get those incredible shots.

While we were visiting a carpet weaving collective in Goreme, Turkey, our group’s trip leader introduced me to this worker who was enjoying a cup of Turkish coffee during her break.  Buy this photo

If you are traveling on a group trip run by a good travel company, you may already may have a fixer working to make your experience (including your photographic experience) as rewarding as possible.  The operator will likely have chosen an itinerary that will get you off the beaten path and into the settings where unusual and powerful images can be made.  They will have arranged your accommodations and transportation well in advance of your departure.  The company should have planned some activities and excursions that will allow you to interact with local people and see how they truly live.  And best of all, they have provided you with a local expert, often called a trip leader or program director, who knows the lay of the land, speaks the local language(s), and can facilitate your getting the kinds of shots you want.  This is of paramount importance when you want to have lots of interaction within a culture very different from your own, which I believe is the best part of traveling as a photographer.

For example, I made the above portrait after being introduced to the young worker at a carpet weaving collective by our trip leader in Turkey.  He translated so that she and I could get to know each other a little bit first, and then asked her if I could make her portrait.  It is certainly possible (I’ve done this countless times) to ask for yourself by using sign language, pointing to your camera, and smiling a lot, but having a local person with you can be a great help.

Sometimes, knowing where to go to seek out authentic cultural interactions works magic.  I captured this shot of our host family during a home-hosted lunch on an estancia (ranch) in Patagonia.

Our hosts, Chango and his extended family, were happy to pose for a portrait after we enjoyed their hospitality on their Patagonian ranch.  A local guide and good travel company can help arrange these kinds of authentic interactions.  Buy this photo


Visiting a rural elementary school in Tanzania afforded us the chance to meet kids in the classroom.  This type of experience would be hard to arrange while traveling independently, but a good group leader or guide can facilitate meaningful interactions with local people.  Buy this photo

When the trip is scheduled specifically to attend a special event, it is especially vital to have a good leader who is adept at working with local professionals to plan all the details.  For example, it was quite a major logistical feat to get a large group of scientists and photographers into place to study and view a total solar eclipse in a part of the world as remote and forbidding as Svalbard.  Our trip leader partnered with an astrophysicist who is a world authority on eclipses, beginning years in advance of the solar event, to ensure we had the best chance possible of clear weather conditions and the right vantage point from which to study and photograph the eclipse.  This is the sort of value that an expert fixer brings when you book a trip with one of the top companies.

Our eclipse expert and one of his students set up their gear on the morning of the total solar eclipse in Svalbard.  Buy this photo

To be sure, there are some compromises required for group travel, and having access to a shared program director is not the same as having a dedicated personal fixer to arrange your photo shoots for you.  I like to travel independently in places with developed infrastructure and where I can readily bridge the cultural or language gaps myself.  That said, I also love to travel in small groups run by excellent travel companies, in large part because their planning, coupled with the knowledge of the local trip leader, helps me make those memorable images.

Want to read other posts about planning your travel photography?  Find them all here: http://www.to-travel-hopefully.com/category/travel/plan/

Have you had a situation where you got your shot thanks to the knowledge of a local expert?  How do you arrange your travel when you’re visiting remote parts of the world or when you want to have lots of interaction within a culture very different from your own?  I’d love to hear your thoughts and experiences!  Please respond via the comment box.

I See a Red Door and I Want to Paint It Black [Encore Publication]: When a black-and-white image is better than color, and how to convert to B&W

Back in the day, a photographer had to choose in advance whether to shoot with color film or black-and-white film.  Conversions from color to B&W were cumbersome and expensive, and conversions from B&W to color were essentially impossible.  During the film era, I typically shot exclusively using color transparency film while traveling, and reserved B&W photography for particularly artistic shoots near home.

Thankfully, in today’s digital world, we no longer have to commit ourselves in advance to monochrome vs. color images.  It’s now a simple procedure to convert our color images to B&W during post-processing.  And that’s a great blessing, because there are plenty of times when a black-and-white photo is better than a color photo.

Consider the image of the alligator at the start of this post.  One of my favorite photos, this one works just fine in color, too.  But the real power of the image is revealed in B&W through the striking textures of the alligator’s skin as seen above the water and as reflected off the water’s surface.  The background above the water fades to a deep, nearly true, black, with the background of the water itself rendered slightly less darkly and showing some nice ripples of motion.  Black-and-white photography is especially powerful when there are contrasts of pattern, texture, and background as in this image.  Buy this photo

When else might we want to render an image in B&W?

Portraits made in monochrome have a timeless look that evokes the earlier years of photography, and this rendering can also bring out the true nature of the subject.  There’s a lovely look to the skin tones and hair when displayed in B&W, and there are fewer distracting elements from the color of clothing or background objects.

This portrait takes on a vintage, timeless look when shown in B&W.  Our eye can focus on the model’s face and hair without the distractions of the colors in her sweater or the building.  There’s almost a street photography kind of documentary quality to this image in monochrome that is lost when viewed in color.  Buy this photo

Color can be distracting in an image where we want to emphasize the essence of a person or place.  In this portrait I made recently for a couple who are fellow musicians and friends of mine, we had beautiful “golden hour” light to work with, and the background and clothing worked well in color.  But converted to B&W, this image really places the emphasis on the couple without the distractions of the color cast in the reflections off the eyeglasses or of the mixed lighting in the background.

In this portrait, black-and-white presentation places the viewer’s attention squarely on the the couple and their instruments, without distractions from the multiple colors of the clothing and background components.  (Client photo not available for purchase.)

When you’re shooting under “mixed lighting”, which means there are multiple light sources with different color temperatures (i.e., some light sources are warmer and others are cooler), converting the image to B&W can be a real problem solver.  Consider the image below, made in Bruges at night.  The light from the street lamps was warmer than the light coming from the spotlights on various buildings, and there was also a bright moon that night, so when seen in color the photo would look less appealing due to the contrasting of the color temperatures in the different parts of the image.  But viewed in B&W, it brings out the grandeur of the old buildings and the beauty of the reflections in the waters of the canal, without the distractions of the color casts.

This image of Bruges at night, when processed in B&W, removes the contrasting color temperatures of the multiple different light sources and allows the viewer to enjoy the stately old buildings with consistent tone and texture.  Buy this photo

Now that we’ve covered a few of the many situations in which a black-and-white image is preferable over a color image, let’s look at how to convert from color to B&W.  There are many ways to perform this conversion, but I recommend it be done using the Color Adjustments settings in the Develop module of Adobe Lightroom.  Here’s how:

Click on the “B&W” tab above the individual color channel sliders, and then adjust the mix of how the colors are blended by increasing or decreasing each color’s slider to see how the black-and-white image looks.  I find that I often have to readjust the contrast slider at this point to get the image looking its best in black-and-white.

For more on using Lightroom to post-process your images, check out my previous post: Previous post on using Lightroom to post-process images.

I do not recommend using your camera’s built-in black-and-white mode, as you will then lose the color information in the image file.  I also do not suggest using the settings some cameras have to make a copy of the image in B&W, because in most cases the camera’s built-in software will not do a very good job of rendering the image in monochrome.  For the best results, either use Lightroom or a dedicated black-and-white conversion application such as Silver Efex Pro 2 from Nik Software, which is available as a plug-in for Lightroom or Photoshop.

Want to read other posts about travel photography techniques?  Find them all here: http://www.to-travel-hopefully.com/category/techniques/

What do you love about a black-and-white image?  When do you convert an image to B&W rather than share it in color?  Any tips or tricks for how to make great B&W photos?  Please share your thoughts in the comment box!


Focus on New Orleans [Encore Publication]: This iconic US city pulsates with jazz, creole, and historic beauty

Some places are magnets that draw us back again and again.  I’ve made at least a dozen visits to New Orleans and each time, I find something new.  It’s an iconic US city that also defies easy categorization.  Home to unique and cutting-edge forms of music, cuisine, and culture, it is also steeped in a grand historic past that evokes France, Spain, Africa, and the Deep South of the US.  Quite simply, there is no other place like New Orleans, and nowhere else do travel photographers find more charismatic subjects.  Here are a few of my favorite images from a recent visit to NOLA, along with a few words about what they depict and how they were made.

Aside from Paris, I can’t think of any other city that has influenced the cocktail more than New Orleans.  Here I captured my older daughter enjoying a classic NOLA libation during dinner on our first night in the Big Easy.  I used only natural light and selected a large aperture to soften the background.  Laissez les bons temps rouler!  Buy this photo

It’s boozy, vomit-filled, sophomoric, touristy, overpriced, and downright awful, but Bourbon Street is a part of the landscape and is worth a quick walk-by.  At night, it’s neon assault can almost seem romantic.  This shot was handheld using a high ISO setting and a small aperture for greater depth of field.  Buy this photo

The lovely Spanish colonial architecture of the French Quarter cries out to be photographed.  I made this shot of a wrought iron balcony using a telephoto lens and enhanced the color vibrancy during post-processing.  Buy this photo

It’s the tiny cheap eateries as much as the temples of haute gastronomy that keep New Orleans at the top of the list of cities for dining.  Be sure to grab some po’ boys, beignets, or muffulettas at these humbler places, and bring your camera to catch some of the action.  This image of workers in a po’ boy shop was shot from the hip, street photography style, using a high ISO to allow for a quick shutter speed.  Buy this photo

New Orleans is rightly famous for its jazz, which seems to seep through every crack in the pavement of the city and can be heard in places humble or elevated.  None is better than the iconic Preservation Hall.  As with many performance venues, this hall allows photography without flash, but it is always better to ask permission first and to be discrete during shows.  Use a fast lens and high ISO setting to allow a fast shutter speed.  Buy this photo

A short trip outside of the city quickly reminds you that New Orleans is a part of the American Deep South.  This image was shot from an airboat plying the bayous of Jean Lafitte National Historic Preserve.  I metered the exposure on the lush vegetation lining the waterway so as to avoid overexposure from the bright reflections.  Buy this photo

I captured this image of an alligator seeking the sun on an overcast winter’s day by framing tightly around the gator and its reflection.  In post-processing, I cropped to emphasize the symmetry of reptile and reflection and converted the image to black-and-white, while increasing its contrast a bit.  Buy this photo

I’m a big fan of food photography, especially when the plate is as strikingly beautiful as this one served at Brigtsen’s Restaurant.  I framed the shot tightly with a fast prime lens and a wide aperture to reduce the depth of field.  Buy this photo

Wherever we travel, we should make images that bring out a sense of place.  This image of my daughters strolling in the Garden District works because it captures the iconic symbols of this neighborhood–the stately mansions and live oak trees–while being a bit playful and framed in an unexpected way.  And as I’ve said many times, remember to capture your travel companions in some of your shots.  Buy this photo

Have you visited New Orleans with a camera in hand?  Please share your experiences.  Where do you like to visit and what do you like to shoot?

Want to read more posts about travel photography destinations?  Find them all here: Posts on Destinations.

Sports Roundup [Encore Publication]: How to get amazing shots at sporting events

Whether we’re traveling afar or close to home, sporting events make for exciting photography.  The thrill of victory and the agony of defeat (credit: ABC’s Wide World of Sports), the heroic effort, and the little moments of humor and repose amidst the adrenaline rush of competition: all of these elements can be captured in images of athletic events.

While every sport has its own rhythm and rules, there are certain techniques that apply across a wide range of sports photography situations.  Let’s take a look at a few situations and discuss how to get the best images given the inherent challenges.  Note that these photos were all made during outdoor sporting events; there are special challenges with many indoor sports, such as basketball or hockey, because the action remains just as fast but there is less light to work with, and the artificial lighting can impart an unnatural color cast.  But that’s a topic for a different post.

Whatever the sport, I like to shoot from different perspectives, from wide to very close.  The wider views show the environment as well as the athletes, so these make good establishing shots.  But often the most compelling and dramatic sports images are the tight compositions, because they portray the athletes in a very personal and relatable way.

Below are two shots of the same rowing crew during the same race at a high school regatta.  The first image was composed from slightly farther away and with a less extreme focal length (300mm), so the resulting composition is more environmental.  It shows not only all the rowers and the coxswain in the shell, but also the width of the river and the surrounding scenery.  This shot establishes the setting and gives the big picture.
Environmental shot of a crew racing at a rowing regatta.  Buy this photo

Now here’s the same crew, but captured from a closer vantage point and using a longer focal length lens (750mm).  This perspective isolates the athletes from the background and shows their expressions and postures.  There’s certainly more drama here, at the expense of some insight into the environment.

A tighter shot of the same crew in the same race.  Buy this photo

There are exceptions, such as when you choose to blur the motion to give a sense of the athlete’s grace, but as rule you want to use a fast shutter speed to freeze the action in sports photography.  Very often that means shooting at 1/1000 of a second or even faster.  Choose the Shutter Priority mode on your camera to gain control over the shutter speed, and be sure to select a high enough ISO setting to allow the shutter speed you require.  If your camera has different auto-focus settings, you may find it helpful to choose a single-point focus setting if you know where the action will be, or a dynamic focus setting if the location of the action changes very quickly.  For this image of a professional beach volleyball tournament, I chose single-point auto-focus so I could select the exact spot where the players would be jumping.  I also find the best way to capture a great image in fast-moving sports (as with wildlife photography) is to set the camera to continuous or burst mode and continue to shoot rapidly through the action.  That way, you’ll have several different images to choose from, and with luck at least one will have caught that “decisive moment.”

A fast shutter speed and single-point auto-focus allow the fast action of a beach volleyball competition to be captured precisely.  Buy this photo

My favorite sports images portray the human element in a very personal way.  This photo from a Spartan Race (an extreme athletic event that combines long-distance running with a supersized obstacle course) captures the strength and the struggle of the athlete as he nears the end of a long race through the 100-degree California desert.  Keys to success in making this image were shooting from a vantage point low to the ground, using a medium-length prime telephoto lens with a large aperture to soften the background, and waiting for just the right moment.

An endurance athlete completes an obstacle near the end of a Spartan Race.  Buy this photo

The fun of shooting a sporting event doesn’t end when the competition is over.  Be sure to capture the dramatic and often humorous moments during award ceremonies and downtime during and after the action.

These athletes have finished their Spartan Race and strike a humorous pose at the finish line.  Buy this photo

Want to see more posts on what to shoot at home and while traveling?  See them all here: http://www.to-travel-hopefully.com/category/travel/shoot/

What sports do you enjoy shooting?  Do you have tips on how to get great sports images?  Please leave a comment in the box after this post.


If You Can’t Be with The Camera You Love [Encore Publication]: How to make the best of it when you don’t have ideal kit with you

There’s an old adage that goes, “The best camera is the one you have with you.”  That is never more true than for travel photography.  As travelers, we have to compromise regarding what gear we pack for a whole trip, and then we have to compromise again with respect to what equipment we can pack on a particular day’s outing during the trip.  If a flight is involved, we’re often obligated to leave much of our gear at home so as to avoid having to check our precious photography equipment.  If a good deal of hiking, biking, or travel via public transportation is required, we may have to leave bulky or heavy items in the hotel room for the day.

Fortunately, it’s never been easier to ensure we always have at least some backup solution to keep shooting even when a key camera, lens, filter, or tripod has to be left behind.  The smartphone that nearly everyone carries with them at all times likely has a pretty darn good camera attached to it.  My Apple iPhone 6s, for example, comes with a 12 MP camera, incorporating a decent if small sensor and a tolerable quality and moderately fast (f/2.2) lens.  Even the smaller “selfie” camera has a 5 MP sensor.

No one will confuse the images made using this camera phone with those made using my professional DSLR camera and collection of lenses, but in a pinch I can get acceptable quality shots with just the phone’s camera.  The trick is understanding how to use your smartphone’s camera, or your small point-and-shoot camera, in the right way to capture the images, and then to post-process the images in such a way as to overcome the compromises built into the camera.

Just yesterday I found myself on a family day trip to the annual Scottish Highland Gathering and Games without my professional camera gear.  I made the best of things and shot all day with just my camera’s phone.  I’m fairly pleased with the resulting images, even though of course they would have been better had I had access to my regular camera and a few choice lenses and accessories.  Here are a few of my images along with some tips on how to get the best out of a not-so-great camera.

First of all, learn how to control your phone’s camera manually so that you can choose what part of the image you want to be in focus and what part of the image you want to drive the exposure.  Nearly all modern phone’s cameras allow you to touch the screen to select where on the image you want to set the focus and exposure.  In this photo of a Scottish traditional music performance, I set the focus point on the fiddler to ensure sharp focus on the musicians.  Then I adjusted the exposure by moving the vertical slider upward, in order to add some brightness to the image and avoid underexposing the backlit performers.

Touch your smartphone camera’s screen to select the focus point, and then move the exposure slider up or down to adjust the exposure separately from the focus point.  Buy this photo on my website

Better yet, take full manual control over your phone’s camera by installing an app.  There are good free and inexpensive apps for both iOS and Android.  The one I use for iOS is called “Manual” and is available on the Apple App Store: Manual app.  With such an app installed on your camera, you can specify manually exactly what settings you want to use for the focus point, aperture, shutter speed, ISO, flash, etc.  This level of control was essential for a shot like the one below.  The tossin’ of the caber, a “heavy athletics” event in which the contestants throw a 75-pound tree trunk as far as possible, requires a fast shutter speed in order to freeze the rapid action.

Note: Since I first wrote this post, I have started using a different iOS app to take manual control over my phone’s camera.  It’s called “ProCam 4” and it’s quite a bit more sophisticated, but as easy to use, as the “Manual” app.  You can purchase it on the Apple iTunes Store here: ProCam 4 App.

Using the “Manual” app I was able to focus on the athlete and choose a fast shutter speed to freeze the rapidly moving caber.   Buy this photo on my website

To capture this action shot of an indoor sheepdog trial, I had to set a fast shutter speed and increase the camera sensor’s sensitivity (ISO) to accommodate the quick action and the low-light setting.  Again, the Manual app allowed for this flexibility.  I also cropped the image during post-processing because the phone’s camera does not have a long enough focal length lens to zoom in closely on the subject.

Both manual selection of the ISO and shutter speed and cropping during post-processing are required to get a decent shot of action like this sheepdog trial.  Buy this photo on my website

To capture this image of a girl teaching young children how to dance around the maypole, I had to use all the elements we’ve been discussing here.  I used manual settings to choose a focus and exposure that were correct for this subject, forced the camera’s flash to fire to try to even out the harsh shadows across the girl’s face, and employed cropping and lighting adjustments during post-processing to achieve a pleasing composition.

Bringing it all together: To make this image of the maypole celebration, I manually selected the focus, exposure, and flash, and then cropped and adjusted exposure during post-processing.  Buy this photo on my website

Next time you can’t or just don’t have the best equipment with you, use the tips we’ve covered here to make the best of a challenging situation.

When did you have to make do with less than ideal gear for a shoot?  How did you make the best of it?  Do you have tips or tricks you can add?  Please contribute your thoughts using the comment box at the end of this post.

Want to read more post about photographic gear?  Find them all here: Posts on Gear.

Decent Exposure [Encore Publication]: Mastering exposure is key to getting great images

Of all the primary elements a photographer controls–composition, focus, the moment the shutter is released, and of course the choice of the subject–none is more critical to making a great image than setting a proper exposure.  Some corrections to a poorly exposed image can be made in post-processing, and there are occasionally good artistic reasons to override the norms of exposure in order to evoke a certain mood in an image by making it darker or brighter than usual, but before we can effectively make these exceptional choices it is necessary to learn the basics of setting an appropriate exposure.

Let’s begin by defining exposure and the elements that comprise it.  Simply put, exposure refers to the amount of light that reaches the camera’s sensor and therefore how light or dark the resulting image will appear.  Four components together determine the exposure: 1) the brightness of the light reflecting off the subject and reaching the front of the lens, 2) the aperture setting on the lens (how wide or narrow is the opening of the lens), 3) the shutter speed setting (how long is the camera’s shutter open to allow light to strike the sensor), and 4) the sensitivity setting of the camera’s sensor.  We don’t always have control over the first component, but the other three are within our control using our camera’s settings.

Many photographers simply set their camera on Auto mode and let the camera’s built-in meter make its best guess as to how the image should be exposed.  That method can work well under certain conditions, but it is highly prone to errors.  For example, if your main subject is strongly backlit, the camera’s meter will expose for the average brightness in the scene and will underexpose the subject.  This is why so often we see underexposed photos of people standing outside in bright sunlight.

Although I compensated for the strong backlighting in this image of a Tibetan family enjoying a midday picnic, their faces are still quite shadowy, indicating a bit brighter exposure would have been better still.  Buy this photo

Fortunately, there are several easy methods to achieve a correct exposure even under challenging lighting conditions.  Here are a few that I use frequently:

  1. Set the camera’s metering mode to Spot Metering: By default most cameras’ metering systems use a sophisticated pattern-matching algorithm that measures how bright or dark each area of the image is and makes its best guess about a workable exposure based on similar scenes in the camera’s database.  Most cameras allow you to select a simpler metering mode called Spot Metering, that just measures the light at the central point in the image or another point that you select.  If you choose Spot Metering and select the measuring point to be right where your main subject is, you should get just the right exposure.
  2. Dial in some exposure compensation: Most cameras let you override the meter’s exposure setting by dialing in a compensation setting to lighten or darken the image.  If your subject is backlit, you will likely want to increase the exposure by one to two stops (each “stop” of additional exposure represents a doubling of the amount of light reaching the sensor).  The camera’s display should show something like “+1 EV” to alert you that you’ve dialed in 1 extra stop of exposure, and the number changes as you change the compensation setting.  Just be sure to set the exposure compensation back to zero when you’re done using it.
  3. Go fully manual: To gain complete control over your camera’s exposure settings, choose the meter’s Manual mode.  Then you can change all three exposure elements (shutter speed, aperture, and ISO) until the image appears properly exposed when you review it on your camera’s display.
  4. Use flash to increase the lighting on your main subject: One good way to achieve proper exposure with a backlit subject is to increase lighting on the subject itself, so that there is no longer such a difference in brightness between the subject and the background.  Your camera’s built-in flash may be strong enough to pull off this trick, but it often helps to have a more powerful flash unit with you.  There are some other reasons why you may not want to use flash as a main source of light on your subject, so this method should be used sparingly.  A reflector can be used instead of flash to reflect some of the sun’s light onto the front of your subject.

For this photo shoot with a musician friend, I shot into the light so she wouldn’t have to squint into the sun and also so that we’d have a beautiful rim light from the sun around her hair.  To pull this off, I used manual mode and selected the proper exposure for her face.  I employed a reflector to bounce some sunlight back onto her face and trumpet.  [Client image not for sale.]

Similar methods can be used for other challenging lighting conditions besides backlighting.  If the subject is a brighter or darker color than the “neutral gray” your camera’s meter uses for a standard, then you need to dial in more or less exposure as appropriate.  My black cat Dragonfly, for example, requires an especially dark exposure to override the meter from thinking he’s a gray cat and choosing too bright an exposure.  Similarly, a white polar bear will need additional exposure to stop the meter from underexposing what it assumes to be a gray bear.

When photographing a black subject, reduce the exposure to compensate for the light meter’s mistaken assumption that the subject is a neutral gray color.  Buy this photo

Whatever method you use to choose your exposure, be sure to take a look at the resulting image using your camera’s monitor.  Does the main subject appear to be properly exposed, or is it still too dark or perhaps too bright?  If your camera offers a histogram display, learn how it works and use it to check your exposure in tricky lighting conditions.  I’ll write a future post specifically about the histogram, as it is a very useful and often overlooked feature.

With some attention to the exposure of your images and use of some of the techniques described here, you can achieve a correctly exposed image nearly all of the time.  After mastering the essentials of exposure, you will have more keepers and fewer images in the virtual trash can, and you can even begin to break the rules for artistic effect.

Want to see more posts on photographic techniques?  You can find them all here: Posts on Techniques.

What lighting situations do you find the trickiest?  What techniques do you use to ensure properly exposed images?  Please share your thoughts in the comments box.

Focus on Shotgun Players [Encore Publication]: Making exciting images from a cold reading of a script requires good timing

Documenting the creative process in the performing arts is one of my favorite photographic subjects.  Whether it be with dancers, actors, musicians, or any other artist, I love capturing the progression from beginning to final performance.

Tonight I was fortunate to be invited by a longtime favorite local theater company, Shotgun Players, to shoot their first cold reading of the script for their new production, “Nora.”  Based on Ibsen’s masterpiece, “A Doll’s House,” this production is much needed during these troubled times in the US.  Tonight’s reading was wonderfully executed.  Introduced by a presentation by the director, the actors and stage manager interpreted the entire script with lots of dramatic affect and emotion.  I can only imagine how superb the final production will be if the cast could develop this much excitement from a cold reading!  I’ve also been invited to shoot the dress rehearsal, so I’ll report back with more images in about six weeks.  The production of “Nora” runs from March 16 through April 16 in Berkeley, California.

The problem with photographing an unstaged script reading is that it is not inherently a compelling visual event.  As exciting as a good reading can be for the live audience, a group of actors in street clothes sitting at a table reading from sheets of paper, and with no props, set, or lighting, can be a flat subject for images.  To handle a situation like this, I suggest paying extremely close attention to the exact timing of your shutter releases so as to catch those telling moments where the actors are interacting vividly.  It’s also a good idea to mix it up a little, so that the portfolio of images contains several different vantage points, perspectives, and other compositional tools.  In today’s post, we’ll look at some of my images from tonight’s reading and discuss how they were made.

Selective focus can be quite effective in setting off one person or element from the others.  Here I used a very wide aperture (f/1.8) to emphasize the stage manager in front against the soft background of the actor and table behind her.  Note that while it’s always important to be very conscious of your backgrounds while shooting, in a visually stark situation like a script reading you should work extra hard to keep the background as simple and undistracting as possible.  Buy this photo

I try to include all the key people in any event I shoot.  It would be easy to capture only the actors reading the script, but I also made several images of the director (shown here), the stage manager, and the event organizer.  Buy this photo

Timing is everything when it comes to photographing a visually simple event like a play reading, classical music rehearsal, or lecture.  Try to wait for the moment of greatest emotional interaction.    Buy this photo

There’s no rule that says all your images have to conform to the aspect ratio of your camera’s sensor.  Here I cropped the image to a longer aspect ratio to include more of the actors and their interactions.  It has almost a “Last Supper” feel to it.  Buy this photo

Series work well to add excitement to your image gallery.  This image and the next one together depict the climactic moments of the play, when the husband first shouts at his wife and she screams back at him, finally having gained some power in the relationship.  Buy this photo

This final image is the second in the series described above.  I love the intensity of both actors’ postures and expressions.  If the cold reading can be this dramatic, I can hardly wait for the final run of the show!  Buy this photo

What techniques do you use when shooting subjects that have less visual impact than the usual ones?  Please share your thoughts here.

Want to read more posts about what to shoot while traveling or near home?  Find them all here: Posts on What to Shoot.