Celebration Time, Come On: How to shoot festivals, street fairs, and other celebrations

As a professional travel photographer, I have to be prepared at any given time to shoot in nearly every genre of photography.  Landscapes, urban scenes, street photography, night and astrophotography, sports, wildlife, and portraiture are all stock-in-trade, and I love them all!  But when I’m asked what my favorite photographic genre is, I reply that I love portraying living culture the most of all.  Making images of people celebrating their culture, especially when those images convey a sense of place, is my top objective when I shoot, whether I’m halfway around the world or near home.

Culture can be expressed in small everyday elements of dress, gesture, and environment.  But celebrations such as festivals, street fairs, religious observances, arts, and sports show us culture writ large.  It is these outpourings of color, sounds, motion, and ritual that show us how people are different and yet similar all around the world.  And of all the celebrations I shoot regularly, my favorite of all is the annual Carnaval San Francisco.  So in today’s post, we’ll explore how to shoot striking images of cultural celebrations, using Carnaval SF as an example.

This year’s Carnaval was held this past Sunday.  But I was privileged to be “embedded” with several of the comparsas, or Carnaval groups, during the months leading up to the big parade day.  This allowed me the opportunity to get to know the leaders and dancers in these groups, making very special images of the preparations for Carnaval.  While I won’t be including any of those behind-the-scenes images in today’s post, the images of the parade day itself did benefit from my having had the chance to get to know the members of these groups over the months leading up to the day.  We’ll include some discussion of this observation in the post.

I’d like to start with an observation on gear.  I see a lot of fellow photographers shooting at events like Carnaval with way too much gear.  When I say too much gear, I mean more gear than is good for them or for the participants and observers of the festival.  Several photographers had two or three DSLR bodies mounted with enormous zoom lenses and attached to large strobes with huge diffusers.  Some used monopods and a few even tried to set up tripods for this rapidly moving and crowded event.  I brought a single DSLR with two light and fast prime lenses (a 50mm “normal” lens, and an 85mm portrait lens).  That’s it.  I never mounted a zoom lens during the whole day of shooting and I never used any artificial light.  And of course I went handheld the whole day; there’s really no safe or practical way to use a tripod at a crowded and mobile event.  All 2500 images I made that day used just that compact kit, and I’m very happy with the results.

It’s a good idea to arrive well before the scheduled start time.  Often, the best images of the day will be the ones you make during the preparations rather than during the event itself.  For this image of a leader of the Viva la Diva group, who I knew well from working with them over the last few months, I got in close with an 85mm portrait lens and allowed her elaborate headdress to fill the entire frame.  Buy this photo

Try to include some of the elements surrounding the people in the celebration.  A portrait that shows a person or people within their surroundings is called an “environmental portrait,” and often these tell us more about the person and the culture than do close-ups.  Buy this photo

Seek out the key people in a celebration, such as the King of Carnaval shown here.  He has such an amazing presence that all I had to do was find the right vantage point and shoot away.  I always look for uncluttered backgrounds when making portraits, so the background doesn’t distract much from the image.  Buy this photo

Kids make wonderful subjects during celebrations, especially during those moments when they forget the camera is there and are completely uninhibited.  Buy this photo

Try to choose backgrounds that complement your subject without competing with it.  I asked this samba dancer to pose by a street mural whose bright blues complemented her own costume.  Buy this photo

Group portraits can be challenging.  It’s difficult during the chaos of a celebration to get everyone’s eyes on the camera.  Try to find a vantage point that flatters everyone in the image (for full-body portraits, it’s often best to shoot from the level of the middle of the body, not from head level), choose an uncluttered and undistracting background, and select an aperture that gives just enough depth-of-field to keep all the people in focus while softening the background.  Buy this photo

To make close-up portraits during the actual celebration (in this case, a parade), it is not necessary to use a long telephoto lens.  Shooting with a long lens means you’re “taking” the portrait, not “making” the portrait.  You simply can’t interact with your subject while shooting from far away.  I prefer to use a prime normal or portrait lens so that I can interact with my subject and make an image where his personality shines through.  It helped here that I knew the members of this group from our interactions over the last few months.  Buy this photo

Another reason to use a fast prime lens is that you can choose a very wide aperture (here, F/2.0 using an F/1.4 lens) to get tack-sharp focus on the subject’s face while softening the background and sometimes other parts of the body.  Here I wanted to emphasize the pointing gesture by having the fingers so close as to be out of focus, while the dancer’s face and body are in sharp focus.  Buy this photo

For images that really pop, use a large aperture (small F-stop number) to soften the background and separate the subject from the other people and objects around him.  Buy this photo

During the chaos and cacophony of an urban celebration, it’s nice to find those quiet moments, too.  While most festival dances are joyous and boisterous, this Latin American folkloric dance is quiet and mournful.  I wanted the portrait to reflect that mood, so I shot from the side as if walking next to the dancer and caught the quiet gesture of holding the white handkerchief.  Again, a large aperture was used to blur the background and emphasize the subject.  Buy this photo

I look for scenes where participants are just being themselves.  These girls were having a blast, marching and chatting with each other, but they also were interacting with the crowd.  I got down nearly to the ground so as to shoot from their level and framed the image so as to emphasize the color and pattern of their costumes.  Buy this photo

Most images of parades are shot from straight ahead looking backward onto the subjects.  You’ll observe in this post that most of my images are not made from that perspective, but occasionally it does work to frame a great scene, such as this delightful image of a salsa dancing couple.  Buy this photo

It can be challenging to include a whole parade contingent in one shot.  Here I was able to frame the whole group in formation, including some of the lovely San Francisco houses on the steep hill behind, by running ahead to the truck in front of the dancers and getting as much distance as I could between me and them.  I shot with an 85mm lens and selected a small aperture (large F-number) so as to keep all of the dancers and the background in focus.  Buy this photo

With bold and colorful costumes, some subjects cry out for a big striking close-up.  When this dancer stopped to interact with me, I got in close with a portrait lens and captured him full-frame.  Buy this photo

Don’t shy away from using non-standard aspect ratios.  To include the whole Muito Quente contingent, I moved back from the dancers and captured the whole width of the street, then in post-processing I cropped to keep the full width but remove the unwanted foreground and background portions.  Buy this photo

Again, it is helpful to know the participants in advance of the performance.  I had been working with the Muito Quente group for several months before the parade, which made it more natural to interact with each of the dancers and make the best images possible.  Buy this photo

Always shoot in RAW mode for maximum flexibility.  A few words about post-processing: Using Lightroom, I make small adjustments to the color and contrast curves so as to emphasize the subject.  A little boost to the vibrance (but not so much as to make the image appear unnatural) and a touch of post-crop vignetting can really make the image pop.  Buy this photo

Sometimes it’s okay to break the usual rules of composition.  A portrait is not supposed to be cropped at the joints, such as at the knee, but here it works because the dancer’s ornate flowing dress gives a sense of motion and fluidity in the bottom of the frame.  Buy this photo

Even in a fast-moving parade, find the opportunities to have your subject stop for a moment and interact with you.  The resulting images will convey much more personality that way, even if the personage is fully masked.  Buy this photo

We’ll close with this moment of sheer Carnaval magic.  It’s such a wonderful feeling when all the elements come together to make a memorable image.  This portrait uses most of the techniques we’ve discussed in today’s post–careful composition, bright vibrant colors, a perfect moment, sharp subject with soft background–and conveys a strong sense of personality, culture, and place.  And that is what Carnaval, and cultural celebrations in general, are all about!  Buy this photo

What are your favorite cultural celebrations?  How do you make images that capture their essence?  Please share your thoughts here.

Want to read more posts about what to shoot while traveling or close to home?  Find them all here: Posts on What to Shoot.

A Good Camera Store is Hard to Find [Encore Publication]: Can anything be done to prevent the extinction of pro camera stores?

img_3689

A few months ago, the doors closed permanently at one of the San Francisco Bay Area’s few remaining pro camera shops, Keeble & Shuchat of Palo Alto.  After 51 years of providing sales of a tremendous range of fairly priced photographic gear, friendly service, lifesaving repairs, and informative classes, this local institution was forced to shut down.  The story is a familiar one, and extends beyond the San Francisco Bay Area and beyond the photography sector.  Local brick-and-mortar stores nationwide and in all sectors of the retail economy are being forced out of business due to severe price competition with online and big-box retailers and rising commercial real estate prices.  Over the last few years, my neighborhood has lost the last of its independent coffee shops, bookstores, and movie theaters, and it now seems that camera stores oriented toward enthusiast and professional photographers are also going the way of the dodo bird.

I’m sad about the closure of Keeble & Schuchat because there really is no substitute store within an hour’s drive of my house, and because I knew several of the staff there and don’t know what they’ll do next.  But at the same time, I share some of the blame over their closing.  I was a regular in their store, where I browsed their range of new gear and asked all manner of questions of the friendly and helpful staff.  I made it a point to buy a few doodads at K&S, and I attended paid classes there from time to time.  I depended on them for the repair and maintenance of most of my gear.

But whenever it came time to drop some big bucks on a new pro camera or lens, guess what?  I always purchased from a big online retailer like Amazon or B&H.  I’m sure many other serious photographers behave similarly.  It’s hard to justify paying a 10-20% price premium as well as the local 9.25% sales tax in my county when we’re already stretching to afford the gear in the first place.  It’s very tempting to save so much money with just a few clicks in our web browser.  But something significant is lost when we drive away the local experts who sell books, cameras, or cappuccinos in our neighborhoods.  We lose the local merchant’s accumulated knowledge and the passion for the category we love.  For us photographers, that means there soon won’t be many places we can go locally to chat about the merits or drawbacks of some new piece of gear, to repair or maintain our existing gear, or to learn from people who share our passion for image-making.

When my main portrait lens had some dirt stuck between the inner elements that was causing a speck to appear on all my images, and I observed this on the day before a major portrait shoot for two clients, I took the lens to K&S and their tech diagnosed and repaired it while I waited.  He charged me the whopping sum of $10 for his efforts.  Why?  Because he also was a working photographer and he knew the importance of getting this problem solved quickly and without impacting the clients.  We may save a few dollars by buying our gear online, but what is lost by the mass shift from local stores to e-commerce sites?  I’d better be thinking about what I’m going to do the next time I need an urgent repair done, because there is no longer anywhere reliable to go within an hour’s drive of my home.

How about you?  Please share your thoughts on the value or lack thereof of having experienced, passionate tradespeople in our neighborhoods?  Is it worth spending extra cash to ensure we preserve access to these local stores?  Or do you have a different viewpoint?

img_3690

The Things We Carry [Encore Publication]: Basic Gear for Travel Photography, Part II

Kyle Adler photographer travel photography

Let’s pick up the gear discussion where we left off on the recent post.  Last time, we covered cameras and lenses.  Now we’ll talk about flashes, tripods, accessories, bags, and other essential kit.

Flash Units

Your camera most likely has a built-in flash, and in many cases that can be good enough to provide some fill-in lighting for backlit subjects or even to serve as a main light in very dark situations.  But for more flexible control over how much light you want, the quality of that light, and where that light comes from and goes to, you will likely want to have a separate flash unit.  I use the Nikon SB-910, which is powerful and flexible enough for most settings.  It has been discontinued and replaced by the Nikon SB-5000, but the older model is often still available.

Whatever flash you use, it is best to attach a diffuser of some sort to soften the otherwise very harsh light of the flash.  I also keep my camera set to lower the flash output by 1 stop, and I only override this setting occasionally.  Flash is often best when used sparingly.

Tripods

For most travel situations, you’ll want a lightweight tripod that folds up to a nice portable size but still offers enough stability for most uses.  There are times, though, when I need to bring along my heavy and bulky professional tripod.  Whatever tripod you choose, be sure to fit it with a good quality head (ball heads provide a lot of flexibility and ease of use for travelers) and remember to take along the plate that attaches the tripod to your camera, if required.

My go-to lightweight travel tripod is the Manfrotto Be Free.  It folds up to an incredibly small size yet affords a surprising amount of stability.  The included ball head works well but is difficult to adjust for sensitivity.  This tripod is designed to fit into a special pouch in my favorite travel photography backpack, also made by Manfrotto.

The SLIK 615-315 is a great tripod for use close to home or on trips where you will have constant vehicle support.  It’s very solid, supports a tremendous amount of weight, and can be adjusted for nearly any shooting situation.  I recommend you fit it with a good ball head for maximum flexibility.

A monopod can be a real problem solver when you need more stability than handholding or resting your camera on a vehicle or table will afford, but you can’t carry or use a full tripod.  I use the Manfrotto 681B model.

Accessories

We photographers love our toys!  While it is easy to get carried away and purchase every cool accessory that comes along, I will try to limit the recommendations here to a handful of truly essential items.  And don’t forget the little things like lens cleaning cloths, a blower brush for dust, and of course extra batteries and chargers for your camera and flash.

Three kinds of filters are essential gear for most photographers.  I’ll cover each type below.  Note that you must use a filter that is the correct size to attach to your lens.

It’s a good idea to keep a UV filter attached to your lenses at all times, as this helps protect the front element of the lens from scratches.  Use a good quality filter, though, as the poorer ones can affect image quality.  I would recommend removing the UV filter when shooting with certain other combinations of filters, as the edges of the image can be cut off (vignetting) with too thick a stack of filters on the end of the lens.  I’ve had good luck with Hoya UV filters.

The second must-have type of filter is the circular polarizer.  A polarizing filter can reduce glaring reflections and can darken skies and enhance natural colors.  This little gadget is almost a secret weapon for making images that really pop.  Again, I like the Hoya products, which are thin, well made, and perform as they should.

The final essential filter is the neutral density filter.  These reduce the amount of light that reaches the camera’s sensor, so you can use slower shutter speeds to blur motion, or so you can use a wider aperture to get a shallow depth-of-field, even in bright sunlight.

Another essential is a good remote release for your camera.  I know plenty of photographers who still use the good old trusty wired (or cable) releases.  I like to be able to move away from the camera when shooting remotely, so I favor a wireless release such as the RFN-4s Wireless Remote Shutter Release.

Smartphones

Most of us would never consider leaving home without our phone, and there are additional good reasons to carry yours with you when you are photographing at home or around the globe.  First, the cameras in today’s better phones are now good enough to make quite good images.  I’ve been very impressed with the quality of the main camera, and even the selfie camera, on my Apple iPhone 6S.  But your phone is also an essential photography tool because there are some very good apps to help you plan, shoot, and share your images.  There are too many to list here, but I’ll plan a future post to share some of my favorites.

Bags

Aside from cameras and lenses, no other category of gear gets photographers arguing quite so heatedly as bags.  For a travel photographer, your bag must be highly protective and durable yet lightweight, fit your gear well but with the flexibility to change out kit as needed, and preferably not advertise that you have expensive camera equipment inside.  The choice of what bag to use is a very personal one, but I’m still going to recommend my three favorites.

For those times when you need to bring most or all of your gear on a trip, I like the Tamrac 5586 Expedition 6x Backpack.  It carries a lot of gear snugly and flexibly, and it doesn’t look like a camera bag so it’s less likely to invite the wrong kind of attention.  It will almost always be accepted as carryon on flights, but it is a bit bulky and heavy for all-day, everyday use while traveling.  I’ll often use this bag to get all my gear to my first destination, then pack a day bag for just the gear I’ll need for each day of the trip.

My current favorite bag for day use for nearly any shooting situation near home or while traveling is the Manfrotto MB MA-BP-TRV Advanced Travel Backpack.  It can fit a reasonable amount of gear while leaving room for non-photography items like a jacket or a water bottle (yes, even photographers occasionally have to drink or stay warm).  It disguises your gear pretty well, has good rain protection, and even sports a special sleeve for carrying the Manfrotto Be-Free Travel Tripod.

For carrying just a few pieces of gear around town or close to home or hotel, a shoulder bag can work well.  This is the best setup for quickly accessing your gear while shooting, but it can be tiring to carry the weight across one side of your body if you have a lot of trekking to do.

Software

For post-processing my images, I use both Adobe Lightroom and Adobe Photoshop Elements.  I can do 90% of my processing using just Lightroom, but occasionally I do need the added power of Photoshop.  While I still use the perpetual license software versions, by now most photographers have gone over to the monthly licensing structure that Adobe calls the Creative Cloud.

What gear can’t you live without?  Have you discovered any little gadgets that improve your images or make life easier for photographers?  Please share your thoughts in the comment box.  I’d love to get your ideas!

Want to read more posts about photographic gear?  Find them all here: Posts on Gear.

The Things We Carry [Encore Publication]: Basic Gear for Travel Photography, Part I

In today’s post, we’ll cover cameras and lenses.  I’ll post again soon with Part II, which will discuss flash units, tripods, accessories, bags, and other essential gear.

One of the biggest challenges we face as travel photographers is what gear to carry with us.  On the one hand, we have to be ready for anything.  It’s quite possible we will have to shoot landscapes, wildlife, portraits, architecture, indoor performances, and night scenes, often all on the same day.  On the other hand, there’s a practical limit to how much we can carry without being turned away by airline personnel or damaging our bodies.  And who really wants to travel with 75 pounds of photo kit?

Here is my basic setup for travel.  Note that my gear is suitable for a professional or enthusiast photographer on a not-unlimited budget (my wife keeps me from getting carried away).  There are less expensive alternatives for most of the gear I carry, and those on unlimited budgets can spend much, much more than this.  I will adjust what I bring depending on the specifics of the trip.  For a safari in East Africa, that 500mm lens is essential, but I wouldn’t want to lug it on a hiking trip in Ireland.  On a trip to view a total solar eclipse, I’ll need that rock solid but very heavy professional tripod, but on most trips my lightweight travel tripod is good enough, thank you.  But the following list of items comprises the core of my basic travel gear.

Cameras

There is no one-size-fits-all when it comes to your choice of camera.  These days, even a simple point-and-shoot camera or a smartphone camera is capable of making very good images.  But if you’re willing to carry a bit more weight and to learn how to use it before you take it on your first trip, a mirrorless interchangeable lens camera or a digital single-lens reflex (DSLR) camera will give you much more flexibility.  I use a DSLR, but more and more of my photographer friends are switching over to mirrorless cameras.  It’s really a matter of personal choice, and if you’re not planning to carry a lot of specialized (and heavy) lenses with you, the smaller size and lighter weight of a mirrorless camera may make up for the loss of certain features.  For very photo-intensive trips where it would be impossible to replace a lost or broken camera, such as an African safari, I will pack two DSLR camera bodies, but often I take a chance and bring just one.  Whatever camera you take on your trip, make sure you know how to use all its features and have tested it thoroughly before you leave, and if you’ve been using it for a while, have it cleaned in advance of your departure.  Note that while I am a Nikon shooter, comparable gear is available from Canon for DSLR afficianadoes.  In the high-end mirrorless arena, Sony’s Alpha a7R II is favored by many professionals and enthusiasts.

My go-to camera is the Nikon D810.  This is a professional model and not for beginners, but it really does do it all.  The resolution is extraordinary, it performs superbly in very low-light situations, the autofocus is fast and flexible, it’s continuous burst shooting speed is good enough, and I love the feel of the camera in my hands and the control it offers over all settings quickly.  I’ve put this baby through hell and high water, but it always comes through for me.

Lenses

For beginning users of interchangeable lens cameras, or for seasoned photographers who need to travel light, a small and lightweight “walkaround lens” may be all that you need to bring for a day’s shooting.  Mine is the Nikon 24-85mm f/3.5-4.5 lens.  It’s a good value for a well-built if not quite professional grade lens, and while not particularly fast, it does offer vibration reduction which allows you to shoot at slower shutter speeds while controlling for camera shake.  I recommend this lens for users of cameras with full-frame sensors who want a small, light, and fairly durable lens for those situations when you want to be ready for most anything.

It’s a good idea to have a wide-angle zoom lens for landscapes, architecture, and other situations where you need to include a lot of area in the frame or want a more uncluttered or exaggerated perspective.  I use the Nikon 16-35mm f/4 lens for this purpose.  It’s got great image quality and is well built, but it is rather heavy and bulky.

A telephoto zoom lens is a must-have for most travel photographers, as it allows you to shoot many wildlife subjects as well as emphasize details in all subjects you encounter.  A longer lens also can be used to provide a compressed perspective that makes far-away subjects appear to be closer to foreground subjects; this perspective can be very powerful in landscape images.  My primary tele zoom is the Nikon 70-300mm f/4.5-5.6 VR lens.  While this lens is built on aging technology and doesn’t always feel as solid as more professional lenses, it is relatively small and lightweight, fairly inexpensive, and provides a very effective vibration reduction function.  This lens has been a staple in my bag for many years, during which time I’ve used it to capture some of my favorite images.


You may never need a super-telephoto lens.  They tend to be expensive, bulky, and heavy, and on many trips you won’t need it.  But for those trips when you expect to encounter lots of wildlife or want to capture astronomical events like an eclipse or transit of a planet, a very long lens is essential.  Mine is the Sigma 150-500mm f/5-6.3 lens.  It’s more economical than a Nikon or Canon super-tele, and it produces reasonably sharp images even when used at its widest aperture.  You can spend much more on this type of big glass if you want or need to, but I’ve found this lens works quite well for me.

So far, we’ve talked about zoom lenses.  It’s also a good idea to carry a few prime (fixed focal length) lenses.  These tend to be faster, higher quality, and less expensive than zoom lenses in the same category.  The downside, of course, is that you have to “zoom with your feet,” that is, find a vantage point that works to compose your image without benefit of changing the lens’ focal length.

If you pack only one prime lens, it most likely will be a “normal” lens, that is one with a focal length of about 50mm for a full-frame camera or about 35mm for a crop-sensor camera.  I carry the Nikon 50mm f/1.4G lens.  This is the one I use in very low-light situations or to get a really shallow depth-of-field.

I think my current favorite lens of all is my Nikon 85mm f/1.8G lens.  This is a classic portrait lens and provides a flattering perspective and great image quality when your subject is a human being.  I use it for nearly all of my portrait work these days.  But this lens also shines for nature and action photography where you don’t need a really long focal length.  It renders really lovely “bokeh”, or the soft quality of the out-of-focus parts of the image.

A wide angle prime lens can be useful for landscapes, architecture and interiors, and astrophotography, among other purposes.  I like the Nikon 24mm f/1.8.


Stay tuned for Part II of our gear discussion, to be posted soon on this same Bat Channel.

What’s your go-to camera and which are your indispensable lenses?  Add your thoughts to the comment box at the end of this post!

Want to read more posts about photographic gear?  Find them all here: Posts on Gear.

Tyger, Tyger, Burning Bright [Encore Publication]: In search of the elusive royal bengal tiger in India’s Ranthambore National Park

Wildlife photography is one of the most exciting and rewarding pursuits I know, but it requires some special knowledge and gear, plenty of time, and lots of luck.  I’ve posted on this topic before, specifically about wildlife photography gear (Post on Wildlife Photography Gear) and about sensitivity to the wildlife we’re shooting (Post on Approaching Wildlife).  Today’s post is a case study on my recent wildlife safari in Ranthambore National Park in Rajasthan, India.  The park is famous for its population of wild royal bengal tigers, but even with its high concentration of the big cats, it is rare to see them.  We were fortunate to encounter two tigers during our game drives, one a female who was stalking prey at some distance from us across a meadow, the other a large male who was close to us but obstructed by dense jungle vegetation.

I was rewarded with a few marvelous images of the female tiger, my favorite of which is this one:

The money shot!  After weeks of planning, days of travel, hours of driving on rough tracks, and minutes of shooting, I had bagged several hundred images of this remarkable female tiger.  A few of the images had the required combination of tack-sharp focus, uncluttered background, and appealing view of the animal.  Buy this photo

Making an image like this requires careful planning to be in the right place at the right time.  In our case, our travel company lined up the logistics and hired an expert guide and driver, which certainly helps, but it is still necessary to prepare for a photo safari like this.  It requires some knowledge of the behavior of the wildlife you are seeking.  It calls for having the right gear and knowing how to use it under time pressure and without hesitating.  And it requires shooting a whole lot of frames in rapid succession, because most will not turn out perfectly.

To capture most wildlife, a long telephoto lens is a necessity.  My go-to long lens for wildlife photography is the Sigma 150-500mm f/5-6.3 lens.  It’s more economical than a Nikon or Canon super-tele, and it produces reasonably sharp images even when used at its widest aperture.  You can spend much more on this type of big glass if you want or need to, but I’ve found this lens works quite well for me.

Stability is very important when shooting a moving subject far away using a super-telephoto lens.  During most game drives around the world, a tripod or monopod cannot be used due to space constraints in the vehicle.  I will often use a beanbag to support the camera and lens, but on our canter (a large open vehicle that seats more than 20 people) in Ranthambore National Park, even that could not be used, as there is no surface to support the beanbag.  So the only option here is to shoot handheld.  Fortunately, the lens has good image stabilization built in, but it is also important to use good shooting technique and a very fast shutter speed.  Remember to keep one hand under the lens to support it, the other hand on the grip of the camera, and both elbows firmly pressed against your sides.  Gently squeeze the shutter release.  I recommend setting your camera to continuous shooting mode if it has this feature, as this will maximize the number of images you can capture as well as avoiding the camera shake from having to press the shutter release repeatedly.

To control exposure when shooting wildlife, I usually use Manual Mode with Auto ISO.  This little-known but extremely useful exposure mode allows you to set both shutter speed (which needs to be fast enough to avoid camera shake and to freeze the animal’s motion) and aperture (which I like to keep close to wide-open in order to soften the background), while adjusting the ISO to keep the exposure correct during changing lighting conditions.  To learn more about this technique, read this post: Post on Manual Mode with Auto ISO.

Shoot many images while encountering the animal in the field.  Keep them all on your memory card (which, of course, you should back up to another medium) until you have the opportunity to carefully cull them down to the ones that are technically adequate.  Finally, during post-processing, you can select the few images that are both technically acceptable (tack-sharp focus, proper exposure) and artistically appealing (the subject looks great, the background is uncluttered and attractive).  These selected images should then be carefully cropped and adjusted for exposure, contrast, and color balance.

There you have it.  The effort that goes into making just a handful of really excellent wildlife images is disproportionate to the workload involved in most tasks we do, and the frustrations are many, but the rewards when it all goes well and we have a wonderful portrait of the animal in hand make it all worthwhile.

What are your favorite wildlife photography techniques?  Please share them in the comment box.

Want to read more posts about photographic techniques?  Find them all here: Posts on Techniques.

A Shot in the Dark [Encore Publication]: Night photography opens up a whole new world of image possibilities

The state of the art in photography gear has improved to the point where creating breathtaking nighttime images is now within the range of most enthusiast photographers.  Until recently an expensive and technically complicated ordeal, making images in very low light can now be done quite easily and with reasonably priced gear.  Today’s post discusses what you need and how to do it.

This image was made at the outskirts of Svalbard’s only population center, Longyearbyen, several hours after sunset.  To capture the scene in nearly total darkness, I used a sturdy tripod, a relatively wide aperture (f/4), and a long shutter speed.  Buy this photo

Because nighttime scenes feature very dim lighting (typically coming from the moon or stars, or occasionally from a bit of reflected ambient sunlight or city lights indirectly illuminating the scene), it is usually essential to mount your camera on a sturdy tripod and to use a high ISO setting.  Sometimes a fast lens can be used to obtain a wide aperture (low f-stop number), in order to reduce the length of the required exposure time.  I like to bracket my exposures (shoot multiple images, each with a slightly different exposure) for most night scenes, so as to maximize the chance of obtaining just the right exposure.  You can read more about exposure bracketing in this post: Post on Bracketing.  To minimize camera shake during these long exposures, use a remote shutter release or your camera’s self-timer to trigger the shot.  My go-to shutter release is inexpensive and very reliable:

To make this image of the Milky Way over Yosemite National Park, I used a very long shutter speed and very high ISO setting.  Both long exposures and high ISO sensitivities will tend to introduce digital noise to the image file.  Fortunately, these sources of noise can usually be effectively controlled during post-processing.  Buy this photo

Night photography requires special attention during post-processing.  Because long exposure times and high ISO sensitivity settings tend to introduce digital noise (random errors in the brightness and/or color rendition of pixels in the image), it is important to pay careful attention to these effects while working in Lightroom, Photoshop, or other post-processing software applications.  I find Lightroom’s tools to be very effective in reducing both sources of noise.  In Lightroom’s Develop Module, play with the Luminance slider under the Noise Reduction tools area until the noise is just controlled, but not so far as to cause unrealistic rendition of color or sharpness.  Note that some cameras also allow you to reduce high ISO noise and/or long exposure noise via menu settings in-camera.  I tend not to use these tools because they slow down the shooting process, and their effect can be replicated easily in post-processing.  Post-processing is also the time to adjust the color rendition and sharpness/contrast of the Milky Way or other stars appearing in the image to make these astronomical features really pop.

This image of Pigeon Point Lighthouse in Pescadero, California combines many of the night photography techniques discussed in this post.  The lighting here was tricky because the brightness of the lighthouse beacon was much greater than the available light on the foreground and background objects.  Bracketing exposure helps in these situations.  Buy this photo

I hope this post inspires you to make your own nighttime images.  With a decent DSLR or mirrorless ILC camera, a relatively fast lens, and a tripod, every photographer can now be equipped to shoot in very low light.

Now it’s your turn.  Please share your own experiences with creating low-light images by leaving a comment here.

Want to read more posts about photographic techniques?  Find them all here: Posts on Techniques.

Beyond the Postcard Shot: Some sites are so iconic, you have to think differently to get a unique shot

Much of the joy of travel photography is seeking out and capturing images of little-known places and the ordinary daily lives of the people who live in them.  But when we’re traveling it is also inevitable that we’ll come face to face with the world’s most famous, overexposed, iconic sites.  You know, those places that are so often documented and discussed that we automatically associate them with the city or country where they are located.  London has Big Ben, Paris has the Eiffel Tower, San Francisco has the Golden Gate Bridge, Tibet has Potala Palace, India has the Taj Mahal, Cambodia has the Angkor Wat temple complex, and so on.  These sites have been photographed and shared so many millions of times that they are ingrained in our visual memories.  But there are ways we can approach and photograph the world’s iconic sites so as to avoid the “postcard shots” and create something different.  In today’s post, we’ll explore a few methods you can use to make less familiar images of the world’s most familiar locations.

Focus on part rather than the whole: Instead of capturing an iconic site such as London’s Big Ben with a normal or wide-angle lens to include the whole structure, try using a longer lens or getting up close to capture just a portion.

Big Ben is nearly always photographed from a distance using a normal or wide-angle lens to include the whole tower.  Here I used a medium telephoto lens looking up at the clock’s face to emphasize some of the detail on the facade.  Buy this photo

Embrace the crowds: Instead of working to remove the hordes of visitors from images of iconic locations, sometimes it is effective to embrace the crowds.  This can create a “nod and a wink”, self-referential photo that tells the viewer we all know this site is a tourist draw.  In this image of Stonehenge, I used a wide-angle lens to include not only the monoliths but also the long line of visitors who have come to see them.

Intentionally including the hordes of visitors in some of our images can give a different effect from the usual photos in which we attempt to remove the people.  Buy this photo

Try a different time of day: Many of the world’s most famous sites are associated with a specific time of day or lighting conditions.  The Golden Gate Bridge, for example, is often photographed at sunset or as the banks of fog roll over it.  Tibet’s Potala Palace is usually pictured by day.  So, for a different view of this lovely temple/palace complex, I visited it by night.  The resulting images offer a different mood from the postcard shots.

A different time of day can yield very different images from the usual ones.  Here, Potala Palace is captured by night, a seldom seen view that offers a very different mood than the postcard pictures.  Buy this photo

Incorporate unexpected visual elements: We associate certain visual themes with iconic locations, so surprise your viewers by including unexpected elements in your images.  I especially enjoy incorporating anachronistic visuals, such as a Buddhist monk speaking on a cell phone (though even that is becoming something of a cliche these days).  In this image of Delhi’s iconic Qutub Minar, I framed the shot first and then waited for the jetliner to enter the frame just behind the minaret.

Including non-contextual visual references in our shots of iconic sites can surprise the viewer.  This image of Delhi’s ancient Qutub Minar minaret incorporates a modern jet airplane for a mashup of old and new.  Buy this photo

Find a different vantage point: The Taj Mahal is a gloriously lovely building, but its true beauty is often overlooked by photographing it straight on from the iconic vantage point across the reflecting pool at the main entrance to the site.  Instead, try capturing the Taj from an unusual vantage point, such as the Moonlight Garden across the river from the back of the Taj.  The resulting image will surprise the viewer by offering a less-seen perspective and by framing the iconic site in an unusual context.

This image of the back side of India’s iconic Taj Mahal was made from the Moonlight Garden across the river.  Freed from the usual framing of the front of the Taj with its reflection in the pool, the viewer can truly appreciate the gracious beauty of the structure itself.  Buy this photo

Next time you visit one of the world’s most overexposed sites, try making some images using one of more of these new approaches to surprise the viewer with something different.  Avoid the cliches by emphasizing just certain portions of the site or by including crowds or non-contextual elements in your images.  Shoot from a different vantage point or at an unexpected time of day.  There’s really no need to add one more to the heap of millions of identical photos of these places, so go wild and try something unique!

How have you created unusual images of the world’s most iconic locations?  Please share your thoughts here!

Want to read more posts about what to shoot while traveling?  Find them all here: Posts on What to Shoot.

Followup–To JPEG or Not to JPEG [Encore Publication]: For many RAW shooters there is no need to use RAW+JPG

A few months ago, I published the following post in which I explained why I was transitioning away from shooting RAW+JPEG to shooting only in RAW format.  Just a quick follow-up to share that since then, I have executed several dozen photo shoots in RAW mode only, and I also have gone back to nearly all my archives of older shoots and deleted all the JPEG files where the same image was also stored in RAW format.  What are the results so far?  I’ve recovered about 20% of my hard disk drive’s space, so everything now runs faster on my PC and I’m not always struggling to free up enough space for each day’s new shots.  Furthermore, my shoots are going more smoothly because I don’t need to wait for the camera’s buffer to clear as it attempts to write both RAW and JPEG versions of each image to the memory card, and because I don’t need to change memory cards nearly as often.  And I’m happy to report that thus far I have had absolutely no issues as a result of making this major change to my workflow.  If you’re still shooting RAW+JPEG, now may be a good time to examine whether the extra burden is worthwhile in your own workflow.  The original article from two weeks ago follows.

=======ORIGINAL POST FROM FEB. 4, 2017=======

Regular readers of To Travel Hopefully already know that I always shoot in RAW mode, and most likely you do, too.  I’ve written repeatedly about the major advantages of RAW vs. JPEG format.  For a refresher, here’s a good summary post on the topic: Post on RAW Mode.  I concluded this previous post with a recommendation to shoot in RAW+JPEG mode, where the camera writes out the image data in both its native RAW format and in the familiar but problematic JPEG mode.  Here’s the relevant paragraph from that older post:

I recommend shooting in RAW+JPEG all the time, unless you know you will need the slightly faster shooting speed or extra storage space of JPEG alone.  Doing so will give you the best of both worlds: a quick and easy JPEG to share right out of the camera, and the much more detailed data in the RAW file from which to bring out the nuances in color, texture, and exposure later during post-processing.  If you use JPEG alone, you’ll be throwing away image information you may wish you had later.

But right now, I’m in the middle of making a major transition in my workflow.  I’ve stopped shooting in RAW+JPEG mode and am now storing my images only as RAW files.  Moreover, I’m cleaning up my PC’s hard drive by revisiting many of my directories from shoots over the past few years and deleting all of the original JPEG files (obviously, I am keeping the JPEGs that I exported from Lightroom after post-processing the original RAW files).

Why would I do such a thing, you may ask?  There are several major reasons:

  • I don’t end up using the JPEG files: Shooting in RAW+JPEG had become a crutch for me.  I had been using this mode because I was afraid of not having JPEG versions of all my images, in case I decided post-processing the RAW files was too much work or if I wanted to share certain images right out of the camera.  But I’ve been realizing that I never share JPEGs right after shooting.  They just don’t look good enough for most professional work, so I need to post-process the good ones before delivering them to anyone.  You may have clients who need to see some rough JPEGs immediately after the shoot.  I know some wedding photographers who promise this immediate preview to their clients.  But I don’t have this requirement, so the JPEGs were just sitting on my hard drive, unused, forever.  And it’s so easy to export quick-and-dirty JPEG files from Lightroom shortly after the shoot.
  • Duplicate JPEG files slow down shooting: The RAW+JPEG mode tells the camera to write out two different formats for every image you shoot.  This slows down your shooting by bogging down the camera’s processor, and it also fills up the camera’s buffer more quickly, requiring a disruptively long wait to resume shooting.  It also fills up memory cards more quickly.  While JPEG sizes vary from image to image due to compression algorithms, I find they average about 1/3 to 1/2 the size of my camera’s RAW files.  That’s a lot of extra space on the memory card, so I have to stop shooting to change cards more often.
  • Duplicate JPEG files take up a lot of disk space: Even though my main laptop PC has a 1.5 TB hard disk drive, I find it is always filling up, which considerably slows down workflow and requires bothersome housekeeping to clean up.  Storing unneeded JPEG versions of my many tens of thousands of images wastes a lot of disk space.
  • Those JPEGs slow down workflow: Even though Lightroom has a useful option to import only the RAW version into your catalog, and it keeps track of the duplicate JPEG version of the same image, having both files on your hard drive still slows down post-processing and image maintenance tasks.

I know that some photographers really do need to have JPEG files of their images.  They may be delivering images right out of the camera via a wireless connection to a cloud server that supports only JPEG format.  They may not get to post-processing for some time after the shoot and want to remember what the image looked like with the camera’s settings applied (although here one should note that Lightroom and other RAW viewers will access your camera’s settings via the thumbnail image embedded within your image’s RAW file).  They may really love their camera’s black-and-white conversion tool or other in-camera editing tools, which work only with the JPEG format.  There are quite a few situations in which you may truly require a JPEG version of your images.  But I haven’t encountered these situations in my own recent work and don’t expect to in the foreseeable future.

So, that’s the backstory on why I’m moving from shooting RAW+JPEG to RAW only.  I’m even taking the drastic step of going back to recent shoot directories on my PC and deleting the original JPEG versions of the images.  I’ll report back in a few weeks to provide an update on how this works out for me.  In the meantime, if you’re shooting in RAW+JPEG mode, you may also want to think about whether doing so genuinely helps your workflow or simply is wasting your resources.

Do you shoot RAW+JPEG, RAW only, or some different format?  Why?  Please share your experiences here.

Want to read more posts about photographic techniques?  Find them all here: Posts on Techniques.

Focus on Balaknama [Encore Publication]: Making portraits that go beyond documentation to help Delhi’s street kids

During a recent trip through the north of India, I had the opportunity to meet with the advisors and some of the young staff at the Balaknama Newspaper, a project to empower the street kids of New Delhi.  I’ve long been interested in the plight of the street kids who live in Delhi’s sprawling slums and have historically been terribly mistreated at the hands of exploitative child labor bosses, a corrupt police force, and often their own abusive families, so this visit was important to me personally.  In this post I share some of the images I made of the kids who risk their own safety to expose the abuses against the young people in their community, and I also discuss how to go beyond the purely documentary function of portrait photography to give your portraits more power.

The images I share here are published with permission from Balaknama’s editor and the NGO who supports the project.  However, I will not share the location of the offices nor the real names of the kids who work there, in order to protect their identities.

The power of a portrait to advocate for social change depends primarily on its ability to go beyond simple documentation and to reveal the personality, background, and/or motivation of the subject.  For this shoot, I wanted to convey the passion and bravery of the young reporters.  I shot with available light only (no flash) in order to capture the intimate and urgent mood of the work the kids are doing.  I used several lenses for different perspectives, but most of the images were made using a fast prime portrait lens.  My shooting perspective was from a low angle so as not to give the appearance of looking down on the subjects.  People appear more empowered when the camera observes them from the perspective of their peers–it should appear as though the viewer is a part of the conversation.

This 17-year-old reporter is also the primary organizer of more than 10,000 of Delhi’s street kids.  I wanted to capture her intensity and focus in this portrait, so I got in close with a medium-length portrait lens and shot from the perspective of a participant in the conversation.  A wide aperture (low F-stop number) is helpful to isolate the subject from the background.  Buy this photo

The “decisive moment.”  I shot several frames of this young reporter as he described the horrific abuses of his peers in the slums of New Delhi, in order to maximize the chances of capturing just the right instant.  I love this image, which to me appears to emulate the drama and body language of Francisco Goya’s famous painting, “The Executions of the Third of May, 1808”.

This powerful portrait has a painterly feel and freezes the tension and drama of the harrowing stories retold by the young reporter.  Buy this photo

The interaction between the students at the newspaper is an important theme.  Here I worked to capture the girls’ engagement with each other and with the overall discussion.  Buy this photo

Language barriers are less important than many photographers believe them to be.  A simple “thumbs-up” gesture evoked a playful response from these young Balaknama staffers, providing a light moment during the intensity of our conversation.  Buy this photo

As I’ve often written in To Travel Hopefully, it’s important to remember to include your own group in some of your images.  While I most likely won’t publish this image in my stories about Balaknama, I am happy to have this documentation of my fellow travelers as we interacted with the students and staff at the newspaper.

For large group shots in tight spaces, use a wide-angle lens.  This was shot with a Nikon 16-35mm f/4 lens at its widest setting, giving the viewer a sense of the setting as well as the people there.  Buy this photo

I wanted to capture a final portrait of the two primary student organizers as we left the newspaper’s offices, so I asked them to pose together during our walk through the neighborhood.  This gives a sense of the environment in which they live and work.  I got in close using a wide aperture to soften the background, but I also chose a background that would inform the viewer about the kids’ environment.  Buy this photo

Do you have techniques for making powerful portraits that go beyond pure documentation to advocate for the people and causes in the images?  Please share your thoughts here!

Want to read more posts about what and how to shoot while traveling?  Find them all here: Posts on What to Shoot.
Focus on Edinburgh [Encore Publication]: Ancient and modern, Scotland’s capital city offers great architecture, museums, and more

At the end of our two-week hiking adventure in Ireland, we added a stop in Edinburgh for a family visit.  Ancient and modern at the same time, Scotland’s capital offers a wide range of experiences for the traveler, and a wide array of subjects for the travel photographer.  From architecture to museums, castles to palaces, glorious views and creative contemporary cuisine, this city has become a world-class destination.  Here is a brief photo essay capturing some of our experiences there.

The main attraction, dominating the city from its high central vantage point, is the ancient Edinburgh Castle.  It’s an easy walk from the center of town up the hill to tour the castle.  On the way up, a variety of interesting views of the castle unfold.  Try different lenses and compositions to take advantage of the many moods of this place.

Edinburgh Castle towers above the city center and offers a variety of different perspectives for the photographer.  Here I’ve shot from halfway up the hill using a telephoto lens and polarizing filter to isolate this one portion of the edifice and to enhance the stonework and the sky.  Buy this photo

Edinburgh’s Royal Mile stretches from the Castle down to the Palace at Holyrood House.  It’s easy to see this street as a shopping mall jammed with tourists, but it would be a shame to overlook the stately old architecture and the little closes (alleyways) off the main street.

To make this image along the Royal Mile, I chose an unusual perspective and used a medium telephoto lens to align the different colors, textures, and angles of the statue with the cathedral.  Buy this photo

Edinburgh is changing.  During several visits over the decades, I’ve heard many a bagpiper playing in the center of the city, but this is the first time I’ve met a female piper.  She was happy to pose for a portrait.  Buy this photo

Brightly painted façades lend a splash of color to the old stone architecture in this lovely neighborhood.  Buy this photo

Scottish food has also evolved a great deal in recent years, with several restaurants serving contemporary takes on traditional Scottish dishes.  Nowhere is the ambiance nicer than at the Witchery by the Castle, along the Royal Mile.

To capture the lovely interior of the Witchery, I used a fast normal lens and a high ISO setting.  This scene was lit entirely by candlelight and a few sconce lights in the ceiling.  Buy this photo

Revisiting Edinburgh Castle on our second day, I wanted to shoot it from a different perspective at a different time of day.  During post-processing I decided that a black-and-white rendering of the image would highlight the austere tone of the castle.  Buy this photo

Edinburgh has a proud literary tradition, from Burns to Scott to Stevenson.  The city’s literature museum, while small, is worth a visit.

I couldn’t resist capturing this display sign in the Writers’ Museum highlighting the Stevenson quote that graces the name of this website.  For more on the importance of this quote to the development of my passion for travel and photography, please see this page: About To Travel Hopefully.

At the other end of the Royal Mile from the Castle lies the Palace of Holyroodhouse.  This is the Queen’s official residence when she’s in Scotland, and its tour is first-rate.  While photography is not allowed inside the lovely palace, it is okay to photograph the stately and much older abbey adjacent to the palace.

Again here, I tried to seek out an unusual perspective in this shot of the abbey at Holyroodhouse.  I shot upward with a wide-angle lens, using spot metering to expose for the stonework and a small aperture to provide broader depth-of-field.  Buy this photo

I made this portrait of our daughter with two of her friends from university by stepping back and framing them using a medium portrait lens.  I chose a medium aperture to ensure sharp focus on the subjects while also keeping the façade of the abbey reasonably sharp.  Buy this photo

Behind Holyroodhouse is a hill towering above the city.  A short but fairly strenuous hike leads to Arthur’s Seat at the summit.  From the summit there are glorious views over the whole of the Edinburgh area.  This image of the Palace at Holyroodhouse was shot from partway up the hill.

A view of Holyroodhouse from partway up the hike to Arthur’s Seat.  A polarizer helped bring out the drama in the sky and the saturated green of the lawns.  Buy this photo

On our final evening in Edinburgh, we dined on exquisite contemporary Scottish cuisine at the Tower Restaurant.  Sitting atop the Scottish National Museum, this spot has marvelous views over the city to the castle.  The view shown in this image was just as marvelous.

To photograph the beautifully plated trio of smoked Scottish salmon accompanied by a glass of old single malt whisky, I shot from above using a touch of off-camera flash to balance the ambient light of the restaurant.  I used a diffuser on the flash and bounced the flash off the wall to soften its light.  To learn more about food photography, check out this post: Post on Food Photography     Buy this photo

Scottish traditional music is alive and well and performed almost every night at Sandy Bell’s Pub.  This portrait was made using my favorite portrait lens set to a wide aperture, with a high ISO setting on the camera.  The shallow depth of field throws the whistle player into soft focus, so the emphasis in the image is placed on the fiddler.  Buy this photo

Have you visited Edinburgh?  What are your favorite spots there?  What experiences should a photographer be sure to seek out?  Please leave your comments here.

Want to read more posts about travel photography destinations?  Find them all here: Posts on Destinations.

To Travel Hopefully is Taking the Day Off: Please help support this site

Dear Reader,

To Travel Hopefully is taking the day off, but don’t worry, we’ll be back with fresh new content soon.

In the meantime, please take a look at the helpful travel photography tips and inspiring images in our archived posts.  Just select a category (Destinations, Gear, Techniques, Travel, etc.) from the right nav bar, or choose a month under Archives, and browse to your heart’s content.

While you’re here, take a moment to tell your friends and family about us.  Anyone who enjoys travel and wants to improve their photography will find great daily content here, including inspiring images from around the world and tips and tricks for making the best possible photos.  You can email any post or share it via social media with the click of one of the buttons at the end of each post.  And if you enjoy To Travel Hopefully, please click in the right nav bar to subscribe via email or RSS feed, so you won’t miss a single post.

Please consider supporting this site by purchasing some of my photos, browsing for some great gear via the Amazon links, or clicking on some of the ads that interest you.

My holiday special promotion ended on Dec. 31, but I have lowered most of my regular prices considerably.  Fine art prints and novelty items are available in a wide variety of sizes and price ranges for nearly every image in my portfolio.  Please take a look at Featured Photos to see a sampling of my images available for purchase.

And finally, I’d like to share some exciting news: In late January and early February, I will be leading a photography tour through the north of India.  This adventure will go way beyond the usual postcard-style shots to give photographers of all skill levels many unique opportunities to make images you won’t find elsewhere.  Details will be available in the next few days.  

Thank you for visiting To Travel Hopefully!  Without your support, this project cannot continue providing you with daily content including inspiring travel photos and tips and tricks for making great images.

Warm regards,

Kyle Adler

Focus on Northern India [Encore Publication]: A diverse tapestry of colors, cultures, and chaos, India will stay with you forever

My wife and I are just back from an amazing 2.5-week adventure traveling through northern India.  Operated by Overseas Adventure Travel, the trip’s diverse itinerary took us from the chaotic capital of New Delhi to the “pink city” of Jaipur, brought us face to face with wild tigers in Ranthambore National Park, continued to Agra to view the landmark Taj Mahal and Agra Fort, then on to the ornately carved 9th century Chandela temples of Khajuraho, and finally to the ancient holy city of Varanasi.  While it was exciting to view the iconic attractions of India, what made this adventure truly unforgettable for us was its many opportunities to interact with Indian people from all walks of life: pilgrims arrived in Varanasi to pray and bathe in the sacred waters of the Ganges River, street kids in Delhi who started their own newspaper to expose the exploitation and abuses of children in their community, a matriarch and her family as they keep house in a tiny remote rural village, students at a village school, and women in Agra who survived horrific acid attacks and are advocating for awareness and justice.  India is a diverse tapestry of colors, cultures, and chaos that will inspire you and stay with you forever.  And for a travel photographer, visiting the north of India is a dream come true.

In today’s post we will take a look at some of my favorite images from this adventure.  I’ll include some brief discussion about who or what is included in each image and, where appropriate, a few words about how each image was made.

Our adventure began in the capital and largest city, Delhi.  The old part of the city is truly ancient, with a heritage dating back more than 1000 years.  But Delhi’s heritage also includes the British colonial period in the 19th and 20th centuries, and New Delhi today is the capital of the Indian republic and home to 22 million people.

People waiting for the next meal service at the Gurdwara Bangla Sahib Sikh temple in New Delhi.  The staff and volunteers there serve more than 8000 free meals per day to the needy people of New Delhi.  To make this image, I used a telephoto lens and shot from a low angle so as to compress the scene and capture the epic scale of the crowd.  In post-processing, I cropped the image to better lead the viewer’s eye around the scene, and I tweaked the contrast and vibrancy to better represent my original emotions on being in the middle of this scene.  Buy this photo

Our first gift purchase was a set of necklaces from this girl who sold them roadside in New Delhi.  To make this portrait, I used an 85mm portrait lens at a wide aperture (small F-stop number) to blur the background, and I added just a touch of fill-in flash using a handhelf off-camera strobe connected with an extension cable.  Buy this photo

We met this lovely girl at the Jama Masjid, India’s largest mosque, and she graciously agreed to pose for a portrait.  Many travelers will try to “take” photos of people they see on their trips by simply pointing the camera at them or using a long lens to hide their intentions.  To “make” (not “take”) really compelling portraits, it’s essential to have a personal connection with your subject.  Even though we didn’t share a common language, we engaged the young woman in “conversation” using a combination of smiles and hand gestures, and once we were comfortable together, I used the universal gesture to ask if she would pose for my camera.  Buy this photo

For an authentic Indian experience, we took a thrilling and bone-rattling 30-minute ride through the crowded lanes of Old Delhi in a bicycle rickshaw.  In this image I tried to capture the sense of chaos and crowding as we experienced it from the rickshaw.  I shot from the perspective of the passenger and framed the image using the top of the vehicle.  I used a small aperture (high F-stop number) to ensure the whole vista would be in focus, and I set the exposure based on the motorcyclist in front of us.  Buy this photo

Qutab Minar is the symbol of New Delhi and was built in the 12th century.  The minaret is 234 feet high and a crowning achievement of Indo-Islamic architecture.  To fit in the entire tower, a wide-angle lens was required, but I was careful to frame the image so as to avoid distorting the structure too severely.  I timed this shot to capture the jetliner as it overflew the site.  Buy this photo

We made an inspiring visit to the Balaknama newspaper, run by New Delhi’s street kids as a platform for getting their voices heard and for championing fair treatment of these historically underserved and abused children.  This 17-year-old girl is the primary organizer of 10,000 of New Delhi’s street kids.  The portrait was made using only available light (no flash), as I didn’t want to disrupt our conversation with the kids.  Because the light was so dim inside the building, I had to use a very fast portrait lens and a high ISO sensitivity setting.  Buy this photo

After leaving behind the bustle of New Delhi, we traveled overland to Jaipur.  Known as the “Pink City” for the peculiar rosy color its downtown buildings were painted in preparation for a royal visit, Jaipur is home to several of India’s most impressive historical sites.

We arose very early in the morning to embark on a hot-air balloon ride over the rural villages and farms surrounding Jaipur.  I shot this image of a brick-making factory from the gondola of our hot-air balloon using a telephoto lens to compress the perspective.  I converted the image to black-and-white during post-processing in order to emphasize the patterns and textures of the stacks of bricks surrounding the camel-drawn cart.  Buy this photo

Our balloon landed in a field outside a tiny village in rural Rajasthan.  All of the villagers came out to our landing site to say hello.  Here we are posing in front of the hot-air balloon, together with our new friends in the village.  I did not have time to set up my tripod for this shot, so I enlisted a fellow traveler to release the shutter for me.  When using this method to capture yourself in a photo, be sure to preset all of your camera’s controls and show your volunteer exactly how you want the image composed.  Buy this photo

This wonderful elder lady of the village danced for us and generally entertained the whole village.  Equally entertaining to the villagers were the dances we attempted to perform for them.  Buy this photo

Jaipur’s landmark Palace of the Winds provided nearly 1000 windows through which the women of the court could look down on the streets below.  Careful attention should be paid to composing architectural images so as to capture the building in a striking way.  Here I used a wide-angle lens and composed slightly off-center so as to portray some depth to the image.  Buy this photo

During our home-hosted dinner in Jaipur, we enjoyed a lovely meal cooked by our hostess Ruchi.  Most images of food are made by shooting straight down on the plate from above, but here I wanted to convey the conviviality of the meal by shooting from the perspective of a diner at the table.  Buy this photo

Outside of Jaipur we were privileged to come across and participate in a pre-wedding dance celebration in honor of the couple who were to be married the following day.  This portrait was composed from a low angle right in front of the dancer to truly put the viewer into the middle of the action.  A fast shutter speed was used to freeze the motion, and I chose a small aperture (high F-stop number) to keep the whole scene in focus.  Buy this photo

After Jaipur, we set out overland across the heart of Rajasthan, heading for Ranthambore National Park.  This wildlife preserve is home to many species, including spotted deer, the large sambar deer, langur monkeys, crocodiles, and more than 450 species of birds.  But it is best known for its population of wild tigers, one of the highest concentrations of tigers in the world.

Although Ranthamore National Park is one of the best places in the world to attempt to observe tigers, even there it is unusual to see them.  We were very fortunate during our early morning game drive to encounter two tigers.  The first, this female, was not particularly close by was stalking prey in an open and forested terrain.  The second, a large male, was near our vehicle but was obscured in dense jungle.  The key to successful wildlife photography is to shoot lots of images.  I shot more than 200 frames of this tiger in order to ensure a few would be of excellent quality.  I used the bulky and heavy 500mm lens that I had carried all the way from San Francisco in the hopes that we’d encounter a tiger.  The images were shot with a fast shutter speed to freeze the animal’s motion and to reduce camera shake, and I used a relatively wide aperture (low F-stop number) to throw the background out of focus.  Careful attention should be paid to composing wildlife portraits without too much clutter in the background.  Buy this photo

We visited a school in a rural Ranthambore village.  It was a delight to meet the students there.  Here my wife Mary chats with two sixth-grade girls who hope to become engineers when they grow up.  They were very happy to meet Mary, a female engineer herself, and to learn about careers in the field.  When photographing children, many people shoot from their own eye level, which results in portraits that appear condescending to the subject.  It’s better to get down to the child’s eye level or even below so as to show the world from the subject’s point of view.  Buy this photo

After our school visit, we strolled through the village to get a sense of the daily life of the people living there.  A highlight was a visit to this matriarch’s home.  Many of the local kids came by our hostess’ house to say hello to us.  The eyeliner on the kids’ faces is intended to make their eyes look bigger.  Once again, I got down low to capture the scene from the perspective of the kids.  Buy this photo

A women’s cooperative trains village women to make handicrafts, providing them with income and empowering them to invest in the community and their own futures.  We enjoyed lunch with several of the artisans, and after getting to know the woman who sat at our table, I made this compelling portrait.  I got up-close and used a classic 85mm portrait lens with a very wide aperture (small F-stop number) to soften the background.  In post-processing I brought out the colors in her sari and scarf, and I added a bit of vignetting to darken the edges of the image and emphasize the subject.  Buy this photo

En route to Agra, we visited the remarkable Abhaneri step-well, an ingenious solution to bring up water from a very low water table.  In this image I wanted to emphasize the step-well’s abstract, Escher-esque appearance, so I composed it using a telephoto lens to frame the seemingly endless symmetry of the ladders.  In post-processing I converted the image to black-and-white to bring out the patterns and abstraction.  Buy this photo

To break up the very long drive from Ranthambore to Agra, OAT provides an overnight stay at a tented camp.  Here our entire group (except for your intrepid photographer-author) gathers around the campfire for drinks, snacks, and folk-dancing.  Buy this photo

Agra is home to India’s most visited and loved site, the Taj Mahal.  Of course, the Taj is a must-see, but our visit to Agra also included worthwhile visits to the Agra Fort and a farmer’s market, as well as a very moving and inspiring encounter with women survivors of acid attacks.

Early in the morning we visited a farmer’s market in Agra.  I used a medium telephoto lens to capture this fruit seller as he enjoyed a smoking break (right on top of his wares).  Buy this photo

Sheroes’ Cafe in Agra is a project founded by and for the women of India who are survivors of acid attacks.  We were so inspired by meeting Rupa and learning about her story and her road to physical and emotional recovery after her brutal attack at the age of 15 by her stepmother.  Through this project, Rupa has gained the confidence and independence to leave home, meet other survivors and activists, build a business as a clothing designer, and access the surgical care required to reconstruct her face.  The courage and resilience shown by the women we met at the cafe moved us to want to help their cause to educate people and improve the treatment of India’s women.  Buy this photo

When shooting an iconic site such as the Taj Mahal, I try to avoid capturing the “postcard shots,” opting instead to capture the well-known site from a less-known vantage point.  The Moonlight Garden provides a less crowded and even more lovely alternative view of the Taj Mahal at sunset.  As I’ve said before and will surely say again, don’t forget to include yourself in some of your images.  Buy this photo

To get from Agra to Khajuraho, the seat of the 9th and 10th century Chandela Dynasty, it is necessary to take first a train and then a long drive.  It’s worth the effort!  The ancient temple complexes at Khajuraho are adorned with ornate carvings depicting all aspects of life.  Many of the carvings are erotic in nature, which shocked the Victorian British who excavated the site in the 19th century.

The Chandela Dynasty ruled Central India for several hundred years beginning over 1000 years ago.  The temple complexes at Khajuraho are well preserved and are fascinating for their intricate stone carvings, many of them erotic.  Here I included a rhododendron tree in the foreground to provide some contrasting color and texture against the stone of the temple.  Buy this photo

Our final destination in India before returning home by way of Delhi was the ancient sacred city of Varanasi.  This was a highlight of the trip.  Families of the deceased join pilgrims and holy men along the banks of the Ganges River using its sacred waters to cremate the dead, bathe, and pray.  Boat rides along the Ganges in the morning and again in the evening afforded us the chance to observe the many rituals conducted here by India’s Hindus each day.

A sadhu (holy man) on the banks of the Ganges River.  Because the sadhus are dependent on alms to survive, it is important to offer a small amount of money in order to make a portrait.  Buy this photo

Bathing in the sacred Ganges River.  This favorite portrait was made after meeting the two women, getting their permission, and shooting from behind as they prepared to bathe and pray in the river.  To impart the dreamlike mood of the scene into the image, I framed it with the brightly colored women at the front surrounded by the mystical dark color of the water.  I used a wide aperture (high F-stop number) to blur the water, and in post-processing I created a slight vignette to darken the corners of the image.  Buy this photo

We took a second boat ride, this time in the evening, to witness aarti, the sacred light ceremony in which priests thank the river Ganges for providing purification.  This colorful ritual provided a fitting ending to our memorable 2.5-week visit through the north of India.  Buy this photo

Have you visited India?  Please share your fondest (and least fond) memories here, along with your thoughts about how to capture India’s vibrant diverse scenes in images.

Want to read more posts about travel photography destinations?  Find them all here: Posts on Destinations.

“When someone shows you who they are, believe them the first time.” ~Maya Angelou [Encore Publication]: How to make great portraits while traveling or near home

“When someone shows you who they are, believe them the first time.” ~Maya Angelou

I have long believed that travel equates to growth; that we cannot know our place in the world until we have experienced the lives of people in many different places.  Of all the joys of travel photography, to me the greatest is having the chance to meet people from very different backgrounds, to get to know them for a few minutes or for much longer, and to collaborate with them to make memorable images.

A recurring theme in this forum will be how to use our cameras as a bridge to learn about and to share insights into other cultures.  But the emphasis of this particular post is on the technical elements of creating portraits.  These techniques apply as well to shooting portraits across the street from our home as to making great people images halfway around the world.

Most portraits that we see published in magazines or photography books were made in the studio, where the photographer has complete control over the lighting and background, and often is working with a professional model.  But when we’re traveling, there’s often only a moment after getting to know a person and receiving their permission to photograph them, during which to set up our gear and shoot.  We have to live with whatever lighting is available and often must make do with a cluttered background.  To make this portrait of a woman enjoying a coffee break at a carpet-weaving collective in Turkey, I wanted to give the image a soft, flattering look and to bring out the rich, saturated colors of her clothing.  I chose a smaller than usual aperture to provide greater depth-of-field, so that the old house itself became part of the environment.  To accommodate the soft and dim natural indoor lighting, I used a higher ISO setting and a slower shutter speed.

Turkey This portrait set in a weaving collective in Turkey evokes a sense of place and a mood of quiet repose.  Buy this photo 

While trekking in Nepal, we stopped to rest at a teahouse where these two sisters were also taking a break along their journey.  I wished them “Namaste,” or well wishes, and they responded with a traditional hand gesture of greeting.  This image was made long before the digital era on a film camera with a normal lens and natural lighting only (had I had a flash unit handy, it would have helped to bring out the girls’ hair against the dark background).  I love the warmth of the girls’ expressions and the simple but bright colors of their dresses set off against the black background of the teahouse’s interior.

NepalA friendly welcome from these two young sisters at a rural teahouse in Nepal.  Buy this photo

Sometimes we want to tell the viewer more about our subject than what is possible in a simple close-up portrait.  An environmental portrait allows us to include more than just the subject by zooming out and bringing in other elements.  I photographed this maker of traditional Turkish instruments in his workshop while he tested a nearly-completed Bağlama, surrounded by other partially made instruments.  To my eye, the resulting portrait is more compelling than a close-up because it shows the subject in his environment.  To make this portrait, I used a wider focal-length and a narrower aperture so as to have more of the environmental elements in the frame and in focus.

TurkeyAn environmental portrait of a maker of traditional Turkish musical instruments.  Buy this photo

A portrait doesn’t have to portray a stock-still person posing for the camera.  Some of my favorite portraits evoke a strong sense of motion.  I made this portrait of a samba dancer during the Carnaval San Francisco annual parade by getting in close and shooting with a medium-length telephoto lens set to a small aperture to soften the background.  I used a fast shutter speed to freeze the action (although sometimes a slower shutter speed can be used to create a nice blurred effect).  In post-processing, I cropped the image to further isolate the dancer and emphasize the grace of the motion.

USA This dancer in a Brazilian Samba krewe was captured in a tight composition that was further cropped in post-processing to give a strong sense of motion.  Buy this photo

Keep an eye on the total composition when framing a portrait.  It’s more than just a matter of framing the subject within the image: other considerations include the background and the overall flow of the viewer’s eye across the image.  In this portrait of the proprietor of Maria’s Cafe in rural Cuba, I composed the image to use the brightly colored door, balcony, staircase, and tree to frame the subject herself.

CubaComposing a portrait involves thinking about the background and the viewer’s overall experience in looking across the image.  Buy this photo

A really good portrait should tell a story about the subject.  Here, Cuban tobacco farmer Benito relaxes in his drying barn with a cigar he just rolled from his tobacco harvest.  I got in close and used the natural light of his cigar lighter and the diffused sunlight within the barn, with no flash added.

CubaThis portrait of a Cuban tobacco farmer tells a story about who he is and what he does.  Buy this photo  

Consider the angle from which you shoot a portrait, as it has a strong influence on the emotional response of the viewer.  Most of the time we want to shoot a head shot or head-and-shoulders shot from a height midway between the top and bottom of the image, but to make this portrait of sisters on the outskirts of Arusha, Tanzania, I chose to shoot from slightly above.  It’s a fine line between giving a sense of vulnerability and causing the image to seem condescending, but I like this photo in part because I feel the unusual vantage point evokes a strong sense of emotion.

TanzaniaAn unusual shooting angle can enhance a portrait, but be careful not to overdo this effect.  Buy this photo

Another rule meant to be broken is freezing the action of a portrait’s subject.  During a fitness photoshoot with my friend Crystal, I shot mostly with a fast shutter speed to freeze her while she worked out.  But for this image, we wanted a blurred effect to create a sense of her forward motion while running, so I used a slower shutter speed.

A slower shutter speed can be used to give more sense of motion to a rapidly moving subject.  Buy this photo

Sometimes a perspective change can work wonders for a portrait.  In this image of the chief of a remote village in Swaziland, I got down low and shot with a wide-angle lens to portray her in the context of the hut behind her and the gourds she holds in her hands.  A wide view in a portrait can lead to less-flattering likenesses, so this effect should be used sparingly.

SwazilandA wide-angle lens and unusual perspective shooting from low to the ground lend this portrait of a Swaziland village leader a sense of connection to the place.  Buy this photo

A note on gear: My go-to portrait lens is the Nikon 85mm f/1.8G lens.  This is a classic portrait lens and provides a flattering perspective and great image quality when your subject is a human.  I use it for nearly all of my portrait work these days.  But this lens also shines for nature and action photography where you don’t need a really long focal length.  It renders really lovely “bokeh,” or the soft quality of the out-of-focus parts of the image.

Which of your portraits do you find most memorable, and why?  How did you create them?  Please share your thoughts here.

Please read this post for my essential tips on how to photograph people while traveling: Post on Travel Portraiture.


Calibration Time, Come On! [Encore Publication]: Why you should color-calibrate your display devices and how to do it

We tend to take for granted that the colors we perceive when we look at a scene will be captured faithfully by our camera’s sensor and the lens in front of it, and then rendered accurately in every stage of processing thereafter, from the memory card to the computer and to all our displays including laptops, tablets, smartphones, TVs, projectors, and even on these same types of displays owned by our friends with whom we share our images.  (We also expect prints made from our images to faithfully reproduce the colors from our camera’s sensor, but that is a story for another day.)

As photographers, we want to ensure the colors in our final images reflect as best we can the original colors we perceived when first framing the scene.  With proper color-calibration of the display screens we use to process our images, we can keep the colors as true and accurate as possible.  Buy this photo

The reality is that every step of the process of capturing, processing, and sharing an image leads to changes in the rendition of the colors.  No device can fully represent every intensity of every color that the human eye can see.  Camera manufacturers go to great lengths to ensure the colors captured by the camera’s sensor are as accurate as possible when you attach a lens made by the same company.  And when you use software such as Lightroom or Photoshop to post-process your images, you may take great pains to ensure the colors you see on your screen look very close to what you remember you saw when you shot the image in the first place.  But without careful attention, the final image we see later on our various display screens can look very different from device to device.  That’s because every type of display, and even every individual screen, has a unique way of representing every color.  So your PC’s monitor will display any given color just a bit differently than your phone’s screen will show that color.  And your friend’s phone’s screen will look a bit different, still (even if it’s the exact same brand and model as yours).

Fortunately, there is a simple and quite affordable way to standardize the representation of colors across all your devices.  It’s called color calibration, and for less than the cost of a good polarizing filter, say about $100, you can purchase a little doodad that can calibrate all your displays.  I use the X-Rite ColorMunki, which can be had for about $110 at retail.

To use a color calibration device, you install some software on your display(s) and then place the device on your display screen.  The software cycles the screen through displaying a wide range of colors, which are read and recorded by the calibration device.  Finally, the needed adjustments to bring your screen’s settings into line so they render colors as accurately as possible are saved in a special file.  From this point on, whenever your display device is started up, it reads the configuration information in that file and renders colors as closely to their actual appearance as it is physically capable of doing.

Because our eyes perceive colors differently in different ambient light conditions, you’ll want to have your calibration device take an ambient light reading for the typical lighting conditions that will be present while you’re using each display.  For example, if you use your laptop PC mostly when bright daylight is streaming into your kitchen, you’ll want to calibrate when those conditions are present.  You can even save different versions of the configuration file for different lighting conditions.

And because display devices do change over time, it’s a good idea to re-calibrate each device every few weeks to control for that.

If you’re serious about your photography, you want your images to look great not only on your own display screen(s), but also when viewed by other people on other types of devices or on the printed page.  Using a reliable color-calibration device helps ensure the colors in your images remain as accurate as possible through all the stages of processing and sharing until they leave your personal control.  This is a good practice that all photographers should employ.

How do you control for color accuracy in your images?  Please share your methods here!

Want to see other posts about post-processing your images?  Find them all here: Posts on Post-Processing.

Flashback [Encore Publication]: A simple and cheap accessory to improve your lighting

IMPORTANT UPDATE ON AUGUST 11, 2017:

Dear Readers,

I must retract my support for the Vello off-camera flash cord.  It is cheaply made and recently and suddenly failed, disabling my camera during an important client shoot.  I ended up paying over $300 to have the failed Vello accessory removed from my camera, and I lost use of my camera for more than a month while the repairs were being done.

Since this failure occurred, I’ve been very happily using a genuine Nikon brand off-camera flash cord:

The Nikon unit costs more than the Vello unit, but in my estimation it is much more solid and reliable.  I strongly urge all photographers to stay away from the Vello cord.

Here is the original post for reference, but please understand that I retract my support for this product.

=======

When it comes to gear, a lot of photographers will spend a lot of cash on a camera body, lens, or tripod head that they hope will magically elevate the quality of their images.  I’ve said it before, and I’ll say it again: great images are made by great photographers, regardless of the gear they use.  I find that in most cases, spending a lot of money on a new piece of kit will not result in dramatically improved images, at least not right away.  But sometimes it’s a little, inexpensive accessory that can immediately transform our images.  A good polarizing filter, for example, can almost magically improve landscape images by enhancing skies and mountains and reducing unwanted reflections.  In today’s post, I sing the praises of another inexpensive accessory that can make a big difference: the off-camera flash cord.
CubaThis portrait of a student at a Cuban school is compelling for its subject’s poise and its strong color scheme, but the lighting from the hot-shoe mounted speedlight is a bit harsh.  Buy this photo

Using your camera’s built-in flash or a speedlight mounted to the camera’s hot-shoe provides lighting that is aimed directly toward your subject from the plane of the camera’s sensor.  This light will bounce off the subject and come directly back to the camera, which makes for quite harsh lighting, often severe shadows, and red-eye or other unwanted effects.  These often undesirable characteristics can be mitigated a bit by using the flash unit’s tilt head to bounce the light off a wall or ceiling, or by dialing back the power of the flash’s output, but direct flash lighting is rarely the most attractive.

Instead, get the flash unit off the camera to enhance the lighting.  By purchasing an inexpensive off-camera flash cord, you can connect the flash to the camera’s hot-shoe while having the freedom to hold the flash away from the camera and to aim it any way you like.  I usually hand-hold the flash in my left hand while holding the camera in my right, but occasionally it is necessary to have both hands on the camera, in which case a bracket or stand can be used to hold the flash.  Depending on the situation, I will either aim the flash head toward the subject or bounce the flash off another surface such as a ceiling, wall, or even my own clothing.  With the off-camera flash cord, there is much more flexibility in how to position and aim the flash.

NOTE: I RETRACT MY SUPPORT FOR THIS ACCESSORY.  SEE THE NOTE AT THE TOP OF THIS POST.  Here is the flash cord I use.  It’s an independent brand (not made by Nikon, my camera’s and flash unit’s manufacturer), but I’ve found it to be at least as reliable, usable, and durable as the manufacturer’s own cord.  Best of all, this accessory costs less than $20, making it one of the best bargains I’ve encountered in the photographic accessory space.

The results from getting the flash unit off of the camera can be dramatic.  This image from Carnaval San Francisco is striking for the subject’s vibrant color and energetic sense of motion.  There are few visible shadows on her face, and the lighting is natural looking and even.

USAGetting the flash unit off of the camera’s hot-shoe yields even and natural lighting that is free from the harsh appearance and unflattering shadows often found in flash photography.  Buy this photo

There are other methods you can use for off-camera flash.  These days, many photographers use wireless triggers for the camera and flash to communicate.  If this setup works for you, great, but I’ve found a good old-school flash cord to be more reliable than wireless.

Try getting your flash off of the camera with a cord or wireless setup.  I think you’ll be very pleased with the results and the return on investment is likely to be higher than with most other gear purchases.

How do you use flash in your photography?  Any indispensable little accessories in your bag?  Please share your thoughts here.

Want to read more posts about photographic gear?  Find them all here: Posts on Gear.


Join Me on a Photography Tour of India: Capture unique images of cultural celebrations, wild tigers, glorious momuments, and people from all walks of life

Dear Readers,

From Jan. 24 through Feb. 8, 2018, join our small group of photography enthusiasts and experience India with all your senses. India is dream destination for travel photographers: a vivid tapestry of colors, cultures, and chaos. I’ve planned this unique itinerary to provide ample opportunities to capture unforgettable images that you won’t find in travel brochures and on postcards.

Our small group of no more than 12 will embark on a photographic journey that will take us through Delhi’s colorful bazaars and to its annual Republic Day Parade, to the incomparable Taj Mahal in Agra, on to the annual Desert Festival with its rich tableau of dancing and cultural activities, and then on safari to seek the royal bengal tigers of Bandhavgarh National Park, among other memorable destinations. Throughout this journey, we will be interacting with fascinating local people from all walks of life, who we will get the opportunity to meet and to photograph. I will be providing photography instruction for interested participants via workshops and in-the-field learning.  During our optional informal workshops, we’ll review our recent images, plan our shot list for the upcoming locations, and cover techniques to make the best images possible. Photographers of any level from advanced beginner through semi-professional will see their images improve, and non-photographer friends and family are welcome to either attend the daily workshops (even a smartphone camera can make great images) or enjoy a few minutes of extra time on their own. You can enjoy this trip and make memorable images using whatever camera gear you wish to bring; it is not necessary to invest in specialized gear. This tour begins in Delhi on Jan. 24 and ends back in Delhi on Feb. 8. More details will be available in the next few days.

Please let me know if you have questions or are interested in learning more about the trip. Mary and I hope that you can join us for this rare opportunity to experience the people, cultures, landscapes, and wildlife of India on a one-of-a-kind adventure tailored to photographers like you!


Revealing Portraits: Inspirational women of India are struggling to empower themselves and others

Travel photography is about more than simply recording what we see and do during our trips.  It is more important even than creating art from our experiences while traveling.  I believe travel photography also has an important role to play in documenting and communicating to broad audiences the present situation facing underrepresented, repressed, and abused communities, and advocating for change to improve on the present situation.

Today’s post illustrates this point.  In a series of four portraits made during my recent travels in the north of India, I document several of the serious struggles faced by the girls and women of India–abuse of street children, poverty and lack of education, forced early marriage, and acid attacks–and show how these brave young women are working to empower themselves and others like them to end these abuses.

First, we meet a 17-year-old girl from the slums of New Delhi.  Let’s call her Sheela (the NGO supporting her work has requested that I not use her real time in order to protect her identity).  Sheela is the principal organizer of 10,000 street kids from similar slums across the sprawling city.  She helped start a newspaper, called Balaknama, to give a voice to the street kids and expose their stories of child labor exploitation, police harassment, and physical abuse.  Through her efforts and those of other kids from the streets, the editors who advise them, and the NGO that funds them, Balaknama has helped improve the lives of the poorest and most vulnerable residents of Delhi.  My portrait of Sheela is set in Balaknama’s offices and shows her calm and inspiring strength.  Lit by available light only, this image was made with a fast prime portrait lens, shot from a low angle so as not to condescend to the subject, and using a wide aperture to soften the background.  The feeling this image evokes is one of quiet power and a strong drive to expose and right the wrongs of her society.

Sheela, a 17-year-old resident of Delhi’s slums, organizes 10,000 street kids and reports for a newspaper run by and for the street children of the city.  Buy this photo

Next, we meet a girl who was born into poverty in Delhi and was forced at an early age to beg to earn money for her family.  Let’s call her Anika.  School was not an option for her.  However, Anika found a way to earn more and to avoid begging by selling bead necklaces on the streets of the city.  The portrait shows the contrast of her daily life: hopeful yet exhausted, bright yet uneducated, strong yet vulnerable.  This portrait was made using natural light with just a touch of fill flash to accentuate the saturated colors of her outfit and her wares.  The emphasis was placed on Anika by use of the fill flash, by exposing for her face, and by blowing out the overexposed background.

Anika is one of Delhi’s poorer residents.  Unable to attend school, she sells beaded jewelry to make a few rupees for her family.  Buy this photo

In a small village in rural Rajasthan, we met Parma at her modest house.  Forced to marry at the age of 11, Parma had four daughters at an early age.  She is fiercely committed to ensuring her daughters receive a good education so that they will have more options than she had.  Parma made the brave decision to become one of the first women to join a cooperative formed to allow women of the village to learn to make handicrafts in order to earn money for their families.  She and her husband faced considerable scorn from neighbors and relatives over her decision to earn her own income, but now many other village women have seen the success of this program and have also joined.  Parma is proud to have learned to sign her name and read a few words, thanks to her older daughters’ having taught her.  My portrait shows Parma in her kitchen with her third daughter preparing tea in the background and a neighbor child just in front of her.  The image radiates beauty, dignity, strength, and resolve.  In this environmental portrait, I wanted to portray Parma in relation to her home, her family, and her community, so I placed her in the center, exposing and focusing on her face, and allowing her daughter to be clearly identifiable yet slightly out of focus.

Parma, a child bride, vowed to educate her four daughters and works in a women’s cooperative to earn extra money to fulfill her promise.  Buy this photo

Finally, we meet Rupa at Sheroe’s Cafe in Agra.  Sheroes’ is a project founded by and for the women of India who are survivors of acid attacks. We were so inspired by meeting Rupa and learning about her story and her road to physical and emotional recovery after her brutal attack at the age of 15 by her stepmother.  Through this project, Rupa has gained the confidence and independence to leave home, meet other survivors and activists, build a business as a clothing designer, seek legal justice against her attacker, and access the surgical care required to reconstruct her face. The courage and resilience shown by Rupa and the other women we met at the cafe moved us to want to help their cause to educate people and improve the treatment of India’s women.  My portrait of Rupa is powerful because it doesn’t shy away from her scars but allows her courage, resilience, and beauty to shine through.  I got in close to Rupa using an 85-mm prime portrait lens and composed a head-and-shoulders image from eye level.  I exposed for her face and blouse, which she designed herself, bringing out the vibrant saturated colors.  A shallow depth-of-field ensured that Rupa’s face would be emphasized while the background would be soft.

Rupa was brutally attacked with acid by a relative when she was just 15 years old.  Rather than hide at home her whole life, she was empowered by the Stop Acid Attacks organization to live independently, fight for justice, and advocate to end acid attacks across India and Southeast Asia.  Buy this photo

I hope this series of portraits of four brave young women in India will inspire you, as their subjects inspired me, to advocate for improving women’s rights in this part of the world.  And more broadly, I hope you’ll recognize the power that travel photography has to give voice to the unheard and to fight for social change in the places where we travel.

Have you made the opportunity to advocate for change through your images?  Please share your story here!

Want to read more posts about what to shoot while traveling?  Find them all here: Posts on What to Shoot.
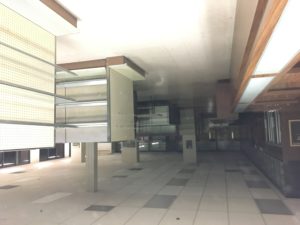
Photographic Blasphemy: Why you don’t need a tripod for most travel photography

Warning: The following assertion will sound heretical to many photography enthusiasts.  Stop reading now if you can’t handle the truth :-).

I’m going to say it.  You don’t need to carry a tripod for most travel photography situations.  There, I’ve said it.

This is blasphemy to many photographers.  After all, for the past 15 years or so, the badge of a “serious” photographer has been this three-legged object we stick between our camera and the ground.  Most scenic overlooks and other landscape photography-friendly locations have been positively flooded by a veritable sea of tripods in recent years.  I’ve seen viewpoints so clogged by tripods that photographers and even (heaven forbid) non-photographers are forced to elbow their way through just to get a place to stand to watch the sunrise, sunset, or other pretty happening.  For years, I have carried at least a lightweight tripod, and occasionally a heavy-duty professional tripod, with me to nearly every shoot, which for me is usually about two per day.  It’s become an ingrained behavior, a knee-jerk reaction, for most photographers.  But why, exactly?

During my recent travels in India, I made many wonderful images in all genres of photography.  I used a lot of gear to do so.  One item I didn’t use: a tripod.  Buy this photo

There are times when a tripod is necessary.  In very low-light situations, such as true nighttime scenes, most astrophotography, and some indoor shoots, it is essential to mount the camera on a sturdy tripod.  When a very long shutter speed is required for a specific effect, such as blurring water in a waterfall or shooting a dancer using rear-curtain sync flash, then you really do need a tripod.  We can even include shoots where several images will be combined using software to make a high dynamic range (HDR) or panoramic image in the category where a tripod is helpful (though, I would argue, not really essential anymore, given how good software has become at stitching overlapping images together).

But so many other times, a tripod is not only not an asset but actually becomes a liability.  Travel photographers must be very mindful of the size and weight of the gear we carry on our adventures.  Every item we bring has to be considered in terms of its value: will the space it takes up in our limited carry-on baggage allotment and its weight on our back every step of our trip be worthwhile in terms of its usefulness in making the best possible images?  A tripod, even a lightweight travel tripod, is a relatively large and heavy piece of gear.  There are other items we need to leave at home in order to make room for a tripod.

I recently returned from a 2.5-week journey through the north of India.  I brought as much gear as I could reasonably fit in carry-on for the international and internal Indian flights.  It weighed a lot, and I had to lug much of the gear I brought on the trip each day on my back through 115-degree heat, sometimes up steep hills to the top of ancient forts.  At the end of the trip, I contemplated my usage of each item I carried.  Both DSLR camera bodies, every lens (even the massive 500mm super-telephoto which I required to make great images of far-off tigers), the speedlights, both battery chargers, and all remote releases, cables, filters, cleaning supplies, etc. were used at some point during the trip.  The one item I never once needed: you guessed it, the tripod!

True, India is a very densely populated country where most sites do not allow tripods or, if they are allowed, the crowds are too thick to deploy them.  And there was ample bright sunlight at most of our locations to handhold the camera.

But I would argue that a tripod is simply not needed for many travel photography situations in general.  These days, a camera’s sensor is so fast and noise-free, and the camera’s resolution so high, that camera shake for most landscape photography settings is a much smaller risk than motion of the subject itself.  My Nikon D810 has a resolution of nearly 37 MB, so if a single tree branch or sometimes even a single leaf moves, I can see it in the image.  A tripod is no more going to stop a leaf from moving than could the ancient viking king Canute stop the tide from coming in (a story frequently misused in modern times, by the way).

From now on, when I pack for a day’s shoot or a month-long journey, I’m going to seriously consider whether I’ll need a tripod and will pack one (or two) only when I can reasonably expect to need it.

What about you?  Do you always carry a tripod, or do you consider its appropriateness before you travel?  If you always carry it, do you always need it?  Would you bring some other piece of gear along if you didn’t have to make space for the tripod?  Please share your thoughts on this controversial topic here!

Want to read more posts about photographic gear?  Find them all here: Posts on Gear.


Tyger, Tyger, Burning Bright: In search of the elusive royal bengal tiger in India’s Ranthambore National Park

Wildlife photography is one of the most exciting and rewarding pursuits I know, but it requires some special knowledge and gear, plenty of time, and lots of luck.  I’ve posted on this topic before, specifically about wildlife photography gear (Post on Wildlife Photography Gear) and about sensitivity to the wildlife we’re shooting (Post on Approaching Wildlife).  Today’s post is a case study on my recent wildlife safari in Ranthambore National Park in Rajasthan, India.  The park is famous for its population of wild royal bengal tigers, but even with its high concentration of the big cats, it is rare to see them.  We were fortunate to encounter two tigers during our game drives, one a female who was stalking prey at some distance from us across a meadow, the other a large male who was close to us but obstructed by dense jungle vegetation.

I was rewarded with a few marvelous images of the female tiger, my favorite of which is this one:

The money shot!  After weeks of planning, days of travel, hours of driving on rough tracks, and minutes of shooting, I had bagged several hundred images of this remarkable female tiger.  A few of the images had the required combination of tack-sharp focus, uncluttered background, and appealing view of the animal.  Buy this photo

Making an image like this requires careful planning to be in the right place at the right time.  In our case, our travel company lined up the logistics and hired an expert guide and driver, which certainly helps, but it is still necessary to prepare for a photo safari like this.  It requires some knowledge of the behavior of the wildlife you are seeking.  It calls for having the right gear and knowing how to use it under time pressure and without hesitating.  And it requires shooting a whole lot of frames in rapid succession, because most will not turn out perfectly.

To capture most wildlife, a long telephoto lens is a necessity.  My go-to long lens for wildlife photography is the Sigma 150-500mm f/5-6.3 lens.  It’s more economical than a Nikon or Canon super-tele, and it produces reasonably sharp images even when used at its widest aperture.  You can spend much more on this type of big glass if you want or need to, but I’ve found this lens works quite well for me.

Stability is very important when shooting a moving subject far away using a super-telephoto lens.  During most game drives around the world, a tripod or monopod cannot be used due to space constraints in the vehicle.  I will often use a beanbag to support the camera and lens, but on our canter (a large open vehicle that seats more than 20 people) in Ranthambore National Park, even that could not be used, as there is no surface to support the beanbag.  So the only option here is to shoot handheld.  Fortunately, the lens has good image stabilization built in, but it is also important to use good shooting technique and a very fast shutter speed.  Remember to keep one hand under the lens to support it, the other hand on the grip of the camera, and both elbows firmly pressed against your sides.  Gently squeeze the shutter release.  I recommend setting your camera to continuous shooting mode if it has this feature, as this will maximize the number of images you can capture as well as avoiding the camera shake from having to press the shutter release repeatedly.

To control exposure when shooting wildlife, I usually use Manual Mode with Auto ISO.  This little-known but extremely useful exposure mode allows you to set both shutter speed (which needs to be fast enough to avoid camera shake and to freeze the animal’s motion) and aperture (which I like to keep close to wide-open in order to soften the background), while adjusting the ISO to keep the exposure correct during changing lighting conditions.  To learn more about this technique, read this post: Post on Manual Mode with Auto ISO.

Shoot many images while encountering the animal in the field.  Keep them all on your memory card (which, of course, you should back up to another medium) until you have the opportunity to carefully cull them down to the ones that are technically adequate.  Finally, during post-processing, you can select the few images that are both technically acceptable (tack-sharp focus, proper exposure) and artistically appealing (the subject looks great, the background is uncluttered and attractive).  These selected images should then be carefully cropped and adjusted for exposure, contrast, and color balance.

There you have it.  The effort that goes into making just a handful of really excellent wildlife images is disproportionate to the workload involved in most tasks we do, and the frustrations are many, but the rewards when it all goes well and we have a wonderful portrait of the animal in hand make it all worthwhile.

What are your favorite wildlife photography techniques?  Please share them in the comment box.

Want to read more posts about photographic techniques?  Find them all here: Posts on Techniques.

Focus on Turkey [Encore Publication]: Spectacular photographic opportunities abound in this troubled nation

In the fall of 2015, my wife and I traveled throughout Turkey on a 2.5-week journey that included adventures in Istanbul, Cappadocia, the Turquoise Coast, and Ephesus.  We traveled with Overseas Adventure Travel (OAT) in the company of a local Turkish trip leader, and we had a wonderful, safe experience.  In today’s post I share our experiences and some of my favorite images from this spectacular but troubled nation.

First, a few words about safety.   Even when we traveled in September and October of 2015, there were concerns about the safety of travel in Turkey.  We did not visit the far southeastern regions of Turkey due to the ongoing violence between various factions from ISIS, Kurdish separatist groups, and the Turkish government.  There was a bombing with many casualties in Ankara while we were visiting a different part of Turkey.  Since our trip, the situation has deteriorated as a result of an escalating crisis in and around the border with Syria, terrorist actions throughout the country, and the broad government crackdown in the wake of the attempted coup earlier this year.  OAT, the company we traveled with, has since suspended all of their trips to Turkey.  Tourism in Turkey is being devastated by the concerns of safety on the ground.

So why would anyone want to go to Turkey?  The cultural, historic, and natural appeals of this destination are undeniable.  It is a travel photographer’s paradise.  And safety is a relative term.  I’ve traveled in over 100 countries and many of them were considered “unsafe” when I visited, but my only two close encounters with real terrorism were in supposedly “safe” cities: a bombing in Tokyo and a mass shooting in Los Angeles.  I felt safer in Turkey late last year than I do in many other parts of the world.  That said, the situation on the ground has deteriorated since I visited, tours to Turkey are becoming hard to find, and only you can decide on your tolerance for risk.  So perhaps wait for more order to return to Turkey before traveling there to make your own images, but in any case you can enjoy my images from this fascinating and gloriously beautiful part of the world.

Our adventure began in Istanbul, an ancient city situated at the border between Europe and Asia.  Its place as a crossroads of history from Roman times through the Byzantine Era, the Ottoman Empire, and the modern Turkish republic is apparent as you stroll its winding streets and ply its crowded waterways.  The are opportunities to make great images everywhere in the city.

Istanbul’s Hagia Sophia, the foremost Byzantine church, is nearly 1500 years old.  When shooting grand architectural sites from up-close, it’s a challenge to try to avoid distortion due to perspective and the necessity of using a wide-angle lens.  Here I kept the horizon level with the ground to avoid excessive distortion.  Buy this photo

The best baklava in Istanbul?  Perhaps.  I certainly didn’t taste any better baklava in the city, and believe me, I tried a lot of baklava.  To make this portrait, I asked our trip leader to introduce me to the baker, who was happy to pose with his wares.  This was shot with natural light and just a touch of fill flash.  Buy this photo

View of the Galata Tower from across the Bosphorous.  Buy this photo

After Istanbul, we traveled to the central region of Cappadocia, famous for its “fairy chimneys,” natural spires formed by the erosion of soft tufa rock.  This region is a veritable dream for travel photographers!

Upon arriving in Cappadocia, we were thrilled to learn our hotel room was inside an ancient cave dwelling.  (Not to worry, it had been recently remodeled.)  When shooting interiors, it’s usually best to use a fast wide-angle lens and to compose the image carefully so as to gain the viewing perspective you want.  Buy this photo

The Goreme Open Air Museum comprises dozens of ancient Byzantine churches carved out of the tufa rock.  Remember to capture some images that include yourself and your travel companions.  Refer to this post for more practical tips about making great self-portraits while traveling: Post on Self Portraits.  To make this image, I set up the camera on a lightweight travel tripod, composed it by having my wife stand in front of the “fairy chimney” church, then joined her in the frame and triggered the camera using a remote release.  Buy this photo

The soft tufa stone formations look almost like sand dunes in the late afternoon glow.  I shot in RAW mode (as always!) and underexposed slightly to allow for a higher-contrast image during post-processing.  Careful cropping also helps a striking landscape really pop.  Buy this photo

We awoke at 5:30 AM to the sight out our cave-hotel’s window of hundreds of hot air balloons launching about the fairy chimneys.  I jumped out of bed, barely remembering to throw some clothes on, before running out the our balcony to set up a tripod and capture this amazing scene.  I exposed for the rock formations and allowed the balloons to be partially silhouetted.  Buy this photo

We visited a school in the region, always a favorite activity during our travels.  While I also made quite a few images in the classrooms with the kids and teachers, I like the unusual perspective in this image.  It was shot from outside the school building as the kids came to the windows to wave goodbye.  Buy this photo

We took a very memorable hot air balloon ride at dawn over Cappadocia’s otherworldly landscape.  I made this image looking down from our gondola at three other balloons in various stages of preparing to launch.  The amphitheaters of soft tufa rock can be seen in the middle-ground and the rising sun in the far background.  Buy this photo

At a rug-weaving cooperative, this woman enjoys a cup of Turkish coffee during her break.  I was drawn by her colorful clothes and enigmatic smile.  I asked our trip leader to introduce us and inquire if it was okay for me to make a portrait.  Shooting quickly with natural light only, no time to set up a tripod, and a too-slow lens mounted on the camera, I had to boost the ISO setting quite high.  Fortunately, I was able to reduce much of the noise in the image during post-processing.  Buy this photo

Hiking up to the top of Uchisar Castle, the highest elevation in Cappadocia.  Buy this photo

We had the chance to watch a whirling dervish ceremony.  The Samazens, followers of Mevlana Rumi, are a mystical Sufi order who practice the ritual we witnessed.  To capture the sense of motion, I used a slower shutter speed to blur the participants.  Buy this photo

The Mevlana Museum houses the monastery and tomb of Mevlana Celaleddin Rumi, the mystic who founded the “Whirling Dervish” sect.  This image captures the incredible workmanship on the interior of the monastery, especially around Rumi’s tomb.  Flashes and tripods are not allowed inside the tomb, so I had to use a fast lens and high ISO setting to handhold the camera.  Buy this photo

We departed Cappadocia and drove to Antalya, the gateway to the southern Mediterranean region known as the Turquoise Coast.  Antalya boasts an ancient Roman harbor and a fascinating archaeological museum.

We happened upon an interesting scene when several archaeologists and their students attempted to match a recently excavated statuary head to a body already in the museum.  Always be on the lookout for serendipitous scenes, which often make the most memorable images from a trip.  Buy this photo

These Lycian house-tombs were carved into the cliffs centuries before the Romans arrived at Myra.  Buy this photo

We boarded our gulet, a traditional Turkish wooden sailing yacht, for a four-day cruise along the Turquoise Coast.  Each day offered a wonderful photographic tapestry of great images, as we sailed, hiked, swam, and dined.

Kayakoy is a ghost town, a Greek village abandoned when the Turks expelled Greeks after their war for independence in the early 20th century.  Turks living in Greece were also expelled the same year.  Buy this photo

My wife Mary spotted this rare wildcat, which looked to us a bit like our local Californian bobcat, along one of our daily hikes.  I changed lenses very quickly while slowly approaching the cat, then captured this portrait using a medium telephoto just moments before he slipped into the brush.  Buy this photo

A riverboat took us from our gulet yacht to the ancient Lycian site of Caunos.  This image of a beautiful kingfisher along the side of the river was captured using a long telephoto lens and a fast shutter speed to allow for handholding the camera on a rocking boat.  Buy this photo

On our last full day in Turkey, we finally got to visit the splendid ruins of Ephesus, a major Roman city in the region.

The ruins at Ephesus include the incomparable Library of Celsus, pictured here in a self-portrait of my wife and me.  To achieve the broad depth-of-field required to ensure both the people and the buildings were in sharp focus, I used a small aperture (large F-stop number).  Major archaeological sites are often packed with other visitors, so try to find vantage points that allow the crowds to appear small in comparison to your main subjects.  Buy this photo

Throughout Turkey, the food was vibrant, simple, and delicious.  Our final day’s lunch, in a beautiful village in the mountains, consisted of course after course of delightful meze (appetizers).  Buy this photo

Turkey is a remarkable destination for travel photography.  Let us hope its current troubles will soon be a thing of the past and that safe and affordable travel will again be available there.

Have you visited Turkey?  What were your most memorable experiences there?  Please share your thoughts here.

Want to read more posts about travel photography destinations?  Find them all here: Posts on Destinations.

Focus on Balaknama: Making portraits that go beyond documentation to help Delhi’s street kids

During a recent trip through the north of India, I had the opportunity to meet with the advisors and some of the young staff at the Balaknama Newspaper, a project to empower the street kids of New Delhi.  I’ve long been interested in the plight of the street kids who live in Delhi’s sprawling slums and have historically been terribly mistreated at the hands of exploitative child labor bosses, a corrupt police force, and often their own abusive families, so this visit was important to me personally.  In this post I share some of the images I made of the kids who risk their own safety to expose the abuses against the young people in their community, and I also discuss how to go beyond the purely documentary function of portrait photography to give your portraits more power.

The images I share here are published with permission from Balaknama’s editor and the NGO who supports the project.  However, I will not share the location of the offices nor the real names of the kids who work there, in order to protect their identities.

The power of a portrait to advocate for social change depends primarily on its ability to go beyond simple documentation and to reveal the personality, background, and/or motivation of the subject.  For this shoot, I wanted to convey the passion and bravery of the young reporters.  I shot with available light only (no flash) in order to capture the intimate and urgent mood of the work the kids are doing.  I used several lenses for different perspectives, but most of the images were made using a fast prime portrait lens.  My shooting perspective was from a low angle so as not to give the appearance of looking down on the subjects.  People appear more empowered when the camera observes them from the perspective of their peers–it should appear as though the viewer is a part of the conversation.

This 17-year-old reporter is also the primary organizer of more than 10,000 of Delhi’s street kids.  I wanted to capture her intensity and focus in this portrait, so I got in close with a medium-length portrait lens and shot from the perspective of a participant in the conversation.  A wide aperture (low F-stop number) is helpful to isolate the subject from the background.  Buy this photo

The “decisive moment.”  I shot several frames of this young reporter as he described the horrific abuses of his peers in the slums of New Delhi, in order to maximize the chances of capturing just the right instant.  I love this image, which to me appears to emulate the drama and body language of Francisco Goya’s famous painting, “The Executions of the Third of May, 1808”.

This powerful portrait has a painterly feel and freezes the tension and drama of the harrowing stories retold by the young reporter.  Buy this photo

The interaction between the students at the newspaper is an important theme.  Here I worked to capture the girls’ engagement with each other and with the overall discussion.  Buy this photo

Language barriers are less important than many photographers believe them to be.  A simple “thumbs-up” gesture evoked a playful response from these young Balaknama staffers, providing a light moment during the intensity of our conversation.  Buy this photo

As I’ve often written in To Travel Hopefully, it’s important to remember to include your own group in some of your images.  While I most likely won’t publish this image in my stories about Balaknama, I am happy to have this documentation of my fellow travelers as we interacted with the students and staff at the newspaper.

For large group shots in tight spaces, use a wide-angle lens.  This was shot with a Nikon 16-35mm f/4 lens at its widest setting, giving the viewer a sense of the setting as well as the people there.  Buy this photo

I wanted to capture a final portrait of the two primary student organizers as we left the newspaper’s offices, so I asked them to pose together during our walk through the neighborhood.  This gives a sense of the environment in which they live and work.  I got in close using a wide aperture to soften the background, but I also chose a background that would inform the viewer about the kids’ environment.  Buy this photo

Do you have techniques for making powerful portraits that go beyond pure documentation to advocate for the people and causes in the images?  Please share your thoughts here!

Want to read more posts about what and how to shoot while traveling?  Find them all here: Posts on What to Shoot.
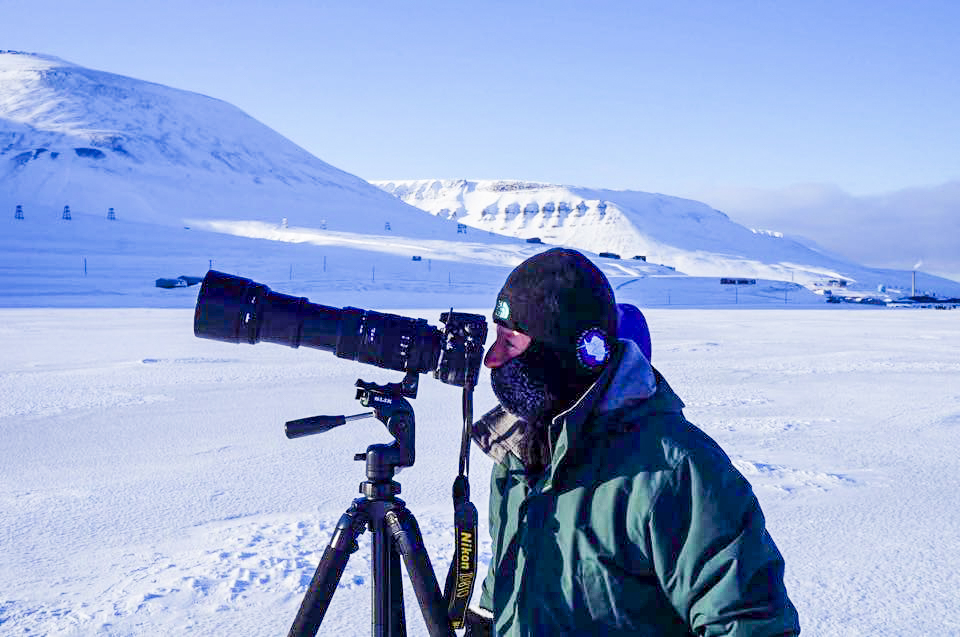
Planning a Shoot [Encore Publication]: A case study in planning and executing a photo shoot

Whether traveling or near home, some of our best photo opportunities occur spontaneously.  Serendipity is part of the fun of photography, but another big part of the photographer’s craft is to carefully plan and professionally execute a photo shoot.  Using a recent shoot in which I collaborated with professional dancer Molly as a case study, in this post I’ll cover the essential elements of planning and conducting a shoot.

Good planning is key to ensuring a fun, safe, and efficient shoot as well as obtaining the desired artistic outcome.  Buy this photo

Elements to Consider When Planning a Shoot:

  • What is the theme or mood?  The artistic concept will inform all the other elements of the shoot.  For the shoot with Molly, we decided on an edgy, urban theme.  Based on that choice, the decisions about location, timing, gear, technique, and post-processing all flowed consistently.

We chose a gritty, urban theme for this shoot, and all other decisions flowed from that choice.  Buy this photo

  • Where is the location?  Often one of the most challenging aspects of planning a shoot is scouting for a suitable location.  The location, of course, should support the theme of the shoot.  It also needs to be accessible, safe (for this shoot, we rejected shooting on or near railroad tracks for safety reasons), and suitable for making the type of images desired.  There are also legal considerations, as in most cases permission is required to shoot on private property and even some public spaces require permission for commercial uses.  Molly and I eventually decided on using the old barracks at the decommissioned Presidio of San Francisco and the adjacent Crissy Field recreation area.  This space was accessible, relatively safe, provided a gritty and urban mood, and afforded sufficient working room for both dancer and photographer.
  • When should the shoot be scheduled?  Obviously, the date and time scheduled need to work for all parties involved.  These parties include not only the model(s) and photographer, but also other client(s) and often an assistant.  Equally important is ensuring the timing supports your artistic choices.  The season of the year and the time of day should offer the best chances of obtaining the lighting you desire.  The scheduled time should also work as well as possible with respect to other considerations such as opening hours of the chosen space, traffic and volume of other people in the location, and even tides, snowfall amounts, or other environmental factors.  Molly and I chose to shoot in the “golden hour” just before sunset on a Sunday to ensure good lighting and access to the location.
  • What gear and techniques should be used?  After choosing the theme and the supporting logistical elements, it’s time to select the techniques desired to capture the images and the gear required to execute.  Elements to consider include lighting (I prefer to work with available light and reflectors/diffusers whenever possible, but sometimes speedlights or portable studio lights are required), lenses (it’s often best to bring a range of lenses for different perspectives), props, and accessories (will you need to stabilize with a tripod, or perhaps you’ll require neutral density filters to obtain the shutter speed and/or aperture you want?).  In the shoot with Molly, I used the camera handheld at mostly fast shutter speeds and low camera angles with fast prime lenses to get that edgy look.

To capture the fast motion of the dancing and to support the urban theme, I worked handheld with fast prime lenses and low camera angles.  Buy this photo

  • How should the images be post-processed?  Again, the overall artistic concept should inform decisions about post-processing.  For this shoot, I aimed for a high-contrast, slightly grainy look and also converted several of the images to black-and-white.
  • How will the images be distributed and used?  All parties should agree before the shoot on how the images will be shared and/or sold.  To protect both model and photographer, it’s a good idea to sign a model release.  For more information on model releases, see this post: Post on Model Releases.

With attention to planning and execution, a photo shoot will be more enjoyable and productive and the artistic results will be better.  Buy this photo

Do you have tips and tricks you use when preparing for your shoots?  Please share your thoughts here.

Want to read more posts about planning your photography?  Find them all here: Posts on Planning.

To Travel Hopefully is Taking the Day Off: Please help support this site

Dear Reader,

To Travel Hopefully is taking the day off, but don’t worry, we’ll be back with fresh new content soon.

In the meantime, please take a look at the helpful travel photography tips and inspiring images in our archived posts.  Just select a category (Destinations, Gear, Techniques, Travel, etc.) from the right nav bar, or choose a month under Archives, and browse to your heart’s content.

While you’re here, take a moment to tell your friends and family about us.  Anyone who enjoys travel and wants to improve their photography will find great daily content here, including inspiring images from around the world and tips and tricks for making the best possible photos.  You can email any post or share it via social media with the click of one of the buttons at the end of each post.  And if you enjoy To Travel Hopefully, please click in the right nav bar to subscribe via email or RSS feed, so you won’t miss a single post.

Please consider supporting this site by purchasing some of my photos, browsing for some great gear via the Amazon links, or clicking on some of the ads that interest you.

My holiday special promotion ended on Dec. 31, but I have lowered most of my regular prices considerably.  Fine art prints and novelty items are available in a wide variety of sizes and price ranges for nearly every image in my portfolio.  Please take a look at Featured Photos to see a sampling of my images available for purchase.

And finally, I’d like to share some exciting news: In late January and early February, I will be leading a photography tour through the north of India.  This adventure will go way beyond the usual postcard-style shots to give photographers of all skill levels many unique opportunities to make images you won’t find elsewhere.  Details will be available in the next few days.  

Thank you for visiting To Travel Hopefully!  Without your support, this project cannot continue providing you with daily content including inspiring travel photos and tips and tricks for making great images.

Warm regards,

Kyle Adler

Black-and-White to the Rescue [Encore Publication]: Converting a noisy or strangely colored image to monochrome can save the day

In a recent post (Post on Circus Automatic), I shared several practical tips for shooting fast-moving indoor performances, using a circus performance as an example.  While I was happy with many of my images from that evening’s shoot, I discussed how the single-colored LED lights now used at many indoor performances can impart an unnatural color cast to photos that can be hard to correct in post-processing.  In today’s post, I show how converting these images to black-and-white can overcome some of the limitations of shooting under these adverse lighting conditions, with the added bonus that the noise imparted to the images (from having to shoot at a very high ISO setting) can also be less noticeable in black-and-white conversions.

First, a little background explanation on why these LED lights are so troublesome for the photographer to work with.  When we refer to the resolution, or number of pixels, in our camera’s sensor, that number is actually the total count of three different kinds of pixels, each kind sensitive to only one of the three primary colors (red, blue, and green).  Without going into the nitty-gritty technical details, suffice it to say that in most camera sensors, about 50% of the pixels record only green data, about 25% only red data, and about 25% only blue data.  My camera (the Nikon D810) is said to have a resolution of 36.3 megapixels (MP), but if my subject is lit by a single-colored red LED, in reality only about 9 MP of resolution is recorded.  The other two color channels will essentially contain no data.  This is bad for several reasons, most notably because the image will be cast unnaturally toward the red color channel and because its effective resolution will be low.

There’s very little we can do in post-processing to recover from the loss of resolution during capture, but we can adjust the color temperature to try to correct a little bit of the strange color cast.  Converting the image to black-and-white, though, can restore the image to a more natural appearance by masking the color cast.  This can be aided by using Lightroom’s contrast and color control sliders to adjust the balance of the black-and-white version until it appears closest to a normal tone.

Consider the following two versions of the same shot.  The first version is in color, and even after adjusting the color temperature and contrast, there is still a distracting red color cast.  There is also some noise apparent in the image as a result of the high ISO setting required to freeze the acrobats’ motion.

The color version of this image appears unnatural even after adjusting color temperature, due to the lighting which consisted of a red-colored LED array.

Now, take a look at the black-and-white version of the same image.  Creating this version required careful attention to the balance of each color and contrast setting to make the final image.  The good news: the monochrome image appears much more natural to the eye than does the color version.  The skin tones seem less artificial, and the curtain in the background does not distract as much.  Furthermore, there is less noise apparent in the black-and-white version.
The same shot appears more natural and less noisy when converted to a black-and-white photo.  Buy this photo

This next shot appears much more acceptable in its color version.  During a live performance, the lighting often changes drastically from one moment to the next, and in this image the LED lights didn’t impart as harsh a red cast as in the previous image.  Furthermore, the aerialist was dressed entirely in red and was working with red ropes, so what red color cast was present does not appear as unnatural.

This image is highly effective when presented in full color.  Buy this photo

While I like this image for its dramatic power and strikingly vibrant red colors, let’s take a look at a black-and-white conversion for comparison.  The monochrome version lacks the visceral impact of the strident red color, but it benefits from a more natural tone, a quasi-documentary look and feel, and a nice clean black background.  In this case, the black-and-white conversion doesn’t so much rescue the image as change the kind of feeling it elicits.  I like both versions.
The black-and-white version is cleaner and evokes a very different set of emotions than does the color version.  Buy this photo

When you are forced to shoot under very difficult lighting conditions, try converting to black-and-white during post-processing.  It just might rescue some of your images and can evoke a very different feel in other images.

For a refresher on the black-and-white conversion process and when you may want to use it, read this post: Post on B&W Conversion.

During post-processing, have you been able to rescue or improve images shot under challenging lighting conditions?  Did you convert to black-and-white, or use different techniques?  Please share your experiences here.

Hiking in Southwestern Ireland [Encore Publication]: How to capture glorious landscapes along the trails

The central portion of our recent trip through Ireland and Scotland was a week of hiking in the southwest of Ireland.  While we hiked independently, the logistics were arranged for us by a travel company called Country Walkers (http://www.countrywalkers.com/).  With its richly verdant and rugged terrain, glorious views to the sea and mountains, historic and cultural points of interest, and warm and welcoming people, this region is supremely rewarding for the travel photographer.

I highly recommend a visit to the very remote Gougane Barra peninsula.  There’s only one hotel, which offers outstanding food and views over a tiny island with a picturesque church and the ruins of a sixth century monastery.  A photographer’s paradise!

St. Finbarr’s Church stands on a tiny island on the Gougane Barra Peninsula.  To make this image, I shot in the early morning when the quality of light was compelling, got down low to include the rushes in the lake, and used a polarizing filter to bring out the textures in the water and sky.  Buy this photo

Don’t put away your gear when the sun sets!  On a rare clear night in rural Ireland, the photography is stunning.  Here’s an image of the Milky Way sprawling above the ruins of St. Finbarr’s Abbey, a sixth century monastery.

To capture the Milky Way, use a sturdy tripod and a relatively fast lens with a high ISO setting.  In most cases, a shutter speed of 20-25 seconds is best, but here I used a somewhat shorter exposure to avoid having the cross appear washed out in the site’s artificial light.  Buy this photo

We then hiked a segment of the long-distance Sheep’s Head Way.  You’ll rarely encounter completely clear skies while walking in Ireland, but the changeable conditions can create opportunities for glorious landscapes.  This lovely image was made just as the rain let up and the sun poked out, generating a vivid rainbow that spanned over the green fields and ancient walls.

Here I used my go-to landscape lens, the Nikon 16-35mm f/4 lens, fitted with a good circular polarizing filter.  I adjusted the angle of the polarizer carefully to enhance the sky without weakening the refraction of the rainbow.  I got down low to the ground to include the leading line from the old wall.  Other compositional elements include the sheep and the dramatic clouds.  Buy this photo

Ladder stiles are encountered frequently when hiking in this region, but are less familiar back home, so dramatic images can be made incorporating travel companions crossing fences using these ladders.  Here I used a wide-angle lens with polarizing filter to emphasize the expansive terrain and dramatic sky.  Buy this photo

At the end of the Sheep’s Head Way sits the lovely Bantry House, owned by the same family since 1750.  Climb the hill behind the house to capture the house and its gardens with the harbor behind.  Buy this photo

On our way to the start of our next day’s hike in Killarney National Park, we stopped at a viewpoint called Priest’s Leap for this lovely view.  I’ve said it before and I’ll say it again: remember to include yourself and your travel companions in some of your images.  Set up the camera and either mount it on a tripod or show another person how to release the shutter.  For more on how to make images including yourself, read this post: Post on Including Yourself

This image at Priest’s Leap was made using a normal lens with polarizing filter, stopped down to maximize depth-of-field.  Buy this photo

Ireland is filled with forests that are shrouded in mystery and magic.  Look for the little things as you walk: a flower or shamrock, a moss-covered tree, a tiny stream.  All that rain has the happy side-effect of making Ireland the greenest place I’ve ever seen.

Slow down and seek out the little natural details around you, like this moss-covered tree in Killarney National Park.  Buy this photo

The lovely Torc Waterfall within Killarney National Park is one of the most scenic in the region.  To capture the motion of the water, I used a neutral density filter to allow a long shutter speed and steadied the camera on a solid tripod.  Buy this photo

The legendary Gap of Dunloe outside of Killarney stretches for eight miles through mountains and valleys, along streams and by ancient farmhouses.  It can be traversed by horse-drawn carriages called “jaunting cars,” but the intrepid photographer will want to hike it instead.

The Gap of Dunloe offers compelling photographic subjects like this stream flowing in a valley surrounded by mountains.  A good wide-angle lens with a polarizing filter brings out the color and texture in such a landscape, even on a “soft day” like this one.  Buy this photo

Hiking isn’t the only great way to see the local landscapes.  After hiking the Gap of Dunloe, take a boat ride along the rivers and lakes to the ancient Ross Castle.

This mountain rising from the lake was captured during the boat ride back from the Gap hike, using a normal lens with polarizing filter.  Buy this photo

We spent every evening in Ireland visiting a pub or two.  These pubs differ in character, but all reflect the generous and friendly local culture, and many offer live music.

At a pub in Killarney, I was chatting with this fiddler during a break between sets and made this portrait using natural light with a fast portrait lens, a wide aperture, and a high ISO.  Buy this photo

My essential portrait lens:

We were fortunate to stay two nights in Killarney at the wonderful Lake Hotel.  The hotel grounds include the ruins of an ancient castle situated on a lake with mountains behind.  During breakfast on our second morning, I noticed the cloud cover had lifted but there was still mist hanging on the side of the hills around the lake.  I ran up to our room, grabbed my thirty pounds of camera gear, and rushed outside to capture the ruins with the mist enshrouding the lake and mountains.

There was no time to set up a tripod as the warming sun was burning away the magical mist on the lake, so I shot this image handheld.  Buy this photo

Our final day’s hike was the beautiful Wild Atlantic Way from Ventry to Dunquin.  The lovely views of the Atlantic are punctuated with green fields dotted with odd “beehive huts,” some dating back to the Neolithic Period.
To make this landscape incorporating ancient stone beehive huts and walls, I shot down across the fields to the sea, being sure to keep the horizon level.  Buy this photo

The picturesque Blasket Islands were home to a community of Irish-speaking farmer-fishermen until they were forced to evacuate in 1953.  This is one of Ireland’s most gorgeous stretches of coastline, captured here using a wide-angle lens with polarizer.  Rotate the filter until the sky is dark and dramatic.  Buy this photo

I hope this post inspires you to hike and photograph in this gorgeous region.  Expect some wet weather nearly every day, and prepare accordingly to protect yourself and your camera gear.  You’ll be richly rewarded with expansive views of some of the world’s greenest and loveliest vistas!

Have you visited southwestern Ireland?  What were your most memorable experiences?  Please share your thoughts here.

Want to see posts on other travel photography destinations?  Find them all here: Posts on Destinations.