If You Can’t Be with The Camera You Love [Encore Publication]: How to make the best of it when you don’t have ideal kit with you

There’s an old adage that goes, “The best camera is the one you have with you.”  That is never more true than for travel photography.  As travelers, we have to compromise regarding what gear we pack for a whole trip, and then we have to compromise again with respect to what equipment we can pack on a particular day’s outing during the trip.  If a flight is involved, we’re often obligated to leave much of our gear at home so as to avoid having to check our precious photography equipment.  If a good deal of hiking, biking, or travel via public transportation is required, we may have to leave bulky or heavy items in the hotel room for the day.

Fortunately, it’s never been easier to ensure we always have at least some backup solution to keep shooting even when a key camera, lens, filter, or tripod has to be left behind.  The smartphone that nearly everyone carries with them at all times likely has a pretty darn good camera attached to it.  My Apple iPhone 6s, for example, comes with a 12 MP camera, incorporating a decent if small sensor and a tolerable quality and moderately fast (f/2.2) lens.  Even the smaller “selfie” camera has a 5 MP sensor.

No one will confuse the images made using this camera phone with those made using my professional DSLR camera and collection of lenses, but in a pinch I can get acceptable quality shots with just the phone’s camera.  The trick is understanding how to use your smartphone’s camera, or your small point-and-shoot camera, in the right way to capture the images, and then to post-process the images in such a way as to overcome the compromises built into the camera.

Just yesterday I found myself on a family day trip to the annual Scottish Highland Gathering and Games without my professional camera gear.  I made the best of things and shot all day with just my camera’s phone.  I’m fairly pleased with the resulting images, even though of course they would have been better had I had access to my regular camera and a few choice lenses and accessories.  Here are a few of my images along with some tips on how to get the best out of a not-so-great camera.

First of all, learn how to control your phone’s camera manually so that you can choose what part of the image you want to be in focus and what part of the image you want to drive the exposure.  Nearly all modern phone’s cameras allow you to touch the screen to select where on the image you want to set the focus and exposure.  In this photo of a Scottish traditional music performance, I set the focus point on the fiddler to ensure sharp focus on the musicians.  Then I adjusted the exposure by moving the vertical slider upward, in order to add some brightness to the image and avoid underexposing the backlit performers.

Touch your smartphone camera’s screen to select the focus point, and then move the exposure slider up or down to adjust the exposure separately from the focus point.  Buy this photo on my website

Better yet, take full manual control over your phone’s camera by installing an app.  There are good free and inexpensive apps for both iOS and Android.  The one I use for iOS is called “Manual” and is available on the Apple App Store: Manual app.  With such an app installed on your camera, you can specify manually exactly what settings you want to use for the focus point, aperture, shutter speed, ISO, flash, etc.  This level of control was essential for a shot like the one below.  The tossin’ of the caber, a “heavy athletics” event in which the contestants throw a 75-pound tree trunk as far as possible, requires a fast shutter speed in order to freeze the rapid action.

Note: Since I first wrote this post, I have started using a different iOS app to take manual control over my phone’s camera.  It’s called “ProCam 4” and it’s quite a bit more sophisticated, but as easy to use, as the “Manual” app.  You can purchase it on the Apple iTunes Store here: ProCam 4 App.

Using the “Manual” app I was able to focus on the athlete and choose a fast shutter speed to freeze the rapidly moving caber.   Buy this photo on my website

To capture this action shot of an indoor sheepdog trial, I had to set a fast shutter speed and increase the camera sensor’s sensitivity (ISO) to accommodate the quick action and the low-light setting.  Again, the Manual app allowed for this flexibility.  I also cropped the image during post-processing because the phone’s camera does not have a long enough focal length lens to zoom in closely on the subject.

Both manual selection of the ISO and shutter speed and cropping during post-processing are required to get a decent shot of action like this sheepdog trial.  Buy this photo on my website

To capture this image of a girl teaching young children how to dance around the maypole, I had to use all the elements we’ve been discussing here.  I used manual settings to choose a focus and exposure that were correct for this subject, forced the camera’s flash to fire to try to even out the harsh shadows across the girl’s face, and employed cropping and lighting adjustments during post-processing to achieve a pleasing composition.

Bringing it all together: To make this image of the maypole celebration, I manually selected the focus, exposure, and flash, and then cropped and adjusted exposure during post-processing.  Buy this photo on my website

Next time you can’t or just don’t have the best equipment with you, use the tips we’ve covered here to make the best of a challenging situation.

When did you have to make do with less than ideal gear for a shoot?  How did you make the best of it?  Do you have tips or tricks you can add?  Please contribute your thoughts using the comment box at the end of this post.

Want to read more post about photographic gear?  Find them all here: Posts on Gear.

When You Get Back Home [Encore Publication]: An introduction to the essentials of postprocessing

You may want to share some of your favorite images with friends and family right out of the camera while you’re still traveling, and as long as you’re not sharing so broadly that potential thieves may be alerted to your absence from home, that’s a fine thing to do.  To enable immediate and easy sharing, you can choose the setting available on many cameras to shoot both RAW and JPG files; the JPG images will often look pretty decent for sharing when they come straight from the camera, and you still have your much more detailed image data saved in the RAW files.

But when you get home from your trip, it’s worth making the effort to catalog and post-process the RAW files of your favorite images so that they will look their very best and so you will be organized for finding them in the future.  I’ll cover how to organize your catalog of images in a later post, but for now let’s take a look at the essentials of post-processing.

There are many software applications available to perform these tasks, but I strongly encourage you to check out Adobe Lightroom.  I use this tool, and nearly all professional and enthusiast photographers I know also use it.  You can license it along with other Adobe software on a pay-per-month basis as part of Adobe’s Creative Cloud, but it can also be purchased with a perpetual license (i.e., you purchase the software once and can use it forever), which is how I acquired it.

Once you have Lightroom installed on your PC, it’s easy to import your images from your camera’s memory card or from your PC’s hard drive and to organize your catalog of images using the software’s Library module.  When your images are in your Lightroom catalog, the software allows you to perform all post-processing you desire using its Develop module.  After shooting the image, my second-favorite part of the digital photography process is enhancing the the image in the Develop module.  The software package even gets its name, Lightroom, as the new digital equivalent of the work we older photographers formerly had to do in the darkroom, such as dodging, burning, and cropping our film negatives to get the images looking their best.

As an example of how a little post-processing can dramatically enhance an image, let’s take a look at a night shot I made of Copenhagen’s Christiansborg Palace, the seat of the Danish Parliament.  Here’s the “Before” picture:


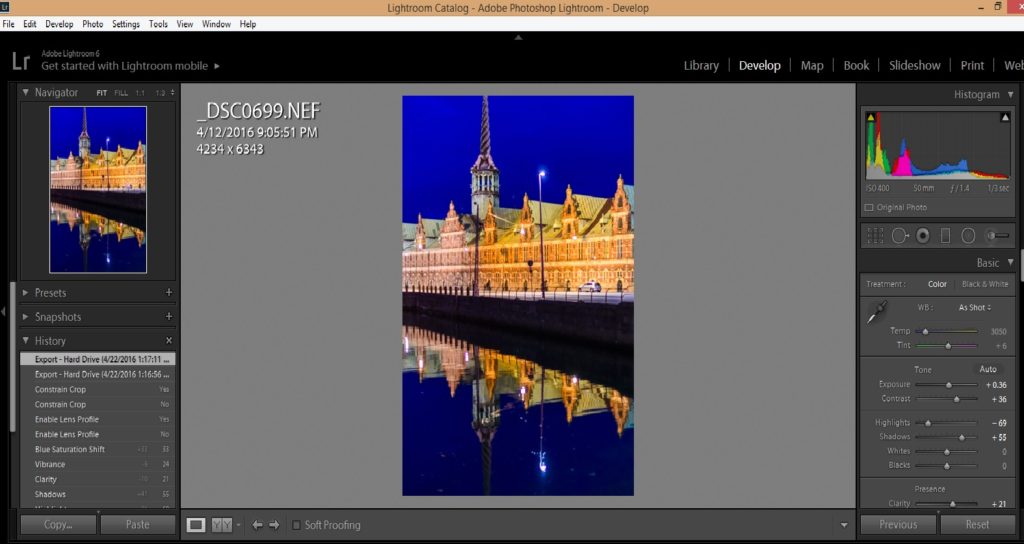
Lightroom’s Develop module

The beauty of Lightroom’s method is that it doesn’t actually change your original image files as you edit them.  Instead Lightroom saves a roadmap of the various edits you make and stores this list of adjustments along with a pointer to the original file.  This is called “non-destructive editing”, and it allows you to edit your images to your heart’s content without overwriting or changing the originals at all.  You can go back as many times as you want later to revisit your edits and change them again and again.

Let’s look at this process in more detail.  Here is the basic Lightroom Develop module screen:

lightroom develop module

The left bar shows a thumbnail of the image you’re working on and a list of the most recent edits you have made.  The central part of the screen shows a larger version of your image and this can be zoomed in and out to work on details or the whole image.  The right bar has a histogram (a graph showing how many pixels in the image are at each brightness level from totally black to totally white) at the top, then a toolbar from which you can choose some of the editing tools quickly, and then a large area with sliders (only some of which are shown in this screenshot) that you move left or right to adjust various elements of your image.  The editing tools in Lightroom are comprehensive enough that I find I very rarely need to import an image into Adobe Photoshop to make really sophisticated edits; nearly all of the time, I can perform all of my post-processing using only Lightroom.

Some photographers spend a lot of time making major enhancements to their images, but I like to try to adjust my camera’s settings precisely enough that the image is made in the camera the way I envisioned it when shooting, so that I need to make only minor adjustments in post-processing.  While the exact steps of post-processing will be different for every image, here is my basic workflow (note that for the most part, I work from the top to the bottom of the adjustment tools found in the right bar):

  1. Adjust the white balance as needed.  Remember my advice to always shoot in RAW mode.  One of the advantages of RAW files is that you can adjust the white balance in post-processing, regardless of what your camera’s white balance controls were set for while you were shooting the image.  In JPG files you have much less control over the white balance after the fact.  Just choose a different preset white balance type (such as Daylight, Shade, or Flash) from Lightroom’s menu, or create a custom white balance yourself.
  2. Adjust the exposure as needed.  Use the histogram and the image preview pane to lighten or darken the whole image until it looks best.
  3. Adjust the contrast as needed.  Increasing contrast gives more separation between the darkest and lightest portions of the image, while decreasing contrast does the opposite.  I find that most images require the contrast to be increased slightly to moderately.
  4. Adjust the highlights and shadows as needed.  Highlights are the brighter parts of the image, and I find that often these need to be reduced in brightness to regain some detail that may have been lost in the camera.  Shadows are the darker parts of the image, and often these need to be made brighter to bring out lost shadow detail.  After the highlights and shadows have been adjusted, you may need to adjust the whites and blacks (very brightest and very darkest points in your image) if there are extremes of contrast present.  Most of the time I do not need to change the white and black points.
  5. Adjust the clarity as needed.  The clarity slider changes the contrast of the middle tones (neither the darker nor the lighter parts) of the image.  Usually images need a subtle increase in clarity to bring out the details in the texture.  Don’t overuse this tool or the image can become unnatural looking.
  6. Adjust the vibrance and/or saturation as needed.  Both of these sliders will change the concentration of the colors in your image, but vibrance tries to avoid changing the color of skin tones so images with people will often look more natural after increasing the vibrance than after increasing saturation.  Occasionally you might need to make adjustments to both vibrance and saturation, but usually I find a subtle increase in vibrance is sufficient.  Again, don’t overuse these tools or your image will start to look exaggerated and surreal (unless you’re going for those effects).
  7. Adjust the concentration of individual colors as needed.  Each color channel has its own slider to increase or decrease its saturation.  I don’t use these sliders often, but occasionally you may want to increase or decrease the saturation of just a single color.  For example, when shooting a landscape with sky or water, you may want to increase the blue saturation to bring out those parts of the image.
  8. If you want to work on your image in black-and-white, the color channels area is the tool I use to do the conversion from color to monochrome.  Click on the “B&W” tab above the individual color channel sliders, and then adjust the mix of how the colors are blended by increasing or decreasing each color’s slider to see how the black-and-white image looks.  I find that I often have to readjust the contrast slider at this point to get the image looking its best in black-and-white.
  9. There is some sharpening already applied to your image file by default, but if it looks too soft in the important areas, you can dial in some additional sharpening.
  10. When the image you’re editing was shot at a high ISO (sensitivity) and/or a very long shutter speed, there will likely be some noise in the image.  This can be managed somewhat in Lightroom’s noise reduction tool.
  11. Under basic lens corrections I will usually select all three of the check box items.  Lightroom knows how most camera and lens combinations work and can eliminate many of the optical glitches that would otherwise show up in the image.  Under manual lens corrections, I may need to rotate the image if the horizon wasn’t level when it was shot.
  12. All of the above adjustments affect the entire image.  After completing these adjustments, it’s time to make any selective adjustments that affect only a selected part of the image.  These selective adjustment tools can be found in the toolbar just below the histogram.
  13. Of these selective adjustment tools, the most generally useful is the cropping tool, which of course allows you to remove unwanted portions of the image on the sides, top, or bottom.  It’s always best to try to compose the image correctly in the camera, but cropping is often still needed in post-processing.
  14. The spot removal, filters, and adjustment brush are more complicated selective adjustment tools that can easily be subjects of additional posts in their own right.

These steps usually won’t all be needed for any one image.  If you have several images that were shot under similar conditions, you can select them all in the Library module and turn on Auto Sync, which then allows you to make the adjustments only once and apply them to all the selected images.  Another big time saver is creating your own presets, which are saved routines that you can call at the click of a button to automate tasks that would otherwise have taken multiple steps.  Unlike Photoshop, Lightroom was designed by Adobe specifically for photographers to use, so it is set up in such a way as to make life much easier for us to organize, edit, and share our images.

Here is the “After” version of our sample image of Copenhagen by night.  You can see how a few simple edits during post-processing can really make an image pop.

Buy this photo

I hope you’ve found this very basic introduction to the essentials of post-processing to be helpful.  Now it’s your turn.  What are your go-to techniques in editing your images?  Do you have tips and tricks that you’ve found make your life easier after you return from a trip?  Please share your thoughts in the comment box at the end of this post.

Want to read more posts about post-processing your images?  Find them all here: Posts on Post-Processing.

Total Eclipse of the Heart [Encore Publication]: Techniques for photographing solar eclipses

Dear Readers:

With the Great American Eclipse coming up in just a couple of weeks (it’s on August 21, 2017), I am republishing this popular post on how to shoot a total solar eclipse.  If you have not yet booked your trip to a spot along the path of totality, now is the time to do it!

Kyle

Prof. Jay Pasachoff and his student set up scientific gear for observing the total solar eclipse in Svalbard in 2015.  Buy this photo

If there’s a more thrilling experience anywhere on our planet than observing a total solar eclipse, I’ve not yet found it.  The experience of observing the moon slowly move in front of the sun, obscuring our view of the sun one nibble at a time until day turns into night, the temperature drops, the stars come out in the middle of the day, and the delicate corona of the sun is exposed, is like nothing else we earthlings can feel.  An eclipse is a singular event, each a bit different from any other that has ever occurred, and an exclusive event that often can be observed only from a narrow swatch of land and in very remote corners of the planet.  I’ve stood in the umbra (shadow) of the moon during three total solar eclipses thus far in my life: first in Virginia Beach in the USA when I was 7 years old, then in the mountains above Anji in China in 2009, and most recently in 2015 in Svalbard well above the Arctic Circle.  I plan to be in Salem, Oregon in the USA on August 21, 2017 when the next total solar eclipse occurs.  These events are truly life-changing, and once you’ve experienced an eclipse you will want to seek out others.

Photographing an eclipse takes all of the normal challenges of travel photography and throws a few special ones into the mix.  To start with, an eclipse can take place anywhere on the planet, and often the best location from which to view one is very remote with little or no travel infrastructure.  The eclipse I experienced in 2015 in Longyearbyen, high in the Arctic on the island of Svalbard, was a transformative event, but the extreme cold coupled with the lack of infrastructure made getting there and photographing the eclipse a special challenge.  And of course, during an eclipse the already challenging conditions are stressed even further due to the tremendous crush of visitors who rush in from all over the world to try to view the solar event.

I recommend you travel with an expert in managing the complicated logistics required to stage a successful eclipse trip.  I always go with A Classic Tours Collection (https://aclassictour.com/solar-eclipse-tours/).  Run by travel logistics guru Mark Sood and with scientific consulting from Professor Jay Pasachoff, a world expert in eclipses and the human being who has stood in the shadow of the moon more times than any other, this company has delivered an unprecedented track record of successful eclipse trips since 1980.

Special challenges in photographing a total solar eclipse, like this one in Svalbard in 2015, include remoteness, lack of infrastructure, extreme conditions, the risk of poor weather, and the need for specialized photographic gear.  Go with an expert or risk missing the action.  Buy this photo

Assuming you are able to get all the right gear to the best possible location to observe the eclipse, and then the weather cooperates, the actual technique required to capture remarkable images of this phenomenal event is fairly straightforward.  Here’s what you need to do:

Gather the right gear.  You will need at least one (and I prefer to have two) DSLR or mirrorless ILC camera bodies with a long telephoto lens or two.  I use a Nikon D810 with a Sigma 150-500mm super-telephoto zoom lens.  For each lens you will need a specialized solar filter to block 99.999% of the sun’s light to enable you to shoot the sun safely during the partial stages of the eclipse.  The solar filter blocks much more of the sun’s light than a standard photographer’s neutral density filter, so don’t try to find this item at your local camera shop.  Instead, you will need to order it from a specialized astronomy company such as Thousand Oaks Optical (http://www.thousandoaksoptical.com/solar.html).  Be sure to order a black polymer threaded camera filter in the proper diameter for your specific lens.  Without a properly fitted solar filter on each lens you plan to shoot with, it is not safe for your eyes or for your camera’s sensor to attempt to photograph a solar eclipse.  You will also need a heavy-duty professional tripod with a good ball head and mounting plate to hold your camera and lens steady during the eclipse.  Also be sure to pack a remote shutter release with extra batteries (if required), the tripod collar that came with your lens (if included), a mini flashlight for checking your camera’s settings, extra memory cards, and extra batteries and chargers for your camera.

Super-telephoto zoom lens with tripod mounting collar.  Don’t forget to order a solar filter to fit your lens(es).


Heavy-duty professional tripod.


Remote shutter release.

Test your gear.  Before the trip, test your full setup at home by shooting the sun with your solar filter on the lens, and by shooting the full moon without the solar filter.  These two scenarios will allow you to test your gear in conditions similar to the partial stages of the eclipse and to totality, respectively.

Prepare your gear the evening before the eclipse.  Charge all batteries, format all memory cards, make all camera and lens settings (per my instructions below), and check all your equipment.  Remove the UV filter you ordinarily keep on your lens(es), because they will interfere with the solar filter you will use during the partial stages.  On eclipse day, have in your pocket your flashlight, extra camera batteries, extra remote batteries, and extra memory cards.  It will be dark during totality and you will be excited, so best to have everything well planned in advance and within easy reach on eclipse day.

Configure your camera’s and lenses’ settings in advance of the eclipse.  Shoot in RAW mode (or RAW + JPEG mode if you must have JPEG versions of  your images) using the highest quality setting available on your camera.  I recommend using an ISO setting of 400, and be sure to turn your camera’s Auto ISO setting off.  The exposure changes constantly throughout the eclipse, so I do not recommend manual exposure mode; instead, choose aperture priority mode with the aperture set at f/11.  You may want to choose highlight-weighted metering if your camera has this option; otherwise, select center-weighted metering.  Choose single-frame shooting mode.  I recommend using exposure bracketing to shoot bursts of about 7 frames, each 1 stop (or even 1.3 stops) different from the previous one, so as to capture more of the huge dynamic range in a solar eclipse; this is especially important to do during totality.  Turn off vibration reduction (also referred to as image stabilization), as your camera will be on a sturdy tripod throughout the eclipse.  Set your focus mode to manual, because autofocus will not work during or near totality.  Tape your lens’s focus ring to infinity to be sure it won’t move during the eclipse.  Take a deep breath.  You’re almost ready for the eclipse.

Set everything up at the eclipse viewing site.  Place your camera on the heavy-duty tripod and install your remote control.  Remove your regular UV filter and attach your special solar filter.  As the first contact between sun and moon occurs, start to shoot.  Remember to shoot in bursts of 7 (whatever number of exposure levels you have selected) if you have turned on exposure bracketing.  Due to the rotation of the earth, you will have to recenter the sun in your viewfinder periodically (unless you are shooting through a telescope with an equatorial mount).

This image shows the early partial stages of the Svalbard total solar eclipse.  Shoot periodically during all the partial stages, and remember to reposition your shooting angle so the sun remains in the center of your field of view.  Buy this photo

Remove your solar filter only during the period of totality.  When the diamond ring effect signals the start of totality, and the world around you is suddenly plunged into darkness, quickly take off your lens’s solar filter.  You won’t need it during totality.  The brightness of the sun during totality is similar to that of the full moon, so viewing and photographing the sun during totality will not be dangerous.  This is the most exciting time, and it will last for only about 1-4 minutes, so enjoy the spectacle of the sun’s corona revealed!  Remember to spend some of the time just looking and not shooting.  This is an experience you will want to remember not only through your camera!

For the brief but exhilarating period of totality, remove your solar filter.  This image captures the diamond ring effect that ushers in the period of totality.  The sun’s delicate corona can be seen around the edge of the photosphere.  Buy this photo

Put your solar filter back on after totality.  The partial stages that follow the period of totality, just like the partial stages that came before totality, are not safe to view or photograph without the special solar filter.  Keep shooting those later partial stages because you will want a complete record of the eclipse to show a compelling narrative and to create montages of the images.

Shoot some landscapes and people images, too.  Don’t forget to use a second camera–either a second DSLR or mirrorless ILC body you brought for the occasion or your smartphone’s camera–for landscape and people shots during the eclipse.  You don’t want all of your images to be close-up portraits of the sun and moon only.  You will need a solar filter on the second camera, too, if you plan to include the sun itself in these shots.

Remember to shoot some images, with a second camera, of yourself and your travel companions during the eclipse.  Here’s a shot of my family standing in the umbra during totality at the China eclipse of 2009.  Buy this photo

Return all settings to normal after the eclipse.  You will have made quite a few special adjustments in order to capture the eclipse properly.  Don’t forget to restore your usual settings after the eclipse has ended.

Get creative with your eclipse images once you return home.  There are many ways to compile and share your images to give the world a sense of the thrill you experienced while in the shadow of the moon.

Once home from the eclipse trip, get creative about how to share your experience.  Here I have put together a montage of some of my favorite images from each stage of the Svalbard eclipse.  Using Photoshop, I created a composite image showing the sequence of stages from partial to total and back again.  Buy this photo

This image is a composite of three bracketed exposures combined using High Dynamic Range (HDR) software.  Without HDR techniques, it is impossible to capture in a single image the huge variation in brightness between the sun’s inner corona and outer corona during totality. Buy this photo 

Have you experienced a total solar eclipse?  Photographed one?  Please share your tips and tricks.

Want to read more posts about photographic techniques?  Find them all here: Posts on Techniques.

The Best Auto Mode You’ve Never Heard Of [Encore Publication]: What is manual mode with auto ISO, and when should you use it?

I’ve written often in “To Travel Hopefully” about the importance of learning to go beyond your camera’s full “Auto Mode,” in order to be able to control the exposure of your images.  Frequently I like to shoot in full “Manual Mode” so as to be able to choose both my shutter speed and my aperture for full creative control.  But in rapidly changing lighting conditions, it is a real challenge to stay in full manual mode, and it’s a big help to allow the camera’s exposure programs to choose the best overall exposure from image to image.  There are a few ways to do this.  In between the full auto mode and full manual control, there are two common semi-automatic exposure program modes that most photographers are aware of, namely Aperture Priority and Shutter Priority modes.  In today’s post I introduce another exposure mode that few photographers are aware of, but that can give the best of both worlds: automatic exposure setting while retaining full manual control over both aperture and shutter speed.  This exposure mode is called “Manual Mode with Auto ISO.”

It’s important to be able to control shutter speed because that’s the mechanism by which we can freeze action or allow it to blur for creative effect.  It’s equally important to retain control over aperture because this is the means by which we can increase depth-of-field to keep everything in focus or decrease depth-of-field to soften the background.  But there’s a third side to the exposure triangle beyond shutter speed and aperture.  This third parameter is our ISO setting.  Several years ago, most camera sensors weren’t very good at handling noise at very high ISO settings, so we took a risk of ending up with very noisy images if we used our camera’s Auto ISO setting.  Not so today.  Many modern sensors are quite adept at capturing nearly noiseless images at ISO settings up to at least 3200 and often to 6400 or even a lot higher.  So the stigma that “serious” photographers have historically attached to using the Auto ISO setting should really be laid to rest.

That happy development allows us to use a mode called “Manual Mode with Auto ISO,” in which we set the camera’s exposure program to “M” or full manual mode but also enable the camera’s Auto ISO setting.  By doing so we can preserve full control over both our shutter speed and our aperture, but also allow the camera to choose the best ISO setting to give a good overall exposure as lighting conditions change.  Making this mode even more appealing, most cameras let us select the highest ISO setting (say, 6400) that we’re willing to allow.  So if the lighting level gets sufficiently dim, the ISO won’t go so high as to introduce a lot of noise into the image; instead, we just select a slower shutter speed and/or a wider aperture.

A good example of when it makes sense to use Manual Mode with Auto ISO is when shooting a street fair or an outdoor sporting event.  In these situations the lighting can change quickly depending on the cloud cover, what direction we’re shooting, and the subject and type of image we’re making.  The following three images were all shot at last year’s Carnaval San Francisco, a big street festival and parade.  It was a sunny day, but much of the parade route was in open shade, and depending on the subject there were times when I wanted to use some fill flash.  To freeze the motion, I needed a fast shutter speed, and to isolate my main subject I usually wanted a wide aperture.  Using Manual Mode, I could choose both of these settings.  But because the light conditions were ever-changing, coupling the use of Auto ISO with Manual Mode allowed the camera to adapt the exposure to the light levels for each image.

Full direct sunlight on the main subject made for very bright lighting.  Buy this photo

Open shade with a touch of fill flash required slightly different settings.  Buy this photo

A close-up portrait made in cross-lighting needed yet another exposure level.  Buy this photo

The next time you’re shooting in a shifting lighting environment yet also want to preserve full control over both shutter speed and aperture, try Manual Mode with Auto ISO.  It’s not covered in most cameras’ instruction manuals, but it can be a big problem-solver in many situations.

Do you use Manual Mode with Auto ISO to control exposure?  Do you have other tips for how to adapt to changing lighting conditions without handing over the creative control to your camera?  Please share your experiences here.

Want to read other posts about photographic techniques?  Find them all here: Posts on Techniques.


Focus on Chile and Argentina [Encore Publication]: Rugged mountain landscapes and distinctive cultural experiences abound

Our wonderful 3.5-week adventure took us from Santiago, where we visited our older daughter, to fabled Easter Island, sophisticated Buenos Aires, the mystical island of Chiloe, and then through much of Southern Patagonia.  For much of this itinerary we were traveling with a local leader and a small group of fellow travelers on a trip operated by Overseas Adventure Travel (OAT).  The knowledge of our local trip leader coupled with the small group size allowed us to travel to largely untouristed areas and to engage in authentic cultural interactions that would not have been easy to set up on our own and would have been impractical to include on larger group trips.  Such a format offers amazing opportunities for photographers, as it provides access to an array of experiences beyond the “postcard-type” shots.  From home-hosted meals to wildlife encounters to hiking across glaciers and on the slopes of a volcano, this trip packed a lot of memorable moments–and images–into just a few weeks’ time.

Easter Island is a small and extremely remote island, accessible via daily flights from Santiago.  It is, of course, famed for the monolithic human figures carved by the Rapa Nui people centuries ago, called moai, that are scattered across the island.  But there is a lot more to Easter Island than the moai, including a distinctive Polynesian culture and a wealth of natural beauty.

When photographing iconic sites like this grouping of moai on Easter Island, look for a different perspective.  Here, I have framed the image from an unusual vantage point, shooting with a telephoto lens to compress the moai so that they appear closer together and more imposing than they would if framed from directly in front.   Buy this photo on my website

From Easter Island we traveled to Argentina’s capital city of Buenos Aires.  This city has a high-energy feel, offers a huge array of food specialties, and is graced with stately European style avenues and architecture.


Buenos Aires’ colorful and historic barrio (neighborhood) of La Boca is the birthplace of the tango.  To give a sense of the dance’s motion, I shot with a slightly slower shutter speed.  The rich colors of La Boca can be brought out in post-processing with subtle adjustments to the vibrance and/or saturation tools in image editing software such as Lightroom.  Buy this photo on my website

A stay in the Alpine style village of San Carlos de Bariloche included fascinating interactions with Hans, who as a German boy growing up in Bariloche uncovered his father’s Nazi past and wrote several scholarly books about Nazis living in Argentina; and with Christina, a Mapuche Indian grandmother, civil rights activist, and jewelry maker.  We then crossed overland toward the border with Chile, stopping en route for a home-hosted lunch of grilled lamb and for some horseback ridingon a family estancia (ranch).

Chango, the family patriarch, saddles up the horses for a ranch ride.  An environmental portrait includes not only the person who is the subject of the portrait, but also enough of the surroundings to give a deeper sense of who the person is.  A classic portrait lens would also work nicely for a shot like this one, but to emphasize the relationship between man and horse, and to give some separation between the subject and the background, I chose a longer telephoto lens.  Buy this photo on my website


An otherworldly sight: a lenticular cloud forms on the summit of Osorno Volcano as we were hiking on the slopes.  To capture high-contrast scenes like this one, it often helps to underexpose by about one stop to preserve the detail in the highlights.  Then the shadow detail can be brought back later during post-processing. Buy this photo on my website

The same Osorno Volcano viewed from Vicente Perez Rosales National Park.  To blur the water, I placed the camera on a steady tripod and used a longer shutter speed.  Attaching a neutral density filter to the lens can help by reducing the amount of light reaching the camera’s sensor, thus allowing a longer shutter speed even in bright daylight. Buy this photo on my website

A ferry crossing from mainland Chile brought us to the island of Chiloe for an overnight stay.  Chiloe exudes a strong sense of its mystical past and is characterized by colorful houses rising on stilts out of the water.

Characteristic brightly colored Chilote houses built on stilts.  Choose a vantage point from which the houses can be framed in a pleasing manner, shoot with a wide angle lens to include more of the houses, and add a bit of vibrance in post-processing to bring out the saturated colors. Buy this photo on my website

The island of Chiloe includes a fascinating bird preserve reachable by small boat.  Here is a penguin couple out strolling in their formal wear.  To stabilize the camera and long telephoto lens while shooting from a heavily rocking small boat, use a fast shutter speed (choosing a higher ISO can help), turn on vibration reduction if your lens or camera offers it, and release the shutter at the instant when the boat reaches the top of its cycle of rocking.  It’s helpful to use a monopod if you have one (I didn’t) and to shoot a continuous burst of images so that you are more likely to get a good sharp one. Buy this photo on my website

After traveling south all the way to the Strait of Magellan (the farthest south I have ever stood, with Antarctica the only land mass below it), we continued northwest until we reached Torres del Paine National Park, any photographer’s dream destination.  The photographic possibilities here are endless, with rugged mountains meeting brilliant blue glaciers and clear lakes.  We had the opportunity to view this breathtaking beauty from various hikes and by boat.

Blue ice on Lago Grey’s glacier imitates the mountain peaks soaring behind.  I used a polarizing filter on the lens to bring out the intense blues in the glacier and sky, but had to be careful not to remove too much of the reflection in the water of the lake. Buy this photo on my website

Alpenglow lights the peaks behind Lago Grey and its glacier.  To make this image, I had to forego much of a really good dinner by shooting through the mealtime out on the deck of our lodge.  With the camera on a steady tripod, I shot a series of images using different exposures, a process known as bracketing.  Later, these shots can be blended together using the high dynamic range (HDR) tools in software such as Lightroom or Photoshop. Buy this photo on my website

Heading out of Torres del Paine through the heart of Patagonia, our adventure was not yet over.  We still had another national park (Los Glacieres) to visit on the Argentinian side before returning to Buenos Aires for our farewell dinner and our flights back home.

Patagonian Paradise.  Don’t forget to include yourself and your traveling companions in some of your images.  This one, made as we headed out of Torres del Paine National Park, made a great holiday card. Buy this photo on my website

Have you visited Patagonia, the capital cities of Argentina and Chile, Easter Island, or Chiloe Island?  What did you find most memorable?  Please add your suggestions for places to visit or subjects to shoot.  Just enter your thoughts in the comment box.

Want to read more posts about travel photography destinations?  Find them all here: Posts on Destinations.


A Good Camera Store is Hard to Find [Encore Publication]: Can anything be done to prevent the extinction of pro camera stores?

Dear Readers:

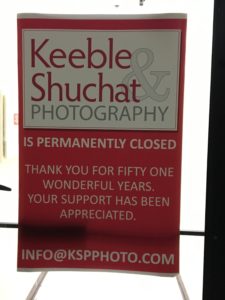
I’m republishing this post because I recently had an experience that reminded me of what is lost when we have no good local camera stores in our neighborhoods.  Two weeks ago, during a shoot for a local theater company, I found myself unable to remove the remote flash cable from my camera’s hot shoe.  I tried for hours to find a way to get it off, but to no avail.  It seems the locking pin on the flash cord’s hot shoe contact had broken and was stuck in place.  Since our local neighborhood camera store (Keeble & Shuchat; read on to get the full story) had closed, I brought the camera to the next best store in my area.  They had no trained repair technicians, so they had to package up the camera and ship it to Nikon.  Two weeks later, I just received the estimate: $350 to remove the broken accessory from my camera.  And they may not be able to return to me in time for a critical travel shoot I have scheduled in three weeks’ time, for which I will need both of my Nikon D810 bodies.  I’m confident that good ol’ K&S could have done this repair inexpensively and quickly in-house.  There is a great deal that is lost when our specialized and passionate local merchants are forced out of business.  Please read on for more!

Kyle

img_3689

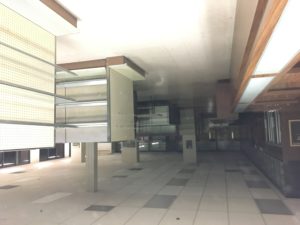
A few months ago, the doors closed permanently at one of the San Francisco Bay Area’s few remaining pro camera shops, Keeble & Shuchat of Palo Alto.  After 51 years of providing sales of a tremendous range of fairly priced photographic gear, friendly service, lifesaving repairs, and informative classes, this local institution was forced to shut down.  The story is a familiar one, and extends beyond the San Francisco Bay Area and beyond the photography sector.  Local brick-and-mortar stores nationwide and in all sectors of the retail economy are being forced out of business due to severe price competition with online and big-box retailers and rising commercial real estate prices.  Over the last few years, my neighborhood has lost the last of its independent coffee shops, bookstores, and movie theaters, and it now seems that camera stores oriented toward enthusiast and professional photographers are also going the way of the dodo bird.

I’m sad about the closure of Keeble & Schuchat because there really is no substitute store within an hour’s drive of my house, and because I knew several of the staff there and don’t know what they’ll do next.  But at the same time, I share some of the blame over their closing.  I was a regular in their store, where I browsed their range of new gear and asked all manner of questions of the friendly and helpful staff.  I made it a point to buy a few doodads at K&S, and I attended paid classes there from time to time.  I depended on them for the repair and maintenance of most of my gear.

But whenever it came time to drop some big bucks on a new pro camera or lens, guess what?  I always purchased from a big online retailer like Amazon or B&H.  I’m sure many other serious photographers behave similarly.  It’s hard to justify paying a 10-20% price premium as well as the local 9.25% sales tax in my county when we’re already stretching to afford the gear in the first place.  It’s very tempting to save so much money with just a few clicks in our web browser.  But something significant is lost when we drive away the local experts who sell books, cameras, or cappuccinos in our neighborhoods.  We lose the local merchant’s accumulated knowledge and the passion for the category we love.  For us photographers, that means there soon won’t be many places we can go locally to chat about the merits or drawbacks of some new piece of gear, to repair or maintain our existing gear, or to learn from people who share our passion for image-making.

When my main portrait lens had some dirt stuck between the inner elements that was causing a speck to appear on all my images, and I observed this on the day before a major portrait shoot for two clients, I took the lens to K&S and their tech diagnosed and repaired it while I waited.  He charged me the whopping sum of $10 for his efforts.  Why?  Because he also was a working photographer and he knew the importance of getting this problem solved quickly and without impacting the clients.  We may save a few dollars by buying our gear online, but what is lost by the mass shift from local stores to e-commerce sites?  I’d better be thinking about what I’m going to do the next time I need an urgent repair done, because there is no longer anywhere reliable to go within an hour’s drive of my home.

How about you?  Please share your thoughts on the value or lack thereof of having experienced, passionate tradespeople in our neighborhoods?  Is it worth spending extra cash to ensure we preserve access to these local stores?  Or do you have a different viewpoint?

img_3690

Luck Favors the Prepared [Encore Publication]: Tools for planning your shot

It was Louis Pasteur who said, “Fortune favors the prepared mind.”  We usually hear the quote paraphrased as, “Luck favors the prepared.”  For travel photographers, there is often a great deal of luck involved in capturing a truly great image, but there are some very useful tools that we can use to help us plan to be in the right place at the right time with the right gear.  Let’s look at just a few of my favorites.

I’ll start with a quick review of the most obvious resources.  I would never plan an hour-long photo shoot, let alone a month-long trip to a far-flung travel destination, without doing some research.  What are the must-see locations, and what dates and times of day are perfect for each one?  What are the events or activities that most authentically represent the locations I am visiting?  Is there a livestock market, a street festival, or a religious celebration taking place while I’m in the region?  How can I build an itinerary that best incorporates all of these locations?  Great resources for this type of research include guidebooks (online and hardcopy), online review sites such as Trip Advisor and Yelp, mapping and navigation apps (Google Maps is still my all-around favorite, but several others have their own advantages), and local weather sites.  I like to build my itinerary by customizing an online map to show all of the locations I’d like to visit, then creating a routing that links the locations in the proper order.  If travel by air, rail, bus, or boat is involved, I research those schedules and fares to determine the best way to get from one place to the next.  Airline consolidation sites such as Orbitz can be quite helpful for finding the best flights at the best prices.  If the itinerary has been pre-planned by a travel company, then I will still do most of this background research to better understand the locations we’ll be visiting.

Once I know where I’ll be going and what events I plan to shoot, I develop a shot list.  Some photographers craft very detailed and specific shot lists, but I like to keep it quite flexible and informal, often simply jotting down my ideas in the calendar event on my phone that is associated with each planned shoot.  After all, if I adhere too closely to a shot list, I will just end up with the same images that hundreds or thousands of other visitors have captured after doing the same research.  Serendipity and the artist’s eye have their place in travel photography, too.  The research phase can also inform me as to what clothing, gear, and other essentials I should bring to each location.

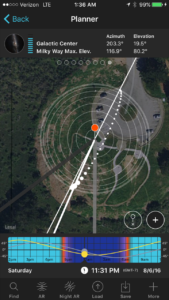
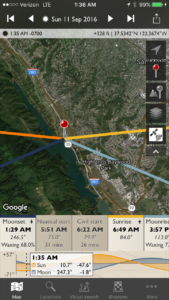
Now I’d like to introduce three smartphone apps that I consider indispensable for travel photography.  First, there’s Photo Pills, an app that incorporates several essential tools into one package.  I use Photo Pills for planning shots where I need to know how to get all the elements, including location, date, and time of day, to come together.  For example, during the Perseid Meteor Shower, I wanted to find a dark sky location with a nice foreground and a view toward the galactic core of our Milky Way.  This way, I could capture images including the meteor shower, the Milky Way, and the pretty landscape in the foreground.  I had a location in mind, a beautiful spot where there isn’t too much light pollution and with a gorgeous view over a reservoir and the Santa Cruz Mountains.  The Planner tool in Photo Pills allowed me to visualize the foreground as viewed by my phone’s camera, superimposed against the Milky Way as it would appear on different days and times of day.  I planned the shot for a certain time on each of several consecutive days, confirmed that the Milky Way would be rising in the desired direction and that the nearly full moon would have already set, and then waited for clear weather.  The first night of the meteor shower was cloudy, but the second night was the charm, and I was able to capture this striking image.
Using the Photo Pills app on my smartphone, I was able to plan in advance for a location, date, and time that would maximize the chances of capturing the Perseid Meteor Shower and Milky Way over the lovely Crystal Springs Reservoir.  Buy this photo

Here’s a screenshot of the Planner tool in Photo Pills that I used to prepare for this shoot.

img_3452

The Photo Pills app has a number of tools to help plan and execute your shots.

Another useful app for planning the best locations, dates, and times for your shoots is TPE (The Photographer’s Ephemeris).  I find this tool to be especially helpful for visualizing the path of the sun and moon across the field of view for any location I select.  This app is very powerful, and I have only scratched the surface of what it can do to predict and prepare for photo opportunities.

img_3453

The Photographer’s Ephemeris (TPE) is a powerful tool for planning any outdoor photo shoots.

A final app I will mention here is called Easy Release.  Sometimes (read this post for details about model releases), we need a model release when a person or several people are clearly identifiable in a photo.  I know some photographers who carry hardcopy model releases with them wherever they travel, but I find this to be cumbersome and impractical when on the road shooting.  Instead, I use Easy Release on my phone, so I’m always ready to quickly prepare a release for a new friend to sign when they appear in my images.  Even though the app has the ability to translate the text of the release into several languages, there are situations in which it isn’t reasonable to try to explain to a local person what’s in the release and why it’s required.  Furthermore, I consider it to be exploitative if the person can’t reasonably be expected to understand what’s in the document or why they should be signing it.  But there are times when having immediate access to a model release that can be prepared, signed, and stored right on my phone is a big advantage.

img_3454

Easy Release is a convenient tool for creating, signing, sharing, and storing model releases when a person is clearly identifiable in photos.

With proper planning using readily available resources and various apps including the ones I’ve presented here, we can be better prepared to maximize our chances of capturing memorable images.  Happy shooting, and remember that luck favors the prepared!

Do you have a favorite tool you use to plan for your photo adventures?  How have you used this tool to get your shot?  Please share your experiences here.

Want to read more posts about tools for planning your travel photography?  Find them all here: Posts on Planning.

“Building” Your Portfolio [Encore Publication]: Architecture gives local flavor and makes a great subject for your photography

Travel photography is exciting in large part because it encompasses all types of subjects.  In a single day while traveling, we may have the opportunity to shoot landscapes of the scenery around us, portraits of the people we meet, wildlife images of the fauna in the region, night images after the sun goes down, and photos of the local architecture.  I’ve already covered how to shoot most of these subjects in previous posts.  Today we’ll focus on how to make compelling images of architecture, which includes both the exteriors and interiors of the buildings we encounter.

For architectural photography, it is essential to carry a good wide-angle lens.  While I’m a big fan of prime (fixed focal-length) lenses, architecture is one subject where a zoom lens comes in very handy.  That’s because it can be difficult to change our vantage point when shooting large buildings in crowded urban environments.  And when photographing buildings, the widest end of the zoom range should be quite wide, indeed.  I recommend a lens that can zoom out to 16mm (for full-frame cameras) or even wider.  The lens doesn’t have to be particularly fast, because buildings do not tend to move quickly and we can use a tripod to steady the camera for longer exposure times, but it must be of very high optical quality for architecture photography.  Cheaper wide-angle lenses are prone to several kinds of distortion that can lend an unprofessional appearance to photos of buildings.  I recommend ponying up for a good professional quality wide-angle zoom lens with a range of somewhere around 16-35mm, or even a fast 14-24mm lens if you have the budget for it.

I use the Nikon 16-35mm f/4 lens for architecture shoots.  It’s got great image quality and is very solid and well built, but at f/4 it is not super fast, and it is rather heavy and bulky.

When shooting the exterior of a building with a wide-angle lens, we need to make an effort not to distort the lines of the building or its surroundings.  A wide-angle lens, especially when pointed upward, has the tendency to exaggerate features so that parallel lines appear to be divergent.  If you have the option of moving to a higher vantage point so you can shoot parallel to the ground instead of upward at the subject, this distortion can be greatly reduced.  But for those frequent situations when you have no choice but to look up at a building from the street level, try to zoom out so that the entire subject can be included in the frame without pointing the lens too far upward.  This image of a stately old building in Buenos Aires was made with the camera pointed nearly parallel to the ground so that even though a very wide focal length was required to fit the building in the frame, there is relatively little distortion of the perspective.
When using a wide-angle lens from street level, try to keep the camera pointed parallel to the ground to avoid severe distortion of the building’s lines.  Buy this photo

In contrast, the next image was shot from a vantage point at the same elevation as the subject, the world’s northernmost church.  I climbed a snowy hill in front of Svalbard’s chapel to attain the same height as the center of the building, so that I could hold the camera exactly level to the ground and still include equal amounts of the church above and below the center of the image.  This minimized the distortion and resulted in a more natural rendering of this fascinating building.

To make this photo of Svalbard’s church, I chose a vantage point at the same elevation as the midpoint of the building, minimizing distortion.  Buy this photo

I like to seek interesting colors and recurring patterns in architecture.  The miners’ houses in Svalbard made an intriguing subject because they were lined up in an even line of identical structures, but they varied in color.  To make the image more compelling, I moved across the street and shot with a moderate telephoto lens (65mm) to compress the scene and make the houses appear closer together.  I based the exposure on the light reflected from the paint on the houses, so that the snow in front of and behind the buildings was nearly blown out.  In post-processing I increased the vibrance slightly to bring out the bold colors in this scene.

Look for architectural scenes featuring interesting patterns and colors, such as this view of miners’ cottages in Svalbard surrounded by snow.  Buy this photo

Sometimes the most effective images of architecture hone in on the details rather than including the whole of the building.  I’m always on the lookout for a characteristic or unusual feature of the buildings around me. In New Orleans’s French Quarter, I framed this shot of a lovely wrought iron balcony using a long telephoto lens so that only this one feature of the building was included.

Zoom in on just the most characteristic or compelling features of a building to make an arresting image of the details rather than the whole building.  Buy this photo

Shooting interiors of buildings poses some of the same challenges as shooting their exteriors.  In particular, since a wide-angle lens is most often required and is frequently pointed upward, it is important to look at the edges of the viewfinder to try to minimize distortion of the building’s lines.  To make this wide-angle image of the inside of a grand mosque in Istanbul, I kept the camera level using a tripod and the camera’s virtual horizon function.  There was still a good deal of distortion around the edges of the upper part of the scene, but I was able to control this to some degree by adjusting the images perspective using Lightroom software during post-processing.

This image of the interior of a mosque in Istanbul shows some distortion, but I was able to keep it under control by shooting level to the floor and adjusting the vertical lines using post-processing software.  Buy this photo

Do you have tips for shooting the interiors and exteriors of buildings?  Please share them here.

Want to read more posts about how to capture amazing images while traveling?  Find them all here: Posts on What to Shoot.

Decent Exposure [Encore Publication]: Mastering exposure is key to getting great images

Of all the primary elements a photographer controls–composition, focus, the moment the shutter is released, and of course the choice of the subject–none is more critical to making a great image than setting a proper exposure.  Some corrections to a poorly exposed image can be made in post-processing, and there are occasionally good artistic reasons to override the norms of exposure in order to evoke a certain mood in an image by making it darker or brighter than usual, but before we can effectively make these exceptional choices it is necessary to learn the basics of setting an appropriate exposure.

Let’s begin by defining exposure and the elements that comprise it.  Simply put, exposure refers to the amount of light that reaches the camera’s sensor and therefore how light or dark the resulting image will appear.  Four components together determine the exposure: 1) the brightness of the light reflecting off the subject and reaching the front of the lens, 2) the aperture setting on the lens (how wide or narrow is the opening of the lens), 3) the shutter speed setting (how long is the camera’s shutter open to allow light to strike the sensor), and 4) the sensitivity setting of the camera’s sensor.  We don’t always have control over the first component, but the other three are within our control using our camera’s settings.

Many photographers simply set their camera on Auto mode and let the camera’s built-in meter make its best guess as to how the image should be exposed.  That method can work well under certain conditions, but it is highly prone to errors.  For example, if your main subject is strongly backlit, the camera’s meter will expose for the average brightness in the scene and will underexpose the subject.  This is why so often we see underexposed photos of people standing outside in bright sunlight.

Although I compensated for the strong backlighting in this image of a Tibetan family enjoying a midday picnic, their faces are still quite shadowy, indicating a bit brighter exposure would have been better still.  Buy this photo

Fortunately, there are several easy methods to achieve a correct exposure even under challenging lighting conditions.  Here are a few that I use frequently:

  1. Set the camera’s metering mode to Spot Metering: By default most cameras’ metering systems use a sophisticated pattern-matching algorithm that measures how bright or dark each area of the image is and makes its best guess about a workable exposure based on similar scenes in the camera’s database.  Most cameras allow you to select a simpler metering mode called Spot Metering, that just measures the light at the central point in the image or another point that you select.  If you choose Spot Metering and select the measuring point to be right where your main subject is, you should get just the right exposure.
  2. Dial in some exposure compensation: Most cameras let you override the meter’s exposure setting by dialing in a compensation setting to lighten or darken the image.  If your subject is backlit, you will likely want to increase the exposure by one to two stops (each “stop” of additional exposure represents a doubling of the amount of light reaching the sensor).  The camera’s display should show something like “+1 EV” to alert you that you’ve dialed in 1 extra stop of exposure, and the number changes as you change the compensation setting.  Just be sure to set the exposure compensation back to zero when you’re done using it.
  3. Go fully manual: To gain complete control over your camera’s exposure settings, choose the meter’s Manual mode.  Then you can change all three exposure elements (shutter speed, aperture, and ISO) until the image appears properly exposed when you review it on your camera’s display.
  4. Use flash to increase the lighting on your main subject: One good way to achieve proper exposure with a backlit subject is to increase lighting on the subject itself, so that there is no longer such a difference in brightness between the subject and the background.  Your camera’s built-in flash may be strong enough to pull off this trick, but it often helps to have a more powerful flash unit with you.  There are some other reasons why you may not want to use flash as a main source of light on your subject, so this method should be used sparingly.  A reflector can be used instead of flash to reflect some of the sun’s light onto the front of your subject.

For this photo shoot with a musician friend, I shot into the light so she wouldn’t have to squint into the sun and also so that we’d have a beautiful rim light from the sun around her hair.  To pull this off, I used manual mode and selected the proper exposure for her face.  I employed a reflector to bounce some sunlight back onto her face and trumpet.  [Client image not for sale.]

Similar methods can be used for other challenging lighting conditions besides backlighting.  If the subject is a brighter or darker color than the “neutral gray” your camera’s meter uses for a standard, then you need to dial in more or less exposure as appropriate.  My black cat Dragonfly, for example, requires an especially dark exposure to override the meter from thinking he’s a gray cat and choosing too bright an exposure.  Similarly, a white polar bear will need additional exposure to stop the meter from underexposing what it assumes to be a gray bear.

When photographing a black subject, reduce the exposure to compensate for the light meter’s mistaken assumption that the subject is a neutral gray color.  Buy this photo

Whatever method you use to choose your exposure, be sure to take a look at the resulting image using your camera’s monitor.  Does the main subject appear to be properly exposed, or is it still too dark or perhaps too bright?  If your camera offers a histogram display, learn how it works and use it to check your exposure in tricky lighting conditions.  I’ll write a future post specifically about the histogram, as it is a very useful and often overlooked feature.

With some attention to the exposure of your images and use of some of the techniques described here, you can achieve a correctly exposed image nearly all of the time.  After mastering the essentials of exposure, you will have more keepers and fewer images in the virtual trash can, and you can even begin to break the rules for artistic effect.

Want to see more posts on photographic techniques?  You can find them all here: Posts on Techniques.

What lighting situations do you find the trickiest?  What techniques do you use to ensure properly exposed images?  Please share your thoughts in the comments box.

Focus on Tanzania [Encore Publication]: Every wildlife photographer’s dream destination

There are very few destinations more exciting to us travel photographers than East Africa.  My family’s 2.5-week trip to Tanzania, with a brief stroll into Kenya, was a dream come true.  Operated by Overseas Adventure Travel, the adventure began with a pre-trip excursion to the Kilimanjaro region, then moved on to the regional capital city of Arusha and to safaris in Tarangire National Park, Olduvai Gorge, Serengeti National Park, and Ngorongoro Crater.  It goes without saying that the wildlife photography in Tanzania is second-to-none, but we found the authentic cultural interactions with the nomadic Maasai and other local people to be a highlight of the trip.

The usually shy Mount Kilimanjaro made a brief appearance as we awaited sunset near our lodge.  The glaciers that adorn this iconic landform are melting quickly as a result of climate change, so this is a place to visit soon.  I used a polarizing filter on a medium telephoto lens to reduce the haze and bring out the texture of the mountain, and I framed the shot through some branches near our campfire.

Mount Kilimanjaro lit by alpenglow.  Buy this photo

On a game drive in the Kilimanjaro region, we encountered this lovely lilac-breasted roller.  To capture this image, I used a long telephoto lens (500mm, which was equivalent to 750mm when fitted on this camera) and stabilized it on a beanbag that I rested on the top of the safari vehicle.  This is a very important accessory to bring with you on a safari, as you cannot fit a tripod in a safari vehicle and a monopod is awkward.  While the beanbag that I use is no longer available, this one is well reviewed by photographers and represents a good value.


Lilac breasted roller captured with a 500mm lens in the Kilimanjaro region.  Buy this photo

The cultural learning and interaction was a big part of this trip.  Here my older daughter is greeted by a young Maasai woman as we arrived at their settlement.  The Maasai are nomadic herders, usually moving from place to place to pasture their cattle throughout the seasons of the year.  It was a fascinating opportunity to meet them and learn about their way of life, and to make portraits with the Maasai people we met.

A warm welcome as we arrived at the first of two Maasai villages visited during our trip.  Buy this photo

I had a fun interaction with this young Maasai boy by showing him the images as I shot his portrait in various places around the village.  He had not seen many photos of himself.  Here he is posing in front of his family’s house.

A Maasai boy by his family’s shelter.  Buy this photo

Our visit to the bustling city of Arusha was intended to be a staging point for the game viewing excursions to follow, but we found Arusha to be a very interesting cultural crossroads.  Here is a shot of what passes for a towing service in the area, a broken-down van being pulled to a service station on top of a donkey cart.  Always be on the lookout for serendipitous moments like this one when you travel!

A street scene in Arusha, the region’s largest city.  Buy this photo

Along the road from Arusha to Tarangire National Park, we stopped to chat with a group of several young Maasai men.  They had recently undergone the ritual circumcision ceremony that marked an important milestone on their journey to become warriors.  For the next six months they would wear the special face paint while they underwent their final training.  Our local guide was very helpful in facilitating our conversation.  Through him, I asked this man’s permission to make a portrait.  This was shot with a moderate telephoto lens and a wide aperture to soften the background.

A young man nears the end of his journey to becoming a Maasai warrior.  Buy this photo

Tarangire National Park is a gem of a nature preserve that is often overlooked by visitors to Tanzania.  Be sure to visit Tarangire if at all possible!  Here’s a shot of a baby baboon in a group of baboons we were observing there.  When shooting backlit wildlife, use your camera’s spot metering mode with the focus point on the animal, so your camera won’t underexpose the main subject.

A playful baby baboon in Tarangire National Park.  Buy this photo

We stopped for a visit to a second Maasai settlement, very different from our first Maasai encounter.  This second group of Maasai were only semi-nomadic and lived much of the year in a more permanent settlement.  While their way of life was a bit less precarious, and included public education and solid housing, they still lacked a source of safe drinking water, a common problem in East Africa.  We presented the chief with a water filter we had purchased in Arusha, for use by the whole village.  This group portrait was made of the villagers when they accepted our gift of the water filter.

Maasai villagers with their new water filter.  Buy this photo

Serengeti National Park is the stuff we travel photographers’ dreams are made of!  Along with game walks and game drives in open safari vehicles, we also had the chance to soar silently above the Endless Plains in a hot air balloon.  This is an amazing way to view the migrations of the herds and the predators and scavengers that tag along.  This image was made by shooting down from the basket of our balloon toward a balloon closer to the ground.  You can see the trees and herds of wildebeest on the plains below.

Safari by hot air balloon.  Buy this photo

Of the hundreds of animal species we encountered, including so much more than just the Big Five, the leopard was one of the most elusive.  Here we spotted (as it were) a leopard napping in a tree in Seregenti National Park.  This shot was made with a long telephoto lens resting on a beanbag in our safari vehicle.  My go-to lens for wildlife photography is the Sigma 150-500mm f/5-6.3 lens.  It’s more economical than a Nikon or Canon super-tele, and it produces reasonably sharp images even when used at its widest aperture.  You can spend much more on this type of big glass if you want or need to, but I’ve found this lens works quite well for me.

A sleepy leopard yawns in a tree above the Endless Plains of Serengeti National Park.  Buy this photo

The migration of the herds is an annual event across the combined national parks of Serengeti in Tanzania and Maasai Mara in Kenya.  It’s a spectacular sight as millions of wildebeest, zebra, and gazelles slowly migrate across plains and rivers, occasionally being eaten by the predators who follow them.  To give a sense of the scale and the action, in this image I zoomed in on a group of wildebeest with a telephoto lens so as to compress the scene.

A small vignette from the massive migration of the herds across the East African plain.  Buy this photo

We were very fortunate to come across this quiet scene of a lioness with her newborn cubs.  We watched from a distance so as not to disturb this family as she cleaned and played with her two cubs, them mewing like housecats all the while.  The light was low in this glen, and the long telephoto lens was slow, so I stabilized it on a beanbag and shot at a higher ISO setting to allow for a reasonably fast shutter speed.  There was some noise in the image as a result of the high ISO (camera sensors weren’t as good at high sensitivities back in 2012), but I did my best to reduce the noise during post-processing.

A mother lion spends some quality time with her cubs.  Buy this photo

We visited a primary school in a small community.  This was one of the first schools in Tanzania to serve breakfast and lunch to students who walk miles each way to school and would have to double their daily walking distance if they had to return home midday for lunch.  My daughter enjoyed talking with students about their daily lessons.

Visiting a classroom at a rural primary school.  Buy this photo

Farewell to Tanzania!  My family enjoys a glorious African sunrise at our tented camp located right inside the national park.

A Serengeti sunrise.  Buy this photo

Want to see posts on other travel photography destinations?  See them all here: http://www.to-travel-hopefully.com/category/destinations/.

Have you visited East Africa?  What were the highlights of your trip?  Please share your comments here.

Camera Pixels App (Updated Review): Significant improvements in the new version make this a best-in-class app

I’ve posted repeatedly about the importance of understanding how to take manual control of your camera in order to make images that are properly exposed and focused.  Whether you are using a professional DSLR, an advanced full-frame mirrorless ILC, a compact point-and-shoot, or the camera built into your smart phone, there is no way you will get consistently acceptable results if you leave the camera’s settings to its auto mode.  See this post for an overview: Post on Beyond the Auto Mode.

About three months ago, I posted a review of an early version of an iPhone app called “Camera Pixels”.  In that review, I found the app to be a very promising concept due to its advanced DSLR-like features and intuitive controls, but I couldn’t fully endorse it in the earlier version because I found several bugs and interface quirks.  You can read that earlier review here: Previous review of early version of Camera Pixels app.  Since that review was published, I have had several discussions with the Camera Pixels support team to detail my concerns about the various issues I found.

For the past two days I have been testing a new version of the Camera Pixels app, and I can now recommend it wholeheartedly.  The new release preserves the advanced features and (relatively) simple interface of the earlier version, but it has addressed all of the significant issues I outlined in my review of the previous release.  Specifically:

  • the image flicker in the “viewfinder” area of the screen has been eliminated,
  • the bracketing of exposures now retains the proper requested spacing (unless at a physical limit of a setting),
  • there is a new “Pro View” mode that keeps the manual settings toolbar always on the screen so any manual overrides are immediately apparent, and
  • the controls to separate the exposure point from the focus point are now more intuitive.

Like the “Manual” camera app that I’ve been using for years and the “ProCam 4” app that has been my go-to camera control app for the past several months, the new “Camera Pixels” app allows the manual selection of ISO, shutter speed, exposure compensation, and focus distance (note that the iPhone camera’s lens has a fixed aperture, so F-stop cannot be manually set).  Also like the Manual app and the ProCam 4 app, Camera Pixels allows images to be captured using RAW mode, which has a great many advantages over capture in JPEG format (see this post for more information: Post on RAW Capture).  And all three of these camera apps display a histogram to assist in setting exposure properly.  

In addition, both Camera Pixels and ProCam 4 (but not Manual) offer some very useful advanced camera control capabilities, including the following:

  • Shutter Priority: You can choose an exposure mode in which you select the shutter speed first and the app will set the appropriate ISO.
  • Exposure Bracketing: You can shoot a series of four shots at different exposures to increase the likelihood that one of them will be at the best exposure for the lighting conditions.  The series of shots can also be combined using HDR tools found in Lightroom, Photoshop, and other editing software into a single image with a higher range of tones from very dark to very bright.
  • White Balance: You can adjust white balance in the app, which is often preferable to having to adjust it in your RAW files during post-processing.
  • Virtual Horizon: The display can show you when the horizon is level.
  • Slow Shutter Options: You can select long fixed shutter speeds as well as bulb mode to keep the shutter open for as long as you’d like.
  • RAW+JPEG: You can choose to store the image in both RAW and JPEG formats.

With all this incremental functionality, your little phone’s camera begins to behave a lot like a more advanced standalone camera.  While the iPhone’s camera, with its small sensor and its tiny fixed-aperture non-interchangeable lens, still cannot compare to a professional or enthusiast DSLR or ILC camera, the results using an advanced manual camera control app such as Camera Pixels or ProCam 4 are vastly improved compared to using the phone’s native camera app.  At iTunes App Store pricing of $2.99 for Camera Pixels or $4.99 (temporarily reduced to $1.99) for ProCam 4, either of these apps is a great buy and a serious enhancement to the iPhone’s built-in camera.

There are some significant differences between Camera Pixels and ProCam 4.  ProCam 4 offers advanced image editing capabilities, while Camera Pixels does not.  However, Camera Pixels offers more flexible exposure bracketing options, the ability to separate exposure point from focus point, a better histogram, and more advanced RAW and video shooting options.  And a significant advantage of the new Camera Pixels app over ProCam 4 is its simple and intuitive user interface for setting and resetting the manual camera control features such as exposure compensation, shutter priority, and ISO priority.  In fact, the Camera Pixels app comes the closest I’ve ever found to the user interface of an advanced DSLR or mirrorless camera.

One note to enhance the usability of the Camera Pixels app: As far as I can tell, there is no built-in help content in the app itself, but there is a very useful online user guide available from the app’s developers.  You can find the user guide here: Camera Pixels app user guide.

In summary, the new Camera Pixels app is a great concept that comes closest of any camera control app I’ve found to the look-and-feel of an advanced standalone camera.  With the greatly improved new release, Camera Pixels has become the best option I’ve found for iPhone users wishing to control the phone’s built-in camera like an advanced DSLR or mirrorless standalone camera.  I now fully recommend this app, and I plan to use it as my first choice for advanced control of my iPhone’s camera.

Here’s the link to the Camera Pixels app on the Apple App Store: Camera Pixels app.

What app do you use to control your phone’s camera?  What do you like and dislike about it?  Please share your thoughts here.

Want to read more posts about photography gear?  Find them all here: Posts on Gear.


Focus on SF Pride Parade and Festival [Encore Publication]: Some images of this year’s San Francisco LGBTQ pride events

It’s no surprise that San Francisco hosts one of the world’s oldest and largest LGBTQ Pride events in the world.  Each year, the parade and festival grow bigger and better attended.  SF Pride is one of my favorite annual events in my home region, the SF Bay Area, and while I find it gratifying to see the mainstream acceptance of this event, it’s also a bit disconcerting to see this once edgy and over-the-top celebration partly subsumed into a blander, more corporate culture.  In today’s post, I share some of my favorite images from this year’s Pride Parade and Festival.  The goal is to showcase the incredible diversity of the participants and observers at this grand celebration, along with a few words about how the images were made.


The theme of this year’s parade is Resist.  It’s a worthy goal given that gains celebrated over the last 50+ years are being systematically and broadly undone by all branches of the US federal government.  In this image, I wanted to capture an establishing shot of the large parade contingent without losing the personal element, so I used a medium lens and composed to include the first few rows of marchers.  Buy this photo

To personalize the message of activism, I focused on an individual marcher.  I used a fast portrait lens set to a wide aperture to defocus the background, and I included the bright pride flag carried over the subject’s head.  Buy this photo

Another individual portrait, this image sets off the subject from the background through use of tight composition and shallow depth-of-field.  Buy this photo

I captured the joy of the young “marcher” by getting in close and shooting at a very wide aperture, so only the young girl’s face is in sharp focus while all other foreground and background elements are soft.  Buy this photo

A touch of post-crop vignetting applied in Lightroom during post-processing helps emphasize the sheer exuberance in this image.  Buy this photo

At a huge event such as SF Pride, with more than half a million participants and spectators, it’s important to capture some intimate images in order to emphasize the impact on individual people’s lives.  Here I’ve used an 85mm portrait lens to share a private moment during a big public event.  Buy this photo

Another intimate couple’s portrait, this image is awash in the colors of the pride flag and the marchers’ clothing.  Careful attention to composition and selective focus help bring out the private moment within the context of the larger contingent.  Buy this photo

I’m not usually a big fan of selective colorizing, but sometimes its use is appropriate.  When I pre-visualized this image of a parade spectator dressed in white, I imagined the entire scene in black-and-white except for the vivid rainbow colors of the pride symbol.  It’s an easy effect to achieve during post-processing in Lightroom.  Simply select the part of the image you want to remain in color using the Radial Filter tool, and then remove the color from everywhere else in the image by bringing the Saturation slider down to zero.  Buy this photo

To convey the grand scale of the event, I shot from a low angle and composed to include several rows of festival participants with San Francisco’s City Hall in the background.  Buy this photo

What are some of your favorite celebrations, and how do you capture their diversity in your images?  Please share your thoughts here.

Want to read more posts about what to shoot while traveling or close to home?  Find them all here: Posts on What to Shoot.

Prime Time [Encore Publication]: Why a prime lens is often better than a zoom

Most photographers make most of their images using a zoom lens.  Aside from smartphone cameras, which typically feature a fixed focal-length lens, nearly every camera today comes with a zoom lens attached.  Most point-and-shoot and compact cameras do not have interchangeable lenses, so the zoom lens that comes with the camera is the only choice, while most mirrorless and DSLR cameras have interchangeable lenses.  That means these more advanced cameras offer the choice of using a broad range of different lenses, including both zoom and prime (fixed focal-length) lenses.  While many photographers own one or several prime lenses, from my observation the vast majority shoot nearly all of their images using one of their zoom lenses instead.  In today’s post, I make the case for using prime lenses in many, or even most, shooting situations.

This portrait of a Delhi girl outside India’s largest mosque is lovely and effective, but because I didn’t have time to change lenses and was forced to use my slower walkaround zoom lens, the depth-of-field is quite deep, making for a somewhat distracting background.  Buy this photo

Zoom lenses have one clear advantage over prime lenses: they offer a range of focal lengths, which helps the photographer compose the image without having to walk closer to or farther away from the subject.  But even here I would argue that in most cases it aids creativity to “zoom with the feet,” or walk around to compose the best shot.  Even when this isn’t possible, a high-resolution digital image can easily be cropped in post-processing to achieve the composition the photographer had in mind.

But prime lenses have many advantages over zoom lenses.  First, they are nearly always sharper and generally higher quality than zooms, because they don’t require extra internal glass elements to enable the zooming.  While zoom lenses have improved in optical quality over recent years, it remains the case that prime lenses offer a quality advantage.  Second, prime lenses are typically smaller and lighter than zooms.  This is a blessing especially to travel photographers.  Third, primes are less expensive than zooms of similar optical and build quality.  That means you can buy two or three different prime lenses for the price of one zoom lens covering a similar range of focal lengths.  And fourth, primes are usually faster (i.e., offer a wider maximum aperture size) than zooms.  This last point is a big advantage for many types of shooting, because a wide aperture (small F-number) lets in more light, allowing use of faster shutter speeds and lower ISO settings in low-light conditions.  This is a real boon for nighttime and astro-photography.  A wide aperture also results in shallow depth-of-field, which emphasizes the main subject by softening the focus of the background.  The best lenses offer a pleasing “bokeh”, or pleasant blurring of the out-of-focus elements of the image.  This effect makes for extremely effective portraits as well as wildlife images, but is also useful for other types of photography.


This portrait, made with my current favorite lens, an 85mm f/1.8 portrait lens, offers very sharp focus on the subject’s face and pleasing bokeh, or soft blurring of the out-of-focus background.  It would not have been possible to make this portrait using a zoom lens because the maximum aperture would be too small to achieve the soft background effect.  Buy this photo

I shoot a lot of performing arts events (dance, music, theater), which typically take place indoors where the light is very dim and frequently feature fast-moving action requiring a fast shutter speed.  Using a prime lens allows me to shoot at an action-freezing shutter speed without having to use extremely high ISO settings that introduce noise into the images.  And again, the pleasantly blurred backgrounds help set off the very sharp main subject for a striking overall effect.

I captured this image of a samba dancer at a dress rehearsal under very low-light conditions.  Using my 85mm f/1.8 prime portrait lens, I was able to freeze the motion using a fast shutter speed, keep the ISO at a reasonable level to avoid noise, and render a nice soft background.  Buy this photo

I would estimate that most enthusiast and professional photographers shoot about 80% of their images using zoom lenses.  My own usage pattern is the opposite, that is, I shoot about 80% of my images using prime lenses.  For some purposes, a zoom lens is still required, but it’s surprising how often we can achieve better results using a prime.  Prime lenses are smaller, lighter, less expensive, higher quality, and faster than zoom lenses.  I encourage you to dig out your prime lenses if you have a few, or borrow, rent, or buy one or two (remember, they are much less expensive than comparable zoom lenses) and try shooting with them exclusively, or at least much of the time, for a week or two.  Compare your images made with the primes vs. the ones made with zooms and come to your own conclusions.  If you’re like me, you’ll find that a prime lens is the right tool for most photographic jobs.

Here are my three favorite prime lenses, a “normal” lens, a medium telephoto or “portrait” lens, and a wide-angle lens:

If you pack only one prime lens, it most likely will be a “normal” lens, that is one with a focal length of about 50mm for a full-frame camera or about 35mm for a crop-sensor camera.  I carry the Nikon 50mm f/1.4G lens.  This is the one I use in very low-light situations or to get a really shallow depth-of-field.

I think my current favorite lens of all (including primes and zooms) is my Nikon 85mm f/1.8G lens.  This is a classic portrait lens and provides a flattering perspective and great image quality when your subject is a human being.  I use it for nearly all of my portrait work these days.  But this lens also shines for nature and action photography where you don’t need a really long focal length.  It renders really lovely “bokeh”, or the soft quality of the out-of-focus parts of the image.

A wide-angle prime lens can be useful for landscapes, architecture and interiors, and astro-photography, among other purposes.  I like the Nikon 24mm f/1.8.

What are your preferences regarding use of prime vs. zoom lenses, and why?  Please share your experiences in the comments box.

Want to read other posts about gear?  Find them all here: Posts on Gear.


Focus on Tahiti Dance Fete [Encore Publication]: A case study in shooting under challenging circumstances

The travel photographer must be prepared to shoot under challenging circumstances, because often we have little control over the conditions in the field.  We may plan our travel years in advance to observe and photograph a total solar eclipse, only to wake up on the morning of the eclipse to find the sky is totally overcast.  Or we could make arrangements months ahead to be at a major cultural festival, but learn upon arrival that the area we’re shooting from is hundreds of yards from the action.  These things happen, but the professional photographer still needs to get her shot.  So, what can be done to persevere and increase our odds of getting usable images under adversity?  The answer, of course, depends on the specific circumstances of each shoot, but there are some general tips I can offer.  Today’s post presents a case study based on my recent shoot of the solo dance competition at the Tahiti Fete in San Jose, California.

The dancers made lovely subjects, but the shooting conditions were very challenging.  Read on to learn how to make the best of a difficult situation.  Buy this photo

Upon arrival at the dance competition, I realized immediately that this shoot would be challenging.  It was held in a cramped hotel convention room with a makeshift stage, rows of folding chairs for spectators, insufficient lighting of poor color quality, and a bank of judges blocking most of the view of the stage.  To make matters worse, the room was packed with people, many of whom stood up to cheer on their friends, and the only available seats were near the far end of the room.  An extra challenge was thrown into the mix by the cluttered and unattractive background behind the performers on the stage.

Cluttered backgrounds are a significant obstacle, but good images can still be made in these situations.  Buy this photo

What can be done to mitigate against a cluttered background?  I shot plenty of images of each dancer to increase the likelihood that I could eliminate some of the more distracting background elements while still capturing the excitement, grace, and colors of the dancing.  This image was the best I could capture of this particular dancer, so I committed to it in post-processing.  I cropped the image to avoid the most distracting elements, adjusted the exposure curves, contrast, and sharpness of the background to de-emphasize it, and applied some post-crop vignetting to ensure the dancer would be highlighted.

When using a very high ISO, some noise will result.  This doesn’t have to be a disadvantage.  Buy this photo

The lighting was very dim at this venue.  Because I was shooting from far away, I needed to use a long telephoto lens, which limited me to a small aperture and no possibility of using flash.  Nonetheless, a fast shutter speed was required in order to freeze the fast action of the Polynesian dancing.  This combination (low lighting, small aperture, and fast shutter speed) leaves no option other than a very high ISO setting.  I shot the above image at ISO 6400.  Even with an excellent professional camera sensor, such a high ISO will generate some noise in the image.  Noise can often be reduced to acceptable levels during post-processing.  But for this particular image, I was aiming for a soft, painterly feel.  The visual effect of high contrast, soft colors, and a bit of visual noise here gives the feel of an impressionistic rendering.  For this expressive Tahitian subject, I was very happy to have a Gauguin-esque style shine through in the final image.

 Cut out elements that don’t work.  Buy this photo

To make the above image, I cropped out distracting portions such as the judges’ heads in the foreground and an ugly door and wall in the background.  The resulting aspect ratio is non-standard, but works well for this image.  I desaturated the background and used post-crop vignetting to focus attention on the dancer.


Black-and-white renderings can be more forgiving when color quality is low.  Buy this photo

This image portrays a lovely subject but the lighting was especially poor.  Realizing I couldn’t do much to mitigate the strange color cast resulting from the artificial lights, I converted the image to monochrome, boosted the contrast, and adjusted the color channel mix to render a pleasing and elegant final image.  Check out this post to learn how black-and-white conversion can be used to save the day when color temperatures or image noise are problems: Post on B&W conversion to save strangely colored images.

Bringing it all together: This image works nicely in spite of all the challenges present at the shoot, including foreground obstacles, dim and low quality lighting, a far-away vantage point, and a cluttered background.  Buy this photo

In spite of multiple significant technical issues, I was able to make some striking images of the lovely dancers at this Tahitian festival.  Hopefully, the tips presented here will help when you next are faced with a challenging shoot.  The most important thing is to keep shooting as best you can while in the field.  There are multiple methods you can use in post-processing to mitigate against the shooting challenges and end up with images you will be proud of.

What techniques do you use when faced with difficult shooting conditions?  Please share your thoughts here.

Want to read more posts about photographic techniques?  Find them all here: Posts on Techniques.

Focus on Balaknama [Encore Publication]: Making portraits that go beyond documentation to help Delhi’s street kids

During a recent trip through the north of India, I had the opportunity to meet with the advisors and some of the young staff at the Balaknama Newspaper, a project to empower the street kids of New Delhi.  I’ve long been interested in the plight of the street kids who live in Delhi’s sprawling slums and have historically been terribly mistreated at the hands of exploitative child labor bosses, a corrupt police force, and often their own abusive families, so this visit was important to me personally.  In this post I share some of the images I made of the kids who risk their own safety to expose the abuses against the young people in their community, and I also discuss how to go beyond the purely documentary function of portrait photography to give your portraits more power.

The images I share here are published with permission from Balaknama’s editor and the NGO who supports the project.  However, I will not share the location of the offices nor the real names of the kids who work there, in order to protect their identities.

The power of a portrait to advocate for social change depends primarily on its ability to go beyond simple documentation and to reveal the personality, background, and/or motivation of the subject.  For this shoot, I wanted to convey the passion and bravery of the young reporters.  I shot with available light only (no flash) in order to capture the intimate and urgent mood of the work the kids are doing.  I used several lenses for different perspectives, but most of the images were made using a fast prime portrait lens.  My shooting perspective was from a low angle so as not to give the appearance of looking down on the subjects.  People appear more empowered when the camera observes them from the perspective of their peers–it should appear as though the viewer is a part of the conversation.

This 17-year-old reporter is also the primary organizer of more than 10,000 of Delhi’s street kids.  I wanted to capture her intensity and focus in this portrait, so I got in close with a medium-length portrait lens and shot from the perspective of a participant in the conversation.  A wide aperture (low F-stop number) is helpful to isolate the subject from the background.  Buy this photo

The “decisive moment.”  I shot several frames of this young reporter as he described the horrific abuses of his peers in the slums of New Delhi, in order to maximize the chances of capturing just the right instant.  I love this image, which to me appears to emulate the drama and body language of Francisco Goya’s famous painting, “The Executions of the Third of May, 1808”.

This powerful portrait has a painterly feel and freezes the tension and drama of the harrowing stories retold by the young reporter.  Buy this photo

The interaction between the students at the newspaper is an important theme.  Here I worked to capture the girls’ engagement with each other and with the overall discussion.  Buy this photo

Language barriers are less important than many photographers believe them to be.  A simple “thumbs-up” gesture evoked a playful response from these young Balaknama staffers, providing a light moment during the intensity of our conversation.  Buy this photo

As I’ve often written in To Travel Hopefully, it’s important to remember to include your own group in some of your images.  While I most likely won’t publish this image in my stories about Balaknama, I am happy to have this documentation of my fellow travelers as we interacted with the students and staff at the newspaper.

For large group shots in tight spaces, use a wide-angle lens.  This was shot with a Nikon 16-35mm f/4 lens at its widest setting, giving the viewer a sense of the setting as well as the people there.  Buy this photo

I wanted to capture a final portrait of the two primary student organizers as we left the newspaper’s offices, so I asked them to pose together during our walk through the neighborhood.  This gives a sense of the environment in which they live and work.  I got in close using a wide aperture to soften the background, but I also chose a background that would inform the viewer about the kids’ environment.  Buy this photo

Do you have techniques for making powerful portraits that go beyond pure documentation to advocate for the people and causes in the images?  Please share your thoughts here!

Want to read more posts about what and how to shoot while traveling?  Find them all here: Posts on What to Shoot.

Filtered Down to the Essentials [Encore Publication]: Why you should always have these filters in your bag

Filters are the Rodney Dangerfield of photographic gear: They don’t get enough respect.  Most photographers will begin to salivate when talking about the latest camera bodies or lenses and even plates or heads for our tripods, but we tend to think of filters as pedestrian items, if we think about them at all.  I nearly always make room in my bag for several filters, and I believe that using them properly is more important than what camera or even which lens I choose.  Let’s look into why these affordable little accessories are so important.

Three kinds of filters are essential gear for most photographers.  I’ll cover each type here.  Note that you must use a filter that is the correct size to attach to your lens.

It’s a good idea to keep a UV filter (also known as a haze filter) attached to your lenses at all times, as this helps protect the front element of the lens from fingerprints, moisture, and even scratches.  In addition to offering some physical protection for your lens, a good UV filter can also improve image quality when there is atmospheric haze or moisture in the air.  Use a good quality filter, though, as some can adversely affect your image quality.  I would recommend removing the UV filter when shooting with certain other combinations of filters, as the edges of the image can be cut off (vignetting) with too thick a stack of filters on the end of the lens.  In most cases, use of a UV filter does not affect the exposure more than about half a stop, so they can be used in most lighting conditions. I’ve had good luck with Hoya UV filters.  Always be sure to look at the specifications for your lens before buying any screw-on filter, because the diameter of the filter thread must match the size of the lens.

The second must-have type of filter is the circular polarizer.  A polarizing filter can reduce glaring reflections and can darken skies and enhance natural colors.  This little gadget is almost a secret weapon for making images that really pop.  Again, I like the Hoya products, which are thin, well made, and perform as they should.

It takes a bit of practice to learn to use a polarizing filter properly.  While looking through your camera’s viewfinder or LCD screen, turn the outer part of the filter slowly to see the effect.  The greater the angle between the light source (typically the sun) and the shooting direction, the bigger the effect of turning the outer ring of the filter.  You will observe as you rotate the outer ring of the filter that the sky, clouds, and any bodies of water will transform quite dramatically.  When you see the effect you like best, overshoot a little bit and then rotate the outer ring back to where you want it.  In most cases, I recommend not using the maximum amount of polarizing effect when there are reflections from water or glass, because you usually want some of these reflections to be visible in your final image, but this is art, not science, so you get to choose the effect you want.  Note that using a polarizing filter will cost you about 2-3 stops of exposure.  You will have to use a slower shutter speed and/or faster ISO or wider aperture, so use a steady tripod if the lighting conditions are dim.

Here’s an example of a shooting situation in which a polarizing filter can really make an image pop.  For this shot of the imposing peaks in Southern Patagonia’s Torres del Paine National Park, I rotated the polarizer to about 2/3 of its maximum effect to darken the sky, make the clouds more dramatic, and bring out the bright sheer faces of the granite peaks.

A circular polarizing filter makes a big difference when shooting mountains, skies, and/or bodies of water.  Buy this photo

The final essential filter is the neutral density (ND) filter.  These reduce the amount of light that reaches the camera’s sensor, so you can use slower shutter speeds to blur motion, or so you can use a wider aperture to get a shallow depth-of-field, even in bright sunlight.  ND filters come in different strengths as designated by the number in the filter’s specifications.  For example, an ND2 filter blocks 1/2 the light for a one-stop reduction in exposure, while an ND8 filter blocks 7/8 of the light for a three-stop reduction in exposure.  It’s a good idea to carry a range of ND filters for each lens you plan to use in the field.  A newer type of ND filter even allows for variable adjustment of the strength of the ND effect with just one filter, but these tend to be expensive.

A classic example of a situation in which you’d want to use an ND filter is when shooting moving water in bright lighting conditions.  You may want to use a longer shutter speed to blur the water, but even at your camera’s lowest ISO setting and your lens’ smallest aperture there could still be too much light for a slow shutter speed.  Mounting an ND8 filter to your lens will allow you to use a shutter speed eight times longer than without the filter, so for example you could move from shooting at 1/30 of a second to 1/4 of a second.

Here’s a photo of my younger daughter by a waterfall in Yosemite National Park.  The image was made in the early afternoon under very bright sunlight, bright enough that even using my camera’s slowest native ISO sensitivity and my lens’s most narrow aperture, I would still have had to use a shutter speed of 1/60 of a second, which would have frozen the water in the falls.  Using an ND8 filter, however, I was able to slow down the shutter speed to 1/8 of a second, long enough to impart a nice blur to the falling water.

 Use of a neutral density filter allowed me to blur the falling water even under very bright lighting conditions.  Buy this photo

I recommend carrying a kit containing several ND filters of different strengths for each lens you plan to use for landscape images.  Once again, make sure the diameter of the filter matches the diameter of the lens you intend to fit it to.

Note that there’s another type of ND filter called the “graduated ND filter,” and this filter varies the light-blocking effect from one end of the filter to the other end.  I used to use this type of filter quite often, but in this digital era I find it usually works just as well to simulate the effect of a graduated ND filter using post-processing software later.

Armed with these three types of filters, you will be prepared to create the images you have in your mind, even under challenging shooting conditions.  Happily, filters are small, light, and not terribly expensive, making them one of the better values we photographers can find.

Which filters do you always carry, and when have you found them most useful?  Any tips or tricks on how to use filters for the best results?  Please leave a comment in the box after this post to share your thoughts.

Want to see more posts about photography gear?  Find them all here: Posts on Gear.


Calibration Time, Come On! [Encore Publication]: Why you should color-calibrate your display devices and how to do it

We tend to take for granted that the colors we perceive when we look at a scene will be captured faithfully by our camera’s sensor and the lens in front of it, and then rendered accurately in every stage of processing thereafter, from the memory card to the computer and to all our displays including laptops, tablets, smartphones, TVs, projectors, and even on these same types of displays owned by our friends with whom we share our images.  (We also expect prints made from our images to faithfully reproduce the colors from our camera’s sensor, but that is a story for another day.)

As photographers, we want to ensure the colors in our final images reflect as best we can the original colors we perceived when first framing the scene.  With proper color-calibration of the display screens we use to process our images, we can keep the colors as true and accurate as possible.  Buy this photo

The reality is that every step of the process of capturing, processing, and sharing an image leads to changes in the rendition of the colors.  No device can fully represent every intensity of every color that the human eye can see.  Camera manufacturers go to great lengths to ensure the colors captured by the camera’s sensor are as accurate as possible when you attach a lens made by the same company.  And when you use software such as Lightroom or Photoshop to post-process your images, you may take great pains to ensure the colors you see on your screen look very close to what you remember you saw when you shot the image in the first place.  But without careful attention, the final image we see later on our various display screens can look very different from device to device.  That’s because every type of display, and even every individual screen, has a unique way of representing every color.  So your PC’s monitor will display any given color just a bit differently than your phone’s screen will show that color.  And your friend’s phone’s screen will look a bit different, still (even if it’s the exact same brand and model as yours).

Fortunately, there is a simple and quite affordable way to standardize the representation of colors across all your devices.  It’s called color calibration, and for less than the cost of a good polarizing filter, say about $100, you can purchase a little doodad that can calibrate all your displays.  I use the X-Rite ColorMunki, which can be had for about $110 at retail.

To use a color calibration device, you install some software on your display(s) and then place the device on your display screen.  The software cycles the screen through displaying a wide range of colors, which are read and recorded by the calibration device.  Finally, the needed adjustments to bring your screen’s settings into line so they render colors as accurately as possible are saved in a special file.  From this point on, whenever your display device is started up, it reads the configuration information in that file and renders colors as closely to their actual appearance as it is physically capable of doing.

Because our eyes perceive colors differently in different ambient light conditions, you’ll want to have your calibration device take an ambient light reading for the typical lighting conditions that will be present while you’re using each display.  For example, if you use your laptop PC mostly when bright daylight is streaming into your kitchen, you’ll want to calibrate when those conditions are present.  You can even save different versions of the configuration file for different lighting conditions.

And because display devices do change over time, it’s a good idea to re-calibrate each device every few weeks to control for that.

If you’re serious about your photography, you want your images to look great not only on your own display screen(s), but also when viewed by other people on other types of devices or on the printed page.  Using a reliable color-calibration device helps ensure the colors in your images remain as accurate as possible through all the stages of processing and sharing until they leave your personal control.  This is a good practice that all photographers should employ.

How do you control for color accuracy in your images?  Please share your methods here!

Want to see other posts about post-processing your images?  Find them all here: Posts on Post-Processing.


Focus on Northern India [Encore Publication]: A diverse tapestry of colors, cultures, and chaos, India will stay with you forever

My wife and I are just back from an amazing 2.5-week adventure traveling through northern India.  Operated by Overseas Adventure Travel, the trip’s diverse itinerary took us from the chaotic capital of New Delhi to the “pink city” of Jaipur, brought us face to face with wild tigers in Ranthambore National Park, continued to Agra to view the landmark Taj Mahal and Agra Fort, then on to the ornately carved 9th century Chandela temples of Khajuraho, and finally to the ancient holy city of Varanasi.  While it was exciting to view the iconic attractions of India, what made this adventure truly unforgettable for us was its many opportunities to interact with Indian people from all walks of life: pilgrims arrived in Varanasi to pray and bathe in the sacred waters of the Ganges River, street kids in Delhi who started their own newspaper to expose the exploitation and abuses of children in their community, a matriarch and her family as they keep house in a tiny remote rural village, students at a village school, and women in Agra who survived horrific acid attacks and are advocating for awareness and justice.  India is a diverse tapestry of colors, cultures, and chaos that will inspire you and stay with you forever.  And for a travel photographer, visiting the north of India is a dream come true.

In today’s post we will take a look at some of my favorite images from this adventure.  I’ll include some brief discussion about who or what is included in each image and, where appropriate, a few words about how each image was made.

Our adventure began in the capital and largest city, Delhi.  The old part of the city is truly ancient, with a heritage dating back more than 1000 years.  But Delhi’s heritage also includes the British colonial period in the 19th and 20th centuries, and New Delhi today is the capital of the Indian republic and home to 22 million people.

People waiting for the next meal service at the Gurdwara Bangla Sahib Sikh temple in New Delhi.  The staff and volunteers there serve more than 8000 free meals per day to the needy people of New Delhi.  To make this image, I used a telephoto lens and shot from a low angle so as to compress the scene and capture the epic scale of the crowd.  In post-processing, I cropped the image to better lead the viewer’s eye around the scene, and I tweaked the contrast and vibrancy to better represent my original emotions on being in the middle of this scene.  Buy this photo

Our first gift purchase was a set of necklaces from this girl who sold them roadside in New Delhi.  To make this portrait, I used an 85mm portrait lens at a wide aperture (small F-stop number) to blur the background, and I added just a touch of fill-in flash using a handhelf off-camera strobe connected with an extension cable.  Buy this photo

We met this lovely girl at the Jama Masjid, India’s largest mosque, and she graciously agreed to pose for a portrait.  Many travelers will try to “take” photos of people they see on their trips by simply pointing the camera at them or using a long lens to hide their intentions.  To “make” (not “take”) really compelling portraits, it’s essential to have a personal connection with your subject.  Even though we didn’t share a common language, we engaged the young woman in “conversation” using a combination of smiles and hand gestures, and once we were comfortable together, I used the universal gesture to ask if she would pose for my camera.  Buy this photo

For an authentic Indian experience, we took a thrilling and bone-rattling 30-minute ride through the crowded lanes of Old Delhi in a bicycle rickshaw.  In this image I tried to capture the sense of chaos and crowding as we experienced it from the rickshaw.  I shot from the perspective of the passenger and framed the image using the top of the vehicle.  I used a small aperture (high F-stop number) to ensure the whole vista would be in focus, and I set the exposure based on the motorcyclist in front of us.  Buy this photo

Qutab Minar is the symbol of New Delhi and was built in the 12th century.  The minaret is 234 feet high and a crowning achievement of Indo-Islamic architecture.  To fit in the entire tower, a wide-angle lens was required, but I was careful to frame the image so as to avoid distorting the structure too severely.  I timed this shot to capture the jetliner as it overflew the site.  Buy this photo

We made an inspiring visit to the Balaknama newspaper, run by New Delhi’s street kids as a platform for getting their voices heard and for championing fair treatment of these historically underserved and abused children.  This 17-year-old girl is the primary organizer of 10,000 of New Delhi’s street kids.  The portrait was made using only available light (no flash), as I didn’t want to disrupt our conversation with the kids.  Because the light was so dim inside the building, I had to use a very fast portrait lens and a high ISO sensitivity setting.  Buy this photo

After leaving behind the bustle of New Delhi, we traveled overland to Jaipur.  Known as the “Pink City” for the peculiar rosy color its downtown buildings were painted in preparation for a royal visit, Jaipur is home to several of India’s most impressive historical sites.

We arose very early in the morning to embark on a hot-air balloon ride over the rural villages and farms surrounding Jaipur.  I shot this image of a brick-making factory from the gondola of our hot-air balloon using a telephoto lens to compress the perspective.  I converted the image to black-and-white during post-processing in order to emphasize the patterns and textures of the stacks of bricks surrounding the camel-drawn cart.  Buy this photo

Our balloon landed in a field outside a tiny village in rural Rajasthan.  All of the villagers came out to our landing site to say hello.  Here we are posing in front of the hot-air balloon, together with our new friends in the village.  I did not have time to set up my tripod for this shot, so I enlisted a fellow traveler to release the shutter for me.  When using this method to capture yourself in a photo, be sure to preset all of your camera’s controls and show your volunteer exactly how you want the image composed.  Buy this photo

This wonderful elder lady of the village danced for us and generally entertained the whole village.  Equally entertaining to the villagers were the dances we attempted to perform for them.  Buy this photo

Jaipur’s landmark Palace of the Winds provided nearly 1000 windows through which the women of the court could look down on the streets below.  Careful attention should be paid to composing architectural images so as to capture the building in a striking way.  Here I used a wide-angle lens and composed slightly off-center so as to portray some depth to the image.  Buy this photo

During our home-hosted dinner in Jaipur, we enjoyed a lovely meal cooked by our hostess Ruchi.  Most images of food are made by shooting straight down on the plate from above, but here I wanted to convey the conviviality of the meal by shooting from the perspective of a diner at the table.  Buy this photo

Outside of Jaipur we were privileged to come across and participate in a pre-wedding dance celebration in honor of the couple who were to be married the following day.  This portrait was composed from a low angle right in front of the dancer to truly put the viewer into the middle of the action.  A fast shutter speed was used to freeze the motion, and I chose a small aperture (high F-stop number) to keep the whole scene in focus.  Buy this photo

After Jaipur, we set out overland across the heart of Rajasthan, heading for Ranthambore National Park.  This wildlife preserve is home to many species, including spotted deer, the large sambar deer, langur monkeys, crocodiles, and more than 450 species of birds.  But it is best known for its population of wild tigers, one of the highest concentrations of tigers in the world.

Although Ranthamore National Park is one of the best places in the world to attempt to observe tigers, even there it is unusual to see them.  We were very fortunate during our early morning game drive to encounter two tigers.  The first, this female, was not particularly close by was stalking prey in an open and forested terrain.  The second, a large male, was near our vehicle but was obscured in dense jungle.  The key to successful wildlife photography is to shoot lots of images.  I shot more than 200 frames of this tiger in order to ensure a few would be of excellent quality.  I used the bulky and heavy 500mm lens that I had carried all the way from San Francisco in the hopes that we’d encounter a tiger.  The images were shot with a fast shutter speed to freeze the animal’s motion and to reduce camera shake, and I used a relatively wide aperture (low F-stop number) to throw the background out of focus.  Careful attention should be paid to composing wildlife portraits without too much clutter in the background.  Buy this photo

We visited a school in a rural Ranthambore village.  It was a delight to meet the students there.  Here my wife Mary chats with two sixth-grade girls who hope to become engineers when they grow up.  They were very happy to meet Mary, a female engineer herself, and to learn about careers in the field.  When photographing children, many people shoot from their own eye level, which results in portraits that appear condescending to the subject.  It’s better to get down to the child’s eye level or even below so as to show the world from the subject’s point of view.  Buy this photo

After our school visit, we strolled through the village to get a sense of the daily life of the people living there.  A highlight was a visit to this matriarch’s home.  Many of the local kids came by our hostess’ house to say hello to us.  The eyeliner on the kids’ faces is intended to make their eyes look bigger.  Once again, I got down low to capture the scene from the perspective of the kids.  Buy this photo

A women’s cooperative trains village women to make handicrafts, providing them with income and empowering them to invest in the community and their own futures.  We enjoyed lunch with several of the artisans, and after getting to know the woman who sat at our table, I made this compelling portrait.  I got up-close and used a classic 85mm portrait lens with a very wide aperture (small F-stop number) to soften the background.  In post-processing I brought out the colors in her sari and scarf, and I added a bit of vignetting to darken the edges of the image and emphasize the subject.  Buy this photo

En route to Agra, we visited the remarkable Abhaneri step-well, an ingenious solution to bring up water from a very low water table.  In this image I wanted to emphasize the step-well’s abstract, Escher-esque appearance, so I composed it using a telephoto lens to frame the seemingly endless symmetry of the ladders.  In post-processing I converted the image to black-and-white to bring out the patterns and abstraction.  Buy this photo

To break up the very long drive from Ranthambore to Agra, OAT provides an overnight stay at a tented camp.  Here our entire group (except for your intrepid photographer-author) gathers around the campfire for drinks, snacks, and folk-dancing.  Buy this photo

Agra is home to India’s most visited and loved site, the Taj Mahal.  Of course, the Taj is a must-see, but our visit to Agra also included worthwhile visits to the Agra Fort and a farmer’s market, as well as a very moving and inspiring encounter with women survivors of acid attacks.

Early in the morning we visited a farmer’s market in Agra.  I used a medium telephoto lens to capture this fruit seller as he enjoyed a smoking break (right on top of his wares).  Buy this photo

Sheroes’ Cafe in Agra is a project founded by and for the women of India who are survivors of acid attacks.  We were so inspired by meeting Rupa and learning about her story and her road to physical and emotional recovery after her brutal attack at the age of 15 by her stepmother.  Through this project, Rupa has gained the confidence and independence to leave home, meet other survivors and activists, build a business as a clothing designer, and access the surgical care required to reconstruct her face.  The courage and resilience shown by the women we met at the cafe moved us to want to help their cause to educate people and improve the treatment of India’s women.  Buy this photo

When shooting an iconic site such as the Taj Mahal, I try to avoid capturing the “postcard shots,” opting instead to capture the well-known site from a less-known vantage point.  The Moonlight Garden provides a less crowded and even more lovely alternative view of the Taj Mahal at sunset.  As I’ve said before and will surely say again, don’t forget to include yourself in some of your images.  Buy this photo

To get from Agra to Khajuraho, the seat of the 9th and 10th century Chandela Dynasty, it is necessary to take first a train and then a long drive.  It’s worth the effort!  The ancient temple complexes at Khajuraho are adorned with ornate carvings depicting all aspects of life.  Many of the carvings are erotic in nature, which shocked the Victorian British who excavated the site in the 19th century.

The Chandela Dynasty ruled Central India for several hundred years beginning over 1000 years ago.  The temple complexes at Khajuraho are well preserved and are fascinating for their intricate stone carvings, many of them erotic.  Here I included a rhododendron tree in the foreground to provide some contrasting color and texture against the stone of the temple.  Buy this photo

Our final destination in India before returning home by way of Delhi was the ancient sacred city of Varanasi.  This was a highlight of the trip.  Families of the deceased join pilgrims and holy men along the banks of the Ganges River using its sacred waters to cremate the dead, bathe, and pray.  Boat rides along the Ganges in the morning and again in the evening afforded us the chance to observe the many rituals conducted here by India’s Hindus each day.

A sadhu (holy man) on the banks of the Ganges River.  Because the sadhus are dependent on alms to survive, it is important to offer a small amount of money in order to make a portrait.  Buy this photo

Bathing in the sacred Ganges River.  This favorite portrait was made after meeting the two women, getting their permission, and shooting from behind as they prepared to bathe and pray in the river.  To impart the dreamlike mood of the scene into the image, I framed it with the brightly colored women at the front surrounded by the mystical dark color of the water.  I used a wide aperture (high F-stop number) to blur the water, and in post-processing I created a slight vignette to darken the corners of the image.  Buy this photo

We took a second boat ride, this time in the evening, to witness aarti, the sacred light ceremony in which priests thank the river Ganges for providing purification.  This colorful ritual provided a fitting ending to our memorable 2.5-week visit through the north of India.  Buy this photo

Have you visited India?  Please share your fondest (and least fond) memories here, along with your thoughts about how to capture India’s vibrant diverse scenes in images.

Want to read more posts about travel photography destinations?  Find them all here: Posts on Destinations.


Tyger, Tyger, Burning Bright [Encore Publication]: In search of the elusive royal bengal tiger in India’s Ranthambore National Park

Wildlife photography is one of the most exciting and rewarding pursuits I know, but it requires some special knowledge and gear, plenty of time, and lots of luck.  I’ve posted on this topic before, specifically about wildlife photography gear (Post on Wildlife Photography Gear) and about sensitivity to the wildlife we’re shooting (Post on Approaching Wildlife).  Today’s post is a case study on my recent wildlife safari in Ranthambore National Park in Rajasthan, India.  The park is famous for its population of wild royal bengal tigers, but even with its high concentration of the big cats, it is rare to see them.  We were fortunate to encounter two tigers during our game drives, one a female who was stalking prey at some distance from us across a meadow, the other a large male who was close to us but obstructed by dense jungle vegetation.

I was rewarded with a few marvelous images of the female tiger, my favorite of which is this one:

The money shot!  After weeks of planning, days of travel, hours of driving on rough tracks, and minutes of shooting, I had bagged several hundred images of this remarkable female tiger.  A few of the images had the required combination of tack-sharp focus, uncluttered background, and appealing view of the animal.  Buy this photo

Making an image like this requires careful planning to be in the right place at the right time.  In our case, our travel company lined up the logistics and hired an expert guide and driver, which certainly helps, but it is still necessary to prepare for a photo safari like this.  It requires some knowledge of the behavior of the wildlife you are seeking.  It calls for having the right gear and knowing how to use it under time pressure and without hesitating.  And it requires shooting a whole lot of frames in rapid succession, because most will not turn out perfectly.

To capture most wildlife, a long telephoto lens is a necessity.  My go-to long lens for wildlife photography is the Sigma 150-500mm f/5-6.3 lens.  It’s more economical than a Nikon or Canon super-tele, and it produces reasonably sharp images even when used at its widest aperture.  You can spend much more on this type of big glass if you want or need to, but I’ve found this lens works quite well for me.

Stability is very important when shooting a moving subject far away using a super-telephoto lens.  During most game drives around the world, a tripod or monopod cannot be used due to space constraints in the vehicle.  I will often use a beanbag to support the camera and lens, but on our canter (a large open vehicle that seats more than 20 people) in Ranthambore National Park, even that could not be used, as there is no surface to support the beanbag.  So the only option here is to shoot handheld.  Fortunately, the lens has good image stabilization built in, but it is also important to use good shooting technique and a very fast shutter speed.  Remember to keep one hand under the lens to support it, the other hand on the grip of the camera, and both elbows firmly pressed against your sides.  Gently squeeze the shutter release.  I recommend setting your camera to continuous shooting mode if it has this feature, as this will maximize the number of images you can capture as well as avoiding the camera shake from having to press the shutter release repeatedly.

To control exposure when shooting wildlife, I usually use Manual Mode with Auto ISO.  This little-known but extremely useful exposure mode allows you to set both shutter speed (which needs to be fast enough to avoid camera shake and to freeze the animal’s motion) and aperture (which I like to keep close to wide-open in order to soften the background), while adjusting the ISO to keep the exposure correct during changing lighting conditions.  To learn more about this technique, read this post: Post on Manual Mode with Auto ISO.

Shoot many images while encountering the animal in the field.  Keep them all on your memory card (which, of course, you should back up to another medium) until you have the opportunity to carefully cull them down to the ones that are technically adequate.  Finally, during post-processing, you can select the few images that are both technically acceptable (tack-sharp focus, proper exposure) and artistically appealing (the subject looks great, the background is uncluttered and attractive).  These selected images should then be carefully cropped and adjusted for exposure, contrast, and color balance.

There you have it.  The effort that goes into making just a handful of really excellent wildlife images is disproportionate to the workload involved in most tasks we do, and the frustrations are many, but the rewards when it all goes well and we have a wonderful portrait of the animal in hand make it all worthwhile.

What are your favorite wildlife photography techniques?  Please share them in the comment box.

Want to read more posts about photographic techniques?  Find them all here: Posts on Techniques.

Focus on Naatak’s “Toba Tek Singh”: America’s premier Indian theater company launches its grandest show ever

Naatak Indian Theater’s newest and largest production, Toba Tek Singh, opened on July 9 and will run through July 29, 2017.  This grand musical treats the serious topic of the forced Indian/Pakistani separation of 1948 in a lighthearted manner, by examining the issue from the perspective of lunatics in an asylum.  If you live in or will be visiting the San Francisco Bay Area during this show’s run, I highly recommend your attending a performance.  For more information or to order tickets, visit: Naatak Toba Tek Singh.

I had the privilege of shooting the tech rehearsal and the opening night.  Today’s post shares some of my favorite images from the both the tech rehearsal and the first performance, including some behind-the-scenes shots of the actors and crew.  I will refrain from providing commentary on the action in each image, so as not to spoil the narrative. I will, however, provide a few technical tips regarding how the images were made.

When shooting a performance accompanied by live music, try to include the musicians in some of your images.  As a musician myself, I’m aware that these key contributors to stage performances are often overlooked.  Here I captured the wonderful traditional Indian musicians during the tech rehearsal, using a fast normal lens and rendered in a wide aspect ration to include the entire ensemble.  Buy this photo

Part of the excitement of a live performance is the backstage preparation.  With permission from the director or producer, you may be able to go backstage and shoot the cast and crew as they do their costumes, hair, and makeup.  Here I got in close with a normal lens and used a touch of fill flash (off-camera) to saturate the colors and fill in any shadows.  Buy this photo

This show is great fun in part because it is filled with the spectacular antics of the lunatics in an insane asylum parodying the political events of their day.  To capture the sense of lunacy, it’s important to make many images to ensure some will record the perfect moment.  Buy this photo

Rendering this dramatic image in black-and-white gives it a pseudo-journalistic feel and harks back to the era in which the play is set.  Buy this photo

The dancers in this production were more than ornamental; their motion was the physical embodiment of the geopolitical partition between India and Pakistan.  Here I captured the lovely colorful symmetry of their dance with fabrics.  Buy this photo

My basic technique when shooting indoor performances is to use a fast prime lens (either a normal lens or a portrait lens) set to a relatively wide aperture (typically about f/2.2) along with a fast shutter speed (about 1/500 second) and a high ISO setting (around 1600).  This simple technique works very well for capturing fast action in low-light situations.  Many photographers work with zoom lenses at live performances, but I find the faster prime lenses give me an edge in terms of speed, brightness, and sharpness.  Cropping can be used in post-processing to achieve the best composition.  Buy this photo

Curtain call!  I like to shoot curtain calls with a normal lens from as far back in the theater is necessary to fit in the entire cast.  The wide aspect ratio shown here makes for a pleasing way of including everyone without too much distracting background.  Buy this photo

Always be on the lookout for an interesting and unusual perspective.  I shot these last two images from the lighting catwalk overlooking the stage from high above.  Of course, you must obtain permission first and follow all safety rules to shoot from such a vantage point.  The benefit: a whole new way of seeing the action on the stage!  Buy this photo

This image of the curtain call from the catwalk provides an arresting, bird’s-eye view of the final moments of the show.  Buy this photo

How do you translate dramatic performances into still images?  Please share your thoughts here.

Want to read more posts about what to shoot while traveling and near home?  Find them all here: Posts on What to Shoot.

Join Me on a Photography Tour of India: Capture unique images of cultural celebrations, wild tigers, glorious monuments, and people from all walks of life

Dear Readers,

From Jan. 24 through Feb. 8, 2018, join our small group of photography enthusiasts and experience India with all your senses. India is a dream destination for travel photographers: a vivid tapestry of colors, cultures, and chaos. We’ve planned this unique itinerary to provide ample opportunities to capture unforgettable images that you won’t find in travel brochures and on postcards. Included are visits to two of the most colorful and exciting of India’s exotic annual cultural celebrations, the Republic Day Parade and the Desert Festival (similar to the Pushkar Camel Festival but with far fewer tourists and photographers). We also search for wildlife in a national park hosting among the world’s highest density of wild tigers, visit India’s iconic forts and monuments, and seek authentic interactions with a diverse range of local people.

Our extraordinary photographic journey will take us through Delhi’s colorful bazaars and to its annual Republic Day Parade, to the incomparable Taj Mahal in Agra, on to the annual Desert Festival with its rich tableau of dancing and cultural activities, and then on safari to seek the royal Bengal tigers of Bandhavgarh National Park, among other memorable destinations. Throughout this journey, we will be interacting with fascinating local people from all walks of life, whom we will get the opportunity to meet and to photograph.

Award-winning professional travel photographer Kyle Adler will be shooting alongside tour participants and will provide personalized in-the-field instruction. During our optional informal workshops, we’ll review our recent images, plan our shot list for upcoming locations, and cover techniques to make the best images possible. Topics will be tailored to the group’s interests and may cover any aspects of travel photography from shot planning to capture technique, and on to post-processing and image sharing. Unlike most photography tours, we will place a special emphasis on learning to use the camera as a bridge to enhanced understanding of the land and people we visit. Photographers of any level will see their images improve, and non-photographer friends and family are also most welcome to join this tour. You can make memorable images using whatever camera gear you wish to bring; it is not necessary to invest in specialized gear.

See the detailed itinerary, hotel list, pricing, and other information here: KYLE ADLER- COLORS OF INDIA PHOTOGRAPHY TOUR

Please let me know if you have questions or are interested in learning more about the trip. Mary and I hope that you can join us for this rare opportunity to experience the people, cultures, landscapes, and wildlife of India on a one-of-a-kind adventure tailored to photographers like you!

The Harsh Realities [Encore Publication]: How to shoot in extreme conditions

Travel is exciting because it exposes us to new environments from which we can learn about the diversity of the world and our own place within it.  But travel also can expose our expensive and sensitive photo gear to extreme conditions.  Heat, cold, humidity, dryness, wind, dust, sand, salt, water, and physical shocks are among the harsh realities of travel photography.  Let’s examine some of these hazards and discuss how to mitigate the potential harm.

  • Cold: Extremely low temperatures can cause all kinds of problems with modern electronics, including cameras.  Batteries don’t hold their charges very well in frigid conditions, so you need to carry extra batteries and keep them warm in your pocket or inside your parka.  Also expect to be recharging them more frequently than in warmer climes.  The LCD displays on your camera (and other devices such as your smartphone) can stop working partially or completely in very cold temperatures.  I’ve found there isn’t much that can be done when this happens except to try to gently warm the device, but that can be difficult when in the field shooting.  Fortunately, most of the time the display will return to normal functioning when it warms up.  Remember that very cold air is usually also very dry air, so be careful of condensation when getting out of the cold and returning to the warmth of an indoor environment.  The moisture that condenses on the inside of our lenses and electronic equipment can be damaging, so it’s best to let the gear warm up again while inside a sealed bag to prevent excessive condensation.  A large freezer-style bag works well for this purpose; just remember to place your camera and lens in the bag before coming inside from the cold.  Avoid lens changes in extreme cold conditions whenever possible.
  • Extreme cold, such as in Svalbard, can cause problems with the operation of batteries and LCD displays, and with condensation.  Buy this photo
  • Humidity: Excessive humidity can also cause condensation and fogging of the glass surfaces and displays on your gear.  In very humid conditions there is lots of moisture in the air, while in air conditioned vehicles and hotel rooms there is less moisture.  That means your lenses and LCDs will likely fog up quickly after leaving the air conditioned comfort of your hotel or vehicle.  To mitigate this problem, try to store your gear in an area that is less air conditioned, such as a storage area or bathroom.  And when you leave your hotel or car, keep the gear inside your camera bag to help prevent the buildup of moisture.
  • Wind and Dust: Recall that we’ve discussed many times in other posts the need to keep a UV (or haze) filter permanently attached to all lenses.  This protects the lenses from scratching damage, but has the secondary effect of protecting against dust building up on the front surface of the lens.  Dusty areas are also a good place to keep your lens cap on except when you are actually shooting.  Rule Number 1 in dusty environments is never, ever to change lenses outside unless it is absolutely necessary.  I like to carry two camera bodies with different lenses so that I can shoot with both lenses without the need to change in the field.  And if you do get dust on the camera’s viewfinder, lens, LCD, or mirror, you should have a good blower brush and soft lens cloth with you so you can clean it off.  I do not recommend trying to clean your camera’s sensor yourself unless you are confident you have the skills and equipment to do it properly.  Instead, turn on your camera’s sensor-cleaning function, if it has one, to try to prevent dust buildup, and heed the caution never to change lenses in dusty or windy environments.  A few small specks of dust on the sensor can even be removed in post-processing, although this becomes very difficult if the sensor is badly marred by the stuff.  I have a friend who is an ophthalmologist as well as an avid photographer, and he is one of the few people I know who will clean his own camera’s sensor.  I have a wonderful photo of him in full surgical regalia, using a microscope and surgical instruments to do the job.  For the rest of us, bring the camera to a good repair shop after your trip ends and before the next big adventure begins.
  • Physical Shocks: Travel is the school of hard knocks for camera gear.  Safari vehicles, “puddle hopper” bush planes, and long bus rides over bumpy roads are the norm for adventure travelers.  Once the gear takes a punishing blow that damages it, there is very little to be done in the field.  My best advice is to carry your gear in a very good padded bag with snug fittings around each piece, and to bring a backup camera body and lenses in overlapping ranges of focal lengths to ensure redundancy in the event of a mishap.

Game drives while on safari are near the top of every photographer’s “bucket list,” but the harsh realities of jolts, dust, and humid heat can threaten your sensitive camera gear.  Buy this photo

There’s an old saying, “If you can’t run with the big dogs, stay at home on the porch.”  If we were the types of photographers who wanted to avoid all these hazards, we’d just stay at home, right?  But travel photographers are the adventurous sort, and we consider these risks to be a cost of the intense pleasure we derive from shooting all kinds of fascinating subjects in new environments all around the world.  Plan well to minimize problems, bring extra gear for redundancy, and when something does go wrong keep a positive attitude: you’ll be well rewarded when you get home and have unique images as a souvenir of your efforts!

When have you faced extreme conditions for your shoots, and how did you overcome them?  Please share your thoughts here.

Want to read more posts about what to shoot while traveling?  Find them all here: Posts on What to Shoot.


Focus on Yellowstone and Grand Teton [Enore Publication]: The oldest national park in the US remains one of the best photographic destinations

My last visit to Yellowstone National Park and its nearby cousin Grand Teton National Park was in June of 2011, and I am long overdue for a return trip.  These two gems of the US National Park system are among the world’s best photographic destinations.  Featuring an amazing array of mountain scenery, geothermal activity, wildlife, and human cultural records, Yellowstone and Grand Teton are, simply put, indispensable destinations for travel photographers.  In today’s post, let’s look at a few of my favorite images from the 2011 trip and discuss how they were made.  While the parks haven’t changed too much over the past six years, the state of the art of photographic gear certainly has changed a great deal.  Today’s cameras and lenses will afford photographers even more options for capturing the remarkable beauty of these parks.

Yellowstone N.P. has more geothermal activity than any other region of the world, and this activity manifests itself in many fascinating ways.  The Mammoth Terraces area of the park is known for its gloriously delicate and colorful silica terraces, including the one in this image.  For a great landscape image, it’s best to combine the main subject (here, the silica terraces) with striking foreground and/or background elements (here, the Teton Mountain Range, behind).  I used a circular polarizing filter to bring out the drama in the sky and the highlights in the mountain range, but I dialed back the polarizing effect a bit so as not to eliminate the gorgeous reflections in the pools.  Buy this photo

Yellowstone and Grand Teton N.P.’s are filled with fascinating wildlife, including American bison, elk, wolf, coyote, marmot, osprey, and many other mammal and bird species.  Here I’ve captured (in images, of course) an intrepid coyote that cut across our hiking trail.  For striking wildlife portraits, it’s best to use a medium to long telephoto lens so as not to have to get so close as to stress the animal (or risk your own safety).  Tack-sharp focus is important, and I always strive to frame the subject with as uncluttered a background as possible.  Buy this photo

Photographs that tell stories are perennial favorites.  I love the humor apparent in this image, which tells the story of a standoff between a large male bison and two park rangers attempting to shepherd a convoy of park visitors across the field to an interpretive nature program and barbecue dinner.  At the time this photo was made, the bison was winning.  Buy this photo

Just as in a portrait of a person, a wildlife portrait should capture the spirit of the subject.  This large marmot was sitting up as if to get a better look at us.  His expression is both comical and wise.  To maximize the chances of capturing just the right expression and position, frame the subject first, set the proper focus and exposure, and then shoot continuously for several seconds.  Buy this photo

The quaint Chapel of the Transfiguration, located amidst some of the world’s most lovely mountain scenery in Grand Teton N.P., is a wonderful photographic subject.  Here I framed the Tetons in the chapel’s window and fired an off-camera speedlight to illuminate the walls and altar of the church.  Buy this photo

The iconic Moulton Barn sits on a field in Grand Teton N.P. with the glory of the Teton Mountain Range arrayed behind it.  This landscape image was made with great care to ensure a pleasing composition including barn, mountains, and cloudy sky, as well as to expose for the wooden texture of the barn.  A small aperture (high F-stop number) was used to keep the entire scene in focus.  I used a polarizing filter to bring out the drama in the sky and mountains, as well as to concentrate the lovely green and blue colors.  The scene was further enhanced to achieve a pleasing balance through tone and saturation adjustments in post-processing.  Buy this photo

I was drawn to the texture and patterns of the cracked muddy ground in a geothermal area of Yellowstone N.P.  Composing the image to include just enough of the pattern as well as leading lines to draw the eye downrange, I converted it to black-and-white and made adjustments to contrast and tonal range in post-processing.  Buy this photo

Yellowstone’s Grand Prismatic Spring is a breathtaking feature that is almost impossible not to photograph well.  That said, there are techniques to capture it in all its glory.  Grand Prismatic Spring is one of the world’s few iconic subjects that is best photographed in the harsh light of mid-day, when the reflection from the direct sun most vibrantly brings out the array of colors.  Unless you can shoot it from above, looking directly down on the spring, it is best to include some foreground and background elements other than the spring itself, to provide context.  Here, I framed the spring through some lodgepole pine trees and included some forests and mountains in the background.  Buy this photo

Every visitor to Yellowstone N.P. will stop to observe some geyser eruptions.  But instead of just shooting straight on during mid-day into the eruption of a famous geyser like Old Faithful, seek out some of the lesser-known geysers at sunrise and sunset, and compose to include compositional elements other than the eruption itself.  This image, a favorite of mine, was made on a geyser basin at sunset.  I set up the camera on a steady tripod, set the exposure for a wide depth-of-field, and composed the scene to include the cracked earth and and the reflection of the sunset and eruption within the pools of sulfurous water.  Buy this photo

I can hardly wait to return to Yellowstone and Grand Teton National Parks!  I’m even more eager to visit during the winter than during the much more crowded summer months.  The rich array of scenery, wildlife, and otherworldly geothermal features elevate these parks to the pinnacle of travel photography destinations.

Have you visited Yellowstone and Grand Teton?  What did you find most remarkable?  What do you recommend your fellow travel photographers shoot while there, and what techniques do you use?  Please share your comments here.

Want to read other posts about travel photography destinations around the world?  Find them all here: Posts on Destinations.


Bracketing: Hedging Your Bets [Encore Publication]: In challenging shooting conditions, exposure bracketing is a great insurance policy

In the old film days of photography, it would be days or even weeks after shooting before we could see the results.  I would routinely use a procedure called “bracketing” to make a series of shots, each at a slightly different exposure, to increase the odds that one would come out decently exposed.  Even today, when digital photography allows us to see the results immediately, there are two good reasons to employ the exposure bracketing technique: 1) it can be hard to assess on a small LCD screen in bright daylight and while in the excitement of shooting whether the exposure is really correct, and 2) when the contrast between the brighter and dimmer parts of the scene is high we may want to stitch several different exposures together using software to create a high dynamic range (HDR) image later.

Tricky subjects, like this tiny Svalbard reindeer against a glacier background, benefit greatly from exposure bracketing.  From a series of 5, 7, or even 9 images shot at slightly different exposures, you can choose the one with the correct exposure for the conditions.  Buy this photo

So there are still good reasons to use exposure bracketing, and fortunately, it is quite easy to employ this technique.  Here’s how.

If possible, mount your camera on a tripod when using bracketing so it won’t move between exposures.  Then you can combine several of the exposures into an HDR image later if desired.

If your camera has a bracketing button or menu item, use it to specify how many shots you want to take (I usually shoot 5 or 7 different exposures when bracketing) and how much you want to vary the exposure between each shot and the next (often I choose a 1-stop difference).  If your camera lacks this feature, you can still use bracketing by manually adjusting the exposure between each shot and the next; just use your camera’s exposure compensation control to dial in first -2 stops, then -1 stop, then 0, then +1 stop, and finally +2 stops.

I like to set my camera for continuous shooting while bracketing.  That way, I just hold down the remote shutter release and the camera shoots all 5 or 7 exposures in rapid succession.  But it’s fine to shoot each frame individually in single release mode, if you prefer.

There are some subtleties to think about when employing exposure bracketing.  Some cameras let you choose whether to vary the aperture, the shutter speed, or the ISO setting, while holding the other two settings constant.  In most cases, I prefer to vary the shutter speed and hold the aperture and ISO settings constant, because changing the aperture affects the images’s depth-of-field, and changing the ISO setting can affect the noise in the image.

Later, during post-processing, you review the images and choose the one that is properly exposed.  Or if the scene is very high contrast, you can use photo editing software such as Lightroom or Photoshop to stitch several frames in your series together into an HDR image, which ensures good exposure from the brightest to the darkest tones in your photo.

Several exposures were shot using bracketing and then combined in Photoshop to create this HDR  image.  All tones from the darkest shadows on the mountain walls to the brightest highlights on the icebergs and lake are properly exposed in the final image.  Buy this photo

Have you used exposure bracketing techniques?  What are your best practices?  Do you use this process mostly for selecting the best exposure or for creating HDR images?  Please share your thoughts here.

Are you interested in learning new travel photography techniques?  Follow this link to see all the posts on techniques: Posts on Techniques.

Portrait Photography Gear [Encore Publication]: Affordable kit for making great portraits

Whether in my home town or traveling around the world, I love to shoot portraits.  There is something magical about creating an image that captures the essence of a person.  It can be daunting for many photographers to describe what gear they think is required to make professional-quality portraits: we often visualize a fully equipped studio with tens of thousands of dollars’ worth of high-end lights, modifiers, and backgrounds.  The reality is that we can make portraits of publication quality, shot on location and using kit that costs far less.  Here I outline a basic setup that is portable enough to pack on nearly any trip and costs only a few hundred dollars (not including your basic DSLR or mirrorless camera body).

Really all you need to get great people photos is a good portrait lens and a little know-how.  Make sure to set exposure and focus on your subject’s face.  I often use my camera’s Spot metering mode to get the correct exposure in tricky lighting conditions, such as when the subject is backlit.  In these conditions, it can also be helpful to fill in any harsh shadows on the subject’s face by using a touch of flash with a diffuser attached or a reflector.  That’s really all the gear you need: camera with portrait lens, flash unit, and a reflector kit.  Let’s look at the gear and basic techniques.

My indispensable portrait lens is the Nikon 85mm f/1.8G lens.  I shoot at least three-quarters of all my portraits, whether in the studio or on location, using this one piece of glass.  This is a classic portrait lens and provides a flattering perspective and great image quality when your subject is a person.  But this lens also shines for nature and action photography where you don’t need a really long focal length.  It renders really lovely “bokeh,” or the soft quality of the out-of-focus parts of the image.

This portrait of a grandmother and granddaughter at Carnaval San Francisco was made with natural light using an 85mm lens at a wide aperture to throw the background into soft focus.  Because no flash or reflector was used, there are some shadows on the subject’s faces, but I like the shallow depth of field that really emphasizes the subjects, and this would have been difficult to achieve with the slower shutter speed required to synchronize with a flash.  Also, carrying a reflector through the hustle and bustle of a chaotic street fair can be impractical.  I’m very pleased with this image even with a few shadows.

This portrait was shot using natural light only.  Some shadows are visible on the faces, but the effect is not unpleasant, and the soft focus from shooting without a flash is very effective.  Buy this photo

Your camera most likely has a built-in flash, and in many cases it is good enough to provide some fill-in lighting for backlit subjects or even to serve as a main light in very dark situations.  But for more control over how much light you want, the quality of that light, and where that light comes from and goes to, you likely want to have a separate flash unit.  I use the Nikon SB-910, which is powerful and flexible enough for most settings.  It has been discontinued and replaced by the Nikon SB-5000, but the older model is often still available.

Whatever flash you use, it is best to attach a diffuser of some sort to soften the otherwise very harsh light of the flash.  I also keep my camera set to lower the flash output by 1 stop, and I only override this setting occasionally.  Flash is often best when used sparingly.

This next image was shot at the same location as the previous one, but here I used an off-camera flash with diffuser to provide fill lighting on the subjects’ faces, thus reducing the shadows.  The only downside of using flash on location is that a slower shutter speed (typically about 1/160 of a second or slower) must be used, which in turn requires a smaller aperture (here it is f/8), and this can lead to more distraction from in-focus backgrounds.  I could have mitigated this problem by attaching a neutral density filter to block some of the light and allow a larger aperture.

This group portrait was made under similar conditions to the previous image, but here a fill flash was used to soften the shadows.  Buy this photo

An inexpensive accessory can provide the best of both worlds for on-location portraiture.  For less than $20 you can purchase a reflector kit with a variety of different colored reflectors and diffusers.  The reflectors are used to bounce some of the sun’s light back onto the face of the subject, thereby filling in any harsh shadows, while allowing you to shoot at any combination of aperture and shutter speed you choose in order to soften the background.  Each color of reflector imparts a different mood to the image.  An added bonus is that you can preview the precise effect the reflector has in your viewfinder or on your LCD screen.  Really the only downside of using a reflector in the field is that they are bulky to carry and often require an assistant to hold in place while you shoot.

This is the reflector kit I carry with me to most portrait shoots.  It’s high quality, very portable, and affordable.

This portrait was made by metering off the face of the model, choosing a wide aperture to blur the background, and bouncing some sunlight onto her face using the gold reflector from the kit mentioned above.

Using a reflector to bounce sunlight onto your subject’s face can reduce shadows while allowing you to retain full control over your aperture and shutter speed.  Buy this photo

There you have it: my formula for getting professional-looking portraits in the field with relatively inexpensive gear that’s easy to carry and use.

What is your favorite gear for portraiture?  Please share your thoughts in the comment box at the end of this post.

Interested in other posts about photography gear?  See them all here: http://www.to-travel-hopefully.com/category/gear/.