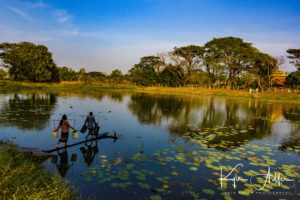
My wife and I recently returned from an amazing 2.5-week adventure traveling through northern India. Operated by Overseas Adventure Travel, the trip’s diverse itinerary took us from the chaotic capital of New Delhi to the “pink city” of Jaipur, brought us face to face with wild tigers in Ranthambore National Park, continued to Agra to view the landmark Taj Mahal and Agra Fort, then on to the ornately carved 9th century Chandela temples of Khajuraho, and finally to the ancient holy city of Varanasi. While it was exciting to view the iconic attractions of India, what made this adventure truly unforgettable for us was its many opportunities to interact with Indian people from all walks of life: pilgrims arrived in Varanasi to pray and bathe in the sacred waters of the Ganges River, street kids in Delhi who started their own newspaper to expose the exploitation and abuses of children in their community, a matriarch and her family as they keep house in a tiny remote rural village, students at a village school, and women in Agra who survived horrific acid attacks and are advocating for awareness and justice. India is a diverse tapestry of colors, cultures, and chaos that will inspire you and stay with you forever. And for a travel photographer, visiting the north of India is a dream come true.
In today’s post we will take a look at some of my favorite images from this adventure. I’ll include some brief discussion about who or what is included in each image and, where appropriate, a few words about how each image was made.
Our adventure began in the capital and largest city, Delhi. The old part of the city is truly ancient, with a heritage dating back more than 1000 years. But Delhi’s heritage also includes the British colonial period in the 19th and 20th centuries, and New Delhi today is the capital of the Indian republic and home to 22 million people.

People waiting for the next meal service at the Gurdwara Bangla Sahib Sikh temple in New Delhi. The staff and volunteers there serve more than 8000 free meals per day to the needy people of New Delhi. To make this image, I used a telephoto lens and shot from a low angle so as to compress the scene and capture the epic scale of the crowd. In post-processing, I cropped the image to better lead the viewer’s eye around the scene, and I tweaked the contrast and vibrancy to better represent my original emotions on being in the middle of this scene. Buy this photo

Our first gift purchase was a set of necklaces from this girl who sold them roadside in New Delhi. To make this portrait, I used an 85mm portrait lens at a wide aperture (small F-stop number) to blur the background, and I added just a touch of fill-in flash using a handhelf off-camera strobe connected with an extension cable. Buy this photo

We met this lovely girl at the Jama Masjid, India’s largest mosque, and she graciously agreed to pose for a portrait. Many travelers will try to “take” photos of people they see on their trips by simply pointing the camera at them or using a long lens to hide their intentions. To “make” (not “take”) really compelling portraits, it’s essential to have a personal connection with your subject. Even though we didn’t share a common language, we engaged the young woman in “conversation” using a combination of smiles and hand gestures, and once we were comfortable together, I used the universal gesture to ask if she would pose for my camera. Buy this photo

For an authentic Indian experience, we took a thrilling and bone-rattling 30-minute ride through the crowded lanes of Old Delhi in a bicycle rickshaw. In this image I tried to capture the sense of chaos and crowding as we experienced it from the rickshaw. I shot from the perspective of the passenger and framed the image using the top of the vehicle. I used a small aperture (high F-stop number) to ensure the whole vista would be in focus, and I set the exposure based on the motorcyclist in front of us. Buy this photo

Qutab Minar is the symbol of New Delhi and was built in the 12th century. The minaret is 234 feet high and a crowning achievement of Indo-Islamic architecture. To fit in the entire tower, a wide-angle lens was required, but I was careful to frame the image so as to avoid distorting the structure too severely. I timed this shot to capture the jetliner as it overflew the site. Buy this photo

We made an inspiring visit to the Balaknama newspaper, run by New Delhi’s street kids as a platform for getting their voices heard and for championing fair treatment of these historically underserved and abused children. This 17-year-old girl is the primary organizer of 10,000 of New Delhi’s street kids. The portrait was made using only available light (no flash), as I didn’t want to disrupt our conversation with the kids. Because the light was so dim inside the building, I had to use a very fast portrait lens and a high ISO sensitivity setting. Buy this photo
After leaving behind the bustle of New Delhi, we traveled overland to Jaipur. Known as the “Pink City” for the peculiar rosy color its downtown buildings were painted in preparation for a royal visit, Jaipur is home to several of India’s most impressive historical sites.

We arose very early in the morning to embark on a hot-air balloon ride over the rural villages and farms surrounding Jaipur. I shot this image of a brick-making factory from the gondola of our hot-air balloon using a telephoto lens to compress the perspective. I converted the image to black-and-white during post-processing in order to emphasize the patterns and textures of the stacks of bricks surrounding the camel-drawn cart. Buy this photo

Our balloon landed in a field outside a tiny village in rural Rajasthan. All of the villagers came out to our landing site to say hello. Here we are posing in front of the hot-air balloon, together with our new friends in the village. I did not have time to set up my tripod for this shot, so I enlisted a fellow traveler to release the shutter for me. When using this method to capture yourself in a photo, be sure to preset all of your camera’s controls and show your volunteer exactly how you want the image composed. Buy this photo

This wonderful elder lady of the village danced for us and generally entertained the whole village. Equally entertaining to the villagers were the dances we attempted to perform for them. Buy this photo

Jaipur’s landmark Palace of the Winds provided nearly 1000 windows through which the women of the court could look down on the streets below. Careful attention should be paid to composing architectural images so as to capture the building in a striking way. Here I used a wide-angle lens and composed slightly off-center so as to portray some depth to the image. Buy this photo

During our home-hosted dinner in Jaipur, we enjoyed a lovely meal cooked by our hostess Ruchi. Most images of food are made by shooting straight down on the plate from above, but here I wanted to convey the conviviality of the meal by shooting from the perspective of a diner at the table. Buy this photo

Outside of Jaipur we were privileged to come across and participate in a pre-wedding dance celebration in honor of the couple who were to be married the following day. This portrait was composed from a low angle right in front of the dancer to truly put the viewer into the middle of the action. A fast shutter speed was used to freeze the motion, and I chose a small aperture (high F-stop number) to keep the whole scene in focus. Buy this photo
After Jaipur, we set out overland across the heart of Rajasthan, heading for Ranthambore National Park. This wildlife preserve is home to many species, including spotted deer, the large sambar deer, langur monkeys, crocodiles, and more than 450 species of birds. But it is best known for its population of wild tigers, one of the highest concentrations of tigers in the world.

Although Ranthamore National Park is one of the best places in the world to attempt to observe tigers, even there it is unusual to see them. We were very fortunate during our early morning game drive to encounter two tigers. The first, this female, was not particularly close by was stalking prey in an open and forested terrain. The second, a large male, was near our vehicle but was obscured in dense jungle. The key to successful wildlife photography is to shoot lots of images. I shot more than 200 frames of this tiger in order to ensure a few would be of excellent quality. I used the bulky and heavy 500mm lens that I had carried all the way from San Francisco in the hopes that we’d encounter a tiger. The images were shot with a fast shutter speed to freeze the animal’s motion and to reduce camera shake, and I used a relatively wide aperture (low F-stop number) to throw the background out of focus. Careful attention should be paid to composing wildlife portraits without too much clutter in the background. Buy this photo

We visited a school in a rural Ranthambore village. It was a delight to meet the students there. Here my wife Mary chats with two sixth-grade girls who hope to become engineers when they grow up. They were very happy to meet Mary, a female engineer herself, and to learn about careers in the field. When photographing children, many people shoot from their own eye level, which results in portraits that appear condescending to the subject. It’s better to get down to the child’s eye level or even below so as to show the world from the subject’s point of view. Buy this photo

After our school visit, we strolled through the village to get a sense of the daily life of the people living there. A highlight was a visit to this matriarch’s home. Many of the local kids came by our hostess’ house to say hello to us. The eyeliner on the kids’ faces is intended to make their eyes look bigger. Once again, I got down low to capture the scene from the perspective of the kids. Buy this photo

A women’s cooperative trains village women to make handicrafts, providing them with income and empowering them to invest in the community and their own futures. We enjoyed lunch with several of the artisans, and after getting to know the woman who sat at our table, I made this compelling portrait. I got up-close and used a classic 85mm portrait lens with a very wide aperture (small F-stop number) to soften the background. In post-processing I brought out the colors in her sari and scarf, and I added a bit of vignetting to darken the edges of the image and emphasize the subject. Buy this photo

En route to Agra, we visited the remarkable Abhaneri step-well, an ingenious solution to bring up water from a very low water table. In this image I wanted to emphasize the step-well’s abstract, Escher-esque appearance, so I composed it using a telephoto lens to frame the seemingly endless symmetry of the ladders. In post-processing I converted the image to black-and-white to bring out the patterns and abstraction. Buy this photo

To break up the very long drive from Ranthambore to Agra, OAT provides an overnight stay at a tented camp. Here our entire group (except for your intrepid photographer-author) gathers around the campfire for drinks, snacks, and folk-dancing. Buy this photo
Agra is home to India’s most visited and loved site, the Taj Mahal. Of course, the Taj is a must-see, but our visit to Agra also included worthwhile visits to the Agra Fort and a farmer’s market, as well as a very moving and inspiring encounter with women survivors of acid attacks.

Early in the morning we visited a farmer’s market in Agra. I used a medium telephoto lens to capture this fruit seller as he enjoyed a smoking break (right on top of his wares). Buy this photo

Sheroes’ Cafe in Agra is a project founded by and for the women of India who are survivors of acid attacks. We were so inspired by meeting Rupa and learning about her story and her road to physical and emotional recovery after her brutal attack at the age of 15 by her stepmother. Through this project, Rupa has gained the confidence and independence to leave home, meet other survivors and activists, build a business as a clothing designer, and access the surgical care required to reconstruct her face. The courage and resilience shown by the women we met at the cafe moved us to want to help their cause to educate people and improve the treatment of India’s women. Buy this photo

When shooting an iconic site such as the Taj Mahal, I try to avoid capturing the “postcard shots,” opting instead to capture the well-known site from a less-known vantage point. The Moonlight Garden provides a less crowded and even more lovely alternative view of the Taj Mahal at sunset. As I’ve said before and will surely say again, don’t forget to include yourself in some of your images. Buy this photo
To get from Agra to Khajuraho, the seat of the 9th and 10th century Chandela Dynasty, it is necessary to take first a train and then a long drive. It’s worth the effort! The ancient temple complexes at Khajuraho are adorned with ornate carvings depicting all aspects of life. Many of the carvings are erotic in nature, which shocked the Victorian British who excavated the site in the 19th century.

The Chandela Dynasty ruled Central India for several hundred years beginning over 1000 years ago. The temple complexes at Khajuraho are well preserved and are fascinating for their intricate stone carvings, many of them erotic. Here I included a rhododendron tree in the foreground to provide some contrasting color and texture against the stone of the temple. Buy this photo
Our final destination in India before returning home by way of Delhi was the ancient sacred city of Varanasi. This was a highlight of the trip. Families of the deceased join pilgrims and holy men along the banks of the Ganges River using its sacred waters to cremate the dead, bathe, and pray. Boat rides along the Ganges in the morning and again in the evening afforded us the chance to observe the many rituals conducted here by India’s Hindus each day.

A sadhu (holy man) on the banks of the Ganges River. Because the sadhus are dependent on alms to survive, it is important to offer a small amount of money in order to make a portrait. Buy this photo

Bathing in the sacred Ganges River. This favorite portrait was made after meeting the two women, getting their permission, and shooting from behind as they prepared to bathe and pray in the river. To impart the dreamlike mood of the scene into the image, I framed it with the brightly colored women at the front surrounded by the mystical dark color of the water. I used a wide aperture (high F-stop number) to blur the water, and in post-processing I created a slight vignette to darken the corners of the image. Buy this photo

We took a second boat ride, this time in the evening, to witness aarti, the sacred light ceremony in which priests thank the river Ganges for providing purification. This colorful ritual provided a fitting ending to our memorable 2.5-week visit through the north of India. Buy this photo
Have you visited India? Please share your fondest (and least fond) memories here, along with your thoughts about how to capture India’s vibrant diverse scenes in images.
Want to read more posts about travel photography destinations? Find them all here: Posts on Destinations.
 Sometimes we get lucky. This alligator was seeking what little sunshine was available on an overcast winter’s day on the bayou in Louisiana. He stayed sufficiently still that I was able to capture this image by handholding a medium telephoto lens from our airboat. Buy this photo
 Lilac breasted roller captured with a 500mm lens in Tanzania’s Kilimanjaro region. Buy this photo
 A sleepy leopard yawns in a tree above the Endless Plains of Serengeti National Park. This image was captured using a 500mm lens resting on a beanbag support placed on the roof of our safari vehicle. Buy this photo


