
Iconic Panamanian scene: Nearly every visitor to Panama comes, at least in part, to see the canal, one of the wonders of the modern world. Although our small vessel was able to transit the canal using the original 1914 lock system, we had the opportunity to visit the newly expanded 2016 lock system that can accommodate some of the world’s largest ships. We observed this super container ship carrying more than 10,000 shipping containers each the size of a tractor-trailer truck as she transited the new lock system. The massive scale of this scene makes it challenging to photograph. Compose too tightly and you lose the grand sense of scale; compose too wide and you lose the dramatic impact. I opted to capture this enormous vessel fully enclosed by the gargantuan lock chamber with the entrance to the Caribbean (Atlantic) waters and the modern Atlantic Bridge in the background.
My wife and I recently returned from a lovely two-week adventure traveling through Panama. Our itinerary took us from the capital of Panama City to the historic and folkloric Azuero Peninsula, then up the Chagres River via dugout canoe for an in-depth encounter with the Embera indigenous people, followed by transiting the entire length of the Panama Canal aboard our 24-passenger catamaran, and ending with a visit to the remarkable rainforest of San Lorenzo National Park before returning to Panama City. Throughout this adventure we had the opportunity to meet and learn about Panama’s people of diverse backgrounds and trades. We discovered that Panama is much more than just a canal: it’s a photographer’s dream, filled with glorious landscapes, unparalleled biodiversity, centuries-old cultural traditions, and friendly people.
Our Panamanian adventure began in the largest city, Panama City. While small relative to other major Latin American cities, Panama City is growing and thriving, juxtaposing a modern vibrant energy on top of a lovely historic Spanish-colonial old town.
 Old meets new in Panama City as the Old Quarter ruins lie in the shadow of newer developments. To capture this juxtaposition of ancient against modern, I composed using a wide-angle lens and a low vantage point so that the skyline appears to grow suddenly from behind the ruins. A narrow aperture (high f-stop number) allows both foreground and background to be in sharp focus.
 Wildlife is abundant nearly everywhere in a rainforest climate zone, so our cameras should already be ready. On the outskirts of Panama City, we observed this lovely iguana. I crouched down very low to shoot from the same level as the iguana, using a long telephoto set to a wide aperture (small f-stop number) to soften the background. It’s important to shoot many frames of wildlife subjects to maximize the likelihood of capturing a few really strong shots. This image appeals because the iguana appears to be smiling at us.
 Lovely view over Panama City from the roof garden of our hotel. A polarizing filter can help darken skies and enhance the sense of drama in clouds and water. When composing busy images like this one, I seek a sense of harmony and balance between the different elements. It’s also helpful to avoid the use of extremely wide-angle lenses and to keep the horizon level so as to minimize distortion of the vertical lines.
 Food is an important aspect of travel, so it’s fun to make some images of the dishes we try, such as this whimsical presentation of ceviche in a local Panama City restaurant. Photographing food in restaurant or home settings can be challenging due to poor lighting and cluttered backgrounds. Here I removed some of the clutter from the table and shot from a 45-degree angle, which works well for many food presentations (shooting from directly above almost never flatters the dish).
 A highlight of our stay in Panama City was getting to explore the neighborhood of El Chorrillo, nearly completely destroyed during the 1989 US invasion to oust Manuel Noriega. Nearly three decades later, much of this neighborhood is still in shambles and its residents are divided on whether such destruction was justified. I feel it’s a privilege to observe and photograph peoples’ homes during times of regeneration, so it’s important to explore and shoot photos with a high degree of respect for those who live in the neighborhood, speaking with residents and obtaining their permission before capturing images.
Departing Panama City for the historic and folkloric region of the Azuero Peninsula, we were very fortunate to arrive in the little town of Chitre on the day they celebrate Panama’s “First Cry of Independence”. The push for independence from Spain began here, then spread to the rest of the country.
 Whether halfway around the world or right in my home town, I’m always thrilled to have the chance to capture the special energy and tradition of a festival or celebration. Because festivals are very busy events, it’s important to look for clean backgrounds insofar as possible. To make this portrait of two young Panamanians dressed in the national costume known as the pollera, I composed so as to minimize clutter in the background and also used a wide aperture (small f-stop number) to render the background in soft focus. Too often photographers compose based only on the main subject, but a clean background is at least as important to the success of the image than an interesting foreground subject.
 In the village of Las Tablas we visited a pollera-making workshop run by a husband and wife team. These intricately embroidered costumes can each cost tens of thousands of dollars and take years to make. The owners’ niece and son made adorable models for their work. I asked them to move a few steps away from the cluttered area where they were standing so we could frame the portrait with the lovely traditional Panamanian window in the background.
 Local fishermen ferried us from the mainland to the lovely Iguana Island for a day of snorkeling, hiking, and relaxing at the beach. A strange sighting: this hermit crab re-purposed the discarded head of a child’s doll for its new shell. I did not have a macro lens with me, so I used the closest focusing lens in my bag and got as close as possible, later cropping the image further during post-processing.
 The second day of independence festivities are celebrated in the small town of Villa de los Santos. I asked this parade participant to pose for a portrait in a spot with a clean background and lovely soft lighting, then got in close with a fast prime portrait lens set to a wide aperture (small f-stop number) to throw the background out of focus. Soft lighting (which can be obtained by shooting near sunrise or sunset, or by moving the subject into a shaded area) makes vivid colors truly pop and flatters the subject of your portrait.
 The “First Cry of Independence” festivities last well into the night. The extremely low-light conditions offer a photographer’s dilemma: either continue to shoot using only available light (and accept the added visual noise and motion blur) or switch to using flash (and live with its short coverage distance, artificial color cast, and distraction to the subjects). I chose to work with just available light, boosting my camera’s ISO sensitivity setting to as high as I could get away with and using a fast prime lens at a very wide aperture to gather as much light as possible, which in turn allowed the use of a reasonably fast shutter speed. The results are lovely: sharp dancers in the foreground with just a touch of motion blur, soft focus on the dancers and buildings in the background, and a soft and painterly feel for the scene that to me feels quintessentially Panamanian.
 As we prepared to depart the Azuero Peninsula, we visited the mask-making workshop of renowned artisan Dario. Even avid photographers enjoy returning home with at least a few photos of themselves and their loved ones, so I set up the camera and asked a fellow traveler to capture the shot. Expect to spend some time fixing the composition and exposure in post-processing if your designated photographer is not very experienced.
After spending a few days on the Azuero Peninsula, we navigated up the Chagres River via dugout canoe to meet the Embera indigenous people. This fascinating in-depth encounter offered a window into an ancient culture that has mostly disappeared from Central America as indigenous groups have been forced to resettle on national parklands where their traditional fishing and hunting practices are not permitted. Our Embera hosts are able to continue to live in the traditional manner by sharing their culture with visitors like us. Our lovely day spent with the Embera villagers included preparing and enjoying a traditional meal, visiting the two-room schoolhouse (supported by Grand Circle Foundation), exploring the village, learning about their government and way of life, and observing and participating in traditional singing and dancing. We will never forget this experience.
 We enjoyed a wonderful visit to the two-room schoolhouse in the Embera village. As we shared songs and dances with the schoolkids, I made this portrait using only available light, intentionally blurring the girl’s hands to impart a sense of motion.
 I got to know this Embera teen as she helped prepare her sisters and brother for the traditional dance ceremony. We chatted and I captured photos of her preparations as she applied tattoos to her siblings using the juice of the jagua plant. It’s always a good practice to get to know your subject before making a portrait. Doing so will help put them at ease and allow you the opportunity to capture their true personality. To make the portrait, I asked the girl to move outside of the hut to a spot with open shade and a pleasing background, then captured the moment using a fast portrait lens and a wide aperture (small f-stop number) to get that lovely “bokeh” (artistic quality in the out-of-focus background areas).
 At the conclusion of our day in the Embera village, all the people of the village came out to demonstrate traditional singing and dancing for us. For large group portraits, it’s often best to work with a slightly wide-angle lens, but not so wide as to cause distortion. I chose a narrow aperture (high f-stop number) so that all of the people and the surrounding village landscape would be in sharp focus. Shooting from the same level as your subject has the effect of seeming to place your viewer within the scene rather than (literally) looking down on the action.
A brief jaunt back to Panama City put us in position to board our 24-passenger catamaran, the M/S Discovery, for our three-day transit of the Panama Canal.
 Strolling near our hotel, we happened upon these two brightly-colored toucans in a tree. Using the longest telephoto lens at my disposal, I made the shot handheld with a fast shutter speed to minimize camera shake. If your camera or lens has built-in image stabilization (also sometimes called vibration reduction), this modern feature can be very useful in avoiding blurring caused by camera shake.
 Setting sail on the Panama Canal, we pass the Frank Gehry designed Biodiversity Museum with the Panama City skyline in the background. Cityscapes can be great fun to photograph. Attention should be paid to composing the image to include the most interesting urban features while eliminating extraneous and distracting elements. A polarizing filter can help reduce reflection and enhance the color and texture of clouds and water. And it’s always a good practice to keep the horizon line nice and level.
 A spider monkey feeds in a tree on an island in Gatun Lake, highest point along the Panama Canal. Photographing an animal in the low light of the rainforest canopy, and from a moving boat, is a challenge. I boosted the camera’s ISO sensitivity setting and used the fastest aperture setting available on this lens to render a sharp image of the monkey in motion.
 Transiting the Atlantic locks near the end of the Panama Canal. This scene conveys the hustle and bustle of this hectic waterway without too many distracting elements. I composed to include two relatively large ships in separate chambers of the locks along with the Canal Authority’s apparatus and our own ship’s Panamanian flag.
All of the images appearing in this post and many more are available for viewing and purchase on my website here: Panama photo gallery.
Have you traveled in Panama? Please share the most memorable aspects of your photographic journey in the comments box.
Want to read more posts about world-class travel photography destinations? Find them all here: Posts about destinations.



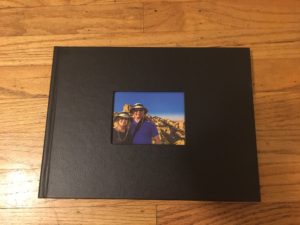
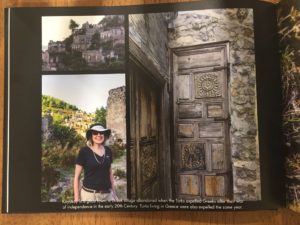
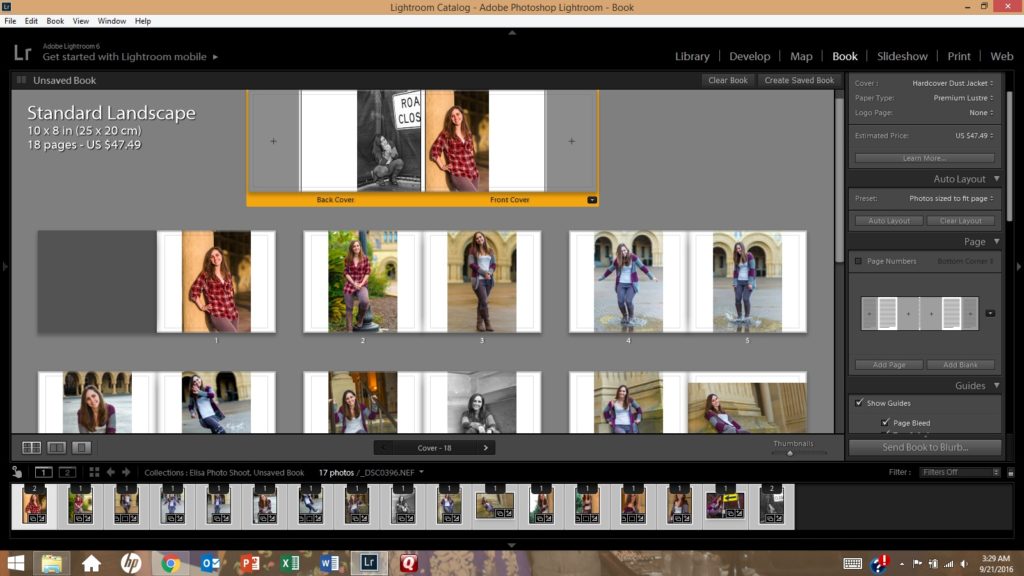 The process of creating a photo book using Lightroom’s Book module (shown here) is fairly straightforward. It’s even more intuitive using an online service such as Snapfish or Shutterfly.


