Focus on Asha Stanford Holi [Encore Publication] : Capturing the colors, joy, and exuberance of an iconic Indian celebration held close to home

I love all aspects of travel photography, but the moments I truly live for are when I have the opportunity to experience and to capture images of the world’s most exuberant celebrations.  The iconic Indian festival of Holi, celebrated annually throughout India in huge cities and small villages alike, is one of my absolute favorites.  This year I had the chance to shoot a large and vibrant Holi celebration without the need to fly for 30 hours to get to India.  As an official photographer for Asha Stanford’s Holi festival, I got to document all the color, joy, and revelry of a large, world-class Holi event, all within 20 minutes drive from my home.  In today’s post, I share some favorite images from the event along with some brief remarks about how each was made.  Note that all of these images and many more are available to view and purchase on my website–get there by clicking on any of the images here.

With colored powder and often sheets of water flying everywhere, Holi is by design a messy and mischievous celebration.  Protect yourself when “playing Holi” by wearing clothes you can part with after the event and by covering your camera body and lens with a rain sleeve.  Here’s the one I use, which is excellent–inexpensive, easy to use and very protective of the gear:

Note that even when using a high-quality rain cover like this one, the front end of the lens is still exposed, so be sure to protect your lens’ front element with a UV or Haze filter.  And to be extra safe, I brought only one camera body and only a single lens, which was an inexpensive but versatile “walk-around” travel zoom lens.

Crowded festivals, by their nature, have cluttered backgrounds.  When making portraits in such environments, I do try to reduce the clutter by choosing the background carefully, but capturing the moment is more important and in any case, it is futile trying to wait for completely uncluttered backgrounds.  In post-processing, some of the clutter can be minimized through careful cropping and the application of just a bit of post-crop vignetting.  Use too much vignetting, though, and the image begins to take on an artificial appearance.

To capture fast action, you obviously want to choose a fast shutter speed.  That’s no problem when shooting in bright sunshine such as we had during this Holi celebration.  Still, I choose a moderately high ISO (400) to ensure I could retain fast shutter speeds even when in the shade or when using a small aperture to maximize depth-of-field.

Get in close!  Portraits often are most effective when they emphasize a specific detail rather than show the entire environment.  To further emphasize that specific detail, try to select a wide aperture (low f-stop number) in order to obtain shallow depth-of-field.  I had only a relatively slow “walk-around” zoom lens with me, so for close-up portraits I shot wide open at f/4.5–not great for isolating the subject, but better than shooting at an even smaller aperture.  In typically less adverse environments, I would be shooting with a much faster portrait lens, most likely my favorite 85mm f/1.8 prime lens:


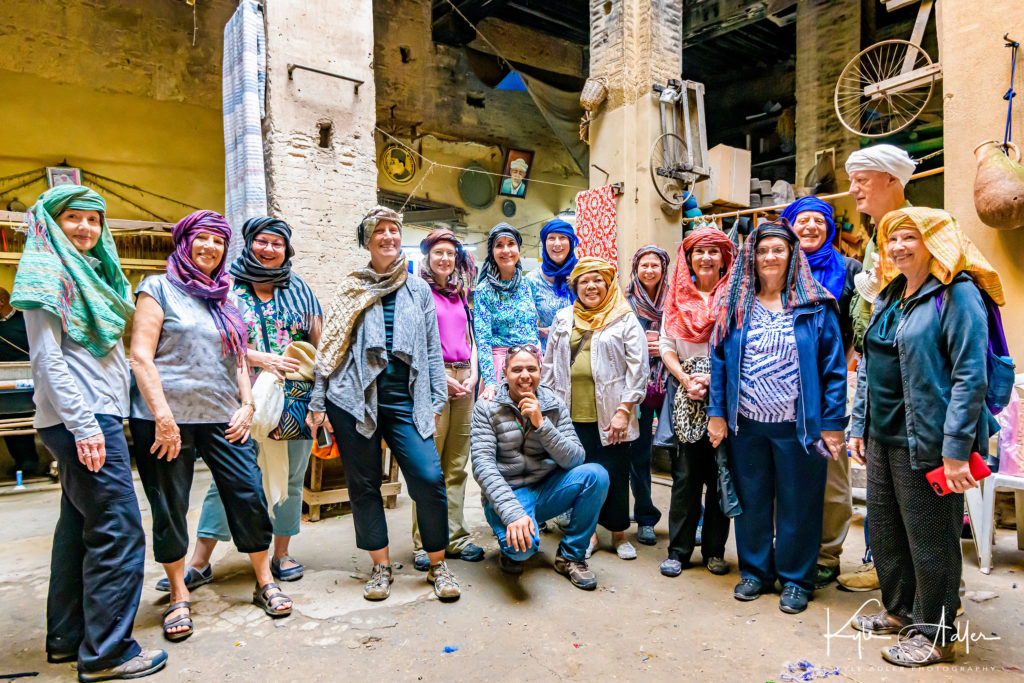
When your subject is backlit (the main light coming from behind), as is often the case when shooting outdoors in bright sunlight, be sure to choose exposure based on the main subject.  Here I used my camera’s spot metering mode to set the exposure based on the clothing of one of the people in the group, but it’s also fine to get your exposure by zooming in or walking up close to the group and then to set that exposure manually on your camera.  You can also use your camera’s exposure compensation control to dial up the automatic exposure by about 1.5 or 2 stops, but I recommend not trying to use automatic exposure modes in general.  If you use the exposure your camera’s auto mode chooses for you and your subject is strongly backlit, your image will be underexposed by typically 1.5-2 stops or even more.

I’m always on the lookout for great moments to capture.  When I saw this dad playing with his young daughter, I composed the frame around the two of them and started shooting continuously so as to get a shot at just the right instant.  During post-processing, I cropped the image to show only the portion that portrays the thrill and joy of the playful pair.

Careful composition is always important in photography, but it’s easy to forget this point during the heat of the moment when shooting in bustling and chaotic environments.  To compose this image, I framed it to get the splash of color from the two friends’ “high-five” moment right in front of the big sign boldly pronouncing, “COLOR”.  That’s a Holi moment.

One of the keys to successfully documenting huge festivals is finding the small, intimate moments.  Big, sweeping crowd shots showing chaotic motion are important to document, but it’s capturing those small interpersonal interactions that really make your portfolio shine.  I used as wide an aperture as I had available in order to cast the busy background in soft focus.

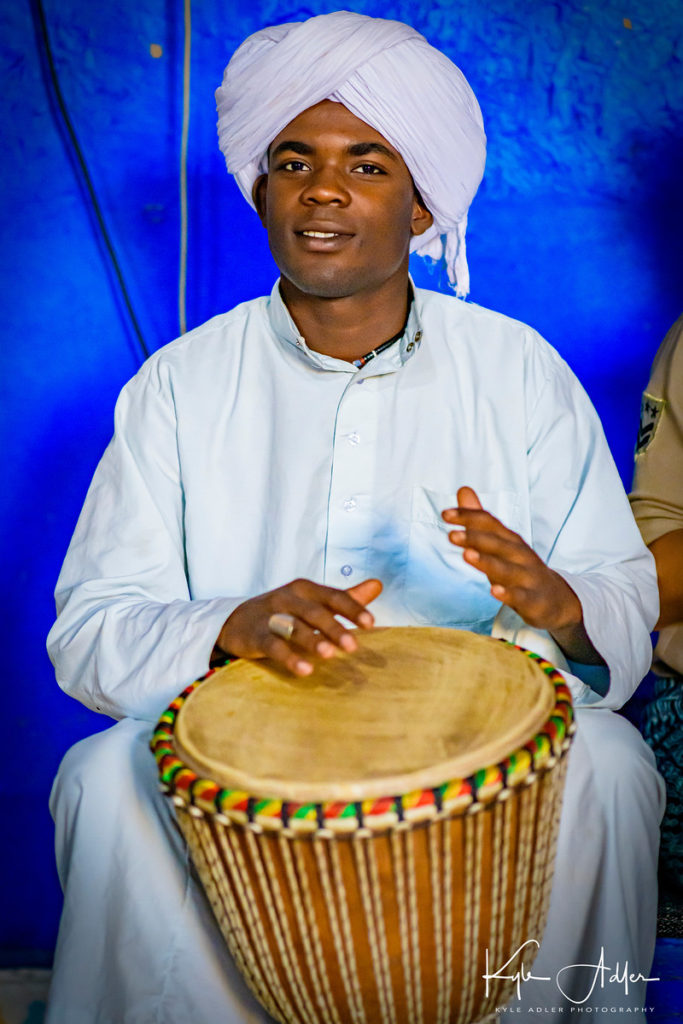
Performances are often a part of festivals, and these are wonderful fun to capture.  I’ve posted many times on the techniques required to make great images of performing arts, so I won’t repeat myself here.  Just be sure to compose appropriately, set the exposure correctly (challenging to do in direct sunlight), and shoot lots of images to be sure of capturing a few excellent ones.

The climactic moment of the Holi celebration comes near the end, when all the revelers simultaneous throw handfuls of colored powder high into the air.  Be ready for these big moments by preparing all your gear and composing all elements of the shot beforehand.  

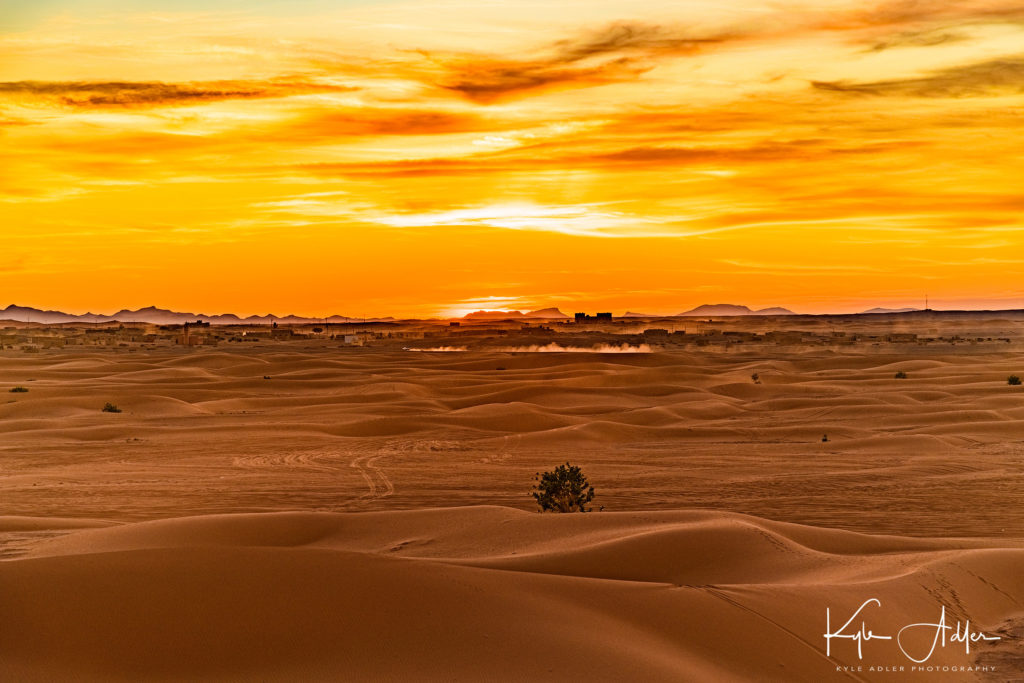
To capture the sweeping scale of really big celebrations, sometimes it helps to make a panoramic image.  Some cameras can do this automatically in-the-camera, but I find those images don’t turn out very well, so I make panoramas manually by shooting a series of overlapping images that span the scene.  In theory this is quite simple.  Just take a series of photos starting from the far left side of the scene, then panning the camera a little bit to the right so the next photo just overlaps with the previous one, and so on until you reach the far right side of the scene.  You then use software such as Lightroom or Photoshop to stitch the separate, overlapping photos together into a single sweeping image.  In practice, this can be quite difficult.  I find the software often takes an extremely long time to process a panoramic image and sometimes even crashes while attempting to do so.  If you have a more powerful computer than I have, you may have an easier time with this process.  

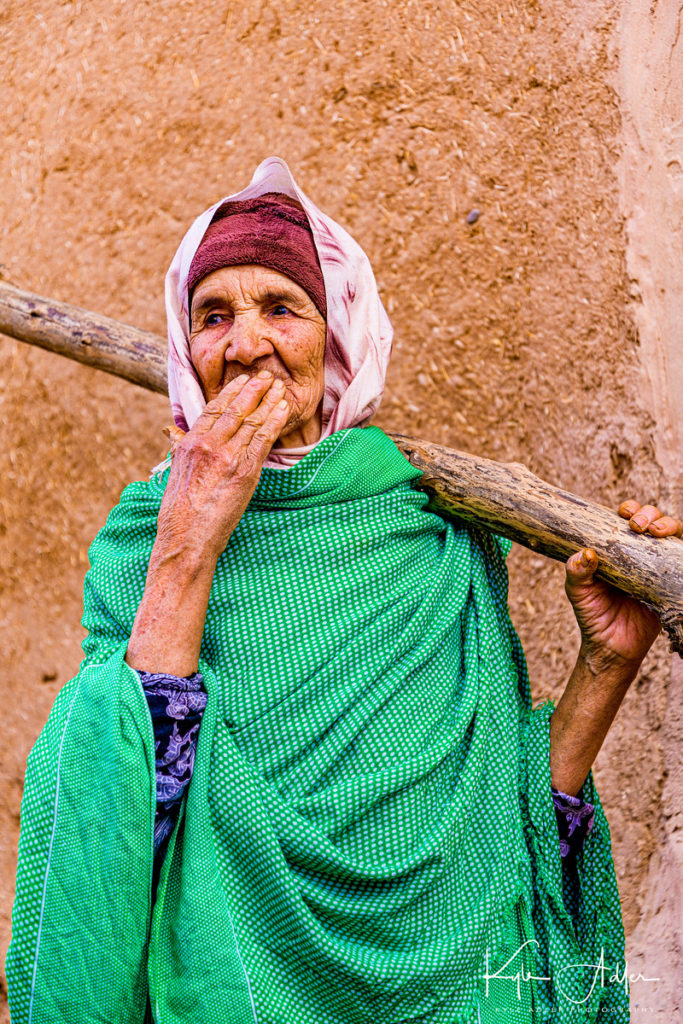
Parting shot: When I see a great subject for a portrait, I will interact with him or her, get to know them a bit, then begin shooting with their permission.  Over time and in the heat of a celebration, they will forget I’m even there, but the resulting images will be better for the time spent interacting with the person first.

I hope you’ve enjoyed this photo essay and brief notes about how to shoot festivals and celebrations.  Whether we’re close to home or halfway around the world, such festive gatherings truly define the culture of the celebrants and make amazing photographic subjects.  If you’d like to read more posts about what to shoot while traveling or near home, find them all here: Posts about what to shoot.

What are your favorite celebrations to shoot, and how do you capture images there?  Please share your thoughts here!


Focus on Dublin [Encore Publication]: Ireland’s main city overflows with Guinness, literature, history, and music

We began our rambles through Ireland and Scotland with a whirlwind two-day stay in Dublin.  The capital of the Republic of Ireland, Dublin is well known as the home of Guinness beer and for its literary and historical legacy, but perhaps less known as a remarkable hub of live music and contemporary fine dining.  It’s also a marvelous place to make images that highlight the old and the new elements of this vibrant city.  Here’s a brief photo essay along with some discussion of how the images were made.

Perhaps the world’s grandest study hall, Trinity College’s Long Room is a stately palace to higher learning.  Located next to the vault housing the famous Book of Kells (where photography is not permitted), the Long Room is best photographed with a wide-angle lens using natural light.  Here I shot from one end of the hall looking up at the ceiling and upper gallery.  Be careful to watch your horizons when making an architectural image from such an angle.  Buy this photo

Live trad (traditional Irish folk) music is a staple of Dublin nightlife, and nowhere is it better than at the famed O’Donoghue Pub, where in the 1960’s bands such as the Dubliners sparked the Irish folks music revival.  Irish pubs are convivial and interactive places, where you can mingle with the performers and other locals.

To make portraits of the musicians, sit close to the “stage” (there’s rarely a true stage in the formal sense, but rather a performer’s area) and shoot with a fast normal or portrait lens using a high ISO setting.  It helps to get to know a few of the players during their breaks.  Buy this photo

Dublin is a world-class literary city, with ties to James Joyce, W. B. Yeats, Jonathan Swift, Oscar Wilde, G. B. Shaw, Samuel Beckett, and Seamus Heaney, among many other literary greats.  We took, and highly recommend, a literary walking tour led by scholar, author, and actor Colm Quilligan.  There are many photo opportunities to be found during this informative walk.  You can learn more about Colm’s walking tours here: http://www.dublinpubcrawl.com/writerswalk.htm.

A self-portrait made at The Duke Pub, where many of Dublin’s great authors took their liquid inspiration.  Remember to include yourself in some images, but always look for unusual perspectives.  Buy this photo

A park sculpture commemorates  the Great Famine of the 1840s.  To bring out the textures, I converted this image to black-and-white using Lightroom’s color channel tools, and boosted the contrast slightly.  Buy this photo

Dublin Castle dates from early Anglo-Norman times, and a guided tour provides a sweeping history of Dublin from its origins through the present day.

To photograph the Castle and Dublin’s other architectural gems, use a wide-angle lens.  Watch out for cluttered foregrounds and keep an eye on the lines at the edges of the frame, as it is tricky to avoid distortion when shooting up with a wide lens.  Here I also used a polarizing filter to add contrast to a rather bleak scene.  Buy this photo

The chapel within Dublin Castle offers many photographic possibilities.  Seek out the details in a place like this.  Here I’ve captured the beautiful (but, alas, no longer functioning) pipe organ.  I brought out the shadow detail and increased the vibrance during post-processing.  Buy this photo

It may or may not come as a surprise to learn that Ireland’s biggest attraction is the Guinness Storehouse.  While it’s easy to dismiss sites like this one–essentially a theme park dedicated to a beer brand–that would be a mistake.  The self-guided tour is fascinating for its historical, cultural, and architectural facets, and the view from the top-floor Gravity Bar (with an included pint of Guinness) is the best in Dublin.

The Guinness Storehouse was converted into a museum and tourist attraction, but happily they have retained much of the old brewing machinery, which makes a great photographic subject.  I used a touch of flash here to saturate the colors.  Buy this photo

My wife Mary pulls a perfect pint of Guinness.  It’s more fun to include traveling companions when they’re doing something locally inspired and interesting.  I used natural light with a fast portrait lens and relatively high ISO setting.  The cluttered background isn’t as distracting as it could be, because it documents the bustle of the place.  Buy this photo

Parting shot on our last night in Dublin.  Another trad music session.  This one (which also incorporates a self-portrait) was shot at the Cobblestone Pub.  It was an informal sit-in session, so I had the chance to chat with and really get to know several of the musicians before shooting their portraits.  Buy this photo

Have you visited Dublin?  What do you consider essential activities–and photographic subjects–in this city?  Please share your comments here.

Want to view posts about other travel photography destinations?  Find them all here: Posts on Destinations.

Focus on Carnival in Madeira [Encore Publication]: This tiny Portuguese island group celebrates a vibrant and unique Mardi Gras

When we think about Mardi Gras carnivals, most often the first locations that come to mind are Rio de Janeiro, New Orleans, and perhaps Trinidad.  But the start of the Lenten season is celebrated in many parts of the world with the outpouring of dance, music, color, and joy known as Carnival.  While each region’s celebrations have a few elements in common–typically the all include grand parades with samba dancers and floats, all decorated in lavish costumes–there are many notable regional differences.  For example, in my home in the San Francisco Bay Area, Carnaval SF is unique for its array of “comparsas” (samba school contingents) representing the cultural traditions of all of Latin America and the Caribbean as well as parts of Asia.

This year I had the great pleasure of capturing Mardi Gras Carnival images on assignment in Funchal, capital of the tiny island group of Madeira.  While politically a part of Portugal, Madeira is located off the coast of Morocco in North Africa and has a decidedly different cultural flair than what is found in mainland Portugal.  Samba and Carnival were essentially invented by African slaves in Brazil while it was a Portuguese colony, and the samba parade traditions have migrated back to Portugal where celebrations are held throughout the country.  Given its location between Africa and Europe, Madeira combines distinct cultural traditions from both regions and offers a special flavor of Carnival that I found exhilarating.  And best of all, the celebrations roll on over a whole week with numerous events, retaining a true local flavor with few tourists.

Today’s post features some of my favorite images from this year’s Carnival events on Madeira.  If you’d like to see more photos, or to purchase a few, please visit https://www.kadlerphotography.com/Travel-Photography/Madeira-Carnival/.  I am grateful to the Madeira Promotion Bureau for their assistance providing access to the Carnival events.  Enjoy!

I hope you enjoyed these images from this year’s Carnival events on Madeira.  Visit https://www.kadlerphotography.com/Travel-Photography/Madeira-Carnival/ to see more photos.  Again, a big thank-you to the Madeira Promotion Bureau for their assistance providing access to the Carnival events.
Have you discovered any less known locations for Carnival celebrations?  Please share your experiences and your photos here!

Faces of Vietnam and Cambodia, Part II [Encore Publication]: Showcasing the diversity of Vietnam and Cambodia’s people

My wife and I recently returned from an amazing 3.5-week adventure traveling through Vietnam and Cambodia.  Our itinerary took us from the bustling capital of Hanoi to the glorious mountains jutting skyward from Halong Bay, then to the former imperial capital of Hue and the quaint festival city of Hoi An, on to the mountain retreat of Dalat and to modern Ho Chi Minh City (Saigon), and finally to the indescribable temple complexes at Angkor Wat in Cambodia.  While it was wonderful to view the region’s gorgeous landscapes and fabled monuments, what made this adventure truly unforgettable for us was its many opportunities to interact with Vietnamese and Cambodian people from all walks of life: a Buddhist nun, an older couple whose homes were confiscated by the Communist Party, a former South Vietnamese soldier who survived the re-education camps and rose to become major of his village, eager students at Dalat’s rapidly growing university, former Viet Cong fighters, and ethnic minority hill tribes rarely contacted by outsiders.

Yesterday’s and today’s posts showcase some of my favorite portraits, some of them not yet previously published, featuring a wide range of people we met during our adventure.  The portraits will be presented as a photo essay, but I will include brief descriptions of each and occasionally some commentary about how they were made.  You can click on any of these images to view or purchase them and many more from the Vietnam and Cambodia trip.  Yesterday’s post featured Part I, and today’s post comprises Part II.

A wonderful visit to village of Buon Chuoi, home to the Kho Chil ethnic minority. We were among the very few foreigners ever to visit this hill tribe area.  Kids are great fun to photograph.  The key to making authentic portraits of kids, as of adults, is to make a personal connection before starting to shoot.  Get to know your subjects first, be playful and interactive, and only then take out your gear.

School was not in session due to parent conferences when we visited the mountain village of Buon Chuoi, so many of the schoolkids were playing in the courtyard.  I captured this portrait of a girl with her little brother during a game of marbles.

Visiting the village chief’s home in Buon Chuoi Village. His wife, in her eighties, still passes most days by weaving while smoking her pipe.  This is one of my favorite portraits from the whole trip, because it truly captures the spirit of the subject, offers a rare view into rural Vietnamese village life, is illuminated by lovely natural light, and represents a memorable and striking image.

Kho Chil boys run after our tractor as we descend from Buon Chuoi Village.  Not all portraits need to capture a stock-still subject.  This portrait gains its vitality through the boys’ motion, and its jaunty, slightly off-kilter composition adds to the sense of kinetic energy.

Dalat is much cooler than the rest of Vietnam. This mom and her daughter are dressed appropriately for the higher elevations.  Busy backgrounds can distract from a good portrait, but here I mitigated some of the distraction by using a shallow depth-of-field and by applying a bit of post-crop vignetting during post-processing.

In the courtyard of the Linh Phuoc Pagoda, Lady Buddha observes this young woman checking her text messages.  Good street photography is characterized by capturing just the right viewpoint, framing, and moment (what Henri Cartier-Bresson called “The Decisive Moment”) when the people and the space come together, and I believe I caught that conjunction nicely here.

A young Buddhist monk-in-training.  Often, the person appearing in a portrait is more colorful than the background elements, but here the opposite is the case.

At Saigon’s Post Office, I asked this lovely young woman to model the traditional Vietnamese costume, the ao dai.  I made no attempt through depth-of-field, supplemental lighting, or vignetting, to set off the model from the cluttered background.  That’s because I wanted to feature the glorious French colonial architecture of the post office as much as the model posing before it.

Preparing to board our sampan on the Mekong Delta.  The weather was overcast and rainy, so I used a slower shutter speed (1/50 second) and fairly wide aperture (f/4) to saturate the colors.

Ben Tre Village is famous for its coconut plantations.  We enjoyed coconut meat, coconut milk, coconut whiskey, and of course coconut candy.  I used a small amount of fill flash to fill in the shadows on the subject’s face and to help set her off from the background.

A stall-keeper at Saigon’s bustling central market.  I used a fast portrait lens at a wide aperture along with a high ISO setting in order to soften the busy background.

Very interesting learning about the wartime experiences of these former Viet Cong fighters. They lived for years in the Cu Chi Tunnels, which they considered much safer than being exposed to US bombing and infantry attacks above ground.  This portrait is effective because it captures the officer in a candid moment with beautiful available lighting and sets him against a solid colored background.

We visited a farm outside Siem Reap, Cambodia, where women still thresh rice by hand.  The farm family’s six-year-old daughter stopped by to check us out.  

We are welcomed to a small village outside of Siem Reap by this elder.  I made an environmental portrait showing her in the context of her work weaving baskets.  The image works very well because the composition is intimate and engaging, telling the subject’s story in a concise way, and because the simple solid contrasting color of the wall behind her offsets her colorful clothes in a pleasing manner.

Visiting the floating village of Mechrey on the huge Tonle Sap Lake.  I made this image of a local family in their houseboat as we sailed by.  By placing the family in the context of their home and daily activities, the image serves to capture a slice of life rather than to feature any individual member of the household.

A monk pauses to reflect outside the Angkor Wat temple complex.  I spoke with him (using our guide as a translator) to make a personal connection and to obtain his permission to make the portrait.  The contrasting colors and textures of the monk and the temple buildings, as well as the leading lines that guide the viewer’s eye from front to back, make this a memorable portrait.  I made the image using natural light only and incorporated a polarizing filter to deepen the colors and add drama to the sky.

At a home-hosted lunch in rural Kravan Village, I made portraits of the whole family. Here is the oldest daughter, Lia, a flight attendant and gracious hostess.  Classic portrait techniques applied here: make a personal connection first, use a fast prime 85mm lens at a wide aperture, and light the subject with the most beautiful light available in the situation.  

I arranged a visit to a performance of traditional Cambodian Apsara dance. In the days of Khmer empire, only the king and queen were allowed to see these dances.  During live performances, use of flash is almost always prohibited (and almost always rude), so use a fast prime lens, a high ISO setting, and a steady hand.

We learned about the traditional folding of flowers to present at the Buddhist Ang Chorm Shrine in Siem Reap.  The young daughter of the flower stall owner folded these flowers herself.  While a bit on the busy side, this portrait succeeds by capturing a riot of colors and an intriguing story.

Have you visited Vietnam or Cambodia?  What were your favorite photographic subjects?  Please leave your thoughts here.

Want to read more posts about what to shoot while traveling?  Find them all here: Posts about what to shoot.

All of these photos and many more from Vietnam and Cambodia are available for viewing or purchase here: Vietnam and Cambodia image gallery.

Missed Part I of this story in yesterday’s post?  You can read it here: Part I of this story.

Faces of Vietnam and Cambodia, Part I [Encore Publication]: Showcasing the diversity of Vietnam and Cambodia’s people

My wife and I recently returned from an amazing 3.5-week adventure traveling through Vietnam and Cambodia.  Our itinerary took us from the bustling capital of Hanoi to the glorious mountains jutting skyward from Halong Bay, then to the former imperial capital of Hue and the quaint festival city of Hoi An, on to the mountain retreat of Dalat and to modern Ho Chi Minh City (Saigon), and finally to the indescribable temple complexes at Angkor Wat in Cambodia.  While it was wonderful to view the region’s gorgeous landscapes and fabled monuments, what made this adventure truly unforgettable for us was its many opportunities to interact with Vietnamese and Cambodian people from all walks of life: a Buddhist nun, an older couple whose homes were confiscated by the Communist Party, a former South Vietnamese soldier who survived the re-education camps and rose to become major of his village, eager students at Dalat’s rapidly growing university, former Viet Cong fighters, and ethnic minority hill tribes rarely contacted by outsiders.

Today’s and tomorrow’s posts showcase some of my favorite portraits, some of them not yet previously published, featuring a wide range of people we met during our adventure.  The portraits will be presented as a photo essay, but I will include brief descriptions of each and occasionally some commentary about how they were made.  You can click on any of these images to view or purchase them and many more from the Vietnam and Cambodia trip.

Here is Part I, and tomorrow’s post will feature Part II.

Street portrait of a little girl petting a small dog in a Hanoi store.  While still a source a food in Vietnam, dogs are becoming more common as pets in urban areas.  This image was shot from a cyclo-rickshaw, a great way to travel in urban areas of Southeast Asia and an especially good platform for street photography, as this way you travel at eye level of people on the street but will not be noticed as you pass by.

Motor scooters are the major form of transportation in Vietnam’s cities. Whole families of three, four, and even five people commonly share rides.  I’m always looking for striking color palettes, and here I loved the family’s vibrant colored clothing, each person wearing a different colored mask.

Phan Tranh Liem is one of the few remaining practitioners of the 1000-year-old Vietnamese tradition of water puppetry. He makes his own puppets, creates the shows, and performs them with his wife.  I made this environmental portrait of Mr. Phan, surrounded by a few of his puppet creations, in the workshop of his Hanoi home.

At a local market outside of Hanoi. Dog meat is a local delicacy (and quite pricey).

In the village of Tho Ha, 20 miles north of Hanoi, we visited the home of a family who make rice paper, the main occupation in the village. Spring rolls are extremely popular throughout Vietnam, so there is high demand for rice paper.  An environmental portrait is framed to include not only the subject but also enough of the surroundings to give the viewer a sense of the subject’s life.

The head of the household plays a traditional Vietnamese stringed instrument.

In the village of Bat Trang outside of Hanoi, we visited the home of Mr. Duc and his wife.  After the war, their homes were seized and they were persecuted as “landlord oppressors” even though they had never exploited others.  They recovered one of their houses decades later.  It can be a challenge to make a candid portrait of a couple.  Here I used a fast normal (50mm) prime lens with a medium aperture so that both wife and husband would be rendered in fairly sharp focus but without requiring a very slow shutter speed or very high ISO setting.

En route to the Hanoi Airport for our flight to Hue, we stopped to say hello to several farmers harvesting rice by hand.  A good portrait doesn’t need to include the face of the subject, nor even the subject’s head at all.  This portrait works because of the strong composition and lovely color palette, and one feels a connection to the subject even without seeing her face.

We had a lovely visit with a Buddhist nun at the Dieu Thanh Pagoda in Hue. It was fascinating to learn about her life in the convent and her decision process to give up worldly life as a young teen.  To make her portrait, preparation was important.  I had my gear all set up while we were having our discussion, so that when we were comfortable together I could simply ask if it was okay to make her portrait and then shoot without interruption.

Aboard a “dragon boat” on Hue’s Perfume River, we attended a private performance of a cultural show featuring traditional Hue song and dance.  A fast prime portrait lens (85mm) allowed me to shoot this musician using available light with a shallow depth-of-field to offset him from the background.

Hoi An is a charming city adorned everywhere with colorful lanterns. This bride and groom were posing for photos, so (with the permission of the couple and their photographer) I jumped in and captured this portrait.

I chatted with these twin three-year-old cuties and their Mom as we browsed in her shop.  With young kids, it’s important they feel at ease before you start shooting, and you should then shoot many frames quickly in order to increase the likelihood of getting one that captures the mood well.

Hoi An’s central marketplace is a wonderful space to capture portraits of the many vendors selling traditional wares.  The natural light was lovely, but required some finesse due to the bright background relative to the dim lighting on the subjects.

At My Son Sanctuary, site of the most significant ruins from the Champa Kingdom, we attended a performance of ancient Cham dance.  I used a fast portrait lens at a wide aperture and a high ISO sensitivity setting so that I could capture the dancers using a fast shutter speed.  In addition, I used a touch of off-camera fill-in flash, not as the primary light but to fill in the shadow areas and obtain more color saturation.

Outside our restaurant in Nha Trang, our waitress checks her messages.  I was drawn to this framing because it succinctly captures the modern life of young working urban Vietnamese people.  

Fascinating discussion with Xom Gio Village’s chief, a former South Vietnamese soldier and survivor of the re-education camps who managed to work his way up to a high-level position after the war.  To capture this striking portrait, I used a fast prime lens almost wide-open to cast the background into soft focus, and I waited for dramatic moments during our conversation to shoot.

The wife of Xom Gio Village’s chief.  I used the same technique, described above, as for the portrait of her husband.  This portrait has a lovely color scheme, beautiful framing, and nice bokeh (the soft, out-of-focus parts of the background).

The beautiful city of Dalat, high in the mountains, has been a favorite escape from the tropical heat since French colonial times.  We spent a lovely afternoon with students from Dalat University. I had the opportunity to get to know English teacher Trung and his bright young students Nhi , Diễm, and Giang.  For this portrait, we were joined by my wife and several students she accompanied.  To include yourself in a group portrait, first set up the camera carefully, then either mount it on a tripod and trigger it remotely or ask a trusted person to release the shutter for you.

A wonderful visit to village of Buon Chuoi, home to the Kho Chil ethnic minority. We were among the very few foreigners ever to visit this hill tribe area.  

Have you visited Vietnam or Cambodia?  What were your favorite photographic subjects?  Please leave your thoughts here.

Want to read more posts about what to shoot while traveling?  Find them all here: Posts about what to shoot.

All of these photos and many more from Vietnam and Cambodia are available for viewing or purchase here: Vietnam and Cambodia image gallery.

Look for Part II of this story in tomorrow’s post!

Focus on Morocco: A visual feast for all the senses

Iconic Moroccan scene: No visit to the Sahara Desert would be complete without experiencing a dromedary ride across the sand dunes.  Ever try to photograph while clinging on for dear life atop the lurching single hump of a dromedary?  I have.  The best advice for shooting in situations like this one is to preset your camera to a very fast shutter speed in order to freeze the motion, use your camera’s or lens’s stabilization feature, and capture a few bursts of many shots in quick succession.  You’re unlikely to get any award-winning photos while traveling on camelback, but using these tips you can at least capture some of the adventure of the experience.

My wife and I recently returned from a lovely adventure traveling through Morocco.  OAT’s Morocco Sahara Odyssey itinerary took us from the administrative capital of Rabat to the ancient cultural capital of Fez, to the thrilling and otherworldly Sahara Desert including a stay in a luxurious private tented camp nestled among the sand dunes, into the High Atlas Mountains, then on to the quintessential overload experience for all the senses that is Marrakesh, and finally to fabled Casablanca.  Throughout this adventure we had the opportunity to meet and learn from local Moroccan people of diverse backgrounds and trades.  Morocco is a special destination for photographers of all levels: whether you’re shooting with 40 pounds of professional gear (and the backache to prove it) or just using your phone’s camera, this is an adventure that will engage your creativity to capture sweeping desert landscapes, street scenes among the vibrant and bustling souks, ancient cityscapes, lovely portraits, and exotic wildlife.

Our Moroccan adventure began in the capital city, Rabat.  Rabat boasts a twelfth-century mosque and minaret that would have been the world’s largest had they been completed.

When strolling through any city I’m always on the lookout for interesting patterns of color and texture.  This bustling urban scene impressed me with its repeating pattern of blue taxicabs framed by manicured palm trees and whitewashed buildings.

From Rabat we traveled to ancient Fez, with its rich Moroccan cultural legacy. 

At a souk (marketplace) in the old part of Fez, a vendor prepares thin layers of dough for cooking.  Many photographers expect Morocco to be a challenging destination for portraiture because some of its people hold to traditional beliefs and would prefer not to be photographed.  We found this to be only partly true.  As in any other country, in Morocco one should always ask permission before shooting closeup photos including any person.  But in today’s Morocco, particularly in urban settings, people have smartphones and are quite accustomed to being photographed.  Your trip experience leader can act as a local “fixer,” helping introduce us to the people we meet and translating for us to help pave the way for photography.  But with or without a local guide, the traveler who makes an effort to get to know their subject first is likely to be rewarded with a richer understanding of the local culture and some lovely portraits by which to remember its people.

Traditional leather dyeing process at a tannery in Fez.  The tannery staff take pride in continuing to employ natural methods as opposed to the chemical processes used by most modern tanneries.  As we looked down on the dyeing vats from the roof of the tannery’s adjacent four-story shop building, I was struck by the stunning array of vibrant colors.  I used a moderate telephoto lens to compose the image and underexposed the shot by one stop to concentrate the saturation of the colors.

Our intrepid group poses wearing traditional Moroccan turbans at the caravansary, an ancient rest stop along the trade route where camels were fed and sheltered on the ground floor while their people were taken care of on the upper floors.  It’s always fun to capture some shots of the entire group while traveling.  Here, I used a wide-angle lens to include everyone along with the surroundings, a technique referred to as an environmental portrait.  The trick when photographing people through a wide-angle lens is to keep the lens exactly level to the ground rather than pointing it up or down, which causes unflattering distortion.

After spending several days in Fez, we traveled through the Middle Atlas Mountains into the Sahara Desert.  The stark, otherworldly features of the desert were a highlight of the trip.  Far from being a desolate and lifeless place, the Sahara is teeming with flora and fauna and home to some of the friendliest people we’ve met.

Traveling through the Middle Atlas Mountains between Fez and Erfoud, we stopped to view Barbary apes in their habitat in a cedar forest within a national park.  Tips for better wildlife photography include using a long telephoto lens to allow shooting from a safe distance so as not to endanger you or your subject, selecting a high ISO setting and a fast shutter speed, and grabbing a burst of many shots so as to increase the chances of walking away with at least one really good one.

Meet Moha, whose father many years ago found ground water just below a seemingly lifeless patch of land in the Sahara Desert and decided to plant there.  Moha, shown here with his granddaughter, took over the farm from his father and now tends to more than 150 date trees.  He showed us his entire impressive operation.  When making portraits of two people, it’s best to wait for them to relax and then to catch the moments when they are interacting with each other and not the camera.  I used a wide aperture setting (small f-stop number) to soften the background, which helps emphasize the people in the foreground.

Hiking to the top of a massive sand dune near our tented camp to enjoy happy hour, I captured this landscape photo of a Saharan sunset.  Not all landscapes need to be photographed using a wide-angle lens.  In this case I wanted to compress the apparent distance between the far-off layers of dunes, so I used a moderate telephoto lens.  Underexposing by one stop helped concentrate the colors in this scene.

Sand surfing down from our perch on the dunes.  Because this photo was shot in almost total darkness well after sunset, I had to boost my camera’s ISO sensitivity setting.  This allowed the use of a small enough aperture (high f-stop number) to keep the whole scene in sharp focus and a fast enough shutter speed to freeze the action.

Spectacular night sky in the middle of the Sahara Desert featuring a brilliant Milky Way and a meteorite above rolling sand dunes.  Because our private tented camp was situated in a remote spot among the dunes, I had only to walk a few steps from our tent to find a dark-sky location for night photography.  Today’s cameras are much better at capturing nighttime scenes, but there are still some complexities in getting your shot: use a sturdy tripod and a remote shutter release to keep your camera stationary, employ a wide-angle lens to include more of the sky, focus manually so that the stars appear sharp, and select a fast ISO setting and wide aperture (small f-stop number) to allow a shutter speed of no longer than twenty seconds. A longer exposure risks that the stars will move during your shot.

This region of the Sahara is known for its Gnawa musicians.  Originally from Sub-Saharan Africa, their ancestors escaped slavery and migrated north, bringing ancient folk traditions with them.  Today pre-Islamic and more modern musical forms are integrated into their performances.  The famous photojournalist Robert Capa once said, “If your photos aren’t good enough, you’re not close enough.”  This is not universally true but it’s certainly a helpful reminder when shooting portraits that we shouldn’t be afraid to get really close to our subjects—assuming we have their permission and we’re not disrupting their activities.  I used my go-to portrait lens, a moderate (85mm) telephoto prime (non-zoom) lens with a very wide aperture (very low f-stop number) to be able to get this closeup without disturbing the performance.  The wide aperture allows a faster shutter speed to freeze the motion and also softens the background so that the drummer’s features are emphasized.

We had a chance meeting with Aicha as she carried a tree she planned to use for firewood through the alleys of the village of Tinjdad.  Our wonderful trip experience leader Mohammed broke the ice by asking Aicha some questions about her life and her activities that day.  She had quite a few questions for us, too, and found the interaction to be very amusing.  With her permission I made this delightful portrait that expresses her wisdom and curiosity about the people she has just met.

En route from the Sahara to the ancient and chaotic city of Marrakesh, we visited several villages and met some of their people.

An eleventh-century village and fortress that is now a UNESCO World Heritage Site.  For village scenes, I find it’s helpful to look for a while without the camera and wait for an interesting visual story to come to mind.  Only then do I choose the right focal length lens to tell the story.  There are many ways to photograph an historical place, so be sure to find a story that has meaning to you.

In the village of Asfalu, Ahmed and his wife Leila welcomed us into their home.  I love this portrait of one of their daughters, 13-year-old Nouhayla.  After getting to know each other, she agreed to pose for the photo and I suggested we move into the courtyard outside their home where there was an uncluttered background.  The background is at least as important as the foreground subject when composing a photo, so don’t be shy about moving your subject.

Marrakesh is a place unlike any other.  Its ancient souks inhabit the narrow alleys of the medina (old city).  Jemaa el-Fnaa Square, a UNESCO World Heritage Site in the heart of town, bustles day and night with thousands of visitors from near and far.

We enjoyed coffee at a café atop a nearby building and were afforded a panoramic view at sunset over Jemaa el-Fnaa Square.  Any camera yields great results when photographing a scene this vibrant and lively.  Just choose a composition that speaks to you and fire away.  I do recommend checking that the horizon line is level while composing your shot, as it’s easy to get carried away with the excitement of the scene and to shoot with an uneven horizon.

One of countless thousands of vendor stalls along the labyrinthine alleys of Marrakesh’s medina.  I was intrigued by the array of identically shaped jars, each with its own vibrantly colored contents.  To ensure the lines of the shelves were not distorted, I used a medium telephoto lens and shot from slightly further back.  Wide-angle lenses have the effect of distorting parallel lines unless great care is taken when composing the photo. 

A few travelers from our group used our free time to hike among the hill towns of the Imlil Valley in the High Atlas Mountains.  We were afforded glorious views of nearby villages as we trekked along the narrow trails.  This scene of a village at the base of the mountain appeared around a bend in the trail.

A beautiful tagine (Moroccan stew) served at lunch during our hike.  We were amazed by the flavor and appearance of this dish, especially given our location at a tiny rooftop café in a remote mountain village.  Capturing photos of food is rarely easy and certainly was a challenge in dazzlingly bright sunlight.  I moved the tagine under a canopy, positioned a black placemat behind it, and shot from an oblique angle to bring out the contrasting colors and textures in the dish.  During post-processing, I cropped a bit more tightly and darkened the background to make it completely black.

Leaving Marrakesh behind, we traveled to Casablanca, our final stop before returning home. 

The Hassan II Mosque in Casablanca is the world’s third-largest mosque, accommodating 105,000 worshipers.  Only the mosques in Mecca and Medina are bigger.  Photographing very large and tall buildings poses a challenge.  To include the whole structure a very wide-angle lens is required, but if the camera is tilted up or down even a little bit, the lines of the building are distorted.  Here I used an ultrawide lens but ensured the camera was kept exactly level to the ground to minimize distortion. 

You can see more of my images from our Morocco adventure here: https://www.kadlerphotography.com/Travel-Photography/Morocco.

Have you traveled and photographed in Morocco? Please share your experiences, and images, by commenting on this post!

Stripped Down to the Bare Essentials [Encore Publication]: Cupid’s Undie Run supports Children’s Tumor Foundation

I’m fortunate to live in the San Francisco Bay Area, where fun, crazy, photogenic events–planned and spontaneous–occur nearly continuously.  But the zany and colorful annual event known as Cupid’s Undie Run, for which participants strip down to their underwear and run through the city’s streets to raise money for Children’s Tumor Foundation, is actually held in dozens of cities around the world.  The San Francisco version was quite small this year, in spite of 60-degree mostly sunny weather, but it was as energetic, irreverent, and just plain fun as ever.  Today’s post features a few of my favorite images from this Valentine’s Day inspired event.  This time, it’s just for fun; I’m not going to annotate the images with a lot of detailed information about how they were made.  Enjoy, and consider supporting this valuable charitable cause: Children’s Tumor Foundation.

In between rounds of margaritas, a quick run along San Francisco’s waterfront.  Buy this photo

Happily, the weather was unseasonably warm and dry.  Buy this photo

The “finish line” is the front door of the pub.  Buy this photo

It wouldn’t be Cupid’s Undie Run without Cupid.  Buy this photo

Speaks for itself.  Buy this photo

A quick reminder about how to make a stunning portrait: 1) find soft and appealing lighting, 2) get in close with a medium portrait lens, 3) select a wide aperture for shallow depth-of-field.  Buy this photo

I love this town!  Buy this photo

Look for this fun event in your town next year around Valentine’s Day.  And, whether you’re traveling around the world or right in your home town, seek out those fun and quirky happenings that yield eye-catching images.

What are some of your favorite events to shoot, and why?

Want to read more posts about what to shoot while traveling or near home?  Find them all here: Posts on What to Shoot.


Getting Oriented [Encore Publication]: Shooting vertically as well as horizontally expands your artistic vision

Who says a portrait image has to be shot in portrait orientation, or that a landscape photo must be shot using landscape orientation?  Rules are meant to be broken, and they call it “artistic license” for a reason.  I would estimate that a third of my people images are shot in landscape (horizontal) orientation, and that a third of my landscape images are shot in portrait (vertical) orientation.  It’s always a good idea to shoot at least a few frames in both orientations so you can decide later which ones work best for your artistic vision.  Let’s take a look at a few examples.

Laura is one of my all-time favorite models (she also creates all her own costumes and does her own hair and makeup), and she looks great framed in any orientation, but I think her remarkable inventiveness is shown to good advantage in this composition using landscape orientation.  Buy this photo

It’s a cliché that people pictures should be composed vertically, so that we can fill the whole frame with the model’s head or full body.  A lot of the time this portrait orientation works well.  But there are some good reasons to shoot people images using landscape orientation as well as portrait orientation.

First, sometimes the model’s pose or the environmental elements around the model favor a horizontal image.  When traveling, I like to shoot environmental portraits that show us more than just the person by including elements of his or her home, livelihood, or lifestyle.

Second, we need to think about how the image will be used.  If I’m shooting publicity photos for musicians, for example, I know they need horizontal images at least as often as vertical images, so as to meet the requirements for the venues and promoters with whom they work.  Magazines and billboards often require landscape orientation, as well.  Even more prosaic uses of our photos, such as Facebook or LinkedIn cover photos, must be oriented horizontally.

Third, some portraits just cry out artistically to be framed in landscape orientation.  The image of the model Laura, above, for example, just works better to my eye in horizontal format, because the negative space behind her leads the viewer’s eye to admire her remarkably creative style, and leaving the lower part of her body and her dress out of the image allows us to focus on her expressive face.

By the same token, there are some good reasons to shoot landscape images in portrait orientation.

First, there could be some limitations to the left or right of the frame that, when shot horizontally, could distract from the power of the image we want to create.  Think about a coastal landscape with a glorious sunset sky and delightful foreground elements such as rocks with water flowing around them, but to the left of our vantage point there’s an unattractive pile of litter.  Frame the image in portrait orientation and avoid the problem.

Second, there are publication media where portrait orientation is required.  Knowing where the image is likely to be published will dictate the orientation in which we shoot.  A card or trifold brochure, for example, will likely require a vertical shot.

Third, again, consider your creative vision.  This night landscape of the Milky Way over Yosemite National Park’s Half Dome also worked beautifully in the more traditional landscape orientation, but here I shot the same scene using portrait orientation to frame the granite mountains with a circle of trees and to create a leading line using the Milky Way’s galactic core to bring the viewer’s eye around the valley’s landforms and the night sky.

This night shot of the Milky Way over Yosemite Valley works especially well in portrait orientation because the pine trees create a frame around the leading line of the galactic core.  Buy this photo

Whenever possible, remember to mix it up and shoot with the non-standard orientation for at least a few frames.  You may find your best shots–and the most marketable ones for placement in certain forums–are the ones you make using the unconventional orientation.

Do you have a favorite image that you shot using the opposite orientation from the expected one?  Please share your experiences here.

Want to learn some more photographic techniques?  Here’s a list of all my posts dealing with the technical aspects of travel photography: http://www.to-travel-hopefully.com/category/techniques/


Every Day I Write the Book [Encore Publication]: Even in the digital world, there’s a place for a hardcover photo book from your trip

In the brave new digital world, we have a lot of ways to share our travel photos after (and sometimes even before) we return from the trip: social media, on-screen slideshows, video montages, and of course the enduringly popular paper print.  Even with all of these very immediate sharing options, one of my favorite formats for preserving my travel images is the hardcopy photo book, and today there are more choices than ever before regarding how to create these wonderful keepsakes.

Our living room bookshelf and coffee table are home to more than a dozen photo books, each one showcasing the images and preserving the often fleeting memories of the details of a major trip we’ve taken.  Here’s why I love this method of sharing travel photography and how to create your own photo books.

img_3497

The leather cover of a photo book showcasing our recent travels in Turkey.

Why create a photo book?  Over time, new digital formats replace existing ones, and the very old ones become obsolete.  Within about 20 years, it is quite likely that none of our present formats of storing data will still be readable.  The printed page has much more staying power.  It is estimated that photos printed on high quality paper using high quality inks, and stored away from direct sunlight, can last for 100 years.  I’m a big fan of framed prints, as well, but a photo book is more cost-effective and space-efficient as a means to preserve many more photos than we could easily hang on our walls.  And because photo books can include customized captions to accompany the included images, they’re a great reference source for refreshing our memories about what we saw, when, and where.  Finally, photo books look great and are fun conversation-starters to tell the story of our travels when friends and family come to visit.

How do you create a photo book?  There are a number of methods, but unless you are a scrapbooker or handy with bookbinding, all of them involve sending your specifications and images to a vendor that will print the book, bind it, and mail it to you.  Some software packages, including Lightroom, have built-in modules for creating photo books.  And most photo sharing websites, including SmugMug (a fabulous site used by many professionals including me), Snapfish, Shutterfly, and Apple Photos, allow you to create and purchase photo books from your images.  These services vary in features, price, and quality, so shop carefully.  Most of my past photo books were created using Snapfish, but I am transitioning to using Lightroom’s and SmugMug’s services instead.  I will report on the results in a future post.

img_3493

Good book-creation software should allow you to choose from a wide range of formats on each page to display one or several photos plus text.

The basic process works similarly for any of these services.  You specify the book size, cover material, paper quality, printing quality, and other basic parameters for your book.  Then, you fill the pages of the book with your photos, specifying the layout you want for each page.  You can add captions for individual images or series of images, and you may be able to add various special effects.  At the end of the process, you place your order for the book to be printed and mailed to you.  Using the service offered by Blurb, which is available via SmugMug and Lightroom, you can self-publish a large or small print run of books and make them available for sale on Amazon or directly on your own website.

lightroom-book-module
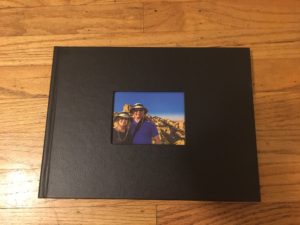
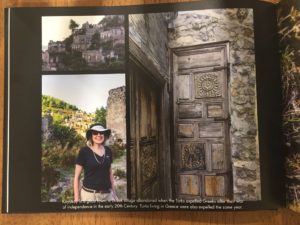
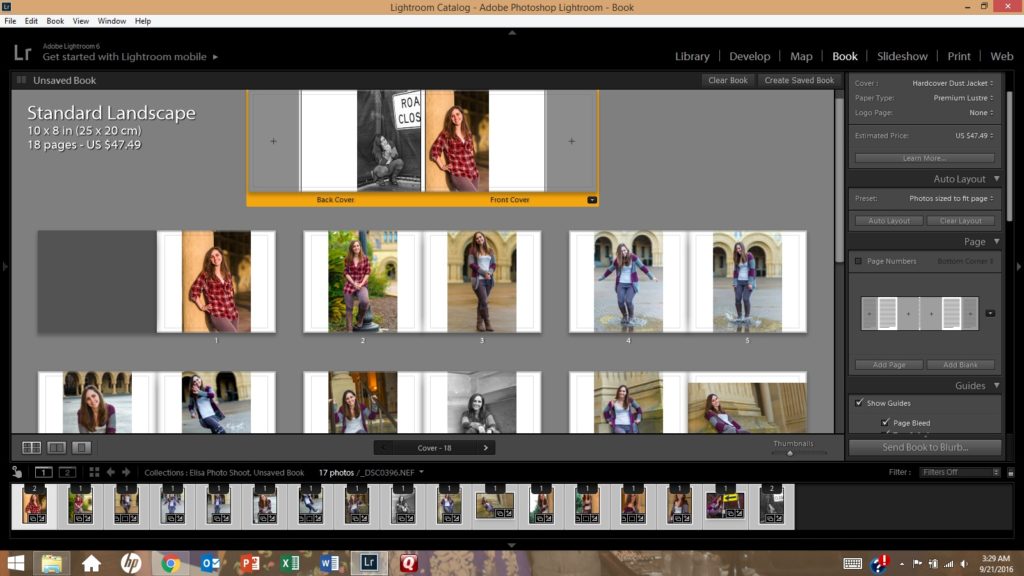
The process of creating a photo book using Lightroom’s Book module (shown here) is fairly straightforward.  It’s even more intuitive using an online service such as Snapfish or Shutterfly.

When you receive your photo book a few days after placing your order, you’ll have a keepsake suitable for sharing with visitors and for preserving your own precious travel memories.

img_3494

A two-page spread in our Turkey photo book showcases several images of the incredible rock formations in the Cappadocia region.

Have you created photo books from your travel images?  Which service did you use and how was your experience?  Please share your thoughts here.

Interested in reading more posts about sharing your travel images?  Click here to see them all: http://www.to-travel-hopefully.com/category/travel/share/.

Focus on How Weird Street Faire [Encore Publication]: A case study on simple techniques to capture winning images of festivals

As a professional travel photographer, I shoot regularly in nearly all genres of photography.  A typical day on the road might include shooting landscapes, wildlife, cityscapes, portraits, action (sports, dance, performance), and nighttime photography.  While I enjoy all types of shooting, my great joy as a photographer is capturing portraits of the people I meet.  Whether close to home or halfway around the world, getting to know the people and learning about their culture through making portraits of them is a wonderful experience.  And there’s no better way to capture images of many amazing people in a short time than by attending local festivals.  People tend to be their best selves at special celebrations like festivals and street fairs.  They dress exuberantly, dance with abandon, make new friends quickly, and (nearly always) are overjoyed to pose for photos.

I shoot about a hundred festivals and other special events every year, so I’ve learned a few tips about how to make the best images during these occasions.  In today’s post I share some simple but effective techniques for capturing great portraits at festivals and other gatherings, using San Francisco’s recent How Weird Street Faire as a case study.  How Weird is a vibrant and colorful, only-in-SF, annual celebration of individuality, tolerance, music, art, and hula hoops.  Read on to see some of my favorite images from this year’s festival, presented along with some discussion of how they were made.  To view more of my images, or to buy some, check out this gallery: How Weird photo gallery.

I see a lot of fellow photographers at events like How Weird shooting with huge telephotos and even tripods, like they’re after images of wildlife on a Kenyan safari.  In my opinion, they are missing the point.  We’re making portraits of people here, so use a normal or moderate telephoto portrait lens, preferably a fast prime lens, ditch the tripod and monopod at home, and get in close to chat with and get to know the people you’re photographing.  When you interact with people, you get a sense of what makes them special, allowing both you and them to capture that special trait in your photos.  Random sniping from far away with a long telephoto will yield far more bland and generic photos.  All of my images at How Weird Street Faire were made with a single camera body and one lens, my trusty 85mm f/1.8 portrait lens.  Sometimes simple is better, especially when it comes to capturing people at fast-moving events.

Larger groups can be challenging to capture in portraits, particularly in bustling spaces like those of a festival.  When they couple I was chatting with suddenly ran into a friend and they had a group hug, I quickly stepped back a few paces and made this expressive and engaging portrait.  It’s okay to break the rules sometimes–here, one of the subject’s faces is completely obscured and another’s is partially obscured, yet the portrait works because it captures the energy and affection of the moment.

When photographers argue that the “street photography” approach (candidly sneaking images of people who aren’t aware they’re present) is the best for capturing people’s true essence, I show them images like this one.  This wholly genuine and unguarded moment of the girl dancing was made with her full knowledge and permission.  The trick is to chat with the subject and get their permission for photography first, then to lay back for a while and let them go back to what they were doing.  After a few minutes, they’ll nearly forget you’re there and they will reveal their true selves.  But unlike shots you sneak without permission, now you have a subject happy to have you photographing them, and you can take your time and not have to rush your work in order to hide your shooting from them.

Often we see only the most obvious subjects at crowded, chaotic events like festivals.  It’s easy to spend all our time shooting people dancing, partying, and displaying their costumes, but I try always to look for the more hidden people and infrastructure that support the event.  This DJ was partially hidden atop the big dance stage and behind the banks of speakers, but she made a fun subject for this portrait.

Don’t be afraid to get in close.  This portrait really pops because the tight composition allows us to focus our attention on the symmetry and color of the subject’s hair and costume.  

The interactions between people are at least as much fun to observe and capture as the individuals themselves.  I had chatted with and photographed a group of people for a few minutes when I observed this fun interaction, so I stepped back and framed some shots of the two young people together.

While post-processing my images after the shoot, I decided to render this one in monochrome to achieve a gritty urban street scene sort of feel.  Often color can distract from the power of an image, so always consider which of your images could benefit from conversion to black-and-white.

In ordinary daily life, I find that perhaps two-thirds of people are willing to have their portrait made if the photographer spends some time getting to know them first and then asks politely.  But at a festival, nearly everyone is excited about posing for portraits.  The trick is to capture scenes where they show you their underlying personalities a bit, rather than just striking a cliched pose for the camera.  To achieve that here, I spent a few minutes shooting, asking the couple to pose in different styles and have fun with it.

Putting it all together.  Here’s a summary of the basic techniques I use when shooting portraits at festivals:  1) Use a fast prime normal or portrait lens.  2) Set your camera for a fast shutter speed (1/500 second or faster is good for dancing and other fast action), wide aperture (f/2.5 or wider is ideal except for large groups) to isolate the subject, and an ISO appropriate to the lighting of the scene (I used ISO 100 the whole day due to the bright outdoor light).  3) Get to know your subject before shooting, let them relax, and capture them during an authentic moment.  4) Try to compose the portrait with as uncluttered a background as possible; of course, this is often difficult at crowded festivals.  5) During post-processing, crop to clean up the scene and then vignette just a touch to further clean up busy backgrounds.

I hope this discussion of techniques to capture portraits during festivals has been helpful.  The best way to learn these techniques and to find your own style is to shoot and shoot some more!

Please leave a comment with your own thoughts and tips about how to make great images of people at celebrations.

Want to read more posts about photographic techniques?  Find them all here: Posts about techniques.

“Peripheral Vision: Divergent Travel Photography” exhibition remains open until January 12

Dear Readers,

There’s still time to check out the juried travel photography exhibition at Santa Cruz Art League: http://ow.ly/LSRU50xMTw4…/peripheral-vision-divergent-travel-phot…/. It runs through January 12. Come see some striking contemporary photography from a variety of artists representing a wide range of subjects, styles, and regions. And two of my pieces are still available for purchase, including the signature “Reflective Gator” image that hangs with pride of place under the sign at the entrance of the show :-).

A Good Camera Store is Hard to Find [Encore Publication]: Can anything be done to prevent the extinction of pro camera stores?

Dear Readers:

I’m republishing this post because I recently had an experience that reminded me of what is lost when we have no good local camera stores in our neighborhoods.  Two weeks ago, during a shoot for a local theater company, I found myself unable to remove the remote flash cable from my camera’s hot shoe.  I tried for hours to find a way to get it off, but to no avail.  It seems the locking pin on the flash cord’s hot shoe contact had broken and was stuck in place.  Since our local neighborhood camera store (Keeble & Shuchat; read on to get the full story) had closed, I brought the camera to the next best store in my area.  They had no trained repair technicians, so they had to package up the camera and ship it to Nikon.  Two weeks later, I just received the estimate: $350 to remove the broken accessory from my camera.  And they may not be able to return to me in time for a critical travel shoot I have scheduled in three weeks’ time, for which I will need both of my Nikon D810 bodies.  I’m confident that good ol’ K&S could have done this repair inexpensively and quickly in-house.  There is a great deal that is lost when our specialized and passionate local merchants are forced out of business.  Please read on for more!

Kyle

img_3689

A few months ago, the doors closed permanently at one of the San Francisco Bay Area’s few remaining pro camera shops, Keeble & Shuchat of Palo Alto.  After 51 years of providing sales of a tremendous range of fairly priced photographic gear, friendly service, lifesaving repairs, and informative classes, this local institution was forced to shut down.  The story is a familiar one, and extends beyond the San Francisco Bay Area and beyond the photography sector.  Local brick-and-mortar stores nationwide and in all sectors of the retail economy are being forced out of business due to severe price competition with online and big-box retailers and rising commercial real estate prices.  Over the last few years, my neighborhood has lost the last of its independent coffee shops, bookstores, and movie theaters, and it now seems that camera stores oriented toward enthusiast and professional photographers are also going the way of the dodo bird.

I’m sad about the closure of Keeble & Schuchat because there really is no substitute store within an hour’s drive of my house, and because I knew several of the staff there and don’t know what they’ll do next.  But at the same time, I share some of the blame over their closing.  I was a regular in their store, where I browsed their range of new gear and asked all manner of questions of the friendly and helpful staff.  I made it a point to buy a few doodads at K&S, and I attended paid classes there from time to time.  I depended on them for the repair and maintenance of most of my gear.

But whenever it came time to drop some big bucks on a new pro camera or lens, guess what?  I always purchased from a big online retailer like Amazon or B&H.  I’m sure many other serious photographers behave similarly.  It’s hard to justify paying a 10-20% price premium as well as the local 9.25% sales tax in my county when we’re already stretching to afford the gear in the first place.  It’s very tempting to save so much money with just a few clicks in our web browser.  But something significant is lost when we drive away the local experts who sell books, cameras, or cappuccinos in our neighborhoods.  We lose the local merchant’s accumulated knowledge and the passion for the category we love.  For us photographers, that means there soon won’t be many places we can go locally to chat about the merits or drawbacks of some new piece of gear, to repair or maintain our existing gear, or to learn from people who share our passion for image-making.

When my main portrait lens had some dirt stuck between the inner elements that was causing a speck to appear on all my images, and I observed this on the day before a major portrait shoot for two clients, I took the lens to K&S and their tech diagnosed and repaired it while I waited.  He charged me the whopping sum of $10 for his efforts.  Why?  Because he also was a working photographer and he knew the importance of getting this problem solved quickly and without impacting the clients.  We may save a few dollars by buying our gear online, but what is lost by the mass shift from local stores to e-commerce sites?  I’d better be thinking about what I’m going to do the next time I need an urgent repair done, because there is no longer anywhere reliable to go within an hour’s drive of my home.

How about you?  Please share your thoughts on the value or lack thereof of having experienced, passionate tradespeople in our neighborhoods?  Is it worth spending extra cash to ensure we preserve access to these local stores?  Or do you have a different viewpoint?

img_3690

Focus on the Embera People [Encore Publication]: Capturing enchanting images of an ancient traditional way of life

During our recent travels in Panama, my wife and I navigated up the Chagres River via dugout canoe to meet the Embera indigenous people.  This fascinating in-depth encounter offered a window into an ancient culture that has mostly disappeared from Central America as indigenous groups have been forced to resettle on national parklands where their traditional fishing and hunting practices are not permitted.  Our Embera hosts are able to continue to live in the traditional manner by sharing their culture with visitors like us.  Our lovely day spent with the Embera villagers included preparing and enjoying a traditional meal, visiting the two-room schoolhouse (supported by Grand Circle Foundation), exploring the village, learning about their government and way of life, and observing and participating in traditional singing and dancing.  We will never forget this experience.  In the spirit of sharing, today’s post is a photo essay featuring images from this special day.  Click on any of the images to visit the Panama photo gallery on my website, where many more photos are available to view or possibly to purchase.

Traveling up the Chagres River via dugout canoe to meet the Embera indigenous people. 

This lovely Embera mom and daughter greet us on arrival at their village.

The Embera people lead us up the hill from the river to their village.

To make this portrait of a young Embera woman, I asked her to move a few feet to an area with pleasant lighting and an uncluttered background, then shot using a fast prime portrait lens (85mm f/1.8) at a wide aperture to throw the background into soft focus.  

Showing us how the midday meal is prepared. 

We enjoyed a wonderful visit to the two-room schoolhouse in the Embera village.  As we shared songs and dances with the schoolkids, I made this portrait using only available light, intentionally blurring the girl’s hands to impart a sense of motion.

One of our group brought along simple dolls to hand out to the Embera children.  Group portraits can be tricky in general, but are very challenging when the subjects are young children.  My advice is to capture plenty of shots over a period of several minutes, interacting with the kids all the while.  This allows the children to relax around the photographer, and maximizes the likelihood of getting a few really good images.

I’m never happier than when I can experience and photography traditional cultural performances (singing, dancing, theater, puppetry, etc.).  Our new Embera friends were kind enough to show us some of their tradition of song and dance.  I find that the preparations for these performances are often as or more fascinating than the performances themselves.  Here, a young boy practices his drumming for the upcoming show.

In preparation for the singing and dancing performance, this Embera teen prepares her younger brother and sister by applying tattoos using the juice of the jagua plant.   

I got to know this Embera teen as she helped prepare her sisters and brother for the traditional dance ceremony.  We chatted and I captured photos of her preparations as she applied tattoos to her siblings using the juice of the jagua plant.  It’s always a good practice to get to know your subject before making a portrait.  Doing so will help put them at ease and allow you the opportunity to capture their true personality.  To make the portrait, I asked the girl to move outside of the hut to a spot with open shade and a pleasing background, then captured the moment using a fast portrait lens and a wide aperture (small f-stop number) to get that lovely “bokeh” (artistic quality in the out-of-focus background areas).

This little one is all tuckered out even before the dance celebration begins.  To make portraits more intimate and personal, try to isolate the subject using narrow depth-of-field and a simple, non-distracting background. 

An impromptu soccer match in the green open area of the village. 

View of the Embera village from the top of a nearby hill.   

An Embera family pose for a portrait. 

At the conclusion of our day in the Embera village, all the people of the village came out to demonstrate traditional singing and dancing for us.  For large group portraits, it’s often best to work with a slightly wide-angle lens, but not so wide as to cause distortion.  I chose a narrow aperture (high f-stop number) so that all of the people and the surrounding village landscape would be in sharp focus.  Shooting from the same level as your subject has the effect of seeming to place your viewer within the scene rather than (literally) looking down on the action.

I hope you’ve enjoyed this photographic tour of our day spent with the Embera people in their small village located far up the Chagres River from Panama’s main city.

Do you have a memorable experience of meeting a group of people willing to share their traditional culture?  Please share your experience by leaving a comment here!

Want to read more posts about what to shoot while traveling?  Find them all here: Posts about what to shoot.

Resolve to Improve Your Travel Photography in 2020: Please share your thoughts about the future of To Travel Hopefully

Dear Fellow Travel Photographers,

I want to thank you for joining our community of travel photography enthusiasts and for coming along on the wild ride during 2019.  During its first three years, our group has grown to several hundred active members.  We shared a variety of experiences together, including three photo tours in amazing destinations around the world (Myanmar, Chile–including the total solar eclipse, and Morocco); several fun local SF Bay Area photography walks, classes, and workshops; and of course dozens of posts filled with practical tips on how to improve your travel photography.

This year I was honored to be named one of three Emerging Professionals by leading international trade publication “Digital Photo Pro Magazine” in their 2019-20 search.  While my professional life has become much busier as a result of this and other recent awards and publications, I remain committed to offering our To Travel Hopefully community a wide range of fun and practical learning experiences in 2020.  But I need your help!

To Travel Hopefully is not currently meeting its financial goals. While readership is up, engagement–including interaction with the daily posts, sharing your favorite articles with fellow enthusiasts, and click-through on the ads and Amazon affiliate sales–is low. Let’s make 2020 the year when we grow not only readership but also engagement. 

Please reply to this post and let me know what topics most interest you.  I want to make this group relevant to your interests and goals.  Tell your friends about To Travel Hopefully and encourage them to join. Check out interesting links for affiliated photo gear and advertisements. Your actions can help ensure our community continues to grow and thrive. As always, To Travel Hopefully will be dedicated to helping us all improve our travel photography skills and learn to use our lens as a tool to build bridges between cultures and to give back to the people we encounter around the world.

Thanks for your feedback and ongoing engagement!  Looking forward to sharing some wonderful experiences in the coming year.

Cheers,

Kyle

Faces of Myanmar [Encore Publication], Part II: Showcasing the Diversity of Burma’s People

My wife and I recently returned from an amazing 2.5-week adventure traveling through Myanmar.  Our itinerary took us from the main city of Yangon to the vast plains gleaming with ancient pagodas in Bagan; then to the former imperial capital and cultural hub of Mandalay; on to Kalaw, the gateway to many hill tribes of the region; and finally to Inle Lake, well known for its picturesque floating gardens and for the Inthe people with their unique traditional style of fishing.  While it was wonderful to view Myanmar’s gorgeous landscapes and fabled temples, what made this adventure truly unforgettable for us was its many opportunities to interact with Burmese people from many ethnic groups and all walks of life: Buddhist monks and nuns, villagers displaced by a typhoon 10 years ago who are still living in temporary bamboo huts with no running water, the Paduang hill tribe whose women traditionally wear heavy brass plates on their necks, an octogenarian master of the dying art form of Burmese marionette theater, young boys celebrating their initiation as novice monks, and the delightful girls who have found a caring home at an orphanage in Mandalay.  Burma is a photographer’s dream, filled with glorious pagodas, gorgeous vistas, and friendly, diverse cultures.

Yesterday’s and today’s posts showcase some of my favorite portraits, some of them not yet previously published, featuring a wide range of people we met during our adventure.  The portraits will be presented as a photo essay, but I will include brief descriptions of each and occasionally some commentary about how they were made.  You can click on any of these images to view or purchase them and many more from the Myanmar trip.  Yesterday’s post featured Part I, and today’s post comprises Part II.

A fascinating visit to Myawaddy Nunnery, where we had the opportunity to meet some of the more than 200 novice nuns who study there.  I composed this image to include the contrasting colors of the novices’ pink robes against the painted carved teak facade of the building.

Portrait of the abbess at Myawaddy Nunnery.  The lovely “bokeh”, or soft quality of the out-of-focus background elements, is created by using a very wide aperture on a lens known for having this property (in this case, an 85mm f/1.8 prime lens).  Even when traveling, it’s important to have the right lens for the right job.

The Mingun Bell, 13 feet high and weighing 90 tons, is the world’s second largest functioning bell.

A delightful visit to the Aye Yeik Mon Girls’ Orphanage. We were heartbroken to learn the stories of some of the abandoned girls who live here, but were uplifted to see the wonderful care and guidance they are receiving there now.

I had the opportunity to get to know 15-year-old Phyu Phyu at the Aye Yeik Mon Girls’ Orphanage. Abandoned by her mother at an early age, Phyu Phyu’s early life was challenging, but she has flourished under the care of the nuns at Aye Yeik Mon and is planning to continue her education and to enter a professional career.

We were invited into the Mandalay home of Oma and his family. His mother was a restaurant owner and chef for many years, so we were treated to an amazing Burmese meal.  It can be challenging to make portraits of groups, especially when young children are involved.  I shot several frames and chose one where the young boys are looking (nearly) directly at the lens, settling for some of the other family members to be looking elsewhere.

Kuthodaw Paya is called the world’s largest book because the entire canon of early Buddhist scripture is recorded on carved stone tablets housed in its hundreds of pagodas.  These young local women wanted me to pose for a selfie with them, so I asked them to return the favor.  Their brightly colored longyis (traditional Burmese attire) stand out nicely against the drab background of the pagoda behind them.

A quiet moment at the entrance to Shwenandaw Kyaung Monastery.  I used spot-metering based on the woman’s clothing so as to achieve proper exposure given the much brighter background.

A stop at the Kalaw morning market to purchase the produce for our visit to Myin Ma Htie village.

We visited the village monastery in Myin Ma Htie and met with the monk there.

On arrival at Myin Ma Htie, we are greeted by villagers who will be our hosts.  This portrait was carefully composed to provide nice soft natural lighting on the girl and to frame her in a pleasing way within the surrounding area.

Traditional spinning methods to create yarn from lotus plant fiber.  I was struck by the symmetry and the bright color of the yarn in this scene.  

A worker in a cheroot workshop demonstrates her craft. She makes about 1000 of these small and inexpensive cigars every day.  To make this portrait, I used my go-to 85mm portrait lens at a wide aperture and added just a small amount of balanced fill flash to evenly expose the subject’s face.

The Phaung Daw Oo Paya is one of Burma’s most sacred sites. Dating to the 11th century, this pagoda houses the four remaining Buddha statues that enclose relics from the body of the Buddha. Worshipers add a little gold leaf to these statues when they visit, so that today the shape cannot even be recognized as that of the Buddha.

A fisherman on Inle Lake demonstrates the ancient style of fishing with a netted basket.  I framed the shot through the fabric of the net to add texture and visual interest.

Meeting members of the Padaung ethnic minority, whose women are famous for wearing heavy brass coils to make their necks look longer.  This 18-year-old Padaung girl proudly wears the brass coils on her neck as a symbol of ethnic identity. She told us her younger sister chooses not to wear the ornaments as she goes to a Burman school where most of the other students are not Padaung. The tradition was often scorned as backwards during the military regime, but now young Padaung women are again often choosing to practice it.

Have you visited Myanmar?  What were your favorite photographic subjects?  Please leave your thoughts here.

Want to read more posts about what to shoot while traveling?  Find them all here: Posts about what to shoot.

All of these photos and many more from Myanmar are available for viewing or purchase here: Myanmar image gallery.

Missed Part I of this story in yesterday’s post?  You can read it here: Part I of this story.

Faces of Myanmar, Part I [Encore Publication]: Showcasing the Diversity of Burma’s People

My wife and I recently returned from an amazing 2.5-week adventure traveling through Myanmar.  Our itinerary took us from the main city of Yangon to the vast plains gleaming with ancient pagodas in Bagan; then to the former imperial capital and cultural hub of Mandalay; on to Kalaw, the gateway to many hill tribes of the region; and finally to Inle Lake, well known for its picturesque floating gardens and for the Inthe people with their unique traditional style of fishing.  While it was wonderful to view Myanmar’s gorgeous landscapes and fabled temples, what made this adventure truly unforgettable for us was its many opportunities to interact with Burmese people from many ethnic groups and all walks of life: Buddhist monks and nuns, villagers displaced by a typhoon 10 years ago who are still living in temporary bamboo huts with no running water, the Paduang hill tribe whose women traditionally wear heavy brass plates on their necks, an octogenarian master of the dying art form of Burmese marionette theater, young boys celebrating their initiation as novice monks, and the delightful girls who have found a caring home at an orphanage in Mandalay.  Burma is a photographer’s dream, filled with glorious pagodas, gorgeous vistas, and friendly, diverse cultures.

Today’s and tomorrow’s posts showcase some of my favorite portraits, some of them not yet previously published, featuring a wide range of people we met during our adventure.  The portraits will be presented as a photo essay, but I will include brief descriptions of each and occasionally some commentary about how they were made.  You can click on any of these images to view or purchase them and many more from the Myanmar trip.

Here is Part I, and tomorrow’s post will feature Part II.

A worshiper at Chaukhtatgyi Pagoda. I’m always on the lookout for ways to include local people when shooting monuments and other landmarks.  The human element adds great visual interest to travel images and also personalizes the photo, transforming a generic scene into a story.

We were shown around the Musmeah Yeshua Synagogue by one of the 17 remaining members of Myanmar’s only Jewish community.  Environmental portraits like this one include not only the person but also some other elements that help tell the person’s story, in this case the Torahs at the ark of the synagogue.

A worshiper at Shwedagon Pagoda, the most sacred Buddhist site in all of Burma.  At least 90% of the time I include people as a main element in my images, I obtain permission from them first.  I find that this approach, as well as being friendlier than shooting first and asking questions later, tends to lead to better portraits as there is an interpersonal connection between the subject and the photographer.  However, there are certain instances when asking first could interrupt the subject’s activities or negatively impact the dynamic being captured.  For this photo, I made no attempt to hide that I was shooting the woman, but I didn’t interrupt her meditation, either.

Armies of volunteer sweepers make the rounds at Shwedagon Pagoda to ensure the temple is kept spotless.  To shoot this large and fast-moving group, I positioned myself at a scenic spot, configured my camera’s setting in advance, then waited for the volunteers to move into position.

Rangoon’s Inya Lake, site of the former military junta’s brutal response to the 8888 uprisings and the Saffron Revolution, is now a peaceful place where young people picnic, make music, and go on dates.  When shooting strongly backlit subjects, be sure to use spot metering or exposure compensation unless you’re trying to create a silhouette.  

Street vendor in Yangon.

A fascinating visit to an informal housing settlement inhabited by people displaced by the devastating 2008 typhoon. A decade later they are still living in squalid conditions in bamboo huts with no running water. Here, children are filling containers with water from the lake and carrying 40 kg (88 pounds) of water, often more than their body weight, several miles to their families’ homes. This image is a favorite because it effectively combines the contrasting moods of the scenic beauty of the region with the hardship of the people living there.

As curious about me as I am about her, a young dweller in the informal settlement comes to say “mingalaba”.  I used a fairly narrow aperture to create enough depth-of-field allow some of the background to be emphasized in addition to the girl.

A traditional Burmese dance performance showcases the dancers’ grace and the beauty of their costumes.  Always look for an uncluttered background when composing and be sure to capture multiple shots so that one will be timed just right.

At the village market in Nyaung-U in the Bagan region.  I introduced myself to the vendor and received permission to make her portrait. At first she appeared stilted and posed, but as she tended to other customers and got accustomed to my being there, she returned to a natural state.

Escaping steam nearly obscures a worker at a Bagan workshop where pone ye gyi (a popular flavored soybean sauce) is made.  A portrait can become much more visually interesting when composed in an unexpected fashion.

The matriarch shows us around her family’s paper workshop where they make ceremonial fans for weddings and other events.  I made this image using my classic portrait technique: using a fast portrait lens (85mm f/1.8) nearly wide open to emphasize the subject, and choosing a location with nice soft lighting and as uncluttered a background as possible.

One of the family’s daughters kindly poses for a portrait. She wears thanaka, the tree bark paste that most Burmese women, and quite a few men, apply to their faces daily.

We had been invited by villagers to attend a Buddhist initiation ceremony, so we rose early and traveled to their village. The boys in the back row are preparing to start their service as novice monks in a monastery. All Buddhist boys in Myanmar are required to perform this service at some point during their childhood.  The girls in the front row are some of their sisters who are celebrating their ritual ear piercing.

The boys paraded through the village to the monastery on horseback, while the girls and some of the parents rode oxcarts.  Another classic portrait using a fast prime lens at a wide aperture to soften the background, this image also was made with a touch of balanced fill-in flash to reduce shadows on the subject’s face.

During an excursion to Phaw Saw Village outside Bagan, we met this artisan.


Have you visited Myanmar?  What were your favorite photographic subjects?  Please leave your thoughts here.

Want to read more posts about what to shoot while traveling?  Find them all here: Posts about what to shoot.

All of these photos and many more from Myanmar are available for viewing or purchase here: Myanmar image gallery.

Look for Part II of this story in tomorrow’s post!


Hiking in Southwestern Ireland [Encore Publication]: How to capture glorious landscapes along the trails

The central portion of our recent trip through Ireland and Scotland was a week of hiking in the southwest of Ireland.  While we hiked independently, the logistics were arranged for us by a travel company called Country Walkers (http://www.countrywalkers.com/).  With its richly verdant and rugged terrain, glorious views to the sea and mountains, historic and cultural points of interest, and warm and welcoming people, this region is supremely rewarding for the travel photographer.

I highly recommend a visit to the very remote Gougane Barra peninsula.  There’s only one hotel, which offers outstanding food and views over a tiny island with a picturesque church and the ruins of a sixth century monastery.  A photographer’s paradise!

St. Finbarr’s Church stands on a tiny island on the Gougane Barra Peninsula.  To make this image, I shot in the early morning when the quality of light was compelling, got down low to include the rushes in the lake, and used a polarizing filter to bring out the textures in the water and sky.  Buy this photo

Don’t put away your gear when the sun sets!  On a rare clear night in rural Ireland, the photography is stunning.  Here’s an image of the Milky Way sprawling above the ruins of St. Finbarr’s Abbey, a sixth century monastery.

To capture the Milky Way, use a sturdy tripod and a relatively fast lens with a high ISO setting.  In most cases, a shutter speed of 20-25 seconds is best, but here I used a somewhat shorter exposure to avoid having the cross appear washed out in the site’s artificial light.  Buy this photo

We then hiked a segment of the long-distance Sheep’s Head Way.  You’ll rarely encounter completely clear skies while walking in Ireland, but the changeable conditions can create opportunities for glorious landscapes.  This lovely image was made just as the rain let up and the sun poked out, generating a vivid rainbow that spanned over the green fields and ancient walls.

Here I used my go-to landscape lens, the Nikon 16-35mm f/4 lens, fitted with a good circular polarizing filter.  I adjusted the angle of the polarizer carefully to enhance the sky without weakening the refraction of the rainbow.  I got down low to the ground to include the leading line from the old wall.  Other compositional elements include the sheep and the dramatic clouds.  Buy this photo

Ladder stiles are encountered frequently when hiking in this region, but are less familiar back home, so dramatic images can be made incorporating travel companions crossing fences using these ladders.  Here I used a wide-angle lens with polarizing filter to emphasize the expansive terrain and dramatic sky.  Buy this photo

At the end of the Sheep’s Head Way sits the lovely Bantry House, owned by the same family since 1750.  Climb the hill behind the house to capture the house and its gardens with the harbor behind.  Buy this photo

On our way to the start of our next day’s hike in Killarney National Park, we stopped at a viewpoint called Priest’s Leap for this lovely view.  I’ve said it before and I’ll say it again: remember to include yourself and your travel companions in some of your images.  Set up the camera and either mount it on a tripod or show another person how to release the shutter.  For more on how to make images including yourself, read this post: Post on Including Yourself

This image at Priest’s Leap was made using a normal lens with polarizing filter, stopped down to maximize depth-of-field.  Buy this photo

Ireland is filled with forests that are shrouded in mystery and magic.  Look for the little things as you walk: a flower or shamrock, a moss-covered tree, a tiny stream.  All that rain has the happy side-effect of making Ireland the greenest place I’ve ever seen.

Slow down and seek out the little natural details around you, like this moss-covered tree in Killarney National Park.  Buy this photo

The lovely Torc Waterfall within Killarney National Park is one of the most scenic in the region.  To capture the motion of the water, I used a neutral density filter to allow a long shutter speed and steadied the camera on a solid tripod.  Buy this photo

The legendary Gap of Dunloe outside of Killarney stretches for eight miles through mountains and valleys, along streams and by ancient farmhouses.  It can be traversed by horse-drawn carriages called “jaunting cars,” but the intrepid photographer will want to hike it instead.

The Gap of Dunloe offers compelling photographic subjects like this stream flowing in a valley surrounded by mountains.  A good wide-angle lens with a polarizing filter brings out the color and texture in such a landscape, even on a “soft day” like this one.  Buy this photo

Hiking isn’t the only great way to see the local landscapes.  After hiking the Gap of Dunloe, take a boat ride along the rivers and lakes to the ancient Ross Castle.

This mountain rising from the lake was captured during the boat ride back from the Gap hike, using a normal lens with polarizing filter.  Buy this photo

We spent every evening in Ireland visiting a pub or two.  These pubs differ in character, but all reflect the generous and friendly local culture, and many offer live music.

At a pub in Killarney, I was chatting with this fiddler during a break between sets and made this portrait using natural light with a fast portrait lens, a wide aperture, and a high ISO.  Buy this photo

My essential portrait lens:

We were fortunate to stay two nights in Killarney at the wonderful Lake Hotel.  The hotel grounds include the ruins of an ancient castle situated on a lake with mountains behind.  During breakfast on our second morning, I noticed the cloud cover had lifted but there was still mist hanging on the side of the hills around the lake.  I ran up to our room, grabbed my thirty pounds of camera gear, and rushed outside to capture the ruins with the mist enshrouding the lake and mountains.

There was no time to set up a tripod as the warming sun was burning away the magical mist on the lake, so I shot this image handheld.  Buy this photo

Our final day’s hike was the beautiful Wild Atlantic Way from Ventry to Dunquin.  The lovely views of the Atlantic are punctuated with green fields dotted with odd “beehive huts,” some dating back to the Neolithic Period.
To make this landscape incorporating ancient stone beehive huts and walls, I shot down across the fields to the sea, being sure to keep the horizon level.  Buy this photo

The picturesque Blasket Islands were home to a community of Irish-speaking farmer-fishermen until they were forced to evacuate in 1953.  This is one of Ireland’s most gorgeous stretches of coastline, captured here using a wide-angle lens with polarizer.  Rotate the filter until the sky is dark and dramatic.  Buy this photo

I hope this post inspires you to hike and photograph in this gorgeous region.  Expect some wet weather nearly every day, and prepare accordingly to protect yourself and your camera gear.  You’ll be richly rewarded with expansive views of some of the world’s greenest and loveliest vistas!

Have you visited southwestern Ireland?  What were your most memorable experiences?  Please share your thoughts here.

Want to see posts on other travel photography destinations?  Find them all here: Posts on Destinations.

Focus on 2018 SF Pride Parade [Encore Publication]: Capturing diversity, purpose, and intimacy

It’s no surprise that San Francisco hosts one of the world’s oldest and largest LGBTQ Pride events in the world.  Each year, the parade and festival grow bigger and better attended.  SF Pride is one of my favorite annual events in my home region, the SF Bay Area, and what I love the most about this exuberant celebration is its remarkable focus on the central human values of diversity, inclusion, activism, hope, and love.  In today’s post, I share some of my favorite images from this year’s Pride Parade, along with a few words about how the images were made.  The goal is to showcase the incredible diversity and sense of social purpose of the participants and observers at this grand celebration, while also striving to capture the small, more intimate, moments.  Remember that you can view–and purchase–all of these images as well as many more by clicking on any of the images in this post.

In a frenzied environment like that of most festivals, parades, and street fairs, it can be a challenge to make a nice clean portrait with an uncluttered background.  Sometimes it’s possible to relocate the subject to an area with a clean and clutter-free background, but most often (as with this portrait) that isn’t feasible.  In those cases, my best practices are to use a moderate telephoto “portrait” lens, select a wide aperture (small F-stop number) to throw the background into soft focus, get in close to the subject, and use a touch of post-crop vignetting during post-processing.  

Huge festivals and celebrations such as SF Pride can be overwhelming, with hundreds of thousands of participants and observers present.  I strive to capture the smaller, more intimate, moments within this gigantic environment.  Here I captured a beautiful portrait of two participants sharing their love, which I think encapsulates the entire meaning of Pride events around the world.  I had been chatting with these two people and had obtained their permission to photograph them before making this image.  I used a medium telephoto “portrait” lens and got in close to isolate the couple from the busy background.

Color and texture play a huge role in photographic composition and expression.  As photographers, we’re very aware of these factors when we compose landscapes or nature scenes, but even when making a portrait, we should always be considering the mood evoked by the colors, patterns, and textures in the scene.  I love this portrait for its moody use of the similar shades of orange-red offset against the multiple colors of the flowers and the cigarette.  This is an image that tells a story, but that also leaves most of the story untold.

Another intimate portrait, this one made of a young woman doing yoga poses while waiting to march in the parade.  She had an adorable sense of humor and expressive face, which, coupled with her offbeat outfit, made a great closeup portrait.  Don’t be afraid to get in close to your subject, but always get to know them and ask permission first.

An iconic Pride scene, this portrait was made with a longer telephoto lens, its use made necessary by the greater distance to the parade float in the middle of a wide street.  While I prefer to get up-close and personal with my subjects, and to get to know them before shooting, sometimes we have to shoot from farther away, such as during a fast-moving and crowded parade.  It’s therefore important to have the gear and expertise to make portraits from any range.  Even when shooting from farther away, though, my key portrait rules still apply: try to capture the portrait with as uncluttered a background as possible, use a wide aperture to isolate the main subject from the background, and apply a bit of post-crop vignetting during post-processing.

It can be tricky to try to capture nudity in a tasteful way suitable for sharing and selling to broad audiences.  I spent some time chatting with these two activists to get to know them and to understand their cause–overturning San Francisco’s ban on public nudity–before starting to shoot.  Even though they had given me permission to photograph them nude (which is an important courtesy all photographers should follow, although no permission is legally required to photograph people in a public space in the US), my market for images containing graphic nudity is small, so I strive to capture scenes that tell the story but with implied nudity rather than graphic nudity.  Here I found a vantage point that allowed the subjects’ arms to strategically cover certain parts of their bodies.  The resulting portrait conveys the story of their purpose and gets across the idea of their nudity, but is still shareable and sell-able to a broad market.

Another close-up portrait, using the same techniques I shared earlier in this post.

Another of my favorite portraits from the day, this one also tells a small-scale, intimate story, conveyed by getting in close and isolating the subjects from the busy background.  The end result is a sense that these two people are celebrating their own story, even in the midst of the bustling celebration going on around them.

I met this young woman in a very crowded space, but fortunately I had the opportunity to walk her to a less cluttered space to make her portrait.  I’m always on the lookout for quieter and cleaner spaces when shooting festivals and celebrations.  A few steps was all it took for us to find this simple, clean background, allowing the portrait to really pop.

Group portraits pose a special challenge in busy public spaces: how to capture all the group members in crisp focus while also trying to isolate them from the cluttered background.  Here I used a medium aperture to keep the people in sharp focus while slightly softening the background, but since a very wide aperture cannot be used for groups, the softening effect will be mild.  As a result, it’s especially important when making these group portraits to seek an interesting, complementary, or clean background.

As their float passed by in the staging and assembly area before the official start of the parade, I observed an opportunity to capture this quiet scene of one woman helping to apply her friend’s makeup.  I used a moderate telephoto lens and shot several frames to increase the odds of getting a clean and interesting shot.

When making portraits of kids or seated people, it’s a good practice to get down to their level.  Getting in close is also usually an effective technique, both to isolate the subject and to capture a sense of their spirit.

What are some of your favorite celebrations, and how do you capture their diversity in your images?  Please share your thoughts here.

Want to read more posts about what to shoot while traveling or close to home?  Find them all here: Posts on What to Shoot.

Chromatica App [Encore Publication]: Simple, intuitive, and affordable, this new iPhone camera control app is a winner

LR chromatica screenshot-

I’ve posted repeatedly about the importance of understanding how to take manual control of your camera in order to make images that are properly exposed and focused.  Whether you are using a professional DSLR, an advanced full-frame mirrorless ILC, a compact point-and-shoot, or the camera built into your smart phone, there is no way you will get consistently acceptable results if you leave the camera’s settings to its auto mode.  See this post for an overview: Post on Beyond the Auto Mode.

There are dozens of camera control apps available for the iPhone, and it can be confusing to figure out which one is right for you.  In the past, I’ve reviewed the following apps: Manual (see post on Manual app), ProCam 4 (see post on ProCam 4 app), and Camera Pixels (see post on Camera Pixels app).  In today’s post I offer a first look at a new app, Chromatica, from the same company that developed Camera Pixels.

Chromatica, priced at an appealing $2.99 on the Apple App Store, is aimed for a middle market of photographers who want more manual control than the camera’s native (built-in) app can provide but without the complexity of more enthusiast-level apps, such as Camera Pixels or ProCam 5 (the successor to ProCam 4).  It competes with other mid-level camera control apps such as Manual, though it is priced at $1 less.  My initial testing of the new Chromatica app found it to be a very worthy tool for most users to take control of their iPhone photography without the expense or complexity of the more advanced apps.  Chromatica has a very simple and intuitive interface, offers the ability to shoot in RAW mode for much higher quality images, and provides the basic required functionality to take manual control over your camera.  It doesn’t offer the full suite of bells and whistles found in the more sophisticated apps, but it’s still a powerful tool that makes the iPhone camera act much more like a DSLR or mirrorless camera while providing a clean and simple user interface.

Chromatica’s features include the ability to shoot in either auto or one of several manual modes such as Shutter Priority and ISO Priority.  It’s quite easy to realize which mode you’re in and to return to auto mode when you’re done taking manual control over the camera; the same cannot be said of some other camera control apps I’ve used.  Another essential feature is the ability to separate the exposure and focus points, so that exposure can be set based on one part of the image while focus is set on another part.  There doesn’t seem to be any user manual or in-app help function to explain this feature, so here’s how it works: simply touch the screen with two fingers and you’ll see a circle and a square appear.  Move the circle to the point in the image where you want to set exposure, and move the square to the point where you want to set focus.  Other useful features include an exposure histogram to show you the range of brightness levels in your shot, and exposure clipping to flag the areas of the image that are too bright or too dim.  Chromatica includes full optical stabilization in RAW mode as well as focus peaking to aid in manual focus operations.

What you won’t find in Chromatica, but for most photo-making purposes won’t miss, are advanced image-editing tools (instead, find these in your favorite standalone image editing software such as Lightroom or Photoshop), exposure bracketing, and long-exposure camera control modes.  Other more sophisticated apps do offer these and more features, but at the expense of higher cost and greater complexity.

In short, Chromatica does exactly what it’s designed to do: make it simple and quick to manually control your phone’s camera and make the most of it’s capabilities.  For most casual and enthusiast photographers, this is good enough when using a phone’s camera.  I typically shoot with professional DSLR gear costing many thousands of dollars when I need pro-level results, but I love the convenience and ease of grabbing some quick shots with my phone, and in the future I am likely to use Chromatica to control the phone’s camera when it’s a straightforward capture.  I’ll continue to use Camera Pixels and ProCam 5 when I require more advanced features to control the phone.

Here’s the link to the Chromatica app on the Apple App Store: Chromatica app.

For reference, here are some popular iPhone camera control apps along with their price and brief notes:

  • Native iOS Camera app (Free): Comes built-in with the iPhone.  Does not allow RAW capture, manual control of the camera, or any advanced features, but does allow the separation of focus and exposure points.
  • Camera Pixels Lite (Free): An entry-level version of Camera Pixels that offers basic camera control features but does not allow RAW capture.
  • Manual ($3.99): Another entry-level app that is really starting to show its age.  Offers basic camera control features including RAW capture, but lacks more advanced features and is difficult to use.
  • Chromatica ($2.99): A great value and very easy to use, this app offers camera control features, RAW capture, and a few more advanced features.
  • Camera Pixels ($3.99): A powerful manual control app with a very wide range of features, it remains quite intuitive to use.
  • ProCam 5 ($5.99): A very powerful app with a wide range of camera control features plus more sophisticated functionality typically associated with DSLRs and mirrorless cameras.  Also includes a full suite of image editing tools.  It can be difficult to use.  Note: I’ve only tested the older ProCam 4.
  • Pro Camera ($5.99): A popular higher-end app with a full range of features.  Note: I’ve not yet tested this app.


What app do you use to control your phone’s camera?  What do you like and dislike about it?  Please share your thoughts here.

Want to read more posts about photography gear?  Find them all here: Posts on Gear.


Wildlife and Safari Gear [Encore Publication]: Basic equipment to capture wildlife while traveling or close to home

Wildlife photography is one of the most exciting and rewarding pursuits I know, but it is also very challenging.  Whether on safari in far-flung wilderness regions around the world or in a park or zoo near home, capturing great images of the local fauna requires plenty of patience, a little bit of luck, and some specialized gear.  This post outlines the basic equipment needed for wildlife photography.

Sometimes we get lucky.  This alligator was seeking what little sunshine was available on an overcast winter’s day on the bayou in Louisiana.  He stayed sufficiently still that I was able to capture this image by handholding a medium telephoto lens from our airboat.  Buy this photo

Occasionally, a critter may scamper, fly, or swim right up to where the photographer happens to be standing, but in the vast majority of cases, if we want to capture a really moving and uninhibited portrait of an animal, we need a long telephoto lens.  Working with “big glass” not only fills more of the frame with the main subject, but it has the added benefit of allowing the photographer to shoot from a vantage point far enough away from the animal so as not to frighten it.  It’s also very important when photographing wildlife that we make every effort to keep the wildlife wild, and using a long lens keeps us at a sufficient distance that the creatures we’re observing are less likely to become accustomed to the sight, sound, and smell of humans.

I like to carry both a medium telephoto and a long telephoto when shooting wildlife, so as to be prepared for a variety of situations.  My medium lens of choice is the Nikon 70-300mm f/4.5-5.6 VR lens.  While this lens is built on aging technology and doesn’t always feel as solid as more professional lenses, it is relatively small and lightweight, fairly inexpensive, and provides a very effective vibration reduction function.  This lens has been a staple in my bag for many years, during which time I’ve used it to capture some of my favorite images.

My go-to long lens for wildlife photography is the Sigma 150-500mm f/5-6.3 lens.  It’s more economical than a Nikon or Canon super-tele, and it produces reasonably sharp images even when used at its widest aperture.  You can spend much more on this type of big glass if you want or need to, but I’ve found this lens works quite well for me.

Lilac breasted roller captured with a 500mm lens in Tanzania’s Kilimanjaro region.  Buy this photo

When shooting far-off and often rapidly moving animal subjects with big glass, it is important to have a good means of stabilizing the camera.  Depending on the shooting situation, I use either a lightweight tripod or a beanbag support.

A lightweight travel tripod is perfect for those situations when you have plenty of space and plenty of time in one place.  I like the Manfrotto Be Free travel tripod.  It folds up to an incredibly small size yet affords a surprising amount of stability.  The included ball head works well but is difficult to adjust for sensitivity.  This tripod is designed to fit into a special pouch in my favorite travel photography backpack, also made by Manfrotto.

For situations when you will be on the move much of the time, such as on game drives using safari vehicles, a beanbag support is extremely useful, as you cannot fit a tripod in a safari vehicle and a monopod is awkward.  The bag can be emptied for convenient travel and then filled with “beans” (usually synthetic) upon arrival.   It is placed on top of the safari vehicle while shooting, with the camera and long lens resting on the beanbag.  While the beanbag that I use is no longer available, this one is well reviewed by photographers and represents a good value.

A sleepy leopard yawns in a tree above the Endless Plains of Serengeti National Park.  This image was captured using a 500mm lens resting on a beanbag support placed on the roof of our safari vehicle.  Buy this photo

With a couple of good telephoto lenses, including one long one, and a couple of good options for stabilizing them, you will be armed with the right basic tools for bringing home truly memorable images of the wildlife you encounter on your travels.  Happy hunting!

What are your favorite wildlife subjects and locations, and what gear do you use to capture them?  Please share your experiences here.

Want to read more posts about photographic gear?  Find them all here: Posts on Gear.

Revealing Portraits [Encore Publication]: Inspirational women of India are struggling to empower themselves and others

Travel photography is about more than simply recording what we see and do during our trips.  It is more important even than creating art from our experiences while traveling.  I believe travel photography also has an important role to play in documenting and communicating to broad audiences the present situation facing underrepresented, repressed, and abused communities, and advocating for change to improve on the present situation.

Today’s post illustrates this point.  In a series of four portraits made during my recent travels in the north of India, I document several of the serious struggles faced by the girls and women of India–abuse of street children, poverty and lack of education, forced early marriage, and acid attacks–and show how these brave young women are working to empower themselves and others like them to end these abuses.

First, we meet a 17-year-old girl from the slums of New Delhi.  Let’s call her Sheela (the NGO supporting her work has requested that I not use her real time in order to protect her identity).  Sheela is the principal organizer of 10,000 street kids from similar slums across the sprawling city.  She helped start a newspaper, called Balaknama, to give a voice to the street kids and expose their stories of child labor exploitation, police harassment, and physical abuse.  Through her efforts and those of other kids from the streets, the editors who advise them, and the NGO that funds them, Balaknama has helped improve the lives of the poorest and most vulnerable residents of Delhi.  My portrait of Sheela is set in Balaknama’s offices and shows her calm and inspiring strength.  Lit by available light only, this image was made with a fast prime portrait lens, shot from a low angle so as not to condescend to the subject, and using a wide aperture to soften the background.  The feeling this image evokes is one of quiet power and a strong drive to expose and right the wrongs of her society.

Sheela, a 17-year-old resident of Delhi’s slums, organizes 10,000 street kids and reports for a newspaper run by and for the street children of the city.  Buy this photo

Next, we meet a girl who was born into poverty in Delhi and was forced at an early age to beg to earn money for her family.  Let’s call her Anika.  School was not an option for her.  However, Anika found a way to earn more and to avoid begging by selling bead necklaces on the streets of the city.  The portrait shows the contrast of her daily life: hopeful yet exhausted, bright yet uneducated, strong yet vulnerable.  This portrait was made using natural light with just a touch of fill flash to accentuate the saturated colors of her outfit and her wares.  The emphasis was placed on Anika by use of the fill flash, by exposing for her face, and by blowing out the overexposed background.

Anika is one of Delhi’s poorer residents.  Unable to attend school, she sells beaded jewelry to make a few rupees for her family.  Buy this photo

In a small village in rural Rajasthan, we met Parma at her modest house.  Forced to marry at the age of 11, Parma had four daughters at an early age.  She is fiercely committed to ensuring her daughters receive a good education so that they will have more options than she had.  Parma made the brave decision to become one of the first women to join a cooperative formed to allow women of the village to learn to make handicrafts in order to earn money for their families.  She and her husband faced considerable scorn from neighbors and relatives over her decision to earn her own income, but now many other village women have seen the success of this program and have also joined.  Parma is proud to have learned to sign her name and read a few words, thanks to her older daughters’ having taught her.  My portrait shows Parma in her kitchen with her third daughter preparing tea in the background and a neighbor child just in front of her.  The image radiates beauty, dignity, strength, and resolve.  In this environmental portrait, I wanted to portray Parma in relation to her home, her family, and her community, so I placed her in the center, exposing and focusing on her face, and allowing her daughter to be clearly identifiable yet slightly out of focus.

Parma, a child bride, vowed to educate her four daughters and works in a women’s cooperative to earn extra money to fulfill her promise.  Buy this photo

Finally, we meet Rupa at Sheroe’s Cafe in Agra.  Sheroes’ is a project founded by and for the women of India who are survivors of acid attacks. We were so inspired by meeting Rupa and learning about her story and her road to physical and emotional recovery after her brutal attack at the age of 15 by her stepmother.  Through this project, Rupa has gained the confidence and independence to leave home, meet other survivors and activists, build a business as a clothing designer, seek legal justice against her attacker, and access the surgical care required to reconstruct her face. The courage and resilience shown by Rupa and the other women we met at the cafe moved us to want to help their cause to educate people and improve the treatment of India’s women.  My portrait of Rupa is powerful because it doesn’t shy away from her scars but allows her courage, resilience, and beauty to shine through.  I got in close to Rupa using an 85-mm prime portrait lens and composed a head-and-shoulders image from eye level.  I exposed for her face and blouse, which she designed herself, bringing out the vibrant saturated colors.  A shallow depth-of-field ensured that Rupa’s face would be emphasized while the background would be soft.

Rupa was brutally attacked with acid by a relative when she was just 15 years old.  Rather than hide at home her whole life, she was empowered by the Stop Acid Attacks organization to live independently, fight for justice, and advocate to end acid attacks across India and Southeast Asia.  Buy this photo

I hope this series of portraits of four brave young women in India will inspire you, as their subjects inspired me, to advocate for improving women’s rights in this part of the world.  And more broadly, I hope you’ll recognize the power that travel photography has to give voice to the unheard and to fight for social change in the places where we travel.

Have you made the opportunity to advocate for change through your images?  Please share your story here!

Want to read more posts about what to shoot while traveling?  Find them all here: Posts on What to Shoot.


Comic Relief [Encore Publication]: A photo essay of images from SF Comic Con 2018

As a professional travel photographer, I’m at my happiest when I get to seek out new cultural experiences and work with the people I meet to capture their culture in images.  Sometimes this discovery takes place halfway around the world, and other times it happens very close to home.  This weekend I had the opportunity to make portraits at San Francisco Comic Con 2018 of some of the thousands of attendees who portray their favorite comic book characters.  This was my introduction to the culture of “cosplay”, where people dress up as characters and bring them to life through their performances.  Many cosplayers design and make their own costumes, a laborious process, and interpret the characters’ personalities through their acting abilities.  I was extremely impressed by the wide range of costumes, props, and makeup as well as the cosplayers’ passion and skill.  Comic Cons are also fun events to shoot because the cosplayers love to have their work captured in images.

In today’s post I present some of my favorite images from SF Comic Con 2018 in the form of a photo essay.  Note that all of these images and many others from this event are available to view and purchase on my website.  Click on any image to see a larger version on my site.

A few words about how these images were made:

  1. Any convention is a crowded and bustling affair, and comic cons are no exception.  To achieve as uncluttered a background as possible for my portraits, I engaged cosplayers in conversation and then asked them if they would pose in a less crowded area for a portrait.  Nearly everyone said yes, because they are thrilled to be photographed in costume.  I would then direct them to a wall, alcove, or other fairly clean background before starting to shoot.
  2. My gear was very simple.  I shot with a single DSLR body and just one lens, a 24-85mm “walkaround” zoom.
  3. I shot with available light only.  While quite a few photographers in attendance were using flash or even dedicated studio lights, in my opinion that was a miscalculation because the fluorescent lighting in the convention center was challenging to match with a flash.  This situation results in “mixed lighting”, where the subject is lit by lights of very different color temperatures.  It is often unappealing to look at and difficult to post-process.
  4. I used a high ISO setting, a moderate aperture, and a fairly fast shutter speed.
  5. For variety, I captured a range of poses from full-body to half-length to headshots.  I tried to include all of the subjects’ elaborate props.  If they were part of a group, I captured both group and individual portraits.
  6. This type of shoot requires an intensive effort in post-processing.  I adjusted color balance carefully to try to gain a pleasing and accurate tonal range given the unattractive fluorescent lighting under which the photos were shot.  I processed for a “high key” (bright subject against white background) effect so as to render the venue’s ugly walls as true white.  With effort, harsh shadows can also be reduced during post-processing.

I hope you enjoyed viewing these images from my first foray into capturing cosplayers as much as I enjoyed making them.  I will surely be seeking out and shooting upcoming comic cons, as these are among the more rewarding events to cover.

Have you shot comic cons or cosplay events?  Please share your experiences and your tips and tricks here.

Want to read more posts about what to shoot while traveling or near home?  Find them all here: Posts about what to shoot.

A Panama Panorama!: My professionally published 2020 Panama wall calendar is available now

Dear Readers,

A professionally published 2020 wall calendar featuring 13 of my images from Panama is now available for sale online and in select bookstores. If you or a friend love Panama or just enjoy inspiring travel photography, this calendar will be a big hit. I’ve included images from all over Panama that represent many elements of the country’s natural beauty, history, and cultural diversity. Panama Canal fans will find a couple of photos documenting the operations of this marvel of engineering.

Please order soon to ensure timely delivery. The calendar should be available soon on Amazon, but for now it can immediately be ordered at a discounted price and with free US delivery from reliable British bookseller Book Depository: https://www.bookdepository.com/search/9781325514359. Thanks for supporting my work!

Kyle

Focus on Lisbon, Berlin, and Barcelona [Encore Publication]: History, architecture, and cultures yield boundless photographic opportunities

My wife and I recently returned from two weeks of travel in Europe to fulfill several of my photography assignments. I’ll publish separate posts in the coming weeks covering some of those professional assignments. In today’s post we’ll explore the vibrant capital cities of Lisbon, Berlin, and Barcelona. While each of these three cities has a personality very much its own, I’m hoping my images will demonstrate that photographing cities, like photographing people, is all about looking for what we have in common even as we celebrate our differences. Urban photography is special to me because cities are the places where history, architecture, and culture often align most dramatically to paint a full picture of how we live today. Note that all of these images and many more are available to view and, if desired, to purchase; just click on any image to view the gallery. Enjoy!

On arrival in Lisbon, we are treated to an early morning view of the old Moorish quarter of Alfama. I like to underexpose by 1-2 stops when shooting sunrises and sunsets to bring out more intensity in the colors. If in doubt, bracket your exposures and choose the one that best captures the scene as you experienced it, or combine the different exposures into a composite high dynamic range (HDR) image.
I loved the look and feel of the old streetcars plying the streets of Lisbon, so I found this picturesque spot and waited until the next tram came into view.
If you had told me one of the most amazing experiences in Lisbon is visiting a tile museum, I’d have answered it’s more exciting to watch the grass grow. But it turns out the National Azulejo (Tile) Museum is absolutely incredible from start to finish. This ornate chapel, decorated in azulejo tiles, is entirely contained within a part of the museum. When shooting interiors it is often advantageous to use a wide-angle lens, but it’s important to keep the camera level to the plane of the ground and avoid shooting upward or downward in order to avoid the severe proportional distortion that can occur in these situations. While it is possible to correct for this sort of distortion in post-processing software like Lightroom, it is preferable to get it right in-camera.
A nighttime street scene in Lisbon’s old Moorish neighborhood of Alfama. When handholding the camera in a low-light situation, especially when a small aperture is required for depth-of-field, it’s a good idea to boost the camera’s ISO sensitivity setting in order to achieve a relatively fast shutter speed.
We spent a full day exploring the Sintra region about an hour west of Lisbon, at the very far western edge of the European continent. Quinta da Regaleira is a wonderfully eccentric estate including a palace, a chapel, and several strange features adorned with symbols of alchemy, Masonry, the Knights Templar, and the Rosicrucians. Our favorite feature was this stone tower. I’m always on the lookout for repeating geometric patterns that often make for compelling images. It’s important to compose such shots carefully to enhance the power of the recurring pattern. I converted this image to black-and-white during postprocessing to give it a high-contrast graphic arts style look.

The Alfama neighborhood is famous as the birthplace of fado, a form of music typically performed by a solo singer accompanied by two Portuguese guitars. Fado is essentially a Portuguese version of the blues, with lyrics and melodies emphasizing the melancholy side of the culture. Most fado clubs feature extremely dim lighting to set the mood, and flash photography is strictly prohibited. This results in a technical challenge trying to capture good images. Here I used a very fast (f/1.4) prime lens almost all the way open and also boosted my camera’s ISO sensitivity setting to 6400 (as high as I like to go in order to avoid excessive digital noise), but still the required shutter speed was a rather slow 1/15 second. Instead of trying to capture the moving singer in tack-sharp fashion, I leaned into the mood of the place and allowed some motion blur to occur.
On our final day in Lisbon we explored Belem, an historic Medieval parish most well known for its medieval tower. Again, when shooting architecture with a wide-angle lens, try to shoot with the camera parallel to the ground to avoid distortion of the vertical lines. I also underexposed this image a bit to make for a more dramatic sky, recovering some of the shadow detail in post-processing.
Enjoying the Lisbon obsession, the sublime custard pastry known as Pastel de Belém, at the cafe that invented them (well, the recipe was probably borrowed from the Jerónimos Monastery next door). Food is a key part of any people’s culture, so I like to capture food scenes as part of every urban shoot. Insofar as possible, I try to arrange the various elements on the table so they tell a story in the frame of the image. Here I removed some of the items that cluttered the background, including just the pastries and the local coffee drinks. I try not to shoot straight down onto the food, as that usually results in unappealing shots. With food photography, some work is usually required in post-processing to adjust color temperatures and remove distractions like dirt and shadows.
After our stay in Lisbon, we enjoyed an unforgettable two days on assignment shooting the annual Mardi Gras Carnival festivities on the Poruguese owned island of Madeira. Those images will be featured in a separate post. Then, onward to Berlin. Our hotel was right next to the infamous Checkpoint Charlie section of the old Berlin Wall, shown here.
No visit to Berlin would be complete without passing through the stately neoclassical Brandenburg Gate. It can be very challenging to get a clean shot of very crowded iconic urban sites. Here I fitted a wide-angle lens, composed the shot looking straight toward the gate without pointing the camera up or down, and waited until nearly all of the tourists had left the frame. Some straightening of the vertical and horizontal lines still had to be done in post-processing to avoid the perspective distortion introduced by the very wide focal length.
Berlin’s Holocaust Memorial takes up a large city block and requires some time to take in and explore. To capture this large, powerful, and rather imposing monument, I composed using a moderately wide lens stopped down to a small aperture for maximum depth-of-field and keeping the horizon line with the background buildings completely straight. I converted to black-and-white in post-processing to achieve a stately, somber feel.
On our way home from Berlin, we had an overnight layover in Barcelona. With time in town for only one dinner and a bit of nighttime and morning sightseeing, we enjoyed Catalonian tapas for an authentic local dining experience. I arranged the stuffed pasta and wine glass in a pleasing pattern against the simple background of the wooden table and cropped the image to emphasize the food and wine without distractions. The color temperature usually needs to be adjusted during post-processing to give the food and beverage a realistic color.
Exploring Gaudí’s masterpiece, the cathedral known as La Sagrada Familia, at night. When shooting really iconic sites, I like to seek out unusual perspectives to avoid the dreaded “postcard shot”. Here I composed looking up from near the base of one of the towers, allowing the background to be filled by the dark night sky. This composition cleaned up most of the busy urban scene’s clutter and made for a dramatic capture of the basilica bathed in several types of light.
We had only 90 minutes to visit the interior of La Sagrada Familia before heading to Barcelona’s airport to fly home to San Francisco. I shot this self-portrait (Mary is also included) using a mirror positioned so visitors could view the soaring interior space of La Sagrada Familia.

I hope you enjoyed these favorite images from three great European cities, along with my descriptions of how the images were made. To view more images, or perhaps to purchase a few, just click on any of the photos to go to the gallery.

What are your favorite techniques or images from your urban photography? Do you have urban themes you like to document wherever you travel? Please leave a comment and share your thoughts.

Want to read more posts about travel photography destinations? Find them all here: http://www.to-travel-hopefully.com/category/destinations/.

New Year’s Resolutions [Encore Publication]: My opinionated list of the top 5 promises all travel photographers should make and keep

Personally, I’m not a big fan of new year’s resolutions.  Common sense dictates that if we really want to make change in our lives, we should resolve to take specific steps toward that change every day.  Promises we make on December 31 each year will most likely be broken by January 15.  That’s certainly what I’ve observed over many years on the running trails and gyms where I’ve run or worked out daily.  A huge surge in attendance begins on January 1 and dissipates within about two weeks.

So this year, ahead of the new year’s holiday, I’m re-posting my earlier thoughts on what we travel photographers should resolve to do differently.  In the three years since I originally posted this article, I actually have made progress against all five resolutions.  

  1. Book that once-in-a-lifetime trip now:
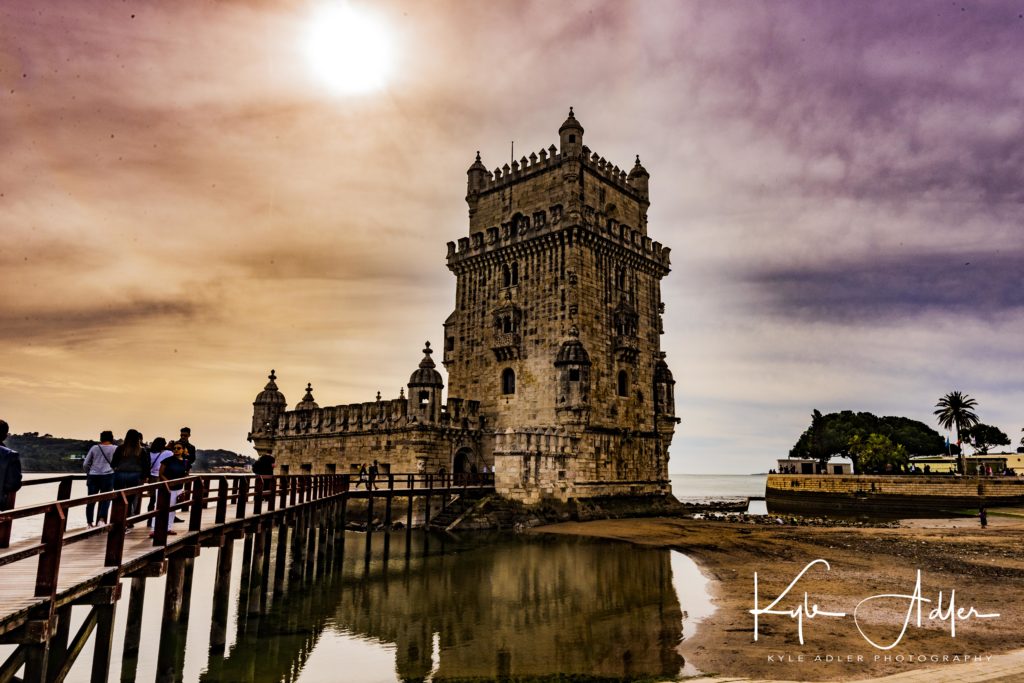
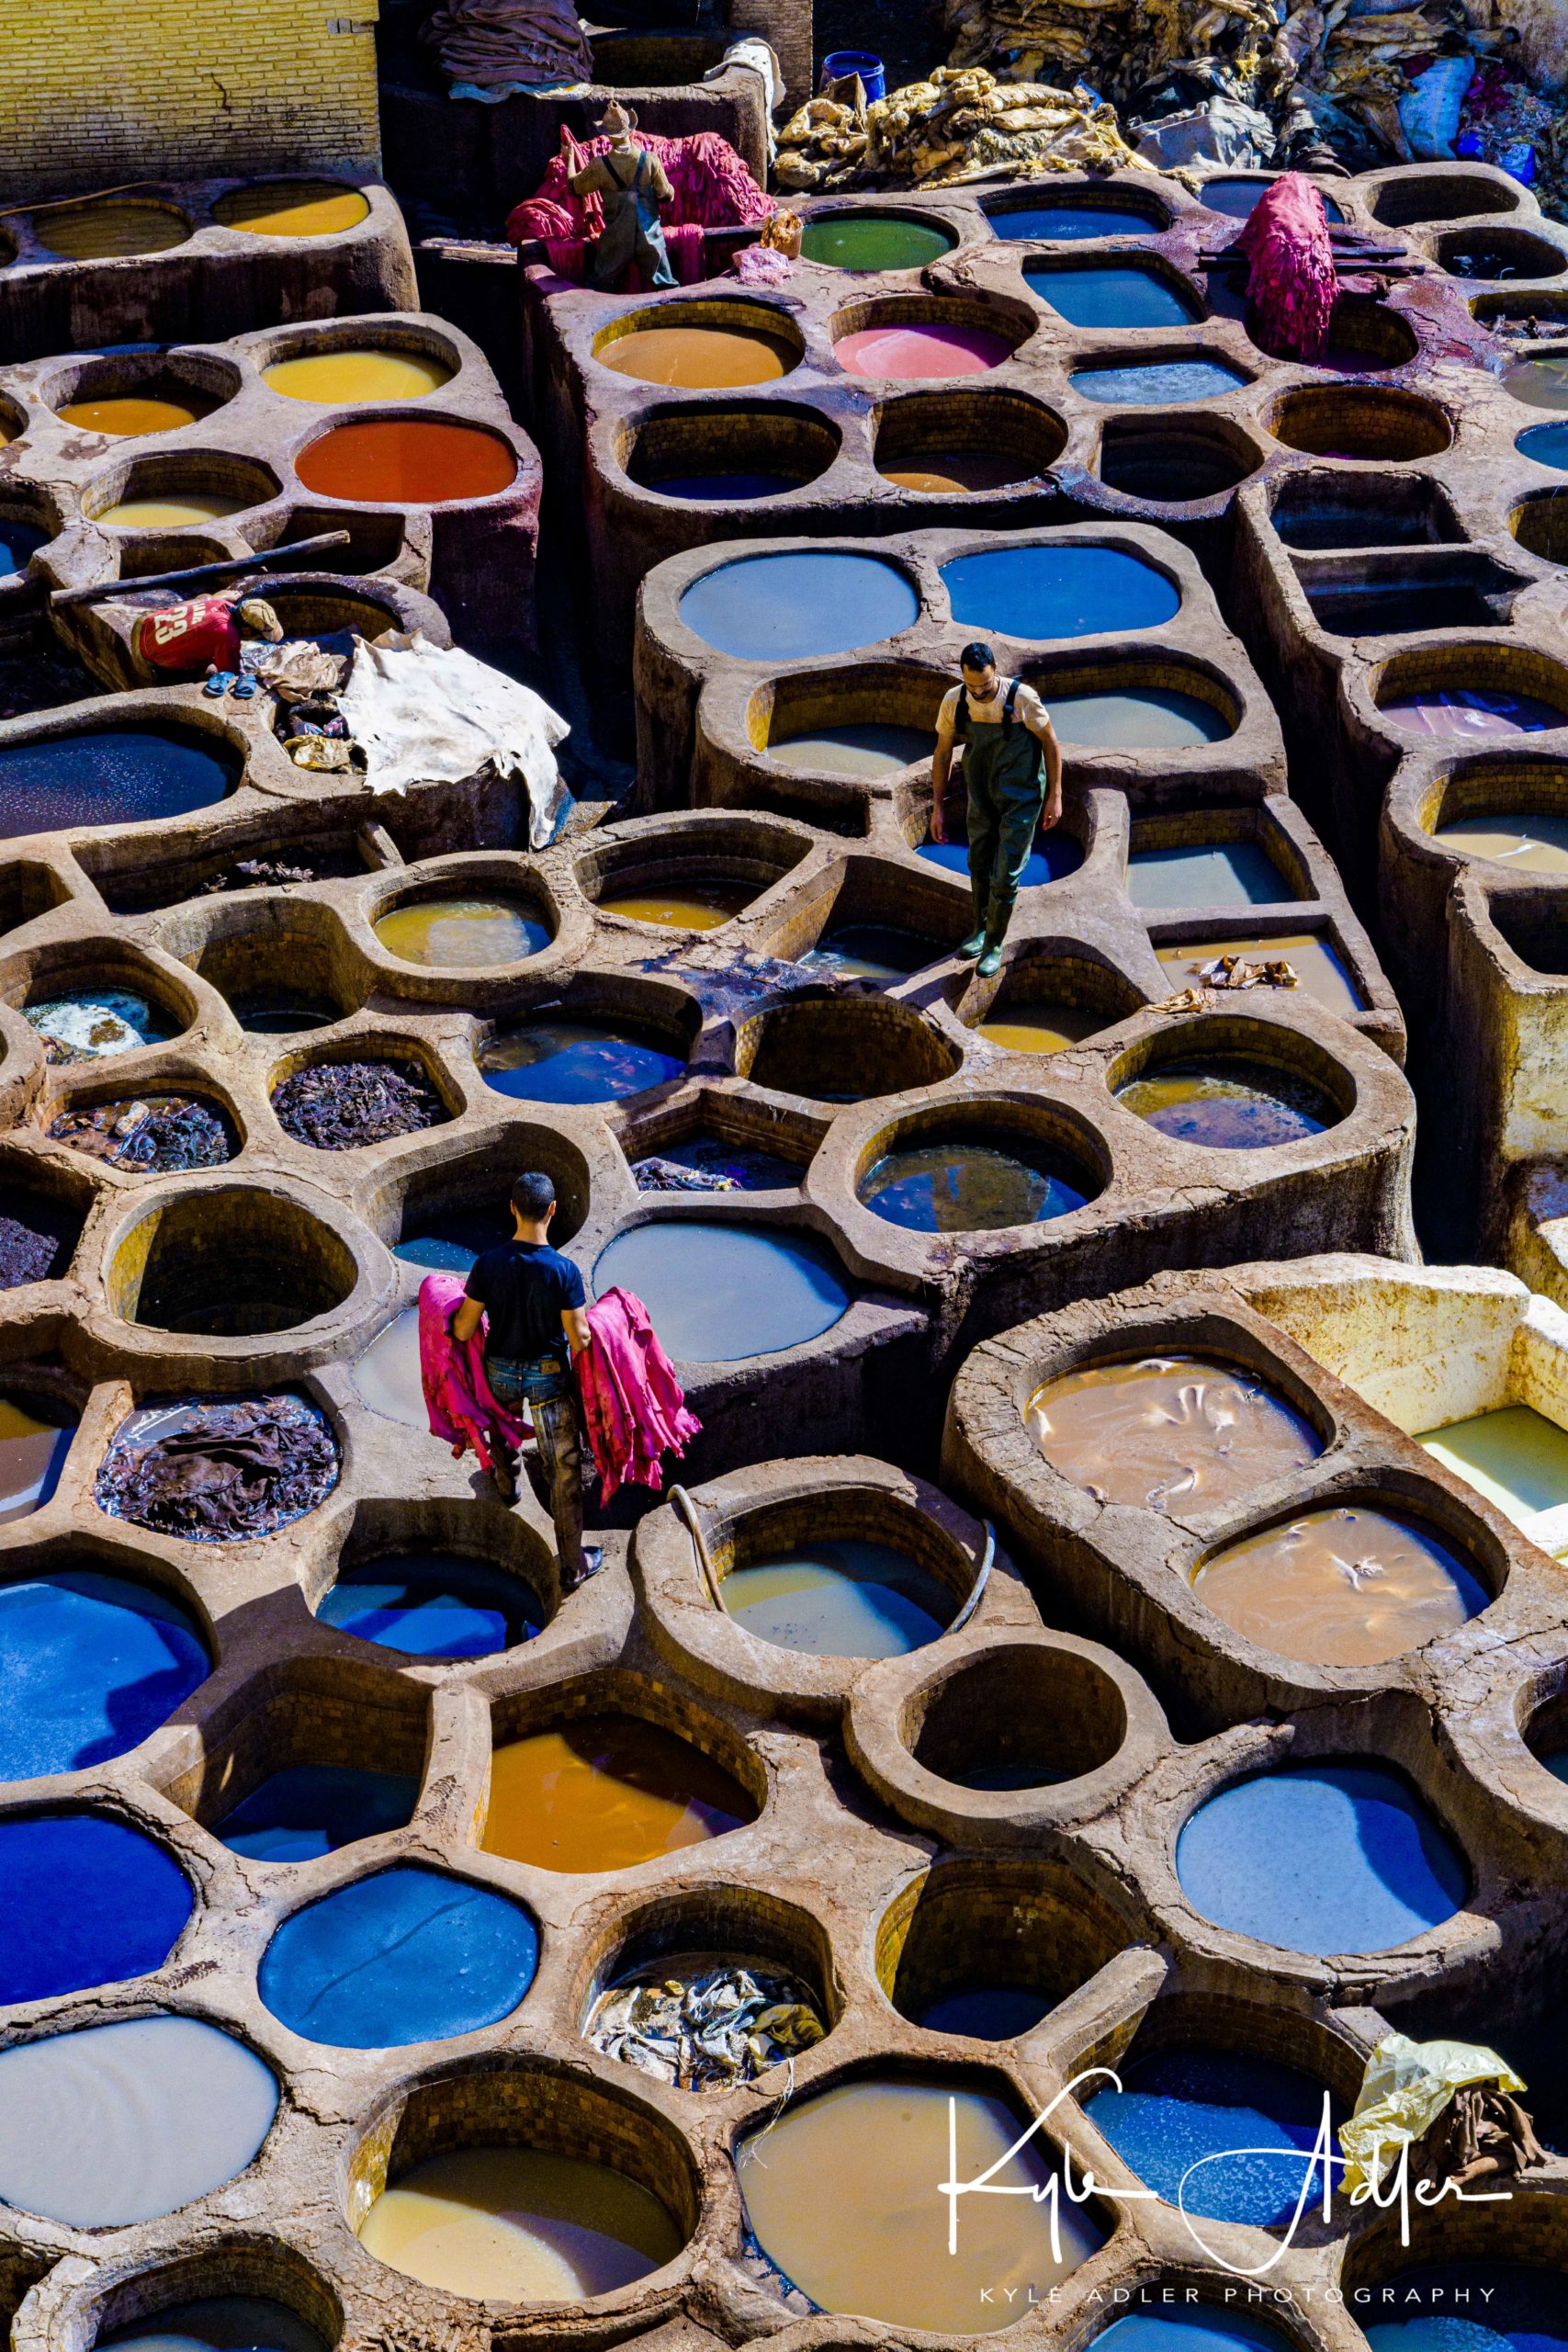
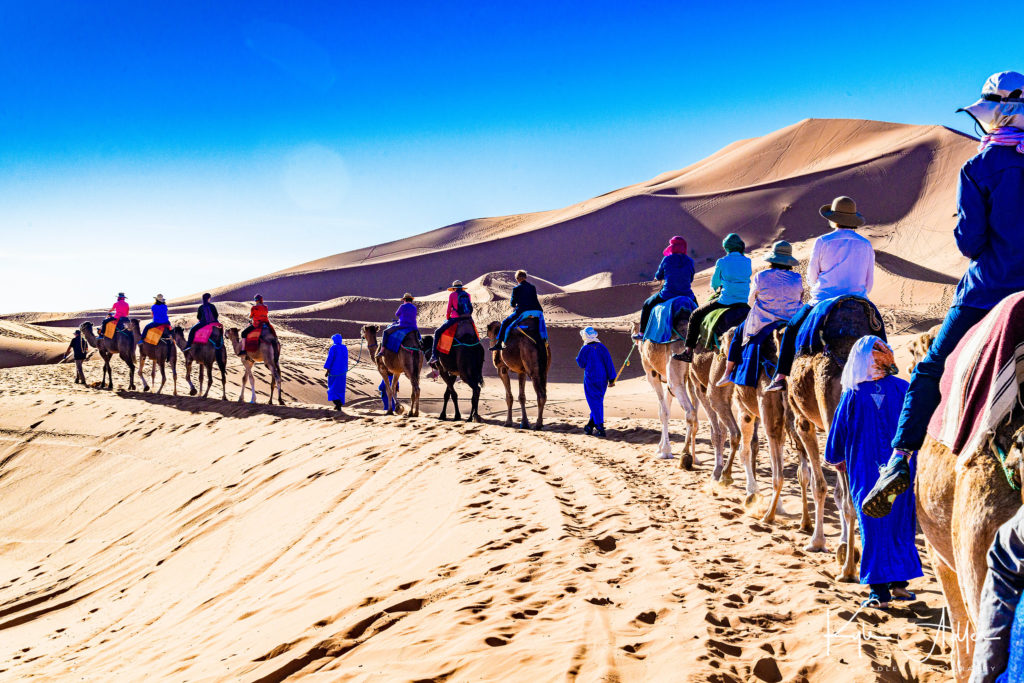
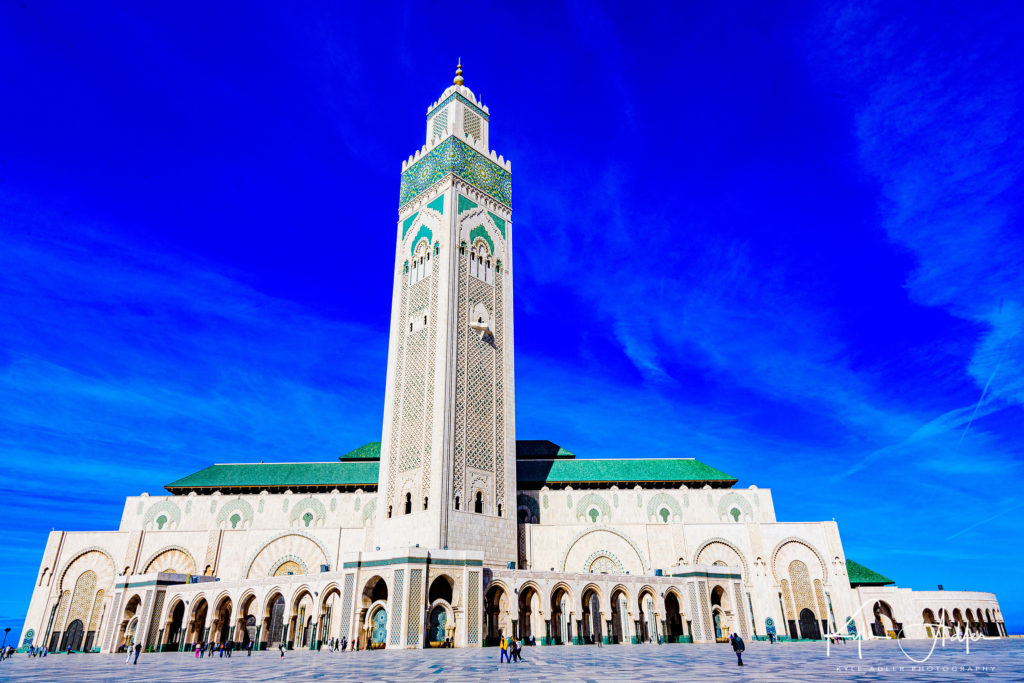
    Visit that exotic destination you’ve always wanted to see!  Buy this photo
    That travel photography “bucket list” needs to be emptied before you kick the proverbial bucket.  I know too many people who always found excuses to put off taking the trips they most desired, until it became too late for them.  The kids are too young, my job is too demanding right now, I can’t afford the cost.  I’ve made these excuses, too.  But the one thing we can’t live a full life without and can’t ever lose once we’ve attained it is experience.  Every trip I’ve taken helped me grow as a person and as a photographer, and also helped me grow closer to my family and other travel companions.  So book that trip today and go this year.  You won’t regret it.
  2. Just get out there and shoot:
    USAThere are countless exciting subjects for your photography within a few miles of your home.  Buy this photo
    Even professional travel photographers can’t be on a lengthy shoot in an exotic part of the globe all the time.  So, book those once (or a few times) in a lifetime trips as soon as feasible, but in the meantime find some wonderful local attractions where you can hone your craft by making compelling images.  I love to shoot little-known local cultural events such as street fairs and performances of dance, theater, and music.  It’s also a great pleasure to find scenic spots near home where we can make some striking landscape images that haven’t been shot thousands of times before.  Remember, you’re the local expert near your home, so seek out frequent opportunities to shoot in your own community.
  3.  Learn to use your camera as a tool to bridge the gap between your culture and the culture of the land you’re visiting:
    CubaPhotography can bring us closer to the people we meet on our journeys.  Buy this photo
    Instead of letting your photography separate you from the people you’ve come to learn from, resolve to turn your image-making into an opportunity to meet more people and get to know them more deeply.  Check out my pillar post on how to do this: Post on Photography as a Cultural Bridging Tool.
  4. Approach wildlife with respect:
    The more we learn about and respect the fauna we encounter during our travels, the healthier they will emerge from the experience (and the better our images will turn out).  Buy this photo
    A photo safari is a life-changing experience and should be on every travel photographer’s list.  But just as our cameras can be used either to alienate local people or to bond with them, so can photographing animals be used to harm them or to respect and help preserve them.  Read this post for more detailed tips (Post on Wildlife Photography), but in the meantime I will summarize by emphasizing the importance of prioritizing the animal’s welfare ahead of our desire to get an amazing shot of it.  Getting too close to wildlife will stress the animal and could even cause it to become lunch (or cause a predator to starve by losing its meal).  The more we get to know a species’ behavior before encountering it in the wild, the better our images will be and the healthier the animal will emerge from the encounter.
  5. Continually improve technique:
    I strive to hone my technique with every shoot.  Buy this photo
    There are more important elements in photography than technique, but a mastery of technique does help us make the images we want, so I always work to improve mine.  If you haven’t already gained the confidence to shoot in manual mode, start learning now.  Remember that while cameras have become very smart, they aren’t artists and they can’t know what the photographer is trying to achieve, so learn to take control of your camera’s settings today.  Here’s a short post listing five key techniques that will help your images stand out: Post on Top Five photography “hacks”.

So, resolve to take that trip of a lifetime, shoot locally while you’re waiting for it, learn to use your camera as a tool to interact beneficially with the people and the wildlife you meet during your travels, and work to hone your technique.  I’ll be doing the same!  Happy trails in 2020.

What do you resolve to do in 2020?  Please share your thoughts here.