Flashback [Encore Publication]: A simple and cheap accessory to improve your lighting

IMPORTANT UPDATE ON AUGUST 11, 2017:

Dear Readers,

I must retract my support for the Vello off-camera flash cord.  It is cheaply made and recently and suddenly failed, disabling my camera during an important client shoot.  I ended up paying over $300 to have the failed Vello accessory removed from my camera, and I lost use of my camera for more than a month while the repairs were being done.

Since this failure occurred, I’ve been very happily using a genuine Nikon brand off-camera flash cord:

The Nikon unit costs more than the Vello unit, but in my estimation it is much more solid and reliable.  I strongly urge all photographers to stay away from the Vello cord.

Here is the original post for reference, but please understand that I retract my support for this product.

=======

When it comes to gear, a lot of photographers will spend a lot of cash on a camera body, lens, or tripod head that they hope will magically elevate the quality of their images.  I’ve said it before, and I’ll say it again: great images are made by great photographers, regardless of the gear they use.  I find that in most cases, spending a lot of money on a new piece of kit will not result in dramatically improved images, at least not right away.  But sometimes it’s a little, inexpensive accessory that can immediately transform our images.  A good polarizing filter, for example, can almost magically improve landscape images by enhancing skies and mountains and reducing unwanted reflections.  In today’s post, I sing the praises of another inexpensive accessory that can make a big difference: the off-camera flash cord.
CubaThis portrait of a student at a Cuban school is compelling for its subject’s poise and its strong color scheme, but the lighting from the hot-shoe mounted speedlight is a bit harsh.  Buy this photo

Using your camera’s built-in flash or a speedlight mounted to the camera’s hot-shoe provides lighting that is aimed directly toward your subject from the plane of the camera’s sensor.  This light will bounce off the subject and come directly back to the camera, which makes for quite harsh lighting, often severe shadows, and red-eye or other unwanted effects.  These often undesirable characteristics can be mitigated a bit by using the flash unit’s tilt head to bounce the light off a wall or ceiling, or by dialing back the power of the flash’s output, but direct flash lighting is rarely the most attractive.

Instead, get the flash unit off the camera to enhance the lighting.  By purchasing an inexpensive off-camera flash cord, you can connect the flash to the camera’s hot-shoe while having the freedom to hold the flash away from the camera and to aim it any way you like.  I usually hand-hold the flash in my left hand while holding the camera in my right, but occasionally it is necessary to have both hands on the camera, in which case a bracket or stand can be used to hold the flash.  Depending on the situation, I will either aim the flash head toward the subject or bounce the flash off another surface such as a ceiling, wall, or even my own clothing.  With the off-camera flash cord, there is much more flexibility in how to position and aim the flash.

NOTE: I RETRACT MY SUPPORT FOR THIS ACCESSORY.  SEE THE NOTE AT THE TOP OF THIS POST.  Here is the flash cord I use.  It’s an independent brand (not made by Nikon, my camera’s and flash unit’s manufacturer), but I’ve found it to be at least as reliable, usable, and durable as the manufacturer’s own cord.  Best of all, this accessory costs less than $20, making it one of the best bargains I’ve encountered in the photographic accessory space.

The results from getting the flash unit off of the camera can be dramatic.  This image from Carnaval San Francisco is striking for the subject’s vibrant color and energetic sense of motion.  There are few visible shadows on her face, and the lighting is natural looking and even.

USAGetting the flash unit off of the camera’s hot-shoe yields even and natural lighting that is free from the harsh appearance and unflattering shadows often found in flash photography.  Buy this photo

There are other methods you can use for off-camera flash.  These days, many photographers use wireless triggers for the camera and flash to communicate.  If this setup works for you, great, but I’ve found a good old-school flash cord to be more reliable than wireless.

Try getting your flash off of the camera with a cord or wireless setup.  I think you’ll be very pleased with the results and the return on investment is likely to be higher than with most other gear purchases.

How do you use flash in your photography?  Any indispensable little accessories in your bag?  Please share your thoughts here.

Want to read more posts about photographic gear?  Find them all here: Posts on Gear.


Photographic Blasphemy: Why you don’t need a tripod for most travel photography

Warning: The following assertion will sound heretical to many photography enthusiasts.  Stop reading now if you can’t handle the truth :-).

I’m going to say it.  You don’t need to carry a tripod for most travel photography situations.  There, I’ve said it.

This is blasphemy to many photographers.  After all, for the past 15 years or so, the badge of a “serious” photographer has been this three-legged object we stick between our camera and the ground.  Most scenic overlooks and other landscape photography-friendly locations have been positively flooded by a veritable sea of tripods in recent years.  I’ve seen viewpoints so clogged by tripods that photographers and even (heaven forbid) non-photographers are forced to elbow their way through just to get a place to stand to watch the sunrise, sunset, or other pretty happening.  For years, I have carried at least a lightweight tripod, and occasionally a heavy-duty professional tripod, with me to nearly every shoot, which for me is usually about two per day.  It’s become an ingrained behavior, a knee-jerk reaction, for most photographers.  But why, exactly?

During my recent travels in India, I made many wonderful images in all genres of photography.  I used a lot of gear to do so.  One item I didn’t use: a tripod.  Buy this photo

There are times when a tripod is necessary.  In very low-light situations, such as true nighttime scenes, most astrophotography, and some indoor shoots, it is essential to mount the camera on a sturdy tripod.  When a very long shutter speed is required for a specific effect, such as blurring water in a waterfall or shooting a dancer using rear-curtain sync flash, then you really do need a tripod.  We can even include shoots where several images will be combined using software to make a high dynamic range (HDR) or panoramic image in the category where a tripod is helpful (though, I would argue, not really essential anymore, given how good software has become at stitching overlapping images together).

But so many other times, a tripod is not only not an asset but actually becomes a liability.  Travel photographers must be very mindful of the size and weight of the gear we carry on our adventures.  Every item we bring has to be considered in terms of its value: will the space it takes up in our limited carry-on baggage allotment and its weight on our back every step of our trip be worthwhile in terms of its usefulness in making the best possible images?  A tripod, even a lightweight travel tripod, is a relatively large and heavy piece of gear.  There are other items we need to leave at home in order to make room for a tripod.

I recently returned from a 2.5-week journey through the north of India.  I brought as much gear as I could reasonably fit in carry-on for the international and internal Indian flights.  It weighed a lot, and I had to lug much of the gear I brought on the trip each day on my back through 115-degree heat, sometimes up steep hills to the top of ancient forts.  At the end of the trip, I contemplated my usage of each item I carried.  Both DSLR camera bodies, every lens (even the massive 500mm super-telephoto which I required to make great images of far-off tigers), the speedlights, both battery chargers, and all remote releases, cables, filters, cleaning supplies, etc. were used at some point during the trip.  The one item I never once needed: you guessed it, the tripod!

True, India is a very densely populated country where most sites do not allow tripods or, if they are allowed, the crowds are too thick to deploy them.  And there was ample bright sunlight at most of our locations to handhold the camera.

But I would argue that a tripod is simply not needed for many travel photography situations in general.  These days, a camera’s sensor is so fast and noise-free, and the camera’s resolution so high, that camera shake for most landscape photography settings is a much smaller risk than motion of the subject itself.  My Nikon D810 has a resolution of nearly 37 MB, so if a single tree branch or sometimes even a single leaf moves, I can see it in the image.  A tripod is no more going to stop a leaf from moving than could the ancient viking king Canute stop the tide from coming in (a story frequently misused in modern times, by the way).

From now on, when I pack for a day’s shoot or a month-long journey, I’m going to seriously consider whether I’ll need a tripod and will pack one (or two) only when I can reasonably expect to need it.

What about you?  Do you always carry a tripod, or do you consider its appropriateness before you travel?  If you always carry it, do you always need it?  Would you bring some other piece of gear along if you didn’t have to make space for the tripod?  Please share your thoughts on this controversial topic here!

Want to read more posts about photographic gear?  Find them all here: Posts on Gear.


Filtered Down to the Essentials [Encore Publication]: Why you should always have these filters in your bag

Filters are the Rodney Dangerfield of photographic gear: They don’t get enough respect.  Most photographers will begin to salivate when talking about the latest camera bodies or lenses and even plates or heads for our tripods, but we tend to think of filters as pedestrian items, if we think about them at all.  I nearly always make room in my bag for several filters, and I believe that using them properly is more important than what camera or even which lens I choose.  Let’s look into why these affordable little accessories are so important.

Three kinds of filters are essential gear for most photographers.  I’ll cover each type here.  Note that you must use a filter that is the correct size to attach to your lens.

It’s a good idea to keep a UV filter (also known as a haze filter) attached to your lenses at all times, as this helps protect the front element of the lens from fingerprints, moisture, and even scratches.  In addition to offering some physical protection for your lens, a good UV filter can also improve image quality when there is atmospheric haze or moisture in the air.  Use a good quality filter, though, as some can adversely affect your image quality.  I would recommend removing the UV filter when shooting with certain other combinations of filters, as the edges of the image can be cut off (vignetting) with too thick a stack of filters on the end of the lens.  In most cases, use of a UV filter does not affect the exposure more than about half a stop, so they can be used in most lighting conditions. I’ve had good luck with Hoya UV filters.  Always be sure to look at the specifications for your lens before buying any screw-on filter, because the diameter of the filter thread must match the size of the lens.

The second must-have type of filter is the circular polarizer.  A polarizing filter can reduce glaring reflections and can darken skies and enhance natural colors.  This little gadget is almost a secret weapon for making images that really pop.  Again, I like the Hoya products, which are thin, well made, and perform as they should.

It takes a bit of practice to learn to use a polarizing filter properly.  While looking through your camera’s viewfinder or LCD screen, turn the outer part of the filter slowly to see the effect.  The greater the angle between the light source (typically the sun) and the shooting direction, the bigger the effect of turning the outer ring of the filter.  You will observe as you rotate the outer ring of the filter that the sky, clouds, and any bodies of water will transform quite dramatically.  When you see the effect you like best, overshoot a little bit and then rotate the outer ring back to where you want it.  In most cases, I recommend not using the maximum amount of polarizing effect when there are reflections from water or glass, because you usually want some of these reflections to be visible in your final image, but this is art, not science, so you get to choose the effect you want.  Note that using a polarizing filter will cost you about 2-3 stops of exposure.  You will have to use a slower shutter speed and/or faster ISO or wider aperture, so use a steady tripod if the lighting conditions are dim.

Here’s an example of a shooting situation in which a polarizing filter can really make an image pop.  For this shot of the imposing peaks in Southern Patagonia’s Torres del Paine National Park, I rotated the polarizer to about 2/3 of its maximum effect to darken the sky, make the clouds more dramatic, and bring out the bright sheer faces of the granite peaks.

A circular polarizing filter makes a big difference when shooting mountains, skies, and/or bodies of water.  Buy this photo

The final essential filter is the neutral density (ND) filter.  These reduce the amount of light that reaches the camera’s sensor, so you can use slower shutter speeds to blur motion, or so you can use a wider aperture to get a shallow depth-of-field, even in bright sunlight.  ND filters come in different strengths as designated by the number in the filter’s specifications.  For example, an ND2 filter blocks 1/2 the light for a one-stop reduction in exposure, while an ND8 filter blocks 7/8 of the light for a three-stop reduction in exposure.  It’s a good idea to carry a range of ND filters for each lens you plan to use in the field.  A newer type of ND filter even allows for variable adjustment of the strength of the ND effect with just one filter, but these tend to be expensive.

A classic example of a situation in which you’d want to use an ND filter is when shooting moving water in bright lighting conditions.  You may want to use a longer shutter speed to blur the water, but even at your camera’s lowest ISO setting and your lens’ smallest aperture there could still be too much light for a slow shutter speed.  Mounting an ND8 filter to your lens will allow you to use a shutter speed eight times longer than without the filter, so for example you could move from shooting at 1/30 of a second to 1/4 of a second.

Here’s a photo of my younger daughter by a waterfall in Yosemite National Park.  The image was made in the early afternoon under very bright sunlight, bright enough that even using my camera’s slowest native ISO sensitivity and my lens’s most narrow aperture, I would still have had to use a shutter speed of 1/60 of a second, which would have frozen the water in the falls.  Using an ND8 filter, however, I was able to slow down the shutter speed to 1/8 of a second, long enough to impart a nice blur to the falling water.

 Use of a neutral density filter allowed me to blur the falling water even under very bright lighting conditions.  Buy this photo

I recommend carrying a kit containing several ND filters of different strengths for each lens you plan to use for landscape images.  Once again, make sure the diameter of the filter matches the diameter of the lens you intend to fit it to.

Note that there’s another type of ND filter called the “graduated ND filter,” and filter varies the light-blocking effect from one end of the filter to the other end.  I used to use this type of filter quite often, but in this digital era I find it usually works just as well to simulate the effect of a graduated ND filter using post-processing software later.

Armed with these three types of filters, you will be prepared to create the images you have in your mind, even under challenging shooting conditions.  Happily, filters are small, light, and not terribly expensive, making them one of the better values we photographers can find.

Which filters do you always carry, and when have you found them most useful?  Any tips or tricks on how to use filters for the best results?  Please leave a comment in the box after this post to share your thoughts.

Want to see more posts about photography gear?  Find them all here: Posts on Gear.

Camera Pixels App Review: A great concept but still needs work

I’ve posted repeatedly about the importance of understanding how to take manual control of your camera in order to make images that are properly exposed and focused.  Whether you are using a professional DSLR, an advanced full-frame mirrorless ILC, a compact point-and-shoot, or the camera built into your smart phone, there is no way you will get consistently acceptable results if you leave the camera’s settings to its auto mode.  See this post for an overview: Post on Beyond the Auto Mode.

For the past two days I have been testing an iPhone app called “Camera Pixels”.  Full Disclosure: The developer of Camera Pixels requested I test their new app and offered me a free download for trial, but to preserve my independence I paid for the download myself.

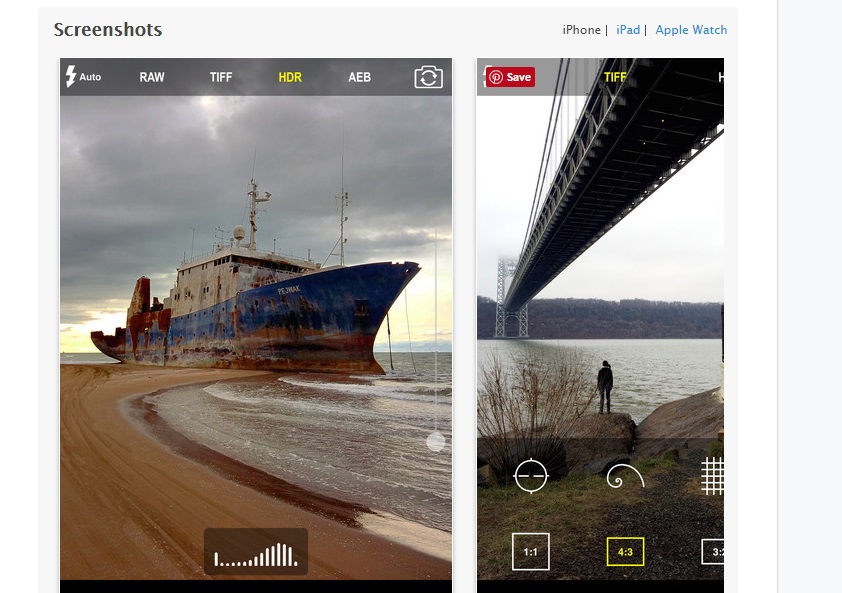
Like the “Manual” camera app that I’ve been using for years and the “ProCam 4” app that has been my go-to camera control app for the past several months, the new “Camera Pixels” app allows the manual selection of ISO, shutter speed, exposure compensation, and focus distance (note that the iPhone camera’s lens has a fixed aperture, so F-stop cannot be manually set).  Also like the Manual app, ProCam 4 allows images to be captured using RAW mode, which has a great many advantages over capture in JPEG format (see this post for more information: Post on RAW Capture).  And all three of these camera apps display a histogram to assist in setting exposure properly.  

In addition, both Camera Pixels and ProCam 4 (but not Manual) offer some very useful advanced camera control capabilities, including the following:

  • Shutter Priority: You can choose an exposure mode in which you select the shutter speed first and the app will set the appropriate ISO.
  • Exposure Bracketing: You can shoot a series of four shots at different exposures to increase the likelihood that one of them will be at the best exposure for the lighting conditions.  The series of shots can also be combined using HDR tools found in Lightroom, Photoshop, and other editing software into a single image with a higher range of tones from very dark to very bright.
  • White Balance: You can adjust white balance in the app, which is often preferable to having to adjust it in your RAW files during post-processing.
  • Virtual Horizon: The display can show you when the horizon is level.
  • Slow Shutter Options: You can select long fixed shutter speeds as well as bulb mode to keep the shutter open for as long as you’d like.
  • RAW+JPEG: You can choose to store the image in both RAW and JPEG formats.

With all this incremental functionality, your little phone’s camera begins to behave a lot like a more advanced standalone camera.  While the iPhone’s camera, with its small sensor and its tiny fixed-aperture non-interchangeable lens, still cannot compare to a professional or enthusiast DSLR or ILC camera, the results using an advanced manual camera control app such as Camera Pixels or ProCam 4 are vastly improved compared to using the phone’s native camera app.  At iTunes Store pricing of $3.99 for Camera Pixels or $4.99 for ProCam 4, either of these apps is a great buy and a serious enhancement to the iPhone’s built-in camera.

There are some significant differences between Camera Pixels and ProCam 4.  ProCam 4 offers advanced image editing capabilities, while Camera Pixels does not.  However, Camera Pixels offers more flexible exposure bracketing options, the ability to separate exposure point from focus point, a better histogram, and more advanced RAW and video shooting options.  And a significant advantage of the new Camera Pixels app over ProCam 4 is its user interface for setting and resetting the manual camera control features such as exposure compensation, shutter priority, and ISO priority.  In fact, the Camera Pixels app comes the closest I’ve ever found to the user interface of an advanced DSLR or mirrorless camera.

Unfortunately, in its current state I cannot unreservedly recommend the Camera Pixels app.  I encountered too many glitches during my brief testing to be able to give this app a glowing review at this time.  Here are a few of the issues I noted:

  • The “viewfinder” (image preview on the screen) flickers intermittently, which can be very distracting when trying to compose images.
  • The bracketing exposure settings are sometimes incorrectly spaced, i.e., instead of being exposed at -3, -2, -1, 0, +1, +2, and +3; the sequence may be exposed at -3, -2, -1, 0, +1, +1, and +1.
  • It can be hard to tell if manual overrides are set, leading to incorrect exposures.
  • The very useful feature to separate the exposure point from the focus point doesn’t always work.

In summary, the new Camera Pixels app is a great concept that comes closest of any camera control app I’ve found to the look-and-feel of an advanced standalone camera; however, there are significant bugs in the current version that hamper the shooting experience.  With further development to fix the problems, Camera Pixels could become an excellent option for iPhone users wishing to control the phone’s built-in camera like an advanced DSLR or mirrorless standalone camera.  I will eagerly await the next revision of this app.

Here’s the link to the Camera Pixels app on the Apple App Store: Camera Pixels app.

You can find the ProCam 4 app here: ProCam 4 app.

What app do you use to control your phone’s camera?  What do you like and dislike about it?  Please share your thoughts here.

Want to read more posts about photography gear?  Find them all here: Posts on Gear.

Wildlife and Safari Gear [Encore Publication]: Basic equipment to capture wildlife while traveling or close to home

Wildlife photography is one of the most exciting and rewarding pursuits I know, but it is also very challenging.  Whether on safari in far-flung wilderness regions around the world or in a park or zoo near home, capturing great images of the local fauna requires plenty of patience, a little bit of luck, and some specialized gear.  This post outlines the basic equipment needed for wildlife photography.

Sometimes we get lucky.  This alligator was seeking what little sunshine was available on an overcast winter’s day on the bayou in Louisiana.  He stayed sufficiently still that I was able to capture this image by handholding a medium telephoto lens from our airboat.  Buy this photo

Occasionally, a critter may scamper, fly, or swim right up to where the photographer happens to be standing, but in the vast majority of cases, if we want to capture a really moving and uninhibited portrait of an animal, we need a long telephoto lens.  Working with “big glass” not only fills more of the frame with the main subject, but it has the added benefit of allowing the photographer to shoot from a vantage point far enough away from the animal so as not to frighten it.  It’s also very important when photographing wildlife that we make every effort to keep the wildlife wild, and using a long lens keeps us at a sufficient distance that the creatures we’re observing are less likely to become accustomed to the sight, sound, and smell of humans.

I like to carry both a medium telephoto and a long telephoto when shooting wildlife, so as to be prepared for a variety of situations.  My medium lens of choice is the Nikon 70-300mm f/4.5-5.6 VR lens.  While this lens is built on aging technology and doesn’t always feel as solid as more professional lenses, it is relatively small and lightweight, fairly inexpensive, and provides a very effective vibration reduction function.  This lens has been a staple in my bag for many years, during which time I’ve used it to capture some of my favorite images.

My go-to long lens for wildlife photography is the Sigma 150-500mm f/5-6.3 lens.  It’s more economical than a Nikon or Canon super-tele, and it produces reasonably sharp images even when used at its widest aperture.  You can spend much more on this type of big glass if you want or need to, but I’ve found this lens works quite well for me.

Lilac breasted roller captured with a 500mm lens in Tanzania’s Kilimanjaro region.  Buy this photo

When shooting far-off and often rapidly moving animal subjects with big glass, it is important to have a good means of stabilizing the camera.  Depending on the shooting situation, I use either a lightweight tripod or a beanbag support.

A lightweight travel tripod is perfect for those situations when you have plenty of space and plenty of time in one place.  I like the Manfrotto Be Free travel tripod.  It folds up to an incredibly small size yet affords a surprising amount of stability.  The included ball head works well but is difficult to adjust for sensitivity.  This tripod is designed to fit into a special pouch in my favorite travel photography backpack, also made by Manfrotto.

For situations when you will be on the move much of the time, such as on game drives using safari vehicles, a beanbag support is extremely useful, as you cannot fit a tripod in a safari vehicle and a monopod is awkward.  The bag can be emptied for convenient travel and then filled with “beans” (usually synthetic) upon arrival.   It is placed on top of the safari vehicle while shooting, with the camera and long lens resting on the beanbag.  While the beanbag that I use is no longer available, this one is well reviewed by photographers and represents a good value.

A sleepy leopard yawns in a tree above the Endless Plains of Serengeti National Park.  This image was captured using a 500mm lens resting on a beanbag support placed on the roof of our safari vehicle.  Buy this photo

With a couple of good telephoto lenses, including one long one, and a couple of good options for stabilizing them, you will be armed with the right basic tools for bringing home truly memorable images of the wildlife you encounter on your travels.  Happy hunting!

What are your favorite wildlife subjects and locations, and what gear do you use to capture them?  Please share your experiences here.

Want to read more posts about photographic gear?  Find them all here: Posts on Gear.

Camera Pixels App Review: A great concept but still needs work


I’ve posted repeatedly about the importance of understanding how to take manual control of your camera in order to make images that are properly exposed and focused.  Whether you are using a professional DSLR, an advanced full-frame mirrorless ILC, a compact point-and-shoot, or the camera built into your smart phone, there is no way you will get consistently acceptable results if you leave the camera’s settings to its auto mode.  See this post for an overview: Post on Beyond the Auto Mode.

For the past two days I have been testing an iPhone app called “Camera Pixels”.  Full Disclosure: The developer of Camera Pixels requested I test their new app and offered me a free download for trial, but to preserve my independence I paid for the download myself.

Like the “Manual” camera app that I’ve been using for years and the “ProCam 4” app that has been my go-to camera control app for the past several months, the new “Camera Pixels” app allows the manual selection of ISO, shutter speed, exposure compensation, and focus distance (note that the iPhone camera’s lens has a fixed aperture, so F-stop cannot be manually set).  Also like the Manual app, ProCam 4 allows images to be captured using RAW mode, which has a great many advantages over capture in JPEG format (see this post for more information: Post on RAW Capture).  And all three of these camera apps display a histogram to assist in setting exposure properly.  

In addition, both Camera Pixels and ProCam 4 (but not Manual) offer some very useful advanced camera control capabilities, including the following:

  • Shutter Priority: You can choose an exposure mode in which you select the shutter speed first and the app will set the appropriate ISO.
  • Exposure Bracketing: You can shoot a series of four shots at different exposures to increase the likelihood that one of them will be at the best exposure for the lighting conditions.  The series of shots can also be combined using HDR tools found in Lightroom, Photoshop, and other editing software into a single image with a higher range of tones from very dark to very bright.
  • White Balance: You can adjust white balance in the app, which is often preferable to having to adjust it in your RAW files during post-processing.
  • Virtual Horizon: The display can show you when the horizon is level.
  • Slow Shutter Options: You can select long fixed shutter speeds as well as bulb mode to keep the shutter open for as long as you’d like.
  • RAW+JPEG: You can choose to store the image in both RAW and JPEG formats.

With all this incremental functionality, your little phone’s camera begins to behave a lot like a more advanced standalone camera.  While the iPhone’s camera, with its small sensor and its tiny fixed-aperture non-interchangeable lens, still cannot compare to a professional or enthusiast DSLR or ILC camera, the results using an advanced manual camera control app such as Camera Pixels or ProCam 4 are vastly improved compared to using the phone’s native camera app.  At iTunes Store pricing of $3.99 for Camera Pixels or $4.99 for ProCam 4, either of these apps is a great buy and a serious enhancement to the iPhone’s built-in camera.

There are some significant differences between Camera Pixels and ProCam 4.  ProCam 4 offers advanced image editing capabilities, while Camera Pixels does not.  However, Camera Pixels offers more flexible exposure bracketing options, the ability to separate exposure point from focus point, a better histogram, and more advanced RAW and video shooting options.  And a significant advantage of the new Camera Pixels app over ProCam 4 is its user interface for setting and resetting the manual camera control features such as exposure compensation, shutter priority, and ISO priority.  In fact, the Camera Pixels app comes the closest I’ve ever found to the user interface of an advanced DSLR or mirrorless camera.

Unfortunately, in its current state I cannot unreservedly recommend the Camera Pixels app.  I encountered too many glitches during my brief testing to be able to give this app a glowing review at this time.  Here are a few of the issues I noted:

  • The “viewfinder” (image preview on the screen) flickers intermittently, which can be very distracting when trying to compose images.
  • The bracketing exposure settings are sometimes incorrectly spaced, i.e., instead of being exposed at -3, -2, -1, 0, +1, +2, and +3; the sequence may be exposed at -3, -2, -1, 0, +1, +1, and +1.
  • It can be hard to tell if manual overrides are set, leading to incorrect exposures.
  • The very useful feature to separate the exposure point from the focus point doesn’t always work.

In summary, the new Camera Pixels app is a great concept that comes closest of any camera control app I’ve found to the look-and-feel of an advanced standalone camera; however, there are significant bugs in the current version that hamper the shooting experience.  With further development to fix the problems, Camera Pixels could become an excellent option for iPhone users wishing to control the phone’s built-in camera like an advanced DSLR or mirrorless standalone camera.  I will eagerly await the next revision of this app.

Here’s the link to the Camera Pixels app on the Apple App Store: Camera Pixels app.

You can find the ProCam 4 app here: ProCam 4 app.

What app do you use to control your phone’s camera?  What do you like and dislike about it?  Please share your thoughts here.

Want to read more posts about photography gear?  Find them all here: Posts on Gear.

Portrait Photography Gear [Encore Publication]: Affordable kit for making great portraits

Whether in my home town or traveling around the world, I love to shoot portraits.  There is something magical about creating an image that captures the essence of a person.  It can be daunting for many photographers to describe what gear they think is required to make professional-quality portraits: we often visualize a fully equipped studio with tens of thousands of dollars’ worth of high-end lights, modifiers, and backgrounds.  The reality is that we can make portraits of publication quality, shot on location and using kit that costs far less.  Here I outline a basic setup that is portable enough to pack on nearly any trip and costs only a few hundred dollars (not including your basic DSLR or mirrorless camera body).

Really all you need to get great people photos is a good portrait lens and a little know-how.  Make sure to set exposure and focus on your subject’s face.  I often use my camera’s Spot metering mode to get the correct exposure in tricky lighting conditions, such as when the subject is backlit.  In these conditions, it can also be helpful to fill in any harsh shadows on the subject’s face by using a touch of flash with a diffuser attached or a reflector.  That’s really all the gear you need: camera with portrait lens, flash unit, and a reflector kit.  Let’s look at the gear and basic techniques.

My indispensable portrait lens is the Nikon 85mm f/1.8G lens.  I shoot at least three-quarters of all my portraits, whether in the studio or on location, using this one piece of glass.  This is a classic portrait lens and provides a flattering perspective and great image quality when your subject is a person.  But this lens also shines for nature and action photography where you don’t need a really long focal length.  It renders really lovely “bokeh,” or the soft quality of the out-of-focus parts of the image.

This portrait of a grandmother and granddaughter at Carnaval San Francisco was made with natural light using an 85mm lens at a wide aperture to throw the background into soft focus.  Because no flash or reflector was used, there are some shadows on the subject’s faces, but I like the shallow depth of field that really emphasizes the subjects, and this would have been difficult to achieve with the slower shutter speed required to synchronize with a flash.  Also, carrying a reflector through the hustle and bustle of a chaotic street fair can be impractical.  I’m very pleased with this image even with a few shadows.

This portrait was shot using natural light only.  Some shadows are visible on the faces, but the effect is not unpleasant, and the soft focus from shooting without a flash is very effective.  Buy this photo

Your camera most likely has a built-in flash, and in many cases it is good enough to provide some fill-in lighting for backlit subjects or even to serve as a main light in very dark situations.  But for more control over how much light you want, the quality of that light, and where that light comes from and goes to, you likely want to have a separate flash unit.  I use the Nikon SB-910, which is powerful and flexible enough for most settings.  It has been discontinued and replaced by the Nikon SB-5000, but the older model is often still available.

Whatever flash you use, it is best to attach a diffuser of some sort to soften the otherwise very harsh light of the flash.  I also keep my camera set to lower the flash output by 1 stop, and I only override this setting occasionally.  Flash is often best when used sparingly.

This next image was shot at the same location as the previous one, but here I used an off-camera flash with diffuser to provide fill lighting on the subjects’ faces, thus reducing the shadows.  The only downside of using flash on location is that a slower shutter speed (typically about 1/160 of a second or slower) must be used, which in turn requires a smaller aperture (here it is f/8), and this can lead to more distraction from in-focus backgrounds.  I could have mitigated this problem by attaching a neutral density filter to block some of the light and allow a larger aperture.

This group portrait was made under similar conditions to the previous image, but here a fill flash was used to soften the shadows.  Buy this photo

An inexpensive accessory can provide the best of both worlds for on-location portraiture.  For less than $20 you can purchase a reflector kit with a variety of different colored reflectors and diffusers.  The reflectors are used to bounce some of the sun’s light back onto the face of the subject, thereby filling in any harsh shadows, while allowing you to shoot at any combination of aperture and shutter speed you choose in order to soften the background.  Each color of reflector imparts a different mood to the image.  An added bonus is that you can preview the precise effect the reflector has in your viewfinder or on your LCD screen.  Really the only downside of using a reflector in the field is that they are bulky to carry and often require an assistant to hold in place while you shoot.

This is the reflector kit I carry with me to most portrait shoots.  It’s high quality, very portable, and affordable.

This portrait was made by metering off the face of the model, choosing a wide aperture to blur the background, and bouncing some sunlight onto her face using the gold reflector from the kit mentioned above.

Using a reflector to bounce sunlight onto your subject’s face can reduce shadows while allowing you to retain full control over your aperture and shutter speed.  Buy this photo

There you have it: my formula for getting professional-looking portraits in the field with relatively inexpensive gear that’s easy to carry and use.

What is your favorite gear for portraiture?  Please share your thoughts in the comment box at the end of this post.

Interested in other posts about photography gear?  See them all here: http://www.to-travel-hopefully.com/category/gear/.

Flashback [Encore Publication]: A simple and cheap accessory to improve your lighting

IMPORTANT UPDATE ON AUGUST 11, 2017:

Dear Readers,

I must retract my support for the Vello off-camera flash cord.  It is cheaply made and recently and suddenly failed, disabling my camera during an important client shoot.  I ended up paying over $300 to have the failed Vello accessory removed from my camera, and I lost use of my camera for more than a month while the repairs were being done.

Since this failure occurred, I’ve been very happily using a genuine Nikon brand off-camera flash cord:

The Nikon unit costs more than the Vello unit, but in my estimation it is much more solid and reliable.  I strongly urge all photographers to stay away from the Vello cord.

Here is the original post for reference, but please understand that I retract my support for this product.

=======

When it comes to gear, a lot of photographers will spend a lot of cash on a camera body, lens, or tripod head that they hope will magically elevate the quality of their images.  I’ve said it before, and I’ll say it again: great images are made by great photographers, regardless of the gear they use.  I find that in most cases, spending a lot of money on a new piece of kit will not result in dramatically improved images, at least not right away.  But sometimes it’s a little, inexpensive accessory that can immediately transform our images.  A good polarizing filter, for example, can almost magically improve landscape images by enhancing skies and mountains and reducing unwanted reflections.  In today’s post, I sing the praises of another inexpensive accessory that can make a big difference: the off-camera flash cord.
CubaThis portrait of a student at a Cuban school is compelling for its subject’s poise and its strong color scheme, but the lighting from the hot-shoe mounted speedlight is a bit harsh.  Buy this photo

Using your camera’s built-in flash or a speedlight mounted to the camera’s hot-shoe provides lighting that is aimed directly toward your subject from the plane of the camera’s sensor.  This light will bounce off the subject and come directly back to the camera, which makes for quite harsh lighting, often severe shadows, and red-eye or other unwanted effects.  These often undesirable characteristics can be mitigated a bit by using the flash unit’s tilt head to bounce the light off a wall or ceiling, or by dialing back the power of the flash’s output, but direct flash lighting is rarely the most attractive.

Instead, get the flash unit off the camera to enhance the lighting.  By purchasing an inexpensive off-camera flash cord, you can connect the flash to the camera’s hot-shoe while having the freedom to hold the flash away from the camera and to aim it any way you like.  I usually hand-hold the flash in my left hand while holding the camera in my right, but occasionally it is necessary to have both hands on the camera, in which case a bracket or stand can be used to hold the flash.  Depending on the situation, I will either aim the flash head toward the subject or bounce the flash off another surface such as a ceiling, wall, or even my own clothing.  With the off-camera flash cord, there is much more flexibility in how to position and aim the flash.

NOTE: I RETRACT MY SUPPORT FOR THIS ACCESSORY.  SEE THE NOTE AT THE TOP OF THIS POST.  Here is the flash cord I use.  It’s an independent brand (not made by Nikon, my camera’s and flash unit’s manufacturer), but I’ve found it to be at least as reliable, usable, and durable as the manufacturer’s own cord.  Best of all, this accessory costs less than $20, making it one of the best bargains I’ve encountered in the photographic accessory space.

The results from getting the flash unit off of the camera can be dramatic.  This image from Carnaval San Francisco is striking for the subject’s vibrant color and energetic sense of motion.  There are few visible shadows on her face, and the lighting is natural looking and even.

USAGetting the flash unit off of the camera’s hot-shoe yields even and natural lighting that is free from the harsh appearance and unflattering shadows often found in flash photography.  Buy this photo

There are other methods you can use for off-camera flash.  These days, many photographers use wireless triggers for the camera and flash to communicate.  If this setup works for you, great, but I’ve found a good old-school flash cord to be more reliable than wireless.

Try getting your flash off of the camera with a cord or wireless setup.  I think you’ll be very pleased with the results and the return on investment is likely to be higher than with most other gear purchases.

How do you use flash in your photography?  Any indispensable little accessories in your bag?  Please share your thoughts here.

Want to read more posts about photographic gear?  Find them all here: Posts on Gear.


If You Can’t Be with The Camera You Love [Encore Publication]: How to make the best of it when you don’t have ideal kit with you

There’s an old adage that goes, “The best camera is the one you have with you.”  That is never more true than for travel photography.  As travelers, we have to compromise regarding what gear we pack for a whole trip, and then we have to compromise again with respect to what equipment we can pack on a particular day’s outing during the trip.  If a flight is involved, we’re often obligated to leave much of our gear at home so as to avoid having to check our precious photography equipment.  If a good deal of hiking, biking, or travel via public transportation is required, we may have to leave bulky or heavy items in the hotel room for the day.

Fortunately, it’s never been easier to ensure we always have at least some backup solution to keep shooting even when a key camera, lens, filter, or tripod has to be left behind.  The smartphone that nearly everyone carries with them at all times likely has a pretty darn good camera attached to it.  My Apple iPhone 6s, for example, comes with a 12 MP camera, incorporating a decent if small sensor and a tolerable quality and moderately fast (f/2.2) lens.  Even the smaller “selfie” camera has a 5 MP sensor.

No one will confuse the images made using this camera phone with those made using my professional DSLR camera and collection of lenses, but in a pinch I can get acceptable quality shots with just the phone’s camera.  The trick is understanding how to use your smartphone’s camera, or your small point-and-shoot camera, in the right way to capture the images, and then to post-process the images in such a way as to overcome the compromises built into the camera.

Just yesterday I found myself on a family day trip to the annual Scottish Highland Gathering and Games without my professional camera gear.  I made the best of things and shot all day with just my camera’s phone.  I’m fairly pleased with the resulting images, even though of course they would have been better had I had access to my regular camera and a few choice lenses and accessories.  Here are a few of my images along with some tips on how to get the best out of a not-so-great camera.

First of all, learn how to control your phone’s camera manually so that you can choose what part of the image you want to be in focus and what part of the image you want to drive the exposure.  Nearly all modern phone’s cameras allow you to touch the screen to select where on the image you want to set the focus and exposure.  In this photo of a Scottish traditional music performance, I set the focus point on the fiddler to ensure sharp focus on the musicians.  Then I adjusted the exposure by moving the vertical slider upward, in order to add some brightness to the image and avoid underexposing the backlit performers.

Touch your smartphone camera’s screen to select the focus point, and then move the exposure slider up or down to adjust the exposure separately from the focus point.  Buy this photo on my website

Better yet, take full manual control over your phone’s camera by installing an app.  There are good free and inexpensive apps for both iOS and Android.  The one I use for iOS is called “Manual” and is available on the Apple App Store: Manual app.  With such an app installed on your camera, you can specify manually exactly what settings you want to use for the focus point, aperture, shutter speed, ISO, flash, etc.  This level of control was essential for a shot like the one below.  The tossin’ of the caber, a “heavy athletics” event in which the contestants throw a 75-pound tree trunk as far as possible, requires a fast shutter speed in order to freeze the rapid action.

Note: Since I first wrote this post, I have started using a different iOS app to take manual control over my phone’s camera.  It’s called “ProCam 4” and it’s quite a bit more sophisticated, but as easy to use, as the “Manual” app.  You can purchase it on the Apple iTunes Store here: ProCam 4 App.

Using the “Manual” app I was able to focus on the athlete and choose a fast shutter speed to freeze the rapidly moving caber.   Buy this photo on my website

To capture this action shot of an indoor sheepdog trial, I had to set a fast shutter speed and increase the camera sensor’s sensitivity (ISO) to accommodate the quick action and the low-light setting.  Again, the Manual app allowed for this flexibility.  I also cropped the image during post-processing because the phone’s camera does not have a long enough focal length lens to zoom in closely on the subject.

Both manual selection of the ISO and shutter speed and cropping during post-processing are required to get a decent shot of action like this sheepdog trial.  Buy this photo on my website

To capture this image of a girl teaching young children how to dance around the maypole, I had to use all the elements we’ve been discussing here.  I used manual settings to choose a focus and exposure that were correct for this subject, forced the camera’s flash to fire to try to even out the harsh shadows across the girl’s face, and employed cropping and lighting adjustments during post-processing to achieve a pleasing composition.

Bringing it all together: To make this image of the maypole celebration, I manually selected the focus, exposure, and flash, and then cropped and adjusted exposure during post-processing.  Buy this photo on my website

Next time you can’t or just don’t have the best equipment with you, use the tips we’ve covered here to make the best of a challenging situation.

When did you have to make do with less than ideal gear for a shoot?  How did you make the best of it?  Do you have tips or tricks you can add?  Please contribute your thoughts using the comment box at the end of this post.

Want to read more post about photographic gear?  Find them all here: Posts on Gear.

Rock Solid [Encore Publication]: Why you should always have a tripod with you

Tripods have had their ups and down, so to speak.  When photography was in its infancy, the wet plates used to make the images were very slow, so extremely long exposures were required and the cameras were big and bulky, so use of a big, heavy wooden tripod was essential.  It’s all the more remarkable when looking at the incomparable work of Ansel Adams to realize that in order to make these images he had to hike miles up steep mountain trails with a heavy view camera, several big and fragile plates, and an enormous tree trunk of a tripod.  As cameras became smaller and film faster, tripods went out of style except for certain low-light situations for professionals.  Now, more and more enthusiast photographers are recognizing the value of a sturdy tripod for capturing the best possible quality images of landscapes, buildings, and of course night scenes.  In some iconic travel spots, it’s hard to find space to shoot amidst the ocean of tripods.

Sure, they’re heavy and bulky, particularly when we’re hiking or walking for long stretches.  But a good solid tripod is essential for so many types of shots that I now carry one with me at nearly all times.

An example of a technique requiring a tripod even in bright light is high dynamic range (HDR) photography.  To make an HDR image, you shoot a series of photos of the exact same scene in rapid succession, varying the exposure by a little bit between each frame, and then use special software during post-processing to bring out all brightness levels in the image, from the dark shadows to the brilliant highlights.  But if the camera moves at all between the shots, it becomes harder to stitch the shots together into a beautiful HDR image.  I’ve been known to handhold some HDR shots, but I strongly recommend shooting them using a tripod.  Of course, you’ll also want a tripod for low-light and nighttime photography, and they’re very useful for landscape images where the high resolution of your camera’s sensor is called upon to render extremely fine detail throughout the scene.  And let’s not forget that to include yourself in a scene, use of a tripod makes life a lot easier.

Although I was shooting in bright sunlight, I needed a tripod to make this HDR image of Yosemite Valley peaks reflected in the Merced River.  If the camera moves at all between frames, it is harder to combine them into the final photo.  Buy this photo

For most travel situations, you’ll want a lightweight tripod that folds up to a portable size but still offers enough stability for most uses.  There are times, though, when I need to bring along my heavy and bulky professional tripod.  Whatever tripod you choose, be sure to fit it with a good quality head–ball heads provide a lot of flexibility and ease of use for travelers–and remember to take along the plate that attaches the tripod to your camera, if required.

My go-to lightweight travel tripod is the Manfrotto Be Free.  It folds up to an incredibly small size yet affords a surprising amount of stability.  The included ball head works well but is difficult to adjust for sensitivity.  This tripod is designed to fit into a specially designed pouch in my favorite travel photography backpack, also made by Manfrotto.

The SLIK 615-315 is a great tripod for use close to home or on trips where you will have constant vehicle support.  It’s very solid, supports a tremendous amount of weight, and can be adjusted for nearly any shooting situation.  I recommend you fit it with a good ball head for maximum flexibility.

A monopod can be a real problem solver when you need more stability than handholding or resting your camera on a vehicle or table will afford, but you can’t carry or use a full tripod.  I use the Manfrotto 681B model.

To be sure, if you know 100 photographers, you’ll hear 110 different opinions about tripods and the heads and plates that go with them.  The products listed above are my recommendations only, but I’ve had good experiences using them.  For those with a lot more money to spend, tripods and heads made by Really Right Stuff are much beloved by professional and well-heeled enthusiast photographers.

What combination of tripod, head, and plate do you use, and why?  Please share your recommendations here.  Tripods are one piece of gear with which we’re constantly experimenting, so bring it on!

Want to read more posts about photography gear?  Find them all here: Posts on Gear


Flashback: A simple and cheap accessory to improve your lighting

IMPORTANT UPDATE ON AUGUST 11, 2017:

Dear Readers,

I must retract my support for the Vello off-camera flash cord.  It is cheaply made and recently and suddenly failed, disabling my camera during an important client shoot.  I ended up paying over $300 to have the failed Vello accessory removed from my camera, and I lost use of my camera for more than a month while the repairs were being done.

Since this failure occurred, I’ve been very happily using a genuine Nikon brand off-camera flash cord:

The Nikon unit costs more than the Vello unit, but in my estimation it is much more solid and reliable.  I strongly urge all photographers to stay away from the Vello cord.

Here is the original post for reference, but please understand that I retract my support for this product.

=======

When it comes to gear, a lot of photographers will spend a lot of cash on a camera body, lens, or tripod head that they hope will magically elevate the quality of their images.  I’ve said it before, and I’ll say it again: great images are made by great photographers, regardless of the gear they use.  I find that in most cases, spending a lot of money on a new piece of kit will not result in dramatically improved images, at least not right away.  But sometimes it’s a little, inexpensive accessory that can immediately transform our images.  A good polarizing filter, for example, can almost magically improve landscape images by enhancing skies and mountains and reducing unwanted reflections.  In today’s post, I sing the praises of another inexpensive accessory that can make a big difference: the off-camera flash cord.
CubaThis portrait of a student at a Cuban school is compelling for its subject’s poise and its strong color scheme, but the lighting from the hot-shoe mounted speedlight is a bit harsh.  Buy this photo

Using your camera’s built-in flash or a speedlight mounted to the camera’s hot-shoe provides lighting that is aimed directly toward your subject from the plane of the camera’s sensor.  This light will bounce off the subject and come directly back to the camera, which makes for quite harsh lighting, often severe shadows, and red-eye or other unwanted effects.  These often undesirable characteristics can be mitigated a bit by using the flash unit’s tilt head to bounce the light off a wall or ceiling, or by dialing back the power of the flash’s output, but direct flash lighting is rarely the most attractive.

Instead, get the flash unit off the camera to enhance the lighting.  By purchasing an inexpensive off-camera flash cord, you can connect the flash to the camera’s hot-shoe while having the freedom to hold the flash away from the camera and to aim it any way you like.  I usually hand-hold the flash in my left hand while holding the camera in my right, but occasionally it is necessary to have both hands on the camera, in which case a bracket or stand can be used to hold the flash.  Depending on the situation, I will either aim the flash head toward the subject or bounce the flash off another surface such as a ceiling, wall, or even my own clothing.  With the off-camera flash cord, there is much more flexibility in how to position and aim the flash.

NOTE: I RETRACT MY SUPPORT FOR THIS ACCESSORY.  SEE THE NOTE AT THE TOP OF THIS POST.  Here is the flash cord I use.  It’s an independent brand (not made by Nikon, my camera’s and flash unit’s manufacturer), but I’ve found it to be at least as reliable, usable, and durable as the manufacturer’s own cord.  Best of all, this accessory costs less than $20, making it one of the best bargains I’ve encountered in the photographic accessory space.

The results from getting the flash unit off of the camera can be dramatic.  This image from Carnaval San Francisco is striking for the subject’s vibrant color and energetic sense of motion.  There are few visible shadows on her face, and the lighting is natural looking and even.

USAGetting the flash unit off of the camera’s hot-shoe yields even and natural lighting that is free from the harsh appearance and unflattering shadows often found in flash photography.  Buy this photo

There are other methods you can use for off-camera flash.  These days, many photographers use wireless triggers for the camera and flash to communicate.  If this setup works for you, great, but I’ve found a good old-school flash cord to be more reliable than wireless.

Try getting your flash off of the camera with a cord or wireless setup.  I think you’ll be very pleased with the results and the return on investment is likely to be higher than with most other gear purchases.

How do you use flash in your photography?  Any indispensable little accessories in your bag?  Please share your thoughts here.

Want to read more posts about photographic gear?  Find them all here: Posts on Gear.


The Things We Carry [Encore Publication]: Basic Gear for Travel Photography, Part II

Kyle Adler photographer travel photography

Let’s pick up the gear discussion where we left off on the recent post.  Last time, we covered cameras and lenses.  Now we’ll talk about flashes, tripods, accessories, bags, and other essential kit.

Flash Units

Your camera most likely has a built-in flash, and in many cases that can be good enough to provide some fill-in lighting for backlit subjects or even to serve as a main light in very dark situations.  But for more flexible control over how much light you want, the quality of that light, and where that light comes from and goes to, you will likely want to have a separate flash unit.  I use the Nikon SB-910, which is powerful and flexible enough for most settings.  It has been discontinued and replaced by the Nikon SB-5000, but the older model is often still available.

Whatever flash you use, it is best to attach a diffuser of some sort to soften the otherwise very harsh light of the flash.  I also keep my camera set to lower the flash output by 1 stop, and I only override this setting occasionally.  Flash is often best when used sparingly.

Tripods

For most travel situations, you’ll want a lightweight tripod that folds up to a nice portable size but still offers enough stability for most uses.  There are times, though, when I need to bring along my heavy and bulky professional tripod.  Whatever tripod you choose, be sure to fit it with a good quality head (ball heads provide a lot of flexibility and ease of use for travelers) and remember to take along the plate that attaches the tripod to your camera, if required.

My go-to lightweight travel tripod is the Manfrotto Be Free.  It folds up to an incredibly small size yet affords a surprising amount of stability.  The included ball head works well but is difficult to adjust for sensitivity.  This tripod is designed to fit into a special pouch in my favorite travel photography backpack, also made by Manfrotto.

The SLIK 615-315 is a great tripod for use close to home or on trips where you will have constant vehicle support.  It’s very solid, supports a tremendous amount of weight, and can be adjusted for nearly any shooting situation.  I recommend you fit it with a good ball head for maximum flexibility.

A monopod can be a real problem solver when you need more stability than handholding or resting your camera on a vehicle or table will afford, but you can’t carry or use a full tripod.  I use the Manfrotto 681B model.

Accessories

We photographers love our toys!  While it is easy to get carried away and purchase every cool accessory that comes along, I will try to limit the recommendations here to a handful of truly essential items.  And don’t forget the little things like lens cleaning cloths, a blower brush for dust, and of course extra batteries and chargers for your camera and flash.

Three kinds of filters are essential gear for most photographers.  I’ll cover each type below.  Note that you must use a filter that is the correct size to attach to your lens.

It’s a good idea to keep a UV filter attached to your lenses at all times, as this helps protect the front element of the lens from scratches.  Use a good quality filter, though, as the poorer ones can affect image quality.  I would recommend removing the UV filter when shooting with certain other combinations of filters, as the edges of the image can be cut off (vignetting) with too thick a stack of filters on the end of the lens.  I’ve had good luck with Hoya UV filters.

The second must-have type of filter is the circular polarizer.  A polarizing filter can reduce glaring reflections and can darken skies and enhance natural colors.  This little gadget is almost a secret weapon for making images that really pop.  Again, I like the Hoya products, which are thin, well made, and perform as they should.

The final essential filter is the neutral density filter.  These reduce the amount of light that reaches the camera’s sensor, so you can use slower shutter speeds to blur motion, or so you can use a wider aperture to get a shallow depth-of-field, even in bright sunlight.

Another essential is a good remote release for your camera.  I know plenty of photographers who still use the good old trusty wired (or cable) releases.  I like to be able to move away from the camera when shooting remotely, so I favor a wireless release such as the RFN-4s Wireless Remote Shutter Release.

Smartphones

Most of us would never consider leaving home without our phone, and there are additional good reasons to carry yours with you when you are photographing at home or around the globe.  First, the cameras in today’s better phones are now good enough to make quite good images.  I’ve been very impressed with the quality of the main camera, and even the selfie camera, on my Apple iPhone 6S.  But your phone is also an essential photography tool because there are some very good apps to help you plan, shoot, and share your images.  There are too many to list here, but I’ll plan a future post to share some of my favorites.

Bags

Aside from cameras and lenses, no other category of gear gets photographers arguing quite so heatedly as bags.  For a travel photographer, your bag must be highly protective and durable yet lightweight, fit your gear well but with the flexibility to change out kit as needed, and preferably not advertise that you have expensive camera equipment inside.  The choice of what bag to use is a very personal one, but I’m still going to recommend my three favorites.

For those times when you need to bring most or all of your gear on a trip, I like the Tamrac 5586 Expedition 6x Backpack.  It carries a lot of gear snugly and flexibly, and it doesn’t look like a camera bag so it’s less likely to invite the wrong kind of attention.  It will almost always be accepted as carryon on flights, but it is a bit bulky and heavy for all-day, everyday use while traveling.  I’ll often use this bag to get all my gear to my first destination, then pack a day bag for just the gear I’ll need for each day of the trip.

My current favorite bag for day use for nearly any shooting situation near home or while traveling is the Manfrotto MB MA-BP-TRV Advanced Travel Backpack.  It can fit a reasonable amount of gear while leaving room for non-photography items like a jacket or a water bottle (yes, even photographers occasionally have to drink or stay warm).  It disguises your gear pretty well, has good rain protection, and even sports a special sleeve for carrying the Manfrotto Be-Free Travel Tripod.

For carrying just a few pieces of gear around town or close to home or hotel, a shoulder bag can work well.  This is the best setup for quickly accessing your gear while shooting, but it can be tiring to carry the weight across one side of your body if you have a lot of trekking to do.

Software

For post-processing my images, I use both Adobe Lightroom and Adobe Photoshop Elements.  I can do 90% of my processing using just Lightroom, but occasionally I do need the added power of Photoshop.  While I still use the perpetual license software versions, by now most photographers have gone over to the monthly licensing structure that Adobe calls the Creative Cloud.

What gear can’t you live without?  Have you discovered any little gadgets that improve your images or make life easier for photographers?  Please share your thoughts in the comment box.  I’d love to get your ideas!

Want to read more posts about photographic gear?  Find them all here: Posts on Gear.


The Things We Carry [Encore Publication]: Basic Gear for Travel Photography, Part I

In today’s post, we’ll cover cameras and lenses.  I’ll post again soon with Part II, which will discuss flash units, tripods, accessories, bags, and other essential gear.

One of the biggest challenges we face as travel photographers is what gear to carry with us.  On the one hand, we have to be ready for anything.  It’s quite possible we will have to shoot landscapes, wildlife, portraits, architecture, indoor performances, and night scenes, often all on the same day.  On the other hand, there’s a practical limit to how much we can carry without being turned away by airline personnel or damaging our bodies.  And who really wants to travel with 75 pounds of photo kit?

Here is my basic setup for travel.  Note that my gear is suitable for a professional or enthusiast photographer on a not-unlimited budget (my wife keeps me from getting carried away).  There are less expensive alternatives for most of the gear I carry, and those on unlimited budgets can spend much, much more than this.  I will adjust what I bring depending on the specifics of the trip.  For a safari in East Africa, that 500mm lens is essential, but I wouldn’t want to lug it on a hiking trip in Ireland.  On a trip to view a total solar eclipse, I’ll need that rock solid but very heavy professional tripod, but on most trips my lightweight travel tripod is good enough, thank you.  But the following list of items comprises the core of my basic travel gear.

Cameras

There is no one-size-fits-all when it comes to your choice of camera.  These days, even a simple point-and-shoot camera or a smartphone camera is capable of making very good images.  But if you’re willing to carry a bit more weight and to learn how to use it before you take it on your first trip, a mirrorless interchangeable lens camera or a digital single-lens reflex (DSLR) camera will give you much more flexibility.  I use a DSLR, but more and more of my photographer friends are switching over to mirrorless cameras.  It’s really a matter of personal choice, and if you’re not planning to carry a lot of specialized (and heavy) lenses with you, the smaller size and lighter weight of a mirrorless camera may make up for the loss of certain features.  For very photo-intensive trips where it would be impossible to replace a lost or broken camera, such as an African safari, I will pack two DSLR camera bodies, but often I take a chance and bring just one.  Whatever camera you take on your trip, make sure you know how to use all its features and have tested it thoroughly before you leave, and if you’ve been using it for a while, have it cleaned in advance of your departure.  Note that while I am a Nikon shooter, comparable gear is available from Canon for DSLR afficianadoes.  In the high-end mirrorless arena, Sony’s Alpha a7R II is favored by many professionals and enthusiasts.

My go-to camera is the Nikon D810.  This is a professional model and not for beginners, but it really does do it all.  The resolution is extraordinary, it performs superbly in very low-light situations, the autofocus is fast and flexible, it’s continuous burst shooting speed is good enough, and I love the feel of the camera in my hands and the control it offers over all settings quickly.  I’ve put this baby through hell and high water, but it always comes through for me.

Lenses

For beginning users of interchangeable lens cameras, or for seasoned photographers who need to travel light, a small and lightweight “walkaround lens” may be all that you need to bring for a day’s shooting.  Mine is the Nikon 24-85mm f/3.5-4.5 lens.  It’s a good value for a well-built if not quite professional grade lens, and while not particularly fast, it does offer vibration reduction which allows you to shoot at slower shutter speeds while controlling for camera shake.  I recommend this lens for users of cameras with full-frame sensors who want a small, light, and fairly durable lens for those situations when you want to be ready for most anything.

It’s a good idea to have a wide-angle zoom lens for landscapes, architecture, and other situations where you need to include a lot of area in the frame or want a more uncluttered or exaggerated perspective.  I use the Nikon 16-35mm f/4 lens for this purpose.  It’s got great image quality and is well built, but it is rather heavy and bulky.

A telephoto zoom lens is a must-have for most travel photographers, as it allows you to shoot many wildlife subjects as well as emphasize details in all subjects you encounter.  A longer lens also can be used to provide a compressed perspective that makes far-away subjects appear to be closer to foreground subjects; this perspective can be very powerful in landscape images.  My primary tele zoom is the Nikon 70-300mm f/4.5-5.6 VR lens.  While this lens is built on aging technology and doesn’t always feel as solid as more professional lenses, it is relatively small and lightweight, fairly inexpensive, and provides a very effective vibration reduction function.  This lens has been a staple in my bag for many years, during which time I’ve used it to capture some of my favorite images.


You may never need a super-telephoto lens.  They tend to be expensive, bulky, and heavy, and on many trips you won’t need it.  But for those trips when you expect to encounter lots of wildlife or want to capture astronomical events like an eclipse or transit of a planet, a very long lens is essential.  Mine is the Sigma 150-500mm f/5-6.3 lens.  It’s more economical than a Nikon or Canon super-tele, and it produces reasonably sharp images even when used at its widest aperture.  You can spend much more on this type of big glass if you want or need to, but I’ve found this lens works quite well for me.

So far, we’ve talked about zoom lenses.  It’s also a good idea to carry a few prime (fixed focal length) lenses.  These tend to be faster, higher quality, and less expensive than zoom lenses in the same category.  The downside, of course, is that you have to “zoom with your feet,” that is, find a vantage point that works to compose your image without benefit of changing the lens’ focal length.

If you pack only one prime lens, it most likely will be a “normal” lens, that is one with a focal length of about 50mm for a full-frame camera or about 35mm for a crop-sensor camera.  I carry the Nikon 50mm f/1.4G lens.  This is the one I use in very low-light situations or to get a really shallow depth-of-field.

I think my current favorite lens of all is my Nikon 85mm f/1.8G lens.  This is a classic portrait lens and provides a flattering perspective and great image quality when your subject is a human being.  I use it for nearly all of my portrait work these days.  But this lens also shines for nature and action photography where you don’t need a really long focal length.  It renders really lovely “bokeh”, or the soft quality of the out-of-focus parts of the image.

A wide angle prime lens can be useful for landscapes, architecture and interiors, and astrophotography, among other purposes.  I like the Nikon 24mm f/1.8.


Stay tuned for Part II of our gear discussion, to be posted soon on this same Bat Channel.

What’s your go-to camera and which are your indispensable lenses?  Add your thoughts to the comment box at the end of this post!

Want to read more posts about photographic gear?  Find them all here: Posts on Gear.


Camera as a Service? [Encore Publication]: A first look at Relonch’s artificial intelligence photography service

In the 150 or so years of its history, the camera has evolved rapidly as a result of the advent of new technologies, each promising to dramatically simplify the photographic process and improve the resulting images.  Just within my lifetime, there have been major upheavals via the introductions of the Kodak Instamatic, the Polaroid SX-70, and of course digital photography.  So perhaps it was inevitable that someone would develop an AI (artificial intelligence) to make photography as simple as pushing a single button.

A company called Relonch (https://relonch.com/) is developing such a system now.  Sometime in 2018, they expect to roll out a Camera as a Service for $99 per month.  You get a loaner of a brightly colored Relonch 291 camera (manufactured by Samsung), with a fixed focal length lens and only a single button, which is used to take the picture.  It doesn’t even have an LCD screen to review your images.  The purported value of the subscription price, of course, is not derived from the camera hardware, but rather from the service.  For this lofty price, your camera transmits your image files to Relonch, who then use algorithms to analyze and process the files.  The next day, they send the processed images that they consider to be your best photos back to your mobile device of choice.

Relonch 291
The Relonch 291 camera

The concept here is that most people are confused by all the settings on their camera, even if it’s a fairly simple point-and-shoot device, so their photos rarely come out the way they envisioned them.  Instead, let them use a simple camera with just a single button, but employ AI techniques to post-process the best images to make them look closer to the way the user intended.

I haven’t tried the camera and its wraparound service yet (the company’s headquarters and showroom are in Palo Alto, near to where I live, so perhaps I can do so soon), but based only on their description of the concept I share my thoughts here.

  1. Will users pay $1200 per year for this service?  I’m skeptical as to whether there is a broad market for the service at this price point.  “Serious” photographers, that is professional and enthusiast amateurs, already know how to use the manual controls on our cameras and enjoy the process of capturing images and enhancing them during post-processing to achieve the final results we want.  Are there enough users who don’t know how to use their cameras but are still willing to pay so much for better images?  Time will tell.
  2. Are people willing to leave the choice of which images they receive up to a software algorithm?  I wouldn’t want someone else, even a top professional photographer, deciding which of my images I get to see and permanently deleting the rest.  And I certainly wouldn’t want an AI to make this decision for me.
  3. Are users okay with waiting a day to see and share their images?  We’ve gotten pretty spoiled as a consumer class.  We expect instant gratification, and ever since the first Polaroid cameras came out in the 1940s, photographers have been able to see their images right away.  Waiting a day may not fly.
  4. Do people really want their photography to be mechanized?  For its whole history, photography has seen its reputation tarnished when compared to other visual art media because a part of this art form includes the use of a mechanical device, the camera.  Just as a great painter creates her art through her vision and her technique, so does a great photographer.  The gear we use is only incidental to the quality of the images we create.  I fear that by taking the craft out of the process and substituting an AI for the artist’s vision, the Relonch service will further degrade photography as an art form.  And let’s be honest here.  An AI can adjust color balance, sharpness, clarity, vibrance, and exposure to improve a raw image, but it can’t determine how to crop or selectively adjust parts of the image to make it artistically pleasing or to give it a story to tell.  And most important of all, no amount of post-processing can turn a poorly composed or an uninteresting image into one worth looking at.  An AI may soon be able to drive our cars from Point A to Point B, be we’re a long way from having an algorithm that can create true visual fine art.  I’ll leave you with the words of master landscape photographer Ansel Adams: “There’s nothing worse than a sharp image of a fuzzy concept.”

What do you think of the Camera as a Service concept?  Valuable evolution of photography that will bring its benefits to a wider range of humanity, or expensive gimmick that will degrade the artistic worth of the medium of photography?  Please share your thoughts here.

Want to read more posts about gear?  Find them all here: Posts on Gear.
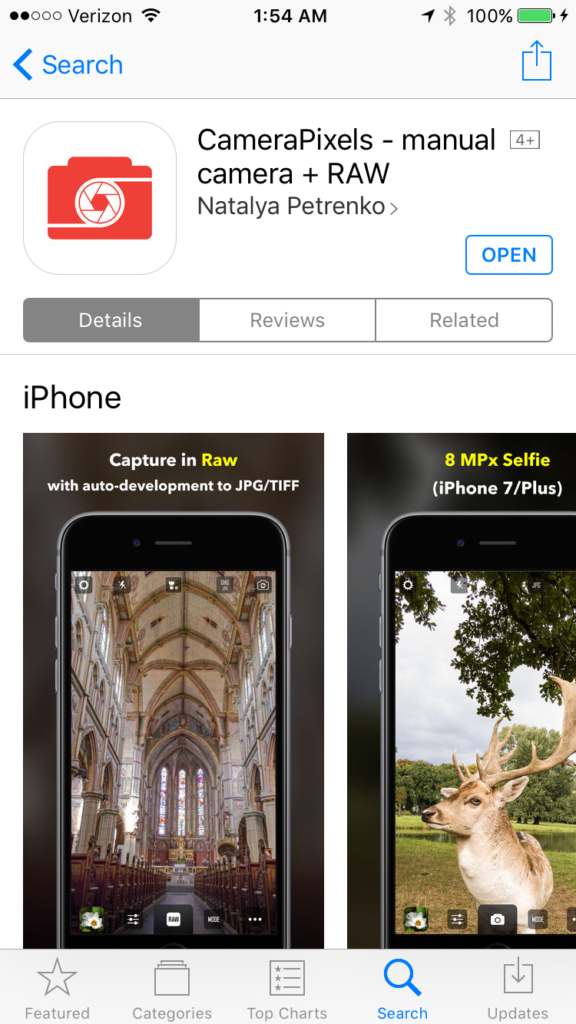
Camera of the Future? [Encore Publication]: A new company promises DSLR quality from a cellphone-sized device

The Holy Grail for us travel photographers would be to have a tiny and affordable cellphone-sized camera that can capture images with the quality and versatility found today only in large, heavy, and expensive digital cameras (DSLRs and medium- to large-format cameras).  A new company called Light promises to offer just such a device starting sometime in 2018.  Reading their pitch in IEEE’s newsletter for this innovative camera design, I was excited by the revolutionary concept but not convinced that their first offering would truly meet travel photographers’ needs.  Take a look at the prototype photo and the IEEE article, and then we’ll discuss the bottom line.

lightcameraconcept

IEEE Article on Light camera concept

My take on Light’s pitch is that they have an exciting new design concept which someday could translate into a truly remarkable product.  The idea of combining multiple cheap camera systems, each with a cellphone camera’s small plastic fixed-aperture lens and tiny inexpensive sensor, and then combining their data using controlling mirrors and software into a single high-resolution image with control over such elements as focal length, depth-of-field, and bokeh effects, is creative and compelling.  By combining the separate power from all of these small cheap lenses and sensors, none of which by itself can gather much light, capture high resolution, nor provide manual control over focal length or aperture, the device and its software can achieve a final image that will be brighter, more detailed, and more controllable than the sum of its parts.

But given how little the sum of its parts costs to produce, this next-gen technology carries a hefty early-adopter premium when priced at $1699.  For that money, one could buy an enthusiast DSLR system (body and a couple of zoom lenses) with similar resolution and a greater range of focal lengths than the Light camera will have.  But there are many other serious advantages to a DSLR or a good advanced mirrorless ILC  system than just resolution and focal length.  Even if the Light device’s software can generate a final processed image that overcomes each lens and sensor’s weaknesses to rival a DSLR’s image in terms of brightness and image quality (and I have real reservations about its ability to do so), it still won’t likely be able to match a DSLR’s power-up time (the time from when you turn it on until it is ready to shoot), capture frame rate (the speed at which it can capture multiple shots), or bright optical viewfinder.

In summary, I like the concept and believe it could hold the key to building a future breed of travel cameras that are smaller, lighter, and cheaper than today’s “serious” cameras while retaining much of their quality.  But the initial device’s high price and design trade-offs won’t leapfrog the advantages of a good DSLR or mirrorless camera just yet.  The first offering would be fun to play with, in the spirit of “the best camera is the one you have with you,” but it won’t get me to leave my DSLR system at home.  This will be a fun technology and a fun company to watch, though.  I’ll provide updates in future posts as I learn of new information.

What do you think of Light’s new camera concept?  Do you see this design as the basis for a new generation devices that would replace your DSLR or mirrorless camera system?  Please share your thoughts here.

Want to read more posts about photography gear?  Find them all here: Posts on Gear.

A Good Camera Store is Hard to Find [Encore Publication]: Can anything be done to prevent the extinction of pro camera stores?

img_3689

This past week, the doors closed permanently at one of the San Francisco Bay Area’s few remaining pro camera shops, Keeble & Shuchat of Palo Alto.  After 51 years of providing sales of a tremendous range of fairly priced photographic gear, friendly service, lifesaving repairs, and informative classes, this local institution was forced to shut down.  The story is a familiar one, and extends beyond the San Francisco Bay Area and beyond the photography sector.  Local brick-and-mortar stores nationwide and in all sectors of the retail economy are being forced out of business due to severe price competition with online and big-box retailers and rising commercial real estate prices.  Over the last few years, my neighborhood has lost the last of its independent coffee shops, bookstores, and movie theaters, and it now seems that camera stores oriented toward enthusiast and professional photographers are also going the way of the dodo bird.

I’m sad about the closure of Keeble & Schuchat because there really is no substitute store within an hour’s drive of my house, and because I knew several of the staff there and don’t know what they’ll do next.  But at the same time, I share some of the blame over their closing.  I was a regular in their store, where I browsed their range of new gear and asked all manner of questions of the friendly and helpful staff.  I made it a point to buy a few doodads at K&S, and I attended paid classes there from time to time.  I depended on them for the repair and maintenance of most of my gear.

But whenever it came time to drop some big bucks on a new pro camera or lens, guess what?  I always purchased from a big online retailer like Amazon or B&H.  I’m sure many other serious photographers behave similarly.  It’s hard to justify paying a 10-20% price premium as well as the local 9.25% sales tax in my county when we’re already stretching to afford the gear in the first place.  It’s very tempting to save so much money with just a few clicks in our web browser.  But something significant is lost when we drive away the local experts who sell books, cameras, or cappuccinos in our neighborhoods.  We lose the local merchant’s accumulated knowledge and the passion for the category we love.  For us photographers, that means there soon won’t be many places we can go locally to chat about the merits or drawbacks of some new piece of gear, to repair or maintain our existing gear, or to learn from people who share our passion for image-making.

When my main portrait lens had some dirt stuck between the inner elements that was causing a speck to appear on all my images, and I observed this on the day before a major portrait shoot for two clients, I took the lens to K&S and their tech diagnosed and repaired it while I waited.  He charged me the whopping sum of $10 for his efforts.  Why?  Because he also was a working photographer and he knew the importance of getting this problem solved quickly and without impacting the clients.  We may save a few dollars by buying our gear online, but what is lost by the mass shift from local stores to e-commerce sites?  I’d better be thinking about what I’m going to do the next time I need an urgent repair done, because there is no longer anywhere reliable to go within an hour’s drive of my home.

How about you?  Please share your thoughts on the value or lack thereof of having experienced, passionate tradespeople in our neighborhoods?  Is it worth spending extra cash to ensure we preserve access to these local stores?  Or do you have a different viewpoint?

img_3690

Wildlife and Safari Gear [Encore Publication]: Basic equipment to capture wildlife while traveling or close to home

Wildlife photography is one of the most exciting and rewarding pursuits I know, but it is also very challenging.  Whether on safari in far-flung wilderness regions around the world or in a park or zoo near home, capturing great images of the local fauna requires plenty of patience, a little bit of luck, and some specialized gear.  This post outlines the basic equipment needed for wildlife photography.

Sometimes we get lucky.  This alligator was seeking what little sunshine was available on an overcast winter’s day on the bayou in Louisiana.  He stayed sufficiently still that I was able to capture this image by handholding a medium telephoto lens from our airboat.  Buy this photo

Occasionally, a critter may scamper, fly, or swim right up to where the photographer happens to be standing, but in the vast majority of cases, if we want to capture a really moving and uninhibited portrait of an animal, we need a long telephoto lens.  Working with “big glass” not only fills more of the frame with the main subject, but it has the added benefit of allowing the photographer to shoot from a vantage point far enough away from the animal so as not to frighten it.  It’s also very important when photographing wildlife that we make every effort to keep the wildlife wild, and using a long lens keeps us at a sufficient distance that the creatures we’re observing are less likely to become accustomed to the sight, sound, and smell of humans.

I like to carry both a medium telephoto and a long telephoto when shooting wildlife, so as to be prepared for a variety of situations.  My medium lens of choice is the Nikon 70-300mm f/4.5-5.6 VR lens.  While this lens is built on aging technology and doesn’t always feel as solid as more professional lenses, it is relatively small and lightweight, fairly inexpensive, and provides a very effective vibration reduction function.  This lens has been a staple in my bag for many years, during which time I’ve used it to capture some of my favorite images.

My go-to long lens for wildlife photography is the Sigma 150-500mm f/5-6.3 lens.  It’s more economical than a Nikon or Canon super-tele, and it produces reasonably sharp images even when used at its widest aperture.  You can spend much more on this type of big glass if you want or need to, but I’ve found this lens works quite well for me.

Lilac breasted roller captured with a 500mm lens in Tanzania’s Kilimanjaro region.  Buy this photo

When shooting far-off and often rapidly moving animal subjects with big glass, it is important to have a good means of stabilizing the camera.  Depending on the shooting situation, I use either a lightweight tripod or a beanbag support.

A lightweight travel tripod is perfect for those situations when you have plenty of space and plenty of time in one place.  I like the Manfrotto Be Free travel tripod.  It folds up to an incredibly small size yet affords a surprising amount of stability.  The included ball head works well but is difficult to adjust for sensitivity.  This tripod is designed to fit into a special pouch in my favorite travel photography backpack, also made by Manfrotto.

For situations when you will be on the move much of the time, such as on game drives using safari vehicles, a beanbag support is extremely useful, as you cannot fit a tripod in a safari vehicle and a monopod is awkward.  The bag can be emptied for convenient travel and then filled with “beans” (usually synthetic) upon arrival.   It is placed on top of the safari vehicle while shooting, with the camera and long lens resting on the beanbag.  While the beanbag that I use is no longer available, this one is well reviewed by photographers and represents a good value.

A sleepy leopard yawns in a tree above the Endless Plains of Serengeti National Park.  This image was captured using a 500mm lens resting on a beanbag support placed on the roof of our safari vehicle.  Buy this photo

With a couple of good telephoto lenses, including one long one, and a couple of good options for stabilizing them, you will be armed with the right basic tools for bringing home truly memorable images of the wildlife you encounter on your travels.  Happy hunting!

What are your favorite wildlife subjects and locations, and what gear do you use to capture them?  Please share your experiences here.

Want to read more posts about photographic gear?  Find them all here: Posts on Gear.

ProCam 4 Update: Still the best iOS camera app I’ve ever used

I’ve been using the ProCam 4 iOS app for nearly two months now, and today’s post provides a brief update to my previous product review.  My original review can be found just after the quick update.

My already high opinion of ProCam 4 has only been enhanced further after spending several weeks using it in the field.  It’s rare to find an app that combines such a high degree of functionality with such an easy-to-use interface.  While I don’t use the in-app editing features, preferring to use Adobe Lightroom for my post-processing whenever possible, I’ve been using most of ProCam 4’s other powerful features including the manual control over ISO, shutter speed, white balance, and flash; capture in RAW+JPEG formats; exposure bracketing; and the different shutter release options.  Everything is pretty intuitive to use and it’s a joy to shoot with because all the main features are readily accessible “on the fly”.  The resulting images are higher quality than those I’ve been able to obtain with the same iPhone 6S camera hardware controlled by other apps.  Overall, I continue to believe ProCam 4 is the best iOS camera app I’ve seen.

Note to Android users: As far as I know, ProCam 4 still is not available for Android devices.

One more note: With this week’s release of iOS 10.2, there is some enhanced support for RAW capture, but the built-in Apple Camera app still does not support RAW mode, so you will continue to need to use a third-party iOS camera app to capture images in RAW.  I recommend ProCam, but there are many choices out there.

My original product review of the ProCam 4 app follows:

I’ve posted repeatedly about the importance of understanding how to take manual control of your camera in order to make images that are properly exposed and focused.  Whether you are using a professional DSLR, an advanced full-frame mirrorless ILC, a compact point-and-shoot, or the camera built into your smart phone, there is no way you will get consistently acceptable results if you leave the camera’s settings to its auto mode.  See this post for an overview: Post on Beyond the Auto Mode.

For the past two days I have been testing an iPhone app called “ProCam 4”, which is by far the best iOS camera app I’ve ever used.  Like the “Manual” camera app that I’ve been using for years, ProCam 4 allows the manual selection of ISO, shutter speed, exposure compensation, and focus distance (note that the iPhone camera’s lens has a fixed aperture, so F-stop cannot be manually set).  Also like the Manual app, ProCam 4 allows images to be captured using RAW mode, which has a great many advantages over capture in JPEG format (see this post for more information: Post on Raw Mode).  And both of these camera apps display a histogram to assist in setting exposure properly.  

But ProCam 4 offers far more functionality than does the Manual app or any other iOS camera app I’ve tried.  Here is a partial list of some of my favorite additional features:

  • Shutter Priority: You can choose an exposure mode in which you select the shutter speed first and the app will set the appropriate ISO.
  • Exposure Bracketing: You can shoot a series of four shots at different exposures to increase the likelihood that one of them will be at the best exposure for the lighting conditions.  The series of shots can also be combined using HDR tools found in Lightroom, Photoshop, and other editing software into a single image with a higher range of tones from very dark to very bright.
  • White Balance: You can adjust white balance in the app, which is often preferable to having to adjust it in your RAW files during post-processing.
  • Virtual Horizon: The display can show you when the horizon is level.
  • Slow Shutter Options: You can select long fixed shutter speeds as well as bulb mode to keep the shutter open for as long as you’d like.
  • RAW+JPEG: You can choose to store the image in both RAW and JPEG formats.
  • Editing Options: This app provides many advanced in-camera editing tools and filters.

With all this incremental functionality, your little phone’s camera begins to behave a lot like a more advanced standalone camera.  While the iPhone’s camera, with its small sensor and its tiny fixed-aperture non-interchangeable lens, still cannot compare to a professional or enthusiast DSLR or ILC camera, the results using ProCam 4 are vastly improved compared to using the phone’s native camera app.  At $4.99 to purchase via the iTunes Store, this app is a great buy and a serious enhancement to the iPhone’s built-in camera.

You can find the ProCam 4 app here: ProCam 4 app.

What app do you use to control your phone’s camera?  What do you like and dislike about it?  Please share your thoughts here.

Want to read more posts about photography gear?  Find them all here: Posts on Gear.

Camera as a Service?: A first look at Relonch’s artificial intelligence photography service

In the 150 or so years of its history, the camera has evolved rapidly as a result of the advent of new technologies, each promising to dramatically simplify the photographic process and improve the resulting images.  Just within my lifetime, there have been major upheavals via the introductions of the Kodak Instamatic, the Polaroid SX-70, and of course digital photography.  So perhaps it was inevitable that someone would develop an AI (artificial intelligence) to make photography as simple as pushing a single button.

A company called Relonch (https://relonch.com/) is developing such a system now.  Sometime in 2018, they expect to roll out a Camera as a Service for $99 per month.  You get a loaner of a brightly colored Relonch 291 camera (manufactured by Samsung), with a fixed focal length lens and only a single button, which is used to take the picture.  It doesn’t even have an LCD screen to review your images.  The purported value of the subscription price, of course, is not derived from the camera hardware, but rather from the service.  For this lofty price, your camera transmits your image files to Relonch, who then use algorithms to analyze and process the files.  The next day, they send the processed images that they consider to be your best photos back to your mobile device of choice.

Relonch 291
The Relonch 291 camera

The concept here is that most people are confused by all the settings on their camera, even if it’s a fairly simple point-and-shoot device, so their photos rarely come out the way they envisioned them.  Instead, let them use a simple camera with just a single button, but employ AI techniques to post-process the best images to make them look closer to the way the user intended.

I haven’t tried the camera and its wraparound service yet (the company’s headquarters and showroom are in Palo Alto, near to where I live, so perhaps I can do so soon), but based only on their description of the concept I share my thoughts here.

  1. Will users pay $1200 per year for this service?  I’m skeptical as to whether there is a broad market for the service at this price point.  “Serious” photographers, that is professional and enthusiast amateurs, already know how to use the manual controls on our cameras and enjoy the process of capturing images and enhancing them during post-processing to achieve the final results we want.  Are there enough users who don’t know how to use their cameras but are still willing to pay so much for better images?  Time will tell.
  2. Are people willing to leave the choice of which images they receive up to a software algorithm?  I wouldn’t want someone else, even a top professional photographer, deciding which of my images I get to see and permanently deleting the rest.  And I certainly wouldn’t want an AI to make this decision for me.
  3. Are users okay with waiting a day to see and share their images?  We’ve gotten pretty spoiled as a consumer class.  We expect instant gratification, and ever since the first Polaroid cameras came out in the 1940s, photographers have been able to see their images right away.  Waiting a day may not fly.
  4. Do people really want their photography to be mechanized?  For its whole history, photography has seen its reputation tarnished when compared to other visual art media because a part of this art form includes the use of a mechanical device, the camera.  Just as a great painter creates her art through her vision and her technique, so does a great photographer.  The gear we use is only incidental to the quality of the images we create.  I fear that by taking the craft out of the process and substituting an AI for the artist’s vision, the Relonch service will further degrade photography as an art form.  And let’s be honest here.  An AI can adjust color balance, sharpness, clarity, vibrance, and exposure to improve a raw image, but it can’t determine how to crop or selectively adjust parts of the image to make it artistically pleasing or to give it a story to tell.  And most important of all, no amount of post-processing can turn a poorly composed or an uninteresting image into one worth looking at.  An AI may soon be able to drive our cars from Point A to Point B, be we’re a long way from having an algorithm that can create true visual fine art.  I’ll leave you with the words of master landscape photographer Ansel Adams: “There’s nothing worse than a sharp image of a fuzzy concept.”

What do you think of the Camera as a Service concept?  Valuable evolution of photography that will bring its benefits to a wider range of humanity, or expensive gimmick that will degrade the artistic worth of the medium of photography?  Please share your thoughts here.


Portrait Photography Gear [Encore Publication]: Affordable kit for making great portraits

Whether in my home town or traveling around the world, I love to shoot portraits.  There is something magical about creating an image that captures the essence of a person.  It can be daunting for many photographers to describe what gear they think is required to make professional-quality portraits: we often visualize a fully equipped studio with tens of thousands of dollars’ worth of high-end lights, modifiers, and backgrounds.  The reality is that we can make portraits of publication quality, shot on location and using kit that costs far less.  Here I outline a basic setup that is portable enough to pack on nearly any trip and costs only a few hundred dollars (not including your basic DSLR or mirrorless camera body).

Really all you need to get great people photos is a good portrait lens and a little know-how.  Make sure to set exposure and focus on your subject’s face.  I often use my camera’s Spot metering mode to get the correct exposure in tricky lighting conditions, such as when the subject is backlit.  In these conditions, it can also be helpful to fill in any harsh shadows on the subject’s face by using a touch of flash with a diffuser attached or a reflector.  That’s really all the gear you need: camera with portrait lens, flash unit, and a reflector kit.  Let’s look at the gear and basic techniques.

My indispensable portrait lens is the Nikon 85mm f/1.8G lens.  I shoot at least three-quarters of all my portraits, whether in the studio or on location, using this one piece of glass.  This is a classic portrait lens and provides a flattering perspective and great image quality when your subject is a person.  But this lens also shines for nature and action photography where you don’t need a really long focal length.  It renders really lovely “bokeh,” or the soft quality of the out-of-focus parts of the image.

This portrait of a grandmother and granddaughter at Carnaval San Francisco was made with natural light using an 85mm lens at a wide aperture to throw the background into soft focus.  Because no flash or reflector was used, there are some shadows on the subject’s faces, but I like the shallow depth of field that really emphasizes the subjects, and this would have been difficult to achieve with the slower shutter speed required to synchronize with a flash.  Also, carrying a reflector through the hustle and bustle of a chaotic street fair can be impractical.  I’m very pleased with this image even with a few shadows.

This portrait was shot using natural light only.  Some shadows are visible on the faces, but the effect is not unpleasant, and the soft focus from shooting without a flash is very effective.  Buy this photo

Your camera most likely has a built-in flash, and in many cases it is good enough to provide some fill-in lighting for backlit subjects or even to serve as a main light in very dark situations.  But for more control over how much light you want, the quality of that light, and where that light comes from and goes to, you likely want to have a separate flash unit.  I use the Nikon SB-910, which is powerful and flexible enough for most settings.  It has been discontinued and replaced by the Nikon SB-5000, but the older model is often still available.

Whatever flash you use, it is best to attach a diffuser of some sort to soften the otherwise very harsh light of the flash.  I also keep my camera set to lower the flash output by 1 stop, and I only override this setting occasionally.  Flash is often best when used sparingly.

This next image was shot at the same location as the previous one, but here I used an off-camera flash with diffuser to provide fill lighting on the subjects’ faces, thus reducing the shadows.  The only downside of using flash on location is that a slower shutter speed (typically about 1/160 of a second or slower) must be used, which in turn requires a smaller aperture (here it is f/8), and this can lead to more distraction from in-focus backgrounds.  I could have mitigated this problem by attaching a neutral density filter to block some of the light and allow a larger aperture.

This group portrait was made under similar conditions to the previous image, but here a fill flash was used to soften the shadows.  Buy this photo

An inexpensive accessory can provide the best of both worlds for on-location portraiture.  For less than $20 you can purchase a reflector kit with a variety of different colored reflectors and diffusers.  The reflectors are used to bounce some of the sun’s light back onto the face of the subject, thereby filling in any harsh shadows, while allowing you to shoot at any combination of aperture and shutter speed you choose in order to soften the background.  Each color of reflector imparts a different mood to the image.  An added bonus is that you can preview the precise effect the reflector has in your viewfinder or on your LCD screen.  Really the only downside of using a reflector in the field is that they are bulky to carry and often require an assistant to hold in place while you shoot.

This is the reflector kit I carry with me to most portrait shoots.  It’s high quality, very portable, and affordable.

This portrait was made by metering off the face of the model, choosing a wide aperture to blur the background, and bouncing some sunlight onto her face using the gold reflector from the kit mentioned above.

Using a reflector to bounce sunlight onto your subject’s face can reduce shadows while allowing you to retain full control over your aperture and shutter speed.  Buy this photo

There you have it: my formula for getting professional-looking portraits in the field with relatively inexpensive gear that’s easy to carry and use.

What is your favorite gear for portraiture?  Please share your thoughts in the comment box at the end of this post.

Interested in other posts about photography gear?  See them all here: http://www.to-travel-hopefully.com/category/gear/.


Camera of the Future?: A new company promises DSLR quality from a cellphone-sized device

The Holy Grail for us travel photographers would be to have a tiny and affordable cellphone-sized camera that can capture images with the quality and versatility found today only in large, heavy, and expensive digital cameras (DSLRs and medium- to large-format cameras).  A new company called Light promises to offer just such a device starting sometime in 2018.  Reading their pitch in IEEE’s newsletter for this innovative camera design, I was excited by the revolutionary concept but not convinced that their first offering would truly meet travel photographers’ needs.  Take a look at the prototype photo and the IEEE article, and then we’ll discuss the bottom line.

lightcameraconcept

IEEE Article on Light camera concept

My take on Light’s pitch is that they have an exciting new design concept which someday could translate into a truly remarkable product.  The idea of combining multiple cheap camera systems, each with a cellphone camera’s small plastic fixed-aperture lens and tiny inexpensive sensor, and then combining their data using controlling mirrors and software into a single high-resolution image with control over such elements as focal length, depth-of-field, and bokeh effects, is creative and compelling.  By combining the separate power from all of these small cheap lenses and sensors, none of which by itself can gather much light, capture high resolution, nor provide manual control over focal length or aperture, the device and its software can achieve a final image that will be brighter, more detailed, and more controllable than the sum of its parts.

But given how little the sum of its parts costs to produce, this next-gen technology carries a hefty early-adopter premium when priced at $1699.  For that money, one could buy an enthusiast DSLR system (body and a couple of zoom lenses) with similar resolution and a greater range of focal lengths than the Light camera will have.  But there are many other serious advantages to a DSLR or a good advanced mirrorless ILC  system than just resolution and focal length.  Even if the Light device’s software can generate a final processed image that overcomes each lens and sensor’s weaknesses to rival a DSLR’s image in terms of brightness and image quality (and I have real reservations about its ability to do so), it still won’t likely be able to match a DSLR’s power-up time (the time from when you turn it on until it is ready to shoot), capture frame rate (the speed at which it can capture multiple shots), or bright optical viewfinder.

In summary, I like the concept and believe it could hold the key to building a future breed of travel cameras that are smaller, lighter, and cheaper than today’s “serious” cameras while retaining much of their quality.  But the initial device’s high price and design trade-offs won’t leapfrog the advantages of a good DSLR or mirrorless camera just yet.  The first offering would be fun to play with, in the spirit of “the best camera is the one you have with you,” but it won’t get me to leave my DSLR system at home.  This will be a fun technology and a fun company to watch, though.  I’ll provide updates in future posts as I learn of new information.

What do you think of Light’s new camera concept?  Do you see this design as the basis for a new generation devices that would replace your DSLR or mirrorless camera system?  Please share your thoughts here.


A Good Camera Store is Hard to Find: Can anything be done to prevent the extinction of pro camera stores?

img_3689

This past week, the doors closed permanently at one of the San Francisco Bay Area’s few remaining pro camera shops, Keeble & Shuchat of Palo Alto.  After 51 years of providing sales of a tremendous range of fairly priced photographic gear, friendly service, lifesaving repairs, and informative classes, this local institution was forced to shut down.  The story is a familiar one, and extends beyond the San Francisco Bay Area and beyond the photography sector.  Local brick-and-mortar stores nationwide and in all sectors of the retail economy are being forced out of business due to severe price competition with online and big-box retailers and rising commercial real estate prices.  Over the last few years, my neighborhood has lost the last of its independent coffee shops, bookstores, and movie theaters, and it now seems that camera stores oriented toward enthusiast and professional photographers are also going the way of the dodo bird.

I’m sad about the closure of Keeble & Schuchat because there really is no substitute store within an hour’s drive of my house, and because I knew several of the staff there and don’t know what they’ll do next.  But at the same time, I share some of the blame over their closing.  I was a regular in their store, where I browsed their range of new gear and asked all manner of questions of the friendly and helpful staff.  I made it a point to buy a few doodads at K&S, and I attended paid classes there from time to time.  I depended on them for the repair and maintenance of most of my gear.

But whenever it came time to drop some big bucks on a new pro camera or lens, guess what?  I always purchased from a big online retailer like Amazon or B&H.  I’m sure many other serious photographers behave similarly.  It’s hard to justify paying a 10-20% price premium as well as the local 9.25% sales tax in my county when we’re already stretching to afford the gear in the first place.  It’s very tempting to save so much money with just a few clicks in our web browser.  But something significant is lost when we drive away the local experts who sell books, cameras, or cappuccinos in our neighborhoods.  We lose the local merchant’s accumulated knowledge and the passion for the category we love.  For us photographers, that means there soon won’t be many places we can go locally to chat about the merits or drawbacks of some new piece of gear, to repair or maintain our existing gear, or to learn from people who share our passion for image-making.

When my main portrait lens had some dirt stuck between the inner elements that was causing a speck to appear on all my images, and I observed this on the day before a major portrait shoot for two clients, I took the lens to K&S and their tech diagnosed and repaired it while I waited.  He charged me the whopping sum of $10 for his efforts.  Why?  Because he also was a working photographer and he knew the importance of getting this problem solved quickly and without impacting the clients.  We may save a few dollars by buying our gear online, but what is lost by the mass shift from local stores to e-commerce sites?  I’d better be thinking about what I’m going to do the next time I need an urgent repair done, because there is no longer anywhere reliable to go within an hour’s drive of my home.

How about you?  Please share your thoughts on the value or lack thereof of having experienced, passionate tradespeople in our neighborhoods?  Is it worth spending extra cash to ensure we preserve access to these local stores?  Or do you have a different viewpoint?

img_3690

Filtered Down to the Essentials [Encore Publication]: Why you should always have these filters in your bag

Filters are the Rodney Dangerfield of photographic gear: They don’t get enough respect.  Most photographers will begin to salivate when talking about the latest camera bodies or lenses and even plates or heads for our tripods, but we tend to think of filters as pedestrian items, if we think about them at all.  I nearly always make room in my bag for several filters, and I believe that using them properly is more important than what camera or even which lens I choose.  Let’s look into why these affordable little accessories are so important.

Three kinds of filters are essential gear for most photographers.  I’ll cover each type here.  Note that you must use a filter that is the correct size to attach to your lens.

It’s a good idea to keep a UV filter (also known as a haze filter) attached to your lenses at all times, as this helps protect the front element of the lens from fingerprints, moisture, and even scratches.  In addition to offering some physical protection for your lens, a good UV filter can also improve image quality when there is atmospheric haze or moisture in the air.  Use a good quality filter, though, as some can adversely affect your image quality.  I would recommend removing the UV filter when shooting with certain other combinations of filters, as the edges of the image can be cut off (vignetting) with too thick a stack of filters on the end of the lens.  In most cases, use of a UV filter does not affect the exposure more than about half a stop, so they can be used in most lighting conditions. I’ve had good luck with Hoya UV filters.  Always be sure to look at the specifications for your lens before buying any screw-on filter, because the diameter of the filter thread must match the size of the lens.

The second must-have type of filter is the circular polarizer.  A polarizing filter can reduce glaring reflections and can darken skies and enhance natural colors.  This little gadget is almost a secret weapon for making images that really pop.  Again, I like the Hoya products, which are thin, well made, and perform as they should.

It takes a bit of practice to learn to use a polarizing filter properly.  While looking through your camera’s viewfinder or LCD screen, turn the outer part of the filter slowly to see the effect.  The greater the angle between the light source (typically the sun) and the shooting direction, the bigger the effect of turning the outer ring of the filter.  You will observe as you rotate the outer ring of the filter that the sky, clouds, and any bodies of water will transform quite dramatically.  When you see the effect you like best, overshoot a little bit and then rotate the outer ring back to where you want it.  In most cases, I recommend not using the maximum amount of polarizing effect when there are reflections from water or glass, because you usually want some of these reflections to be visible in your final image, but this is art, not science, so you get to choose the effect you want.  Note that using a polarizing filter will cost you about 2-3 stops of exposure.  You will have to use a slower shutter speed and/or faster ISO or wider aperture, so use a steady tripod if the lighting conditions are dim.

Here’s an example of a shooting situation in which a polarizing filter can really make an image pop.  For this shot of the imposing peaks in Southern Patagonia’s Torres del Paine National Park, I rotated the polarizer to about 2/3 of its maximum effect to darken the sky, make the clouds more dramatic, and bring out the bright sheer faces of the granite peaks.

A circular polarizing filter makes a big difference when shooting mountains, skies, and/or bodies of water.  Buy this photo

The final essential filter is the neutral density (ND) filter.  These reduce the amount of light that reaches the camera’s sensor, so you can use slower shutter speeds to blur motion, or so you can use a wider aperture to get a shallow depth-of-field, even in bright sunlight.  ND filters come in different strengths as designated by the number in the filter’s specifications.  For example, an ND2 filter blocks 1/2 the light for a one-stop reduction in exposure, while an ND8 filter blocks 7/8 of the light for a three-stop reduction in exposure.  It’s a good idea to carry a range of ND filters for each lens you plan to use in the field.  A newer type of ND filter even allows for variable adjustment of the strength of the ND effect with just one filter, but these tend to be expensive.

A classic example of a situation in which you’d want to use an ND filter is when shooting moving water in bright lighting conditions.  You may want to use a longer shutter speed to blur the water, but even at your camera’s lowest ISO setting and your lens’ smallest aperture there could still be too much light for a slow shutter speed.  Mounting an ND8 filter to your lens will allow you to use a shutter speed eight times longer than without the filter, so for example you could move from shooting at 1/30 of a second to 1/4 of a second.

Here’s a photo of my younger daughter by a waterfall in Yosemite National Park.  The image was made in the early afternoon under very bright sunlight, bright enough that even using my camera’s slowest native ISO sensitivity and my lens’s most narrow aperture, I would still have had to use a shutter speed of 1/60 of a second, which would have frozen the water in the falls.  Using an ND8 filter, however, I was able to slow down the shutter speed to 1/8 of a second, long enough to impart a nice blur to the falling water.

 Use of a neutral density filter allowed me to blur the falling water even under very bright lighting conditions.  Buy this photo

I recommend carrying a kit containing several ND filters of different strengths for each lens you plan to use for landscape images.  Once again, make sure the diameter of the filter matches the diameter of the lens you intend to fit it to.

Note that there’s another type of ND filter called the “graduated ND filter,” and filter varies the light-blocking effect from one end of the filter to the other end.  I used to use this type of filter quite often, but in this digital era I find it usually works just as well to simulate the effect of a graduated ND filter using post-processing software later.

Armed with these three types of filters, you will be prepared to create the images you have in your mind, even under challenging shooting conditions.  Happily, filters are small, light, and not terribly expensive, making them one of the better values we photographers can find.

Which filters do you always carry, and when have you found them most useful?  Any tips or tricks on how to use filters for the best results?  Please leave a comment in the box after this post to share your thoughts.

Want to see more posts about photography gear?  Find them all here: Posts on Gear.

Rock Solid [Encore Publication]: Why you should always have a tripod with you

Tripods have had their ups and down, so to speak.  When photography was in its infancy, the wet plates used to make the images were very slow, so extremely long exposures were required and the cameras were big and bulky, so use of a big, heavy wooden tripod was essential.  It’s all the more remarkable when looking at the incomparable work of Ansel Adams to realize that in order to make these images he had to hike miles up steep mountain trails with a heavy view camera, several big and fragile plates, and an enormous tree trunk of a tripod.  As cameras became smaller and film faster, tripods went out of style except for certain low-light situations for professionals.  Now, more and more enthusiast photographers are recognizing the value of a sturdy tripod for capturing the best possible quality images of landscapes, buildings, and of course night scenes.  In some iconic travel spots, it’s hard to find space to shoot amidst the ocean of tripods.

Sure, they’re heavy and bulky, particularly when we’re hiking or walking for long stretches.  But a good solid tripod is essential for so many types of shots that I now carry one with me at nearly all times.

An example of a technique requiring a tripod even in bright light is high dynamic range (HDR) photography.  To make an HDR image, you shoot a series of photos of the exact same scene in rapid succession, varying the exposure by a little bit between each frame, and then use special software during post-processing to bring out all brightness levels in the image, from the dark shadows to the brilliant highlights.  But if the camera moves at all between the shots, it becomes harder to stitch the shots together into a beautiful HDR image.  I’ve been known to handhold some HDR shots, but I strongly recommend shooting them using a tripod.  Of course, you’ll also want a tripod for low-light and nighttime photography, and they’re very useful for landscape images where the high resolution of your camera’s sensor is called upon to render extremely fine detail throughout the scene.  And let’s not forget that to include yourself in a scene, use of a tripod makes life a lot easier.

Although I was shooting in bright sunlight, I needed a tripod to make this HDR image of Yosemite Valley peaks reflected in the Merced River.  If the camera moves at all between frames, it is harder to combine them into the final photo.  Buy this photo

For most travel situations, you’ll want a lightweight tripod that folds up to a portable size but still offers enough stability for most uses.  There are times, though, when I need to bring along my heavy and bulky professional tripod.  Whatever tripod you choose, be sure to fit it with a good quality head–ball heads provide a lot of flexibility and ease of use for travelers–and remember to take along the plate that attaches the tripod to your camera, if required.

My go-to lightweight travel tripod is the Manfrotto Be Free.  It folds up to an incredibly small size yet affords a surprising amount of stability.  The included ball head works well but is difficult to adjust for sensitivity.  This tripod is designed to fit into a specially designed pouch in my favorite travel photography backpack, also made by Manfrotto.

The SLIK 615-315 is a great tripod for use close to home or on trips where you will have constant vehicle support.  It’s very solid, supports a tremendous amount of weight, and can be adjusted for nearly any shooting situation.  I recommend you fit it with a good ball head for maximum flexibility.

A monopod can be a real problem solver when you need more stability than handholding or resting your camera on a vehicle or table will afford, but you can’t carry or use a full tripod.  I use the Manfrotto 681B model.

To be sure, if you know 100 photographers, you’ll hear 110 different opinions about tripods and the heads and plates that go with them.  The products listed above are my recommendations only, but I’ve had good experiences using them.  For those with a lot more money to spend, tripods and heads made by Really Right Stuff are much beloved by professional and well-heeled enthusiast photographers.

What combination of tripod, head, and plate do you use, and why?  Please share your recommendations here.  Tripods are one piece of gear with which we’re constantly experimenting, so bring it on!

Want to read more posts about photography gear?  Find them all here: Posts on Gear

ProCam 4 Review: The best iOS camera app I’ve ever used

I’ve posted repeatedly about the importance of understanding how to take manual control of your camera in order to make images that are properly exposed and focused.  Whether you are using a professional DSLR, an advanced full-frame mirrorless ILC, a compact point-and-shoot, or the camera built into your smart phone, there is no way you will get consistently acceptable results if you leave the camera’s settings to its auto mode.  See this post for an overview: Post on Beyond the Auto Mode.

For the past two days I have been testing an iPhone app called “ProCam 4”, which is by far the best iOS camera app I’ve ever used.  Like the “Manual” camera app that I’ve been using for years, ProCam 4 allows the manual selection of ISO, shutter speed, exposure compensation, and focus distance (note that the iPhone camera’s lens has a fixed aperture, so F-stop cannot be manually set).  Also like the Manual app, ProCam 4 allows images to be captured using RAW mode, which has a great many advantages over capture in JPEG format (see this post for more information: Post on RAW Capture).  And both of these camera apps display a histogram to assist in setting exposure properly.  

But ProCam 4 offers far more functionality than does the Manual app or any other iOS camera app I’ve tried.  Here is a partial list of some of my favorite additional features:

  • Shutter Priority: You can choose an exposure mode in which you select the shutter speed first and the app will set the appropriate ISO.
  • Exposure Bracketing: You can shoot a series of four shots at different exposures to increase the likelihood that one of them will be at the best exposure for the lighting conditions.  The series of shots can also be combined using HDR tools found in Lightroom, Photoshop, and other editing software into a single image with a higher range of tones from very dark to very bright.
  • White Balance: You can adjust white balance in the app, which is often preferable to having to adjust it in your RAW files during post-processing.
  • Virtual Horizon: The display can show you when the horizon is level.
  • Slow Shutter Options: You can select long fixed shutter speeds as well as bulb mode to keep the shutter open for as long as you’d like.
  • RAW+JPEG: You can choose to store the image in both RAW and JPEG formats.
  • Editing Options: This app provides many advanced in-camera editing tools and filters.

With all this incremental functionality, your little phone’s camera begins to behave a lot like a more advanced standalone camera.  While the iPhone’s camera, with its small sensor and its tiny fixed-aperture non-interchangeable lens, still cannot compare to a professional or enthusiast DSLR or ILC camera, the results using ProCam 4 are vastly improved compared to using the phone’s native camera app.  At $4.99 to purchase via the iTunes Store, this app is a great buy and a serious enhancement to the iPhone’s built-in camera.

You can find the ProCam 4 app here: ProCam 4 app.

What app do you use to control your phone’s camera?  What do you like and dislike about it?  Please share your thoughts here.

Want to read more posts about photography gear?  Find them all here: Posts on Gear.