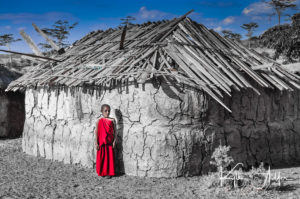
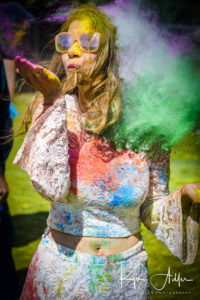
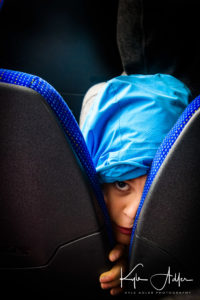
I See a Red Door and I Want to Paint It Black [Encore Publication]: When a black-and-white image is better than color, and how to convert to B&W

Back in the day, a photographer had to choose in advance whether to shoot with color film or black-and-white film.  Conversions from color to B&W were cumbersome and expensive, and conversions from B&W to color were essentially impossible.  During the film era, I typically shot exclusively using color transparency film while traveling, and reserved B&W photography for particularly artistic shoots near home.

Thankfully, in today’s digital world, we no longer have to commit ourselves in advance to monochrome vs. color images.  It’s now a simple procedure to convert our color images to B&W during post-processing.  And that’s a great blessing, because there are plenty of times when a black-and-white photo is better than a color photo.

Consider the image of the alligator at the start of this post.  One of my favorite photos, this one works just fine in color, too.  But the real power of the image is revealed in B&W through the striking textures of the alligator’s skin as seen above the water and as reflected off the water’s surface.  The background above the water fades to a deep, nearly true, black, with the background of the water itself rendered slightly less darkly and showing some nice ripples of motion.  Black-and-white photography is especially powerful when there are contrasts of pattern, texture, and background as in this image.  Buy this photo

When else might we want to render an image in B&W?

Portraits made in monochrome have a timeless look that evokes the earlier years of photography, and this rendering can also bring out the true nature of the subject.  There’s a lovely look to the skin tones and hair when displayed in B&W, and there are fewer distracting elements from the color of clothing or background objects.

This portrait takes on a vintage, timeless look when shown in B&W.  Our eye can focus on the model’s face and hair without the distractions of the colors in her sweater or the building.  There’s almost a street photography kind of documentary quality to this image in monochrome that is lost when viewed in color.  Buy this photo

Color can be distracting in an image where we want to emphasize the essence of a person or place.  In this portrait I made recently for a couple who are fellow musicians and friends of mine, we had beautiful “golden hour” light to work with, and the background and clothing worked well in color.  But converted to B&W, this image really places the emphasis on the couple without the distractions of the color cast in the reflections off the eyeglasses or of the mixed lighting in the background.

In this portrait, black-and-white presentation places the viewer’s attention squarely on the the couple and their instruments, without distractions from the multiple colors of the clothing and background components.  (Client photo not available for purchase.)

When you’re shooting under “mixed lighting”, which means there are multiple light sources with different color temperatures (i.e., some light sources are warmer and others are cooler), converting the image to B&W can be a real problem solver.  Consider the image below, made in Bruges at night.  The light from the street lamps was warmer than the light coming from the spotlights on various buildings, and there was also a bright moon that night, so when seen in color the photo would look less appealing due to the contrasting of the color temperatures in the different parts of the image.  But viewed in B&W, it brings out the grandeur of the old buildings and the beauty of the reflections in the waters of the canal, without the distractions of the color casts.

This image of Bruges at night, when processed in B&W, removes the contrasting color temperatures of the multiple different light sources and allows the viewer to enjoy the stately old buildings with consistent tone and texture.  Buy this photo

Now that we’ve covered a few of the many situations in which a black-and-white image is preferable over a color image, let’s look at how to convert from color to B&W.  There are many ways to perform this conversion, but I recommend it be done using the Color Adjustments settings in the Develop module of Adobe Lightroom.  Here’s how:

Click on the “B&W” tab above the individual color channel sliders, and then adjust the mix of how the colors are blended by increasing or decreasing each color’s slider to see how the black-and-white image looks.  I find that I often have to readjust the contrast slider at this point to get the image looking its best in black-and-white.

For more on using Lightroom to post-process your images, check out my previous post: Previous post on using Lightroom to post-process images.

I do not recommend using your camera’s built-in black-and-white mode, as you will then lose the color information in the image file.  I also do not suggest using the settings some cameras have to make a copy of the image in B&W, because in most cases the camera’s built-in software will not do a very good job of rendering the image in monochrome.  For the best results, either use Lightroom or a dedicated black-and-white conversion application such as Silver Efex Pro 2 from Nik Software, which is available as a plug-in for Lightroom or Photoshop.

Want to read other posts about travel photography techniques?  Find them all here: http://www.to-travel-hopefully.com/category/techniques/

What do you love about a black-and-white image?  When do you convert an image to B&W rather than share it in color?  Any tips or tricks for how to make great B&W photos?  Please share your thoughts in the comment box!


Capturing the Creative Process [Encore Publication]: How to document an artist’s work using your own artistic vision

Capturing images of the performing arts is a specialty of mine, as well as one of my absolute favorite genres of photography.  But as gratifying as I find documenting live performances of dance, music, or theater, there’s a whole higher level of photographic joy available from capturing the artist’s creative process before their work reaches a public audience.  Today’s post focuses on a recent behind-the-scenes shoot that I did for a friend and longtime collaborator, Arina Hunter.

I arranged to shoot her dress rehearsal just before the first of two public performances as part of San Francisco’s SAFEhouse for the Arts RAW (Resident Artist Workshop) program.  Arina was preparing to perform an untitled work-in-progress which was quite complicated technically, so it was fascinating to watch her process of making artistic decisions and readying herself and the technical crew for the evening’s show.

Read on to see some of my favorite images from the rehearsal, accompanied by a few thoughts about my own artistic and technical process that went into the capture of Arina’s work.

All of these images are available for sale on my website.  Just click on any image to view them in the online gallery.

The creative process is about more than just practicing for a performance.  Try to include some wider views depicting the artist’s full environment including equipment, sets, and performance space.

The flip side is that it’s also important to get up-close and to capture the physical work that goes into preparing for a performance.

Shoot plenty of frames to maximize the chances of capturing the “decisive moment” when the artist’s work comes together as an integrated whole.

Typically there are several different moods evoked in a single piece of art.  This image captures a vulnerability and poignancy that informed Arina’s work even as much of her physical performance exudes strength.  Finding the right perspective to convey each mood is key to making successful images.

When post-processing my images, I ask myself how can my own technique best convey the artist’s intention.  For this image I decided a monochrome conversion would best render Arina’s physicality at this precise moment during her process.  Freeing the viewer from the anchor of color perception, a black-and-white image is graphic and timeless and allows us to focus on what is elemental: form, contrast, shadow, and light.  

I shot this image from a low perspective near the ground so as to juxtapose Arina’s body with the projected video image on the wall.  Always look for a different perspectives while shooting that can create compositions to get across your intent.

Another example of perspective: To make this image I climbed on top of a chair and shot down on Arina in her performance space. 

Sometimes the details convey the story better than the whole.  This closeup of Arina’s paint-covered hand framed by colorful canvas makes a powerful summary of her performance piece.

Today’s post has been a bit more conceptual and less technical than most of my posts.  The purpose is to get you thinking about how our own art of photography can be harnessed to capture the creative process of other artists.  The next time you are privileged to get to shoot an artist at work, think about how you can apply elements such as composition, perspective, color, texture, empty space, motion, and stasis to capture compelling images of the artist’s own vision!

Do you have techniques you’ve used to document other artists’ creative process?  Please share your thoughts here.

Want to read other posts about photographic techniques?  Find them all here: Posts about techniques.


Focus on ODC Interspaceology Dance Pilot [Encore Publication]: Capturing the new work of six inspiring choreographers

This past weekend I had the privilege of capturing the new work of six inspiring San Francisco Bay Area choreographers as the official photographer for ODC’s 69th dance pilot program.  Because the six pieces differed substantially in their style, content, dance technique, lighting, and staging, this dress rehearsal shoot makes a good case study in live performance capture techniques.  In today’s post I share some favorite images of each of the pieces along with some brief notes about how they were made.

“Ofrenda” by Carmen Roman:

Performing arts photography need not always show the performers.  Sometimes it adds depth to a performance capture to include some images of costumes, props, venue, or lighting without the performers.  This image shows the altar-like centerpiece, including the Peruvian folkloric masks, before the dancers entered.

This piece was performed outdoors on the street in front of the theater.  It was natural to use some street photography techniques, such as waiting for the people to interact with the setting in an interesting way.   

Because it was held in near-darkness, I had to use some flash to capture the piece.  In these situations, I use an off-camera speedlight, handheld, and attached to the camera with a flash cord.  I nearly always dial down the flash output by one stop so the lighting appears more natural.

“work/force” by Katelyn Hanes:

Try to capture moments when dramatic tension peaks.  In this image, the viewer can feel the conflicting pull that is central to the piece.  Using a fast shutter speed is essential with fast-moving performances, and since lighting is usually dim and available light must be used with no supplemental lighting, it is helpful to use a fast prime lens at a wide aperture and a high ISO setting on the camera.

In post-processing, I look for aspect ratios that best tell the story for each image.  Sometimes that means changing from a landscape to a portrait orientation or vice-versa, and/or cropping to a non-standard aspect ratio.

“Engineering Ephemeral” by Alexandre Munz:

There can be drama in stillness as well as in motion.  This emotional piece had some contemplative moments that tell the story as well as the more active portions.

Dance is about gesture and facial expression, too.  This image captures the choreographer/dancer in a reflection of emotional pain, which to me speaks to a strong storyline.  

“Interbeings” by Carly Lave:

This piece treated the interaction between a human and an artificial intelligence, so I wanted to document their initial encounter.  The dramatic lighting of a single spotlight splits the frame into portions of light and shadow.  To capture the image I had in my mind, I had to move to the center of the stage (made possible because this was a dress rehearsal, not a live performance with an audience) and to lie down on the floor to get a low shooting angle.

Most of the time, performing arts images should be tack-sharp, but for artistic effect it is sometimes desirable to give a sense of the motion by blurring the performer using a slow shutter speed.  To make this image, I switched to a slower ISO setting and a narrower aperture in order to obtain a very slow shutter speed (1.6 seconds).  Because it was shot handheld, I had to hold the camera very steady so as not to blur the background too much.

“Confab” by Arina Hunter:

I’ve worked with Arina several times before and so I have a good feeling for her style.  To capture her new piece, I knew I’d need to have two camera bodies at the ready, one with a 50mm lens and the other with an 85mm lens, so that I could switch between expressive close-ups and exciting action shots.  This image hightens the drama by combining a moment of tension with beautiful lighting and a clean black background.

The best technique for capturing exciting, fast-moving performances is to shoot plenty of images.  I shot a series of images in rapid succession to catch this perfect moment in one of them.  A very fast shutter speed is required, so I used a high ISO setting and a fast prime lens at a wide aperture.

Arina’s gestures and facial expressions are varied and compelling.  To obtain this personal perspective, I shot from her level flat on the floor, and to ensure sharp focus on her whole body I used a moderate aperture setting (f/2.8), requiring a very high ISO setting (6400).  

“ReeLs” by Dana Genshaft:

It can be a challenge to capture multiple dancers moving rapidly in a small space.  Rather than always compose so that the performers are all lined up in a single row like a picket fence, I like to compose images where they are layered.  This image creates a sense of the tension between the dancers by showing the foreground dancer in fast motion, slightly blurred, offset against the background dancers in an instant of stasis.

This image is composed with the dancers all in a row, but the composition works well because the lines of the performers’ bodies leads the viewer’s eye from one side of the frame to the other. 

So, there you have it.  It was a true joy documenting this ODC dance pilot program and getting to know the talented choreographers and dancers.  I’ve described a number of different techniques that can be used, among others, to capture images as vibrant and varied as the performers themselves.

Now it’s your turn.  Please share your favorite techniques for capturing live performances at home or while traveling.

Remember that you can see any of these images in a larger size on my website by clicking on them and that they all are available for purchase there.

Want to read more posts about photographic techniques?  Find them all here: Posts about techniques.

Please Join Me for a Photo Walk/Workshop in SF’s Mission District: Learn travel photography techniques to capture a sense of place

Dear Readers,

August 16 is the only guaranteed remaining date for my highly rated photo walk/workshop in San Francisco’s Mission District.  If you live in or will be visiting the SF Bay Area, please join me for this informative hands-on workshop.  This experience is suitable for photographers of any level from beginner through professional.  We will learn travel photography techniques that cover many photographic genres and can be applied to any location you visit to capture a strong sense of place.  I’m partnering with Airbnb Experiences to offer this series of special photo workshops.  More details can be found here: https://www.airbnb.com/experiences/227047.

Photo Workshop: SF’s Mission District

Arts experience
Hosted by Kyle
The host of this experience
3 hours total
Drinks
Offered in English
About your host, Kyle
I’m a professional travel photographer based in the San Francisco Bay Area. A recent winner of the international competition Travel Photographer of the Year and shortlisted for the National Geographic Travel Photography Awards, I’ve shot in over 100 countries. My work has been published and exhibited widely. My passion is helping fellow photography enthusiasts learn to use their camera as a brid…
What we’ll do
Join a professional travel photographer as we explore one of SF’s last remaining true neighborhoods for a fun photo workshop filled with historic, architectural, artistic, and cultural attractions. The Mission District, named for the Spanish mission built there in 1776, is a vibrant Latino neighborhood that in recent years has undergone some gentrification, overlaying a hipster vibe on top of the …
What I’ll provide
One coffee drink up to $5 ?
Who can come
Guests ages 12 and up can attend.
Notes
Guests should be prepared to walk about 3 miles, including some hills. Bring your gear (any kind of camera or phone) with a fully charged battery and memory card with room to spare for your photos.
Where we’ll be
We’ll visit and photograph these Mission District locations: – Misión San Francisco de Asís (Mission Dolores) – Clarion Alley Murals – The Women’s Building – Dolores Park We stop along the way at a local cafe for a coffee drink and photo review (and restrooms).
Where we’ll meet
Misión San Francisco de Asís (Mission Dolores) · Mission District, San Francisco
Upcoming availability
Thu, Aug 16
3:00 PM − 6:00 PM · $79 per person
Reviews
Holden

Holden

July 5, 2018
We got a tour thru the Mission that I had never seen before. Kyle is a great communicator, and knows his stuff. I am a better photographer with a better eye than I was before I met Kyle!
Anne Sofie

Anne Sofie

July 5, 2018
Had a wonderful time with Kyle on the photowalk. We where a small group and Kyle inquired before the walk about our photograp…
悦Yue

悦Yue

May 18, 2018
Kyle is awesome ,if you just have just one chance to join one Airbnb Experience in San Francisco, choose his.We had a lot of …
Group size
There are 8 spots available on this experience.
You don’t have to fill all of them. Experiences are meant to be social, so other travelers could join too.
Guest requirements
Bringing guests under 18
If you bring a guest that’s under 18, it’s your responsibility to make sure the activities they participate in are age-appropriate.
From the host
Guests should be able to comfortably walk about 3 miles including some hills.
Who can come
Guests ages 12 and up can attend.
Experiences cancellation policy
Any experience can be canceled and fully refunded within 24 hours of purchase. See cancellation policy.

Capturing Authentic Portraits while Traveling: Join me for a free webinar this Saturday

Dear Readers,

In the first in a series of free webinars on various travel photography topics, I will share my tips and tricks on How to Capture Authentic Portraits while Traveling. This was the most often requested topic in my recent poll. Please register soon for this free Meetup event, as there are only 100 spaces available. A few days before the event, I will send out the link to registered participants.

Topics I will cover include:
* Planning your trip
* Gear
* Techniques
* Previsualization
* Approaching your subject
* Post-processing
* Think differently!

Please join my Travel Photography Workshops meetup group first (which also is free) and then RSVP for the webinar.  Here’s the link: Travel Portrait Photography webinar.

Looking forward to having you join me for this webinar on a topic near and dear to my heart!

– Kyle

Meteoric Rise [Encore Publication]: How to shoot the Perseid and other meteor showers

Note: My favorite meteor shower of the year, the Perseid, is coming soon!  Only the Geminid shower can approach the Perseid in terms of the expected peak rate of meteors, but the Geminids come in December where the weather can be more challenging, so at least in places like the San Francisco Bay Area, where clear weather reigns in the summer, the Perseid wins hands-down.  Making matters even better, this year the night of peak activity of the Perseid Meteor Shower, August 12/13, comes just one day after a new moon, meaning the sky will be dark and the photography superb.  For those of us who love to shoot shooting stars, the event later this month could be epic.  Read on for more info about how to capture images of meteor showers.

While the Geminid Meteor Shower in December and the Perseid Meteor Shower in August are the best-known, each year there are quite a few major meteor showers that afford great opportunities for seeing meteor activity.  Here is a partial list, courtesy of Sky & Telescope:

Major Meteor Showers in 2018
Shower Radiant and direction Morning of maximum Best hourly rate Parent
Quadrantid* Draco (NE) Jan. 4 60-100 2003 EH1
Lyrid Lyra (E) April 22 10-20 Thatcher (1861 I)
Eta Aquariid* Aquarius (E) May 6 20-60 1P/Halley
Delta Aquariid* Aquarius (S) July 29 20 96P/Machholz
Perseid Perseus (NE) Aug. 13 90 109P/Swift-Tuttle
Orionid* Orion (SE) Oct. 21 10-20 1P/Halley
Southern Taurid Taurus (S) Nov. 5 10-20 2P/Encke
Leonid* Leo (E) Nov. 18 10-20 55P/Tempel-Tuttle
Geminid Gemini (S) Dec. 14 100-120 3200 Phaethon
Ursid* Ursa Minor (N) Dec. 22 10 8P/Tuttle

* Strong moonlight will interfere with these showers.


Source: Sky & Telescope

While it’s still technically tricky to make great images of a meteor shower, today’s technology certainly makes it possible for those of us without astronomical budgets to do so.  I shot some nice images of last summer’s Perseid shower and would have been out there shooting the Geminids last December except that the cloud cover here in the San Francisco Bay Area was 95-100%.  Here’s a composite of several images I shot last August of the Perseids.

A composite image made up of one long exposure for the lake, mountain, and trees, plus several 25-second exposures capturing the individual meteors I observed over a 2-hour period.  Buy this photo

Most of the techniques you need for capturing a meteor shower are the same as for capturing the Milky Way.  Review my post from a few weeks ago for a refresher course: Post on Milky Way Photography.

The special challenge when shooting a meteor shower is that meteors can occur anywhere in the sky.  Even with a very wide-angle lens, such as a 14mm or 16mm lens on a full-frame camera, only a small portion of the sky can be covered.  As we are limited to a maximum exposure time of about 25-30 seconds with a 14mm or 16mm lens so as to avoid blurring the stars into star trails, it’s clear that we have to shoot a lot of consecutive images to be likely to capture several meteors throughout the night.  We then use software such as Photoshop to combine the images in which meteors are visible into a single composite image showing all of the meteor activity we captured during the night.

A good tutorial on shooting meteor showers, illustrated with amazing images by Glenn Randall, can be found here: Glenn Randall post on photographing meteor showers.

Have you photographed a meteor shower?  What techniques did you use?  Please share your experiences here.

Want to read more posts about photographic techniques?  Find them all here: Posts on Techniques.


Focus on How Weird Street Faire: A case study on simple techniques to capture winning images of festivals

As a professional travel photographer, I shoot regularly in nearly all genres of photography.  A typical day on the road might include shooting landscapes, wildlife, cityscapes, portraits, action (sports, dance, performance), and nighttime photography.  While I enjoy all types of shooting, my great joy as a photographer is capturing portraits of the people I meet.  Whether close to home or halfway around the world, getting to know the people and learning about their culture through making portraits of them is a wonderful experience.  And there’s no better way to capture images of many amazing people in a short time than by attending local festivals.  People tend to be their best selves at special celebrations like festivals and street fairs.  They dress exuberantly, dance with abandon, make new friends quickly, and (nearly always) are overjoyed to pose for photos.

I shoot about a hundred festivals and other special events every year, so I’ve learned a few tips about how to make the best images during these occasions.  In today’s post I share some simple but effective techniques for capturing great portraits at festivals and other gatherings, using San Francisco’s recent How Weird Street Faire as a case study.  How Weird is a vibrant and colorful, only-in-SF, annual celebration of individuality, tolerance, music, art, and hula hoops.  Read on to see some of my favorite images from this year’s festival, presented along with some discussion of how they were made.  To view more of my images, or to buy some, check out this gallery: How Weird photo gallery.

I see a lot of fellow photographers at events like How Weird shooting with huge telephotos and even tripods, like they’re after images of wildlife on a Kenyan safari.  In my opinion, they are missing the point.  We’re making portraits of people here, so use a normal or moderate telephoto portrait lens, preferably a fast prime lens, ditch the tripod and monopod at home, and get in close to chat with and get to know the people you’re photographing.  When you interact with people, you get a sense of what makes them special, allowing both you and them to capture that special trait in your photos.  Random sniping from far away with a long telephoto will yield far more bland and generic photos.  All of my images at How Weird Street Faire were made with a single camera body and one lens, my trusty 85mm f/1.8 portrait lens.  Sometimes simple is better, especially when it comes to capturing people at fast-moving events.

Larger groups can be challenging to capture in portraits, particularly in bustling spaces like those of a festival.  When they couple I was chatting with suddenly ran into a friend and they had a group hug, I quickly stepped back a few paces and made this expressive and engaging portrait.  It’s okay to break the rules sometimes–here, one of the subject’s faces is completely obscured and another’s is partially obscured, yet the portrait works because it captures the energy and affection of the moment.

When photographers argue that the “street photography” approach (candidly sneaking images of people who aren’t aware they’re present) is the best for capturing people’s true essence, I show them images like this one.  This wholly genuine and unguarded moment of the girl dancing was made with her full knowledge and permission.  The trick is to chat with the subject and get their permission for photography first, then to lay back for a while and let them go back to what they were doing.  After a few minutes, they’ll nearly forget you’re there and they will reveal their true selves.  But unlike shots you sneak without permission, now you have a subject happy to have you photographing them, and you can take your time and not have to rush your work in order to hide your shooting from them.

Often we see only the most obvious subjects at crowded, chaotic events like festivals.  It’s easy to spend all our time shooting people dancing, partying, and displaying their costumes, but I try always to look for the more hidden people and infrastructure that support the event.  This DJ was partially hidden atop the big dance stage and behind the banks of speakers, but she made a fun subject for this portrait.

Don’t be afraid to get in close.  This portrait really pops because the tight composition allows us to focus our attention on the symmetry and color of the subject’s hair and costume.  

The interactions between people are at least as much fun to observe and capture as the individuals themselves.  I had chatted with and photographed a group of people for a few minutes when I observed this fun interaction, so I stepped back and framed some shots of the two young people together.

While post-processing my images after the shoot, I decided to render this one in monochrome to achieve a gritty urban street scene sort of feel.  Often color can distract from the power of an image, so always consider which of your images could benefit from conversion to black-and-white.

In ordinary daily life, I find that perhaps two-thirds of people are willing to have their portrait made if the photographer spends some time getting to know them first and then asks politely.  But at a festival, nearly everyone is excited about posing for portraits.  The trick is to capture scenes where they show you their underlying personalities a bit, rather than just striking a cliched pose for the camera.  To achieve that here, I spent a few minutes shooting, asking the couple to pose in different styles and have fun with it.

Putting it all together.  Here’s a summary of the basic techniques I use when shooting portraits at festivals:  1) Use a fast prime normal or portrait lens.  2) Set your camera for a fast shutter speed (1/500 second or faster is good for dancing and other fast action), wide aperture (f/2.5 or wider is ideal except for large groups) to isolate the subject, and an ISO appropriate to the lighting of the scene (I used ISO 100 the whole day due to the bright outdoor light).  3) Get to know your subject before shooting, let them relax, and capture them during an authentic moment.  4) Try to compose the portrait with as uncluttered a background as possible; of course, this is often difficult at crowded festivals.  5) During post-processing, crop to clean up the scene and then vignette just a touch to further clean up busy backgrounds.

I hope this discussion of techniques to capture portraits during festivals has been helpful.  The best way to learn these techniques and to find your own style is to shoot and shoot some more!

Please leave a comment with your own thoughts and tips about how to make great images of people at celebrations.

Want to read more posts about photographic techniques?  Find them all here: Posts about techniques.

Decent Exposure [Encore Publication]: Mastering exposure is key to getting great images

Of all the primary elements a photographer controls–composition, focus, the moment the shutter is released, and of course the choice of the subject–none is more critical to making a great image than setting a proper exposure.  Some corrections to a poorly exposed image can be made in post-processing, and there are occasionally good artistic reasons to override the norms of exposure in order to evoke a certain mood in an image by making it darker or brighter than usual, but before we can effectively make these exceptional choices it is necessary to learn the basics of setting an appropriate exposure.

Let’s begin by defining exposure and the elements that comprise it.  Simply put, exposure refers to the amount of light that reaches the camera’s sensor and therefore how light or dark the resulting image will appear.  Four components together determine the exposure: 1) the brightness of the light reflecting off the subject and reaching the front of the lens, 2) the aperture setting on the lens (how wide or narrow is the opening of the lens), 3) the shutter speed setting (how long is the camera’s shutter open to allow light to strike the sensor), and 4) the sensitivity setting of the camera’s sensor.  We don’t always have control over the first component, but the other three are within our control using our camera’s settings.

Many photographers simply set their camera on Auto mode and let the camera’s built-in meter make its best guess as to how the image should be exposed.  That method can work well under certain conditions, but it is highly prone to errors.  For example, if your main subject is strongly backlit, the camera’s meter will expose for the average brightness in the scene and will underexpose the subject.  This is why so often we see underexposed photos of people standing outside in bright sunlight.

Although I compensated for the strong backlighting in this image of a Tibetan family enjoying a midday picnic, their faces are still quite shadowy, indicating a bit brighter exposure would have been better still.  Buy this photo

Fortunately, there are several easy methods to achieve a correct exposure even under challenging lighting conditions.  Here are a few that I use frequently:

  1. Set the camera’s metering mode to Spot Metering: By default most cameras’ metering systems use a sophisticated pattern-matching algorithm that measures how bright or dark each area of the image is and makes its best guess about a workable exposure based on similar scenes in the camera’s database.  Most cameras allow you to select a simpler metering mode called Spot Metering, that just measures the light at the central point in the image or another point that you select.  If you choose Spot Metering and select the measuring point to be right where your main subject is, you should get just the right exposure.
  2. Dial in some exposure compensation: Most cameras let you override the meter’s exposure setting by dialing in a compensation setting to lighten or darken the image.  If your subject is backlit, you will likely want to increase the exposure by one to two stops (each “stop” of additional exposure represents a doubling of the amount of light reaching the sensor).  The camera’s display should show something like “+1 EV” to alert you that you’ve dialed in 1 extra stop of exposure, and the number changes as you change the compensation setting.  Just be sure to set the exposure compensation back to zero when you’re done using it.
  3. Go fully manual: To gain complete control over your camera’s exposure settings, choose the meter’s Manual mode.  Then you can change all three exposure elements (shutter speed, aperture, and ISO) until the image appears properly exposed when you review it on your camera’s display.
  4. Use flash to increase the lighting on your main subject: One good way to achieve proper exposure with a backlit subject is to increase lighting on the subject itself, so that there is no longer such a difference in brightness between the subject and the background.  Your camera’s built-in flash may be strong enough to pull off this trick, but it often helps to have a more powerful flash unit with you.  There are some other reasons why you may not want to use flash as a main source of light on your subject, so this method should be used sparingly.  A reflector can be used instead of flash to reflect some of the sun’s light onto the front of your subject.

For this photo shoot with a musician friend, I shot into the light so she wouldn’t have to squint into the sun and also so that we’d have a beautiful rim light from the sun around her hair.  To pull this off, I used manual mode and selected the proper exposure for her face.  I employed a reflector to bounce some sunlight back onto her face and trumpet.  [Client image not for sale.]

Similar methods can be used for other challenging lighting conditions besides backlighting.  If the subject is a brighter or darker color than the “neutral gray” your camera’s meter uses for a standard, then you need to dial in more or less exposure as appropriate.  My black cat Dragonfly, for example, requires an especially dark exposure to override the meter from thinking he’s a gray cat and choosing too bright an exposure.  Similarly, a white polar bear will need additional exposure to stop the meter from underexposing what it assumes to be a gray bear.

When photographing a black subject, reduce the exposure to compensate for the light meter’s mistaken assumption that the subject is a neutral gray color.  Buy this photo

Whatever method you use to choose your exposure, be sure to take a look at the resulting image using your camera’s monitor.  Does the main subject appear to be properly exposed, or is it still too dark or perhaps too bright?  If your camera offers a histogram display, learn how it works and use it to check your exposure in tricky lighting conditions.  I’ll write a future post specifically about the histogram, as it is a very useful and often overlooked feature.

With some attention to the exposure of your images and use of some of the techniques described here, you can achieve a correctly exposed image nearly all of the time.  After mastering the essentials of exposure, you will have more keepers and fewer images in the virtual trash can, and you can even begin to break the rules for artistic effect.

Want to see more posts on photographic techniques?  You can find them all here: Posts on Techniques.

What lighting situations do you find the trickiest?  What techniques do you use to ensure properly exposed images?  Please share your thoughts in the comments box.

Bracketing: Hedging Your Bets [Encore Publication]: In challenging shooting conditions, exposure bracketing is a great insurance policy

In the old film days of photography, it would be days or even weeks after shooting before we could see the results.  I would routinely use a procedure called “bracketing” to make a series of shots, each at a slightly different exposure, to increase the odds that one would come out decently exposed.  Even today, when digital photography allows us to see the results immediately, there are two good reasons to employ the exposure bracketing technique: 1) it can be hard to assess on a small LCD screen in bright daylight and while in the excitement of shooting whether the exposure is really correct, and 2) when the contrast between the brighter and dimmer parts of the scene is high we may want to stitch several different exposures together using software to create a high dynamic range (HDR) image later.

Tricky subjects, like this tiny Svalbard reindeer against a glacier background, benefit greatly from exposure bracketing.  From a series of 5, 7, or even 9 images shot at slightly different exposures, you can choose the one with the correct exposure for the conditions.  Buy this photo

So there are still good reasons to use exposure bracketing, and fortunately, it is quite easy to employ this technique.  Here’s how.

If possible, mount your camera on a tripod when using bracketing so it won’t move between exposures.  Then you can combine several of the exposures into an HDR image later if desired.

If your camera has a bracketing button or menu item, use it to specify how many shots you want to take (I usually shoot 5 or 7 different exposures when bracketing) and how much you want to vary the exposure between each shot and the next (often I choose a 1-stop difference).  If your camera lacks this feature, you can still use bracketing by manually adjusting the exposure between each shot and the next; just use your camera’s exposure compensation control to dial in first -2 stops, then -1 stop, then 0, then +1 stop, and finally +2 stops.

I like to set my camera for continuous shooting while bracketing.  That way, I just hold down the remote shutter release and the camera shoots all 5 or 7 exposures in rapid succession.  But it’s fine to shoot each frame individually in single release mode, if you prefer.

There are some subtleties to think about when employing exposure bracketing.  Some cameras let you choose whether to vary the aperture, the shutter speed, or the ISO setting, while holding the other two settings constant.  In most cases, I prefer to vary the shutter speed and hold the aperture and ISO settings constant, because changing the aperture affects the images’s depth-of-field, and changing the ISO setting can affect the noise in the image.

Later, during post-processing, you review the images and choose the one that is properly exposed.  Or if the scene is very high contrast, you can use photo editing software such as Lightroom or Photoshop to stitch several frames in your series together into an HDR image, which ensures good exposure from the brightest to the darkest tones in your photo.

Several exposures were shot using bracketing and then combined in Photoshop to create this HDR  image.  All tones from the darkest shadows on the mountain walls to the brightest highlights on the icebergs and lake are properly exposed in the final image.  Buy this photo

Have you used exposure bracketing techniques?  What are your best practices?  Do you use this process mostly for selecting the best exposure or for creating HDR images?  Please share your thoughts here.

Are you interested in learning new travel photography techniques?  Follow this link to see all the posts on techniques: Posts on Techniques.

Capturing the Creative Process [Encore Publication]: How to document an artist’s work using your own artistic vision

Capturing images of the performing arts is a specialty of mine, as well as one of my absolute favorite genres of photography.  But as gratifying as I find documenting live performances of dance, music, or theater, there’s a whole higher level of photographic joy available from capturing the artist’s creative process before their work reaches a public audience.  Today’s post focuses on a recent behind-the-scenes shoot that I did for a friend and longtime collaborator, Arina Hunter.

I arranged to shoot her dress rehearsal just before the first of two public performances as part of San Francisco’s SAFEhouse for the Arts RAW (Resident Artist Workshop) program.  Arina was preparing to perform an untitled work-in-progress which was quite complicated technically, so it was fascinating to watch her process of making artistic decisions and readying herself and the technical crew for the evening’s show.

Read on to see some of my favorite images from the rehearsal, accompanied by a few thoughts about my own artistic and technical process that went into the capture of Arina’s work.

All of these images are available for sale on my website.  Just click on any image to view them in the online gallery.

The creative process is about more than just practicing for a performance.  Try to include some wider views depicting the artist’s full environment including equipment, sets, and performance space.

The flip side is that it’s also important to get up-close and to capture the physical work that goes into preparing for a performance.

Shoot plenty of frames to maximize the chances of capturing the “decisive moment” when the artist’s work comes together as an integrated whole.

Typically there are several different moods evoked in a single piece of art.  This image captures a vulnerability and poignancy that informed Arina’s work even as much of her physical performance exudes strength.  Finding the right perspective to convey each mood is key to making successful images.

When post-processing my images, I ask myself how can my own technique best convey the artist’s intention.  For this image I decided a monochrome conversion would best render Arina’s physicality at this precise moment during her process.  Freeing the viewer from the anchor of color perception, a black-and-white image is graphic and timeless and allows us to focus on what is elemental: form, contrast, shadow, and light.  

I shot this image from a low perspective near the ground so as to juxtapose Arina’s body with the projected video image on the wall.  Always look for a different perspectives while shooting that can create compositions to get across your intent.

Another example of perspective: To make this image I climbed on top of a chair and shot down on Arina in her performance space. 

Sometimes the details convey the story better than the whole.  This closeup of Arina’s paint-covered hand framed by colorful canvas makes a powerful summary of her performance piece.

Today’s post has been a bit more conceptual and less technical than most of my posts.  The purpose is to get you thinking about how our own art of photography can be harnessed to capture the creative process of other artists.  The next time you are privileged to get to shoot an artist at work, think about how you can apply elements such as composition, perspective, color, texture, empty space, motion, and stasis to capture compelling images of the artist’s own vision!

Do you have techniques you’ve used to document other artists’ creative process?  Please share your thoughts here.

Want to read other posts about photographic techniques?  Find them all here: Posts about techniques.


How Do I Shoot Thee? Let Me Count the Ways! [Encore Publication]: Professional tips for capturing couples

One of my favorite photographic genres is capturing images of couples.  Whether it’s a pre-wedding shoot to make images for use in the couple’s wedding invitations or a holiday or anniversary shoot for use in cards and social media, these assignments are great fun because each is as unique as the couple themselves.  Today’s post is a case study of couples portraiture based on a recent pre-wedding shoot I did for Gayathri and her fiance Abhishek.

Many photographers make the mistake of assuming they need a lot of cumbersome and expensive gear to make professional images of couples.  In fact, in most of my couples photo sessions I use only two DSLR bodies, each fitted with a different fast prime lens (in this case, a 50mm f/1.4 and an 85mm f/1.8), and a set of inexpensive reflectors and diffusers.  A speedlight or two can also be helpful, but for on-location couples shoots there is rarely any need for studio lighting.  Keep it light and simple, and stay open to the special moments that truly show the couple’s distinctive style and love for each other.

Gayatrhi and Abhishek were great fun to shoot because of their distinctive, dynamic, and theatrical style.  With the rental of a tandem bicycle and the addition of a simple floral bouquet prop, we were ready to capture amazing images of the two of them interacting.  A fast prime lens allows quick and easy shooting, the choice of a wide range of apertures to control depth-of-field, and the option to freeze action with a fast shutter speed.

Not all couples shots have to be posed and static.  I love capturing the couple in motion to get a sense of the thrill and excitement they feel by being together.  Here I panned the camera while they rode past to keep sharp focus on the couple while blurring the background.  The sense of motion and tight crop lend this image a dynamic feel.

Get creative during post-processing to lend your images a distinctive look.  Here I retained richly saturated colors for the couple on their tandem bike, while rendering the background in black-and-white.  This juxtaposition gives a magical, Wizard of Oz-like feel to the image.  Gayathri and Abhishek are riding into their future together, bringing all the colors of the world with them.

During all my photoshoots, I like to capture multiple locations (and preferably multiple outfits) in order to give my clients a varied portfolio of images spanning different moods and backgrounds.  Finding a miniature pumpkin patch by the shores of a sailing lake gave us a playful prop for a new series of images.

An 85mm portrait lens set to a moderately shallow depth-of-field allowed me to capture this playful scene.  I wanted the couple to be pin-sharp while the background was slightly soft but still recognizable as a lakeside setting.  Just remember when shooting groups of people that you need a deep enough depth-of-field to ensure sharp focus on all of their faces; for that reason, I don’t usually recommend shooting wider than about f/2.8 for couples or about f/4 for larger groups.

While I may suggest a few poses or ideas to my clients, I’m not a fan of staged poses.  Instead, I like to let the couple interact as they naturally do.  This priceless moment captures their sense of fun and their flair for the dramatic.  A wide aperture allows for sharp focus on the couple while softening the background to keep the emphasis on them.

I always ask my clients to bring a few props with them that represent something they love to do together or reflect their interests.  Because Abhishek is a huge cricket fan, he and Gayathri posed with bats and balls while wearing shirts emblazoned with his name and number.  These kinds of shots emphasize what is unique about the couple.

Remember to shoot from all angles: above, below, front, back, left, and right.  Sometimes the best images are not shot from the conventional perspectives.

If possible, try to include time for the couple to change outfits at least once during the shoot.  This allows for more styles and moods, and provides images that can be used for more purposes.

The grounds of a lovely Victorian mansion provided a great backdrop for another shooting locale after an outfit change.  Both Gayathri and Abhishek have dance experience, so it was natural they would want to perform for the camera.  Whenever the action is fast-paced, be sure to shoot with a fast shutter speed and the appropriate focus settings, and keep shooting continuously to ensure you catch just the right moments. 

I often try to schedule shoots for just before sunset when the “golden hour” lighting is soft, flattering, and evocative.  My favorite technique for portraits is to shoot with the sun behind the couple.  This provides lovely lighting on the hair, a beautiful saturated background, and a relaxed squinting-free pose.  To make this technique work, I meter off the subjects’ faces to avoid their becoming silhouetted, and I often use a reflector to shine some of the sunlight back onto their faces and fill in the shadows.  An assistant can be very helpful for holding the reflector.

Parting shot: This lovely capture was made by spot-metering off the couple’s skin and having my assistant aim a gold reflector onto their faces.  

Do you have tips and techniques for shooting couples?  Please share them here.

Want to read more posts about photographic techniques?  Find them all here: Posts about techniques.

Note: These private client images are not available for purchase.

Cool, Calm, and Composed [Encore Publication]: All the technology in the world can’t replace your vision when composing images

Photographic composition is the process of determining which elements to include in the image and how to combine them in an artistically pleasing way.

What makes a great photograph?  You’ll hear many different answers to this question from different people, but to me a great photograph needs to integrate at least three of these four elements: compelling subject, beautiful light, flawless technical execution, and thoughtful composition.  Assuming we can find a great subject and either find or manufacture lovely lighting, the technology in modern cameras can assist us in certain technical matters such as exposure and focus.  But even the best of today’s AI technology can’t replace the artist’s vision when it comes to photographic composition.  For more of my musings on the application of AI to photography, see yesterday’s post: Post on AI and Photography.

Today’s post presents a quick primer on some of the guidelines that can help us compose our images.  But keep in mind that there are no hard-and-fast rules when it comes to composition.  The photographer must choose which “rules” to use when composing, and when to break some rules.

      • Rule of Thirds: One of the first compositional tools most beginning photographers learn is the so-called Rule of Thirds, which states that strong composition is achieved by placing key elements along the imaginary lines that divide the frame into thirds vertically and horizontally; better yet, try to place the most important parts of the subject at the intersection of a pair of these lines.  This portrait I made of two sisters in Arusha, Tanzania, places each sister’s dominant eye at an intersection point of two of the imaginary dividing lines.

Tanzania Buy this photo

          • Leading Lines: Another tool to aid in composing strong images is using the natural lines in the image to draw the viewer’s eye into the frame.  This landscape made while hiking part of the Sheep’s Head Way in southwestern Ireland incorporates the leading lines of the ancient stone wall, the rainbow, and the coastline to draw the eye down to the sea, over the rainbow, and across the coast.

 Buy this photo

          • Framing Elements: Using natural frames within the image to set off the main subject can be a useful technique.  Look for doors and windows in a population center, or for natural arches, trees, and other landforms in a natural setting.  This night landscape made in Yosemite National Park frames the Milky Way within a ring of trees and granite walls.

 Buy this photo

          • Point-of-View: Think about how the different elements in the image will appear in the perspective of your location.  I could have shot this portrait of a man with his duck at a street fair in San Francisco straight on with them both looking into the lens.  Instead, I chose a viewpoint that was very close to the duck’s head, shooting up from its perspective and relegating the human to the background and edge of the frame, nearly out of focus.  This changes the nature of the portrait to a more humorous and offbeat tone, which matched the occasion of the How Weird Street Faire.

USA Buy this photo

          • Background: Always be at least as aware of your background as your foreground subject matter.  Careful choice of background to support your image’s overall theme is one of the surest ways to elevate your image.  In many cases it is desirable to have a clean, uncluttered background, but for this image of the San Francisco Pride Parade, I wanted the background to support the theme of solidarity and strength in numbers.  While the main subject in the front is the only element in crisp focus, the layers of marchers with flags behind him supports the concept he is not alone.

 Buy this photo

        • Patterns: Composing an image around a recurring pattern can add considerable dramatic impact.  I framed this image of miners’ cottages in Svalbard, Norway by isolating the repeating pattern of houses, each in a different vivid color, against the stark white of the snow and bleak sky.

 Buy this photo

  • Symmetry: Images with symmetry along one or more dimensions are often striking and artistically pleasing.  The subject can have natural symmetry, such as in a face, or can be framed with its reflection to create symmetry.  I framed this image of a resting alligator with its reflection in the Louisiana bayou waters to create a dramatic symmetry.

 Buy this photo

Keep these guidelines in mind as you choose how to compose your images, but remember that which one(s) you apply will depend on the image, that its okay to break the rules, and that ultimately you are the artist and what you envision, not what the rules state, is correct for you.

What guidelines help you compose your best images?  Please share your thoughts here.

Want to read more posts about photographic techniques?  Find them all here: Posts on Techniques.

Please Join Me for a Photo Walk/Workshop in SF’s Mission District: Learn travel photography techniques to capture a sense of place

Dear Readers,

I’ve added new dates weekly through the rest of the summer for my highly rated photo walk/workshop in San Francisco’s Mission District.  If you live in or will be visiting the SF Bay Area, please join me for this informative hands-on workshop.  This experience is suitable for photographers of any level from beginner through professional.  We will learn travel photography techniques that cover many photographic genres and can be applied to any location you visit to capture a strong sense of place.  I’m partnering with Airbnb Experiences to offer this series of special photo workshops.  More details can be found here: https://www.airbnb.com/experiences/227047.

Photo Workshop: SF’s Mission District

Arts experience
Hosted by Kyle
The host of this experience
3 hours total
Drinks
Offered in English
About your host, Kyle
I’m a professional travel photographer based in the San Francisco Bay Area. A recent winner of the international competition Travel Photographer of the Year and shortlisted for the National Geographic Travel Photography Awards, I’ve shot in over 100 countries. My work has been published and exhibited widely. My passion is helping fellow photography enthusiasts learn to use their camera as a bridge to the local culture and land wherever we travel. When not traveling and teaching workshops around the world, I can be found capturing photos of the wonderful people and places around SF.
What we’ll do
Join a professional travel photographer as we explore one of SF’s last remaining true neighborhoods for a fun photo workshop filled with historic, architectural, artistic, and cultural attractions. The Mission District, named for the Spanish mission built there in 1776, is a vibrant Latino neighborhood that in recent years has undergone some gentrification, overlaying a hipster vibe on top of the still strong bedrock community. We approach our exploration as true travel photographers, not as tourists seeking “postcard shots”. I’ll share my award-winning tips and tricks to help you capture amazing images regardless of your experience level. The skills we practice today–covering many photographic genres including architectural, cityscapes, street, and portraiture–will give you a toolkit to draw from during your future travels. We seek a “sense of place” that roots our images to the place and the people we meet. In the middle of our walk, we rest our feet at a local cafe for an included coffee drink and the chance to review some of our photos. Our small group size allows for plenty of interaction and the chance to get your questions answered.
What I’ll provide
One coffee drink up to $5 ?
Who can come
Guests ages 12 and up can attend.
Notes
Guests should be prepared to walk about 3 miles, including some hills. Bring your gear (any kind of camera or phone) with a fully charged battery and memory card with room to spare for your photos.
Where we’ll be
We’ll visit and photograph these Mission District locations: – Misión San Francisco de Asís (Mission Dolores) – Clarion Alley Murals – The Women’s Building – Dolores Park We stop along the way at a local cafe for a coffee drink and photo review (and restrooms).
Where we’ll meet
Misión San Francisco de Asís (Mission Dolores) · Mission District, San Francisco
Upcoming availability
Thu, Jun 7
3:00 PM − 6:00 PM · $79 per person
Wed, Jun 13
3:00 PM − 6:00 PM · $79 per person
Thu, Jun 21
3:00 PM − 6:00 PM · $79 per person
Reviews

悦Yue

悦Yue

May 18, 2018
Kyle is awesome ,if you just have just one chance to join one Airbnb Experience in San Francisco, choose his.We had a lot of fun to explore the Mission District where is super great for the photography:the colorful walls, the secret spots only Kyle knows.This is a photography workshop, Let’s talk about photos.Kyle is so professional both for the knowledge and the skills, we have one of the best job in the world – Travel photographer, and we have so much words to share with the trips, the masters we like in photography history, he is a really good teacher, but very modest to say we can learn from each other.He capture some beautiful moments in the exploration together, and send me very quickly when he back,I will share some in my ins, you will feel excited when you see the color ,the moments he shoot, really cool.Kyle is a really nice & warm human being ,perfect host I ever met, always responsible for any of your questions, prepare very serious before we start, he already know my character/things I do best before we met, when we begin the tour, he share the informations he knows about the buildings, cultures, whatever…Thank you for all the things.I feel lucky to choose the experience which made me love SF more than before. 想要见识一下旧金山比较有趣,Cool,色彩丰富的一面,并且想要拍一些好看的照片,学习一下摄影知识的,都推荐这个行程。关键是摄影师人太好了,超级认真,会为这个体验准备到完美。我最初是被他封面的图片吸引了,就抱着好奇参加了一下,没想到收获了很多惊喜,也结识到了一个当地的好友。在咖啡馆喝一杯咖啡,在公园的高处俯瞰当地人的生活,和城市的悠然,双脚有力地走在这个街区里,穿过色彩斑斓的小巷,都是很美妙的体验。还能学到东西,收获摄影师的专业照片,极棒了。
Group size
There are 8 spots available on this experience.
You don’t have to fill all of them. Experiences are meant to be social, so other travelers could join too.
Guest requirements
Bringing guests under 18
If you bring a guest that’s under 18, it’s your responsibility to make sure the activities they participate in are age-appropriate.
From the host
Guests should be able to comfortably walk about 3 miles including some hills.
Who can come
Guests ages 12 and up can attend.
Experiences cancellation policy
Any experience can be canceled and fully refunded within 24 hours of purchase. See cancellation policy.

Focus on How Weird Street Faire [Encore Publication]: A case study on simple techniques to capture winning images of festivals

As a professional travel photographer, I shoot regularly in nearly all genres of photography.  A typical day on the road might include shooting landscapes, wildlife, cityscapes, portraits, action (sports, dance, performance), and nighttime photography.  While I enjoy all types of shooting, my great joy as a photographer is capturing portraits of the people I meet.  Whether close to home or halfway around the world, getting to know the people and learning about their culture through making portraits of them is a wonderful experience.  And there’s no better way to capture images of many amazing people in a short time than by attending local festivals.  People tend to be their best selves at special celebrations like festivals and street fairs.  They dress exuberantly, dance with abandon, make new friends quickly, and (nearly always) are overjoyed to pose for photos.

I shoot about a hundred festivals and other special events every year, so I’ve learned a few tips about how to make the best images during these occasions.  In today’s post I share some simple but effective techniques for capturing great portraits at festivals and other gatherings, using San Francisco’s recent How Weird Street Faire as a case study.  How Weird is a vibrant and colorful, only-in-SF, annual celebration of individuality, tolerance, music, art, and hula hoops.  Read on to see some of my favorite images from this year’s festival, presented along with some discussion of how they were made.  To view more of my images, or to buy some, check out this gallery: How Weird photo gallery.

I see a lot of fellow photographers at events like How Weird shooting with huge telephotos and even tripods, like they’re after images of wildlife on a Kenyan safari.  In my opinion, they are missing the point.  We’re making portraits of people here, so use a normal or moderate telephoto portrait lens, preferably a fast prime lens, ditch the tripod and monopod at home, and get in close to chat with and get to know the people you’re photographing.  When you interact with people, you get a sense of what makes them special, allowing both you and them to capture that special trait in your photos.  Random sniping from far away with a long telephoto will yield far more bland and generic photos.  All of my images at How Weird Street Faire were made with a single camera body and one lens, my trusty 85mm f/1.8 portrait lens.  Sometimes simple is better, especially when it comes to capturing people at fast-moving events.

Larger groups can be challenging to capture in portraits, particularly in bustling spaces like those of a festival.  When they couple I was chatting with suddenly ran into a friend and they had a group hug, I quickly stepped back a few paces and made this expressive and engaging portrait.  It’s okay to break the rules sometimes–here, one of the subject’s faces is completely obscured and another’s is partially obscured, yet the portrait works because it captures the energy and affection of the moment.

When photographers argue that the “street photography” approach (candidly sneaking images of people who aren’t aware they’re present) is the best for capturing people’s true essence, I show them images like this one.  This wholly genuine and unguarded moment of the girl dancing was made with her full knowledge and permission.  The trick is to chat with the subject and get their permission for photography first, then to lay back for a while and let them go back to what they were doing.  After a few minutes, they’ll nearly forget you’re there and they will reveal their true selves.  But unlike shots you sneak without permission, now you have a subject happy to have you photographing them, and you can take your time and not have to rush your work in order to hide your shooting from them.

Often we see only the most obvious subjects at crowded, chaotic events like festivals.  It’s easy to spend all our time shooting people dancing, partying, and displaying their costumes, but I try always to look for the more hidden people and infrastructure that support the event.  This DJ was partially hidden atop the big dance stage and behind the banks of speakers, but she made a fun subject for this portrait.

Don’t be afraid to get in close.  This portrait really pops because the tight composition allows us to focus our attention on the symmetry and color of the subject’s hair and costume.  

The interactions between people are at least as much fun to observe and capture as the individuals themselves.  I had chatted with and photographed a group of people for a few minutes when I observed this fun interaction, so I stepped back and framed some shots of the two young people together.

While post-processing my images after the shoot, I decided to render this one in monochrome to achieve a gritty urban street scene sort of feel.  Often color can distract from the power of an image, so always consider which of your images could benefit from conversion to black-and-white.

In ordinary daily life, I find that perhaps two-thirds of people are willing to have their portrait made if the photographer spends some time getting to know them first and then asks politely.  But at a festival, nearly everyone is excited about posing for portraits.  The trick is to capture scenes where they show you their underlying personalities a bit, rather than just striking a cliched pose for the camera.  To achieve that here, I spent a few minutes shooting, asking the couple to pose in different styles and have fun with it.

Putting it all together.  Here’s a summary of the basic techniques I use when shooting portraits at festivals:  1) Use a fast prime normal or portrait lens.  2) Set your camera for a fast shutter speed (1/500 second or faster is good for dancing and other fast action), wide aperture (f/2.5 or wider is ideal except for large groups) to isolate the subject, and an ISO appropriate to the lighting of the scene (I used ISO 100 the whole day due to the bright outdoor light).  3) Get to know your subject before shooting, let them relax, and capture them during an authentic moment.  4) Try to compose the portrait with as uncluttered a background as possible; of course, this is often difficult at crowded festivals.  5) During post-processing, crop to clean up the scene and then vignette just a touch to further clean up busy backgrounds.

I hope this discussion of techniques to capture portraits during festivals has been helpful.  The best way to learn these techniques and to find your own style is to shoot and shoot some more!

Please leave a comment with your own thoughts and tips about how to make great images of people at celebrations.

Want to read more posts about photographic techniques?  Find them all here: Posts about techniques.

Beyond the Auto Mode [Encore Publication]: Take control of your images by learning to manually set exposure, focus, and more

Travel photography is so exciting and satisfying in part because it requires us to capture every kind of image in all kinds of shooting environments.  You could be heading out to shoot landscapes when suddenly a rare sighting of an animal transforms your activity into a wildlife shoot.  Or you may be on the road for your next destination when you stumble upon a colorful local festival, and now you’re shooting portraits of the revelers.  This rich diversity of subjects also creates one of the biggest challenges for travel photographers: how to be prepared for anything that comes our way.  For beginning photographers there is some comfort in using the Auto mode that nearly every camera offers.  After all, we’re more likely to get an acceptable shot this way, when the subject turns quickly from fast action to landscapes to the low light of evening, or to an indoor performance.  But in most cases, your camera’s Auto mode, which attempts to make its best guesses as to what settings to use given existing conditions, will yield only acceptable photos and not the striking and memorable images we’re after.

There is a better way.  Take control of your images by learning how to manually set your exposure, focus, and other aspects of your photo.  All advanced point-and-shoot cameras and all mirrorless and DSLR cameras allow you to set most functions manually.  Even some basic point-and-shoot models have a way to go manual, but often this will involve options buried deep in a menu somewhere.  And there are apps available for both iOS and Android smart phones that allow you to take manual control over your phone’s camera.  I use an iPhone 6S, and I’ve found the “ProCam 4” app to work very nicely for providing control over the phone’s camera setting for exposure, focus, and flash.  You can find it for less than $5 on the Apple App Store: ProCam 4 App.  Even without using an app, most smart phone cameras do allow you to override the automatic settings by clicking on the part of the image you want to be in focus and used for the exposure setting; usually you can also set the exposure based on a different area of the image from the area that you want to be in focus.  But the dedicated apps will give you greater control, as they allow you to choose the shutter speed, aperture (when not fixed), and ISO for each shot.

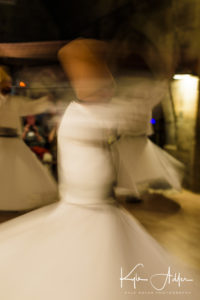
For this image of a whirling dervish in Goreme, Turkey, I wanted to blur the dancer so as to give a sense of the continual turning motion in the ceremony, so I used my camera’s shutter-priority exposure mode and selected a slower shutter speed.  Buy this photo

The key to successfully using your camera’s manual settings is to learn how they work and to practice at home, long before you actually take a trip.  Like anything else, selecting the settings we want on a camera takes practice.  In this digital era, it’s easier to learn because you can see the results of each setting immediately on your camera’s screen.  So dig out that camera user guide, or find it online, or search for a good tutorial.  But do learn how to adjust the key settings manually.

The first manual setting every photographer should learn is how to turn off your camera’s flash.  This sounds very basic, but I’m always amazed to see so many flashes going off in inappropriate places: museums that don’t allow flash photography, cultural performances, sports stadiums where the subject is thousands of feet away from the camera (the flash will only provide acceptable lighting for a few dozen feet, at most), and even the shy octopus exhibit at our local aquarium.  Believe me, you do not want to flash the octopus.  So learn how to turn your flash off, and be sure you actually do turn it off when you’re in a venue where flash is inappropriate or won’t help your image be better exposed.  Remember that glass reflects light, so you don’t want your flash on when shooting through windows of a vehicle or the glass windows of animal enclosures at zoos or aquariums.

Next, learn how to set your camera’s exposure manually.  The light meters built into today’s cameras are very smart, but they are also easily fooled by tricky lighting conditions.  The most common problem is backlighting.  If your subject is lit from behind, as many outdoor subjects are, your camera’s auto mode will likely expose for the brighter background and will leave your main subject underexposed.  You can adjust for this is several ways.  It may be good enough to just use your camera’s exposure compensation button to dial in, say, one extra stop of exposure.  Use your camera’s LCD screen and (if it has one) the histogram, to see how the subject is exposed with varying levels of compensation.  In some cases (if your main subject is quite close to the camera), you can use fill flash to fix backlighting problems.  To do so, manually turn on your camera’s flash, or attach a separate flash unit, and choose the setting for “fill flash” or “balanced TTL” (through the lens) flash mode.  Again, check exposure using your camera’s screen and histogram.  I find I usually get good results in tricky lighting conditions by using my camera’s spot metering mode, which tells the camera’s meter to use only the very center (or whatever area I select) of the image when choosing the exposure.

Other than allowing you to properly expose your main subject, manually setting the exposure also gives you control over what combination of shutter speed (how long the exposure lasts), aperture (how wide the lens is open), and ISO (how sensitive the camera is to light) you want for each shot.  If you’re shooting fast moving action like sports or wildlife, you will likely want to choose a fast shutter speed to freeze the motion (unless you want a blur effect as an artistic choice).  If you’re photographing a waterfall or sky and want to get some nice blurring of the water and/or clouds, you will probably want to choose a slower shutter speed.  Many times you want only certain parts of the image to be in focus.  A wide aperture (low F-stop number such as f/1.8) will give you a shallow depth-of-field, allowing only one part of the image to be in focus and blurring the other parts.  Conversely, a narrow aperture (high F-stop number such as f/16) will allow all parts of the photo to be in focus.  The final element determining exposure is the sensitivity of the camera’s sensor, measured by an ISO number.  Select a higher ISO (such as 1600 or above) only when you really need the extra sensitivity for very low-light subjects when a longer shutter speed or wider aperture is not suitable.  When you use very high ISO settings, the image will tend to have a lot of noise.  Today’s cameras are getting better at limiting noise at high ISO settings, and there are ways to reduce some of the effects of the noise using post-processing software, so my approach is to use as high an ISO as is required after considering the range of available shutter speeds and apertures.

To capture these professional beach volleyball players in sharp focus and to freeze the moment, I selected single-focus-point focus mode and chose the exact spot in the viewfinder where the players would be positioned, and also used my camera’s shutter-priority exposure mode to select a very fast shutter speed.  Buy this photo

The other major type of manual setting that you need to know how to use is focus.  Most cameras today do a pretty good job of choosing the right part of the image to focus on, but they often need some help from the photographer.  From simple smart phone cameras through professional DSLRs, the autofocus function almost always lets the photographer select what part of the image they want to be in focus.  If you keep your camera in fully autofocus mode and don’t help by selecting where your main subject is, it may very well guess incorrectly and put another part of the image as the center of focus.  So, learn how to select the focus point even while letting your camera’s autofocus mechanism actually choose the focus distance.  Sometimes a camera’s autofocus capability may not work for the conditions under which you’re shooting, and in these cases you need to turn off autofocus completely, and focus in manual mode.  Some instances when this is necessary are when shooting in very low light conditions, or when shooting in poor contrast environments (for example, your subject’s texture looks a lot like that of its background, or you’re shooting into the bright sun).  In these cases, turn off the autofocus function and adjust focus manually until the subject looks sharp.

It’s still fine to walk around during your travels with your camera set in fully Auto mode, just in case something very unexpected comes up.  But do know how to set the main functions manually so you’ll get the best possible images in the 95% of the shooting situations when you do have time to set up first.

Want to read other posts about photographic techniques?  Find them all here: http://www.to-travel-hopefully.com/category/techniques/

Do you have tips and tricks you can share on manually adjusting the camera’s settings to get great shots?  How about a time you kept the camera on Auto mode and got disappointing results?  Please share your thoughts using the comment box at the end of this post.

Focus on Tahiti Dance Fete [Encore Publication]: A case study in shooting under challenging circumstances

The travel photographer must be prepared to shoot under challenging circumstances, because often we have little control over the conditions in the field.  We may plan our travel years in advance to observe and photograph a total solar eclipse, only to wake up on the morning of the eclipse to find the sky is totally overcast.  Or we could make arrangements months ahead to be at a major cultural festival, but learn upon arrival that the area we’re shooting from is hundreds of yards from the action.  These things happen, but the professional photographer still needs to get her shot.  So, what can be done to persevere and increase our odds of getting usable images under adversity?  The answer, of course, depends on the specific circumstances of each shoot, but there are some general tips I can offer.  Today’s post presents a case study based on my recent shoot of the solo dance competition at the Tahiti Fete in San Jose, California.

The dancers made lovely subjects, but the shooting conditions were very challenging.  Read on to learn how to make the best of a difficult situation.  Buy this photo

Upon arrival at the dance competition, I realized immediately that this shoot would be challenging.  It was held in a cramped hotel convention room with a makeshift stage, rows of folding chairs for spectators, insufficient lighting of poor color quality, and a bank of judges blocking most of the view of the stage.  To make matters worse, the room was packed with people, many of whom stood up to cheer on their friends, and the only available seats were near the far end of the room.  An extra challenge was thrown into the mix by the cluttered and unattractive background behind the performers on the stage.

Cluttered backgrounds are a significant obstacle, but good images can still be made in these situations.  Buy this photo

What can be done to mitigate against a cluttered background?  I shot plenty of images of each dancer to increase the likelihood that I could eliminate some of the more distracting background elements while still capturing the excitement, grace, and colors of the dancing.  This image was the best I could capture of this particular dancer, so I committed to it in post-processing.  I cropped the image to avoid the most distracting elements, adjusted the exposure curves, contrast, and sharpness of the background to de-emphasize it, and applied some post-crop vignetting to ensure the dancer would be highlighted.

When using a very high ISO, some noise will result.  This doesn’t have to be a disadvantage.  Buy this photo

The lighting was very dim at this venue.  Because I was shooting from far away, I needed to use a long telephoto lens, which limited me to a small aperture and no possibility of using flash.  Nonetheless, a fast shutter speed was required in order to freeze the fast action of the Polynesian dancing.  This combination (low lighting, small aperture, and fast shutter speed) leaves no option other than a very high ISO setting.  I shot the above image at ISO 6400.  Even with an excellent professional camera sensor, such a high ISO will generate some noise in the image.  Noise can often be reduced to acceptable levels during post-processing.  But for this particular image, I was aiming for a soft, painterly feel.  The visual effect of high contrast, soft colors, and a bit of visual noise here gives the feel of an impressionistic rendering.  For this expressive Tahitian subject, I was very happy to have a Gauguin-esque style shine through in the final image.

 Cut out elements that don’t work.  Buy this photo

To make the above image, I cropped out distracting portions such as the judges’ heads in the foreground and an ugly door and wall in the background.  The resulting aspect ratio is non-standard, but works well for this image.  I desaturated the background and used post-crop vignetting to focus attention on the dancer.


Black-and-white renderings can be more forgiving when color quality is low.  Buy this photo

This image portrays a lovely subject but the lighting was especially poor.  Realizing I couldn’t do much to mitigate the strange color cast resulting from the artificial lights, I converted the image to monochrome, boosted the contrast, and adjusted the color channel mix to render a pleasing and elegant final image.  Check out this post to learn how black-and-white conversion can be used to save the day when color temperatures or image noise are problems: Post on B&W conversion to save strangely colored images.

Bringing it all together: This image works nicely in spite of all the challenges present at the shoot, including foreground obstacles, dim and low quality lighting, a far-away vantage point, and a cluttered background.  Buy this photo

In spite of multiple significant technical issues, I was able to make some striking images of the lovely dancers at this Tahitian festival.  Hopefully, the tips presented here will help when you next are faced with a challenging shoot.  The most important thing is to keep shooting as best you can while in the field.  There are multiple methods you can use in post-processing to mitigate against the shooting challenges and end up with images you will be proud of.

What techniques do you use when faced with difficult shooting conditions?  Please share your thoughts here.

Want to read more posts about photographic techniques?  Find them all here: Posts on Techniques.

Please Join Me for a Photo Walk/Workshop in SF’s Mission District: Learn travel photography techniques to capture a sense of place

Dear Readers,

I’ve added four new dates this month for my highly rated photo walk/workshop in San Francisco’s Mission District.  If you live in or will be visiting the SF Bay Area, please join me for this informative hands-on workshop.  This experience is suitable for photographers of any level from beginner through professional.  We will learn travel photography techniques that cover many photographic genres and can be applied to any location you visit to capture a strong sense of place.  I’m partnering with Airbnb Experiences to offer this series of special photo workshops.  More details can be found here: https://www.airbnb.com/experiences/227047.

Photo Workshop: SF’s Mission District

Arts experience
Hosted by Kyle
The host of this experience
3 hours total
Drinks
Offered in English
About your host, Kyle
I’m a professional travel photographer based in the San Francisco Bay Area. A recent winner of the international competition Travel Photographer of the Year and shortlisted for the National Geographic Travel Photography Awards, I’ve shot in over 100 countries. My work has been published and exhibited widely. My passion is helping fellow photography enthusiasts learn to use their camera as a bridge to the local culture and land wherever we travel. When not traveling and teaching workshops around the world, I can be found capturing photos of the wonderful people and places around SF.
What we’ll do
Join a professional travel photographer as we explore one of SF’s last remaining true neighborhoods for a fun photo workshop filled with historic, architectural, artistic, and cultural attractions. The Mission District, named for the Spanish mission built there in 1776, is a vibrant Latino neighborhood that in recent years has undergone some gentrification, overlaying a hipster vibe on top of the still strong bedrock community. We approach our exploration as true travel photographers, not as tourists seeking “postcard shots”. I’ll share my award-winning tips and tricks to help you capture amazing images regardless of your experience level. The skills we practice today–covering many photographic genres including architectural, cityscapes, street, and portraiture–will give you a toolkit to draw from during your future travels. We seek a “sense of place” that roots our images to the place and the people we meet. In the middle of our walk, we rest our feet at a local cafe for an included coffee drink and the chance to review some of our photos. Our small group size allows for plenty of interaction and the chance to get your questions answered.
What I’ll provide
One coffee drink up to $5 ?
Who can come
Guests ages 12 and up can attend.
Notes
Guests should be prepared to walk about 3 miles, including some hills. Bring your gear (any kind of camera or phone) with a fully charged battery and memory card with room to spare for your photos.
Where we’ll be
We’ll visit and photograph these Mission District locations: – Misión San Francisco de Asís (Mission Dolores) – Clarion Alley Murals – The Women’s Building – Dolores Park We stop along the way at a local cafe for a coffee drink and photo review (and restrooms).
Where we’ll meet
Misión San Francisco de Asís (Mission Dolores) · Mission District, San Francisco
Upcoming availability
Thu, Jun 7
3:00 PM − 6:00 PM · $79 per person
Wed, Jun 13
3:00 PM − 6:00 PM · $79 per person
Thu, Jun 21
3:00 PM − 6:00 PM · $79 per person
Reviews
悦Yue

悦Yue

May 18, 2018
Kyle is awesome ,if you just have just one chance to join one Airbnb Experience in San Francisco, choose his.We had a lot of fun to explore the Mission District where is super great for the photography:the colorful walls, the secret spots only Kyle knows.This is a photography workshop, Let’s talk about photos.Kyle is so professional both for the knowledge and the skills, we have one of the best job in the world – Travel photographer, and we have so much words to share with the trips, the masters we like in photography history, he is a really good teacher, but very modest to say we can learn from each other.He capture some beautiful moments in the exploration together, and send me very quickly when he back,I will share some in my ins, you will feel excited when you see the color ,the moments he shoot, really cool.Kyle is a really nice & warm human being ,perfect host I ever met, always responsible for any of your questions, prepare very serious before we start, he already know my character/things I do best before we met, when we begin the tour, he share the informations he knows about the buildings, cultures, whatever…Thank you for all the things.I feel lucky to choose the experience which made me love SF more than before. 想要见识一下旧金山比较有趣,Cool,色彩丰富的一面,并且想要拍一些好看的照片,学习一下摄影知识的,都推荐这个行程。关键是摄影师人太好了,超级认真,会为这个体验准备到完美。我最初是被他封面的图片吸引了,就抱着好奇参加了一下,没想到收获了很多惊喜,也结识到了一个当地的好友。在咖啡馆喝一杯咖啡,在公园的高处俯瞰当地人的生活,和城市的悠然,双脚有力地走在这个街区里,穿过色彩斑斓的小巷,都是很美妙的体验。还能学到东西,收获摄影师的专业照片,极棒了。
Group size
There are 8 spots available on this experience.
You don’t have to fill all of them. Experiences are meant to be social, so other travelers could join too.
Guest requirements
Bringing guests under 18
If you bring a guest that’s under 18, it’s your responsibility to make sure the activities they participate in are age-appropriate.
From the host
Guests should be able to comfortably walk about 3 miles including some hills.
Who can come
Guests ages 12 and up can attend.
Experiences cancellation policy
Any experience can be canceled and fully refunded within 24 hours of purchase. See cancellation policy.

Getting Oriented [Encore Publication]: Shooting vertically as well as horizontally expands your artistic vision

Who says a portrait image has to be shot in portrait orientation, or that a landscape photo must be shot using landscape orientation?  Rules are meant to be broken, and they call it “artistic license” for a reason.  I would estimate that a third of my people images are shot in landscape (horizontal) orientation, and that a third of my landscape images are shot in portrait (vertical) orientation.  It’s always a good idea to shoot at least a few frames in both orientations so you can decide later which ones work best for your artistic vision.  Let’s take a look at a few examples.

Laura is one of my all-time favorite models (she also creates all her own costumes and does her own hair and makeup), and she looks great framed in any orientation, but I think her remarkable inventiveness is shown to good advantage in this composition using landscape orientation.  Buy this photo

It’s a cliché that people pictures should be composed vertically, so that we can fill the whole frame with the model’s head or full body.  A lot of the time this portrait orientation works well.  But there are some good reasons to shoot people images using landscape orientation as well as portrait orientation.

First, sometimes the model’s pose or the environmental elements around the model favor a horizontal image.  When traveling, I like to shoot environmental portraits that show us more than just the person by including elements of his or her home, livelihood, or lifestyle.

Second, we need to think about how the image will be used.  If I’m shooting publicity photos for musicians, for example, I know they need horizontal images at least as often as vertical images, so as to meet the requirements for the venues and promoters with whom they work.  Magazines and billboards often require landscape orientation, as well.  Even more prosaic uses of our photos, such as Facebook or LinkedIn cover photos, must be oriented horizontally.

Third, some portraits just cry out artistically to be framed in landscape orientation.  The image of the model Laura, above, for example, just works better to my eye in horizontal format, because the negative space behind her leads the viewer’s eye to admire her remarkably creative style, and leaving the lower part of her body and her dress out of the image allows us to focus on her expressive face.

By the same token, there are some good reasons to shoot landscape images in portrait orientation.

First, there could be some limitations to the left or right of the frame that, when shot horizontally, could distract from the power of the image we want to create.  Think about a coastal landscape with a glorious sunset sky and delightful foreground elements such as rocks with water flowing around them, but to the left of our vantage point there’s an unattractive pile of litter.  Frame the image in portrait orientation and avoid the problem.

Second, there are publication media where portrait orientation is required.  Knowing where the image is likely to be published will dictate the orientation in which we shoot.  A card or trifold brochure, for example, will likely require a vertical shot.

Third, again, consider your creative vision.  This night landscape of the Milky Way over Yosemite National Park’s Half Dome also worked beautifully in the more traditional landscape orientation, but here I shot the same scene using portrait orientation to frame the granite mountains with a circle of trees and to create a leading line using the Milky Way’s galactic core to bring the viewer’s eye around the valley’s landforms and the night sky.

This night shot of the Milky Way over Yosemite Valley works especially well in portrait orientation because the pine trees create a frame around the leading line of the galactic core.  Buy this photo

Whenever possible, remember to mix it up and shoot with the non-standard orientation for at least a few frames.  You may find your best shots–and the most marketable ones for placement in certain forums–are the ones you make using the unconventional orientation.

Do you have a favorite image that you shot using the opposite orientation from the expected one?  Please share your experiences here.

Want to learn some more photographic techniques?  Here’s a list of all my posts dealing with the technical aspects of travel photography: http://www.to-travel-hopefully.com/category/techniques/


The Sharpest Tack in the Box [Encore Publication]: How to achieve sharp focus in tricky shooting situations

One of the most important elements of an image is focus, and even an untrained viewer can tell immediately when a key part of the image is not in sharp focus.  The stakes are even higher when we consider that poor focus is nearly impossible to correct in post-processing.  Most of us rely on our camera’s autofocus functionality to help us achieve tack-sharp focus while shooting, but as with every other automated system in a camera, even very sophisticated autofocus mechanisms can go awry, especially when we’re faced with tricky shooting situations.  Here’s a quick guide to minimizing focus problems and achieving sharp focus in nearly every shot.

Scenes with low contrast, such as in this image of ice floes on the Barents Sea in Svalbard after sunset, can fool even sophisticated autofocus systems.  Override your camera’s autofocus system and instead shoot manually in these conditions.  Buy this photo

  1. Make sure to select the part of your image that you want to be in sharp focus.  It sounds like a no-brainer, but surprisingly frequently the reason an image’s main subject is not in focus is because the photographer never told the camera’s autofocus system what to focus on.  Remember that as with any assistive technology, a camera’s autofocus system is just a collection of hardware and software designed to make a best guess about what the user wants.  If you leave your camera set to full autofocus mode, it does its best to identify what its software determines is likely to be your intended subject.  A human face, for example, is likely to be what you want to have in sharp focus, so the camera focuses on that.  But often the camera does not guess correctly.  Nearly every camera, including the one in your smartphone, allows you to manually select your desired focus point, often by simply touching the desired part of the image on the screen.  Be sure to check what your camera is doing and correct it by manually selecting the focus point if it guesses wrong.
  2. Recognize that your camera’s autofocus system will likely not work in certain tricky conditions. Most autofocus systems work by looking for areas of the image where the contrast is changing, such as at the outlines of a person or a building.  But in very dim lighting, or when the main subject is badly backlit, or in scenes with very low contrast (think of a stormy sky or the waves of an ocean), the autofocus does not work.  Recognize these deficiencies and be prepared when shooting in these conditions to take manual control.  Every camera has a mechanism to manually select focus, and you need to know how to use that feature.
  3. Choose the autofocus method best suited to your shooting needs.   Most advanced or professional cameras allow you to choose among several different types of autofocus methods.  Often, the first choice is between single-focus mode or continuous-focus mode.  Choose single-focus mode when your subject is relatively stationary and you must have precise focus achieved before releasing the shutter.  For subjects that are moving quickly or where you need to time your shot exactly, even at the expense of not yet having perfect focus, you should choose continuous-focus mode.  Within each of these modes, your camera may offer sub-choices, such as letting you manually choose the exact focus point you want or choosing a range of points from which the camera selects focus based on the motion of the subject.  This is rocket-science technology, but fortunately it is pretty straightforward to choose the desired method once you understand what each one does.  Read your camera’s manual and always practice in the different focus modes before going on any important shoots, especially on a major trip.
  4. Circumvent the whole problem by choosing a wide depth of field.  Sometimes the best artistic choice requires a narrow depth of field so that only the main subject is in sharp focus, and sometimes the light is too dim to choose a narrow aperture, but if you can make the shot work with a wide depth of field (in other words, using a small aperture, represented by a high f-stop number), then you don’t have to worry about focus at all.  In most situations, universal focus from several feet away from your lens through infinity is achieved at apertures of about f/16 or smaller.

Capturing tack-sharp images of fast-moving wildlife like the cheetah requires selection of an autofocus mode capable of dynamically refocusing on the moving subject.  For this shot of a cheetah in Serengeti National Park in Tanzania, there was the added challenge of having low contrast between the animal and the background.  I chose my camera’s continuous-focus mode with predictive focus so the camera would anticipate where the cheetah was moving and focus ahead of the shutter.  Buy this photo

By using these tips, you can achieve tack-sharp focus where you want it in nearly all of your images, whether you’re shooting with a simple point-and-shoot or phone camera, or the most advanced professional camera.  Any camera frequently makes the wrong guess about where the focus point should be, so do not rely blindly on autofocus.  It’s worth investing some time to learn how to configure autofocus appropriately for any shooting situation, and how to turn it off and instead focus manually when required.  Happy shooting!

How do you achieve sharp focus in tricky conditions?  Please share your thoughts in the comment box at the end of this post.

Want to see more articles about techniques?  Find them all here: http://www.to-travel-hopefully.com/category/techniques/.

The Best Auto Mode You’ve Never Heard Of [Encore Publication]: What is manual mode with auto ISO, and when should you use it?

I’ve written often in “To Travel Hopefully” about the importance of learning to go beyond your camera’s full “Auto Mode,” in order to be able to control the exposure of your images.  Frequently I like to shoot in full “Manual Mode” so as to be able to choose both my shutter speed and my aperture for full creative control.  But in rapidly changing lighting conditions, it is a real challenge to stay in full manual mode, and it’s a big help to allow the camera’s exposure programs to choose the best overall exposure from image to image.  There are a few ways to do this.  In between the full auto mode and full manual control, there are two common semi-automatic exposure program modes that most photographers are aware of, namely Aperture Priority and Shutter Priority modes.  In today’s post I introduce another exposure mode that few photographers are aware of, but that can give the best of both worlds: automatic exposure setting while retaining full manual control over both aperture and shutter speed.  This exposure mode is called “Manual Mode with Auto ISO.”

It’s important to be able to control shutter speed because that’s the mechanism by which we can freeze action or allow it to blur for creative effect.  It’s equally important to retain control over aperture because this is the means by which we can increase depth-of-field to keep everything in focus or decrease depth-of-field to soften the background.  But there’s a third side to the exposure triangle beyond shutter speed and aperture.  This third parameter is our ISO setting.  Several years ago, most camera sensors weren’t very good at handling noise at very high ISO settings, so we took a risk of ending up with very noisy images if we used our camera’s Auto ISO setting.  Not so today.  Many modern sensors are quite adept at capturing nearly noiseless images at ISO settings up to at least 3200 and often to 6400 or even a lot higher.  So the stigma that “serious” photographers have historically attached to using the Auto ISO setting should really be laid to rest.

That happy development allows us to use a mode called “Manual Mode with Auto ISO,” in which we set the camera’s exposure program to “M” or full manual mode but also enable the camera’s Auto ISO setting.  By doing so we can preserve full control over both our shutter speed and our aperture, but also allow the camera to choose the best ISO setting to give a good overall exposure as lighting conditions change.  Making this mode even more appealing, most cameras let us select the highest ISO setting (say, 6400) that we’re willing to allow.  So if the lighting level gets sufficiently dim, the ISO won’t go so high as to introduce a lot of noise into the image; instead, we just select a slower shutter speed and/or a wider aperture.

A good example of when it makes sense to use Manual Mode with Auto ISO is when shooting a street fair or an outdoor sporting event.  In these situations the lighting can change quickly depending on the cloud cover, what direction we’re shooting, and the subject and type of image we’re making.  The following three images were all shot at last year’s Carnaval San Francisco, a big street festival and parade.  It was a sunny day, but much of the parade route was in open shade, and depending on the subject there were times when I wanted to use some fill flash.  To freeze the motion, I needed a fast shutter speed, and to isolate my main subject I usually wanted a wide aperture.  Using Manual Mode, I could choose both of these settings.  But because the light conditions were ever-changing, coupling the use of Auto ISO with Manual Mode allowed the camera to adapt the exposure to the light levels for each image.

Full direct sunlight on the main subject made for very bright lighting.  Buy this photo

Open shade with a touch of fill flash required slightly different settings.  Buy this photo

A close-up portrait made in cross-lighting needed yet another exposure level.  Buy this photo

The next time you’re shooting in a shifting lighting environment yet also want to preserve full control over both shutter speed and aperture, try Manual Mode with Auto ISO.  It’s not covered in most cameras’ instruction manuals, but it can be a big problem-solver in many situations.

Do you use Manual Mode with Auto ISO to control exposure?  Do you have other tips for how to adapt to changing lighting conditions without handing over the creative control to your camera?  Please share your experiences here.

Want to read other posts about photographic techniques?  Find them all here: Posts on Techniques.


Top Tips for Great Travel Images [Encore Publication]: These five simple “hacks” will result in more professional images

Festivals and street fairs can be challenging to shoot due to backgrounds cluttered with people, buildings, and cars.  To make this portrait of grandmother and granddaughter at Carnaval San Francisco, I got down low so that most of the background was covered by the cloth of the costume, and I used a wide aperture to throw the hectic street scene into soft focus.  Buy this photo

The web is positively overflowing with “life hacks,” simple tips and tricks to save us all time and effort and to achieve better results.  Some lists are better than others, but it is in the spirit of these lists that I bring you this compilation of five simple travel photography hacks.  These techniques are not difficult and do not require expensive gear.  They work equally well for your photography whether traveling or at home.  And I promise that if you follow them, your images will improve.  The pros do these things almost automatically; to them, it’s hygiene, like tooth brushing.  If you read no other post about photography, read this one.

  1. Avoid cluttered backgrounds: So often the travel images of a professional stand out from those of amateurs simply because they took careful notice of what was in the background while composing the shot.  Try to frame your subject against a clean backdrop such as a dark-colored wall or the sky.  If there’s no way to avoid including some clutter in the background, at least use a wide aperture (low F-stop number) to throw the background into soft focus.
  2. Watch your horizon: Frequently, we’re so intent on composing the main subject within our viewfinder that we forget to check whether the camera is level before firing the shutter.  An uneven horizon can give the impression of vertigo, like the subject is going to fall out of the frame.  Some cameras have a virtual horizon function to show you whether the horizontal and vertical axes are level, but whether you use it or not, be sure to check visually that the edge of the image looks correct.
  3. Achieve sharp focus: The one characteristic of an image that even the most inexperienced viewer can identify immediately, and one that’s almost impossible to fix in post-processing, is poor focus.  Today’s cameras are so easy to use that we often overlook this most basic element.  The camera can’t know for sure what subject you intend to have in focus; it can only make its best guess.  So take the extra fraction of a second while composing your image to move the camera’s focus point onto the main subject.  Or use a small aperture (high F-stop number) to provide a wide depth of field so that essentially everything is in focus.
  4. Choose the correct exposure: Another very basic element of any photograph, exposure can only be correctly chosen by the photographer, not by the camera.  Your camera’s Auto mode can be fooled very easily by many tricky situations, most commonly by backlighting of the subject.  It’s fine to use the camera’s guess as a starting point, but nearly every camera (including smartphone cameras) have a way to manually override this guess, so learn how to do this and add in about a stop or so of extra exposure if your subject is backlit, more if the backlighting is severe.
  5. Turn off the darned flash: Nearly every camera has a mode where it fires the flash automatically if it determines the extra light is needed.  This is rarely a good thing.  Far better to turn off the auto flash setting and make your own decision about when to use the flash.  Otherwise, your low-light images could end up with an eerie, unnatural color cast or your far-away subject could be underexposed (a flash typically lights an object only a few feet away from the camera, so why fire the flash when you’re photographing an object hundreds of yards or even miles away?).  Worse, if you are shooting through glass or another reflective surface, your flash reflects off the surface, ruining your whole image.  Worse still, your flash may blind everyone else near you in a very dim setting, damage sensitive artwork, or scare or anger nearby wildlife.  I’ve seen countless visitors ejected from museums, zoos and aquariums, and other wonderful destinations because they hadn’t figured out how to override their camera’s auto flash setting.  Just turn off the darned flash, and use it manually when appropriate.

Learn these simple techniques and follow them whenever you shoot, and you’ll start making images that stand out from the crowd.  Remember, you, and not the technology inside your camera, are the creative force behind your images.

While this image of a yurt in the remote mountainous region between China and Tajikistan succeeds in spite of (or perhaps because of) the off-kilter horizon, it serves as a good reminder to check the horizons at the edge of our photos.  Buy this photo

What are your favorite tips and tricks to ensure you make the best images possible?  Please share here!

Want to read more posts about photographic techniques?  Find them all here: Posts on Techniques.

Focus on How Weird Street Faire: A case study on simple techniques to capture winning images of festivals

As a professional travel photographer, I shoot regularly in nearly all genres of photography.  A typical day on the road might include shooting landscapes, wildlife, cityscapes, portraits, action (sports, dance, performance), and nighttime photography.  While I enjoy all types of shooting, my great joy as a photographer is capturing portraits of the people I meet.  Whether close to home or halfway around the world, getting to know the people and learning about their culture through making portraits of them is a wonderful experience.  And there’s no better way to capture images of many amazing people in a short time than by attending local festivals.  People tend to be their best selves at special celebrations like festivals and street fairs.  They dress exuberantly, dance with abandon, make new friends quickly, and (nearly always) are overjoyed to pose for photos.

I shoot about a hundred festivals and other special events every year, so I’ve learned a few tips about how to make the best images during these occasions.  In today’s post I share some simple but effective techniques for capturing great portraits at festivals and other gatherings, using San Francisco’s recent How Weird Street Faire as a case study.  How Weird is a vibrant and colorful, only-in-SF, annual celebration of individuality, tolerance, music, art, and hula hoops.  Read on to see some of my favorite images from this year’s festival, presented along with some discussion of how they were made.  To view more of my images, or to buy some, check out this gallery: How Weird photo gallery.

I see a lot of fellow photographers at events like How Weird shooting with huge telephotos and even tripods, like they’re after images of wildlife on a Kenyan safari.  In my opinion, they are missing the point.  We’re making portraits of people here, so use a normal or moderate telephoto portrait lens, preferably a fast prime lens, ditch the tripod and monopod at home, and get in close to chat with and get to know the people you’re photographing.  When you interact with people, you get a sense of what makes them special, allowing both you and them to capture that special trait in your photos.  Random sniping from far away with a long telephoto will yield far more bland and generic photos.  All of my images at How Weird Street Faire were made with a single camera body and one lens, my trusty 85mm f/1.8 portrait lens.  Sometimes simple is better, especially when it comes to capturing people at fast-moving events.

Larger groups can be challenging to capture in portraits, particularly in bustling spaces like those of a festival.  When they couple I was chatting with suddenly ran into a friend and they had a group hug, I quickly stepped back a few paces and made this expressive and engaging portrait.  It’s okay to break the rules sometimes–here, one of the subject’s faces is completely obscured and another’s is partially obscured, yet the portrait works because it captures the energy and affection of the moment.

When photographers argue that the “street photography” approach (candidly sneaking images of people who aren’t aware they’re present) is the best for capturing people’s true essence, I show them images like this one.  This wholly genuine and unguarded moment of the girl dancing was made with her full knowledge and permission.  The trick is to chat with the subject and get their permission for photography first, then to lay back for a while and let them go back to what they were doing.  After a few minutes, they’ll nearly forget you’re there and they will reveal their true selves.  But unlike shots you sneak without permission, now you have a subject happy to have you photographing them, and you can take your time and not have to rush your work in order to hide your shooting from them.

Often we see only the most obvious subjects at crowded, chaotic events like festivals.  It’s easy to spend all our time shooting people dancing, partying, and displaying their costumes, but I try always to look for the more hidden people and infrastructure that support the event.  This DJ was partially hidden atop the big dance stage and behind the banks of speakers, but she made a fun subject for this portrait.

Don’t be afraid to get in close.  This portrait really pops because the tight composition allows us to focus our attention on the symmetry and color of the subject’s hair and costume.  

The interactions between people are at least as much fun to observe and capture as the individuals themselves.  I had chatted with and photographed a group of people for a few minutes when I observed this fun interaction, so I stepped back and framed some shots of the two young people together.

While post-processing my images after the shoot, I decided to render this one in monochrome to achieve a gritty urban street scene sort of feel.  Often color can distract from the power of an image, so always consider which of your images could benefit from conversion to black-and-white.

In ordinary daily life, I find that perhaps two-thirds of people are willing to have their portrait made if the photographer spends some time getting to know them first and then asks politely.  But at a festival, nearly everyone is excited about posing for portraits.  The trick is to capture scenes where they show you their underlying personalities a bit, rather than just striking a cliched pose for the camera.  To achieve that here, I spent a few minutes shooting, asking the couple to pose in different styles and have fun with it.

Putting it all together.  Here’s a summary of the basic techniques I use when shooting portraits at festivals:  1) Use a fast prime normal or portrait lens.  2) Set your camera for a fast shutter speed (1/500 second or faster is good for dancing and other fast action), wide aperture (f/2.5 or wider is ideal except for large groups) to isolate the subject, and an ISO appropriate to the lighting of the scene (I used ISO 100 the whole day due to the bright outdoor light).  3) Get to know your subject before shooting, let them relax, and capture them during an authentic moment.  4) Try to compose the portrait with as uncluttered a background as possible; of course, this is often difficult at crowded festivals.  5) During post-processing, crop to clean up the scene and then vignette just a touch to further clean up busy backgrounds.

I hope this discussion of techniques to capture portraits during festivals has been helpful.  The best way to learn these techniques and to find your own style is to shoot and shoot some more!

Please leave a comment with your own thoughts and tips about how to make great images of people at celebrations.

Want to read more posts about photographic techniques?  Find them all here: Posts about techniques.

I See a Red Door and I Want to Paint It Black [Encore Publication]: When a black-and-white image is better than color, and how to convert to B&W

Back in the day, a photographer had to choose in advance whether to shoot with color film or black-and-white film.  Conversions from color to B&W were cumbersome and expensive, and conversions from B&W to color were essentially impossible.  During the film era, I typically shot exclusively using color transparency film while traveling, and reserved B&W photography for particularly artistic shoots near home.

Thankfully, in today’s digital world, we no longer have to commit ourselves in advance to monochrome vs. color images.  It’s now a simple procedure to convert our color images to B&W during post-processing.  And that’s a great blessing, because there are plenty of times when a black-and-white photo is better than a color photo.

Consider the image of the alligator at the start of this post.  One of my favorite photos, this one works just fine in color, too.  But the real power of the image is revealed in B&W through the striking textures of the alligator’s skin as seen above the water and as reflected off the water’s surface.  The background above the water fades to a deep, nearly true, black, with the background of the water itself rendered slightly less darkly and showing some nice ripples of motion.  Black-and-white photography is especially powerful when there are contrasts of pattern, texture, and background as in this image.  Buy this photo

When else might we want to render an image in B&W?

Portraits made in monochrome have a timeless look that evokes the earlier years of photography, and this rendering can also bring out the true nature of the subject.  There’s a lovely look to the skin tones and hair when displayed in B&W, and there are fewer distracting elements from the color of clothing or background objects.

This portrait takes on a vintage, timeless look when shown in B&W.  Our eye can focus on the model’s face and hair without the distractions of the colors in her sweater or the building.  There’s almost a street photography kind of documentary quality to this image in monochrome that is lost when viewed in color.  Buy this photo

Color can be distracting in an image where we want to emphasize the essence of a person or place.  In this portrait I made recently for a couple who are fellow musicians and friends of mine, we had beautiful “golden hour” light to work with, and the background and clothing worked well in color.  But converted to B&W, this image really places the emphasis on the couple without the distractions of the color cast in the reflections off the eyeglasses or of the mixed lighting in the background.

In this portrait, black-and-white presentation places the viewer’s attention squarely on the the couple and their instruments, without distractions from the multiple colors of the clothing and background components.  (Client photo not available for purchase.)

When you’re shooting under “mixed lighting”, which means there are multiple light sources with different color temperatures (i.e., some light sources are warmer and others are cooler), converting the image to B&W can be a real problem solver.  Consider the image below, made in Bruges at night.  The light from the street lamps was warmer than the light coming from the spotlights on various buildings, and there was also a bright moon that night, so when seen in color the photo would look less appealing due to the contrasting of the color temperatures in the different parts of the image.  But viewed in B&W, it brings out the grandeur of the old buildings and the beauty of the reflections in the waters of the canal, without the distractions of the color casts.

This image of Bruges at night, when processed in B&W, removes the contrasting color temperatures of the multiple different light sources and allows the viewer to enjoy the stately old buildings with consistent tone and texture.  Buy this photo

Now that we’ve covered a few of the many situations in which a black-and-white image is preferable over a color image, let’s look at how to convert from color to B&W.  There are many ways to perform this conversion, but I recommend it be done using the Color Adjustments settings in the Develop module of Adobe Lightroom.  Here’s how:

Click on the “B&W” tab above the individual color channel sliders, and then adjust the mix of how the colors are blended by increasing or decreasing each color’s slider to see how the black-and-white image looks.  I find that I often have to readjust the contrast slider at this point to get the image looking its best in black-and-white.

For more on using Lightroom to post-process your images, check out my previous post: Previous post on using Lightroom to post-process images.

I do not recommend using your camera’s built-in black-and-white mode, as you will then lose the color information in the image file.  I also do not suggest using the settings some cameras have to make a copy of the image in B&W, because in most cases the camera’s built-in software will not do a very good job of rendering the image in monochrome.  For the best results, either use Lightroom or a dedicated black-and-white conversion application such as Silver Efex Pro 2 from Nik Software, which is available as a plug-in for Lightroom or Photoshop.

Want to read other posts about travel photography techniques?  Find them all here: http://www.to-travel-hopefully.com/category/techniques/

What do you love about a black-and-white image?  When do you convert an image to B&W rather than share it in color?  Any tips or tricks for how to make great B&W photos?  Please share your thoughts in the comment box!


Meteoric Rise [Encore Publication]: How to shoot the Perseid and other meteor showers

While the Geminid Meteor Shower in December and the Perseid Meteor Shower in August are the best-known, each year there are quite a few major meteor showers that afford great opportunities for seeing meteor activity.  Here is a partial list, courtesy of Sky & Telescope:

Major Meteor Showers in 2018
Shower Radiant and direction Morning of maximum Best hourly rate Parent
Quadrantid* Draco (NE) Jan. 4 60-100 2003 EH1
Lyrid Lyra (E) April 22 10-20 Thatcher (1861 I)
Eta Aquariid* Aquarius (E) May 6 20-60 1P/Halley
Delta Aquariid* Aquarius (S) July 29 20 96P/Machholz
Perseid Perseus (NE) Aug. 13 90 109P/Swift-Tuttle
Orionid* Orion (SE) Oct. 21 10-20 1P/Halley
Southern Taurid Taurus (S) Nov. 5 10-20 2P/Encke
Leonid* Leo (E) Nov. 18 10-20 55P/Tempel-Tuttle
Geminid Gemini (S) Dec. 14 100-120 3200 Phaethon
Ursid* Ursa Minor (N) Dec. 22 10 8P/Tuttle

* Strong moonlight will interfere with these showers.


Source: Sky & Telescope

While it’s still technically tricky to make great images of a meteor shower, today’s technology certainly makes it possible for those of us without astronomical budgets to do so.  I shot some nice images of last summer’s Perseid shower and would have been out there shooting the Geminids last December except that the cloud cover here in the San Francisco Bay Area was 95-100%.  Here’s a composite of several images I shot last August of the Perseids.

A composite image made up of one long exposure for the lake, mountain, and trees, plus several 25-second exposures capturing the individual meteors I observed over a 2-hour period.  Buy this photo

Most of the techniques you need for capturing a meteor shower are the same as for capturing the Milky Way.  Review my post from a few weeks ago for a refresher course: Post on Milky Way Photography.

The special challenge when shooting a meteor shower is that meteors can occur anywhere in the sky.  Even with a very wide-angle lens, such as a 14mm or 16mm lens on a full-frame camera, only a small portion of the sky can be covered.  As we are limited to a maximum exposure time of about 25-30 seconds with a 14mm or 16mm lens so as to avoid blurring the stars into star trails, it’s clear that we have to shoot a lot of consecutive images to be likely to capture several meteors throughout the night.  We then use software such as Photoshop to combine the images in which meteors are visible into a single composite image showing all of the meteor activity we captured during the night.

A good tutorial on shooting meteor showers, illustrated with amazing images by Glenn Randall, can be found here: Glenn Randall post on photographing meteor showers.

Have you photographed a meteor shower?  What techniques did you use?  Please share your experiences here.

Want to read more posts about photographic techniques?  Find them all here: Posts on Techniques.


Please Join Me for a Hands-on Portraiture Workshop: Learn to make beautiful portraits using natural light

Dear Readers,

If you’d like to learn how to make beautiful portraits using just natural light and a few simple techniques, then please join me for a 2-hour hands-on workshop/class that I’ll be teaching several times over the next few weeks. Held in a scenic location in Mountain View, CA, these classes will cover the basics of techniques and tools, and then we’ll practice by shooting in the field with a wonderful model. Learn more or register for a session here: Kyle’s workshop on portraiture using natural light.

In today’s post I am sharing a few favorite images that we shot during a recent session of this workshop.  Working with our wonderful model Roxy, I walked students through the entire process of creating stunning headshots, full-body and action portraits, and environmental portraits, all using only natural light and with a minimum of gear, fuss, and bother.  Students learned how to configure their cameras, what lenses to choose for different portrait situations, where to shoot, how to pose and direct the model, how to use light modifiers (reflectors and diffusers), and much more.

Learning to capture flattering and eye-catching headshots is a basic requirement for portrait photography.

We will also learn to make full-body and action shots that bring out our subject’s true personality.

Always be on the lookout for special and playful moments.

I emphasize the artistic as well as the technical aspects of portrait photography.

Roxy really went the extra mile by climbing a tree wearing heels and a red dress!  In my hands-on portrait workshops, we will collaborate with fun and creative models.  Students will gain skills and a comfort level in directing models, even if they have never worked with a model previously.

You can see more details and book a session of the class here: Kyle’s workshop on portraiture using natural light.  More dates will be added soon. Hope to see you at one of these sessions!