Last night I was privileged to be invited by Naatak, America’s preeminent Indian theater company, to shoot their annual festival of short plays, Mela ’16. I’m a loyal follower of Naatak, so I was thrilled to have the opportunity to photograph this exciting production. Mela ’16 runs through today, December 4.
The program is comprised of five short plays, each performed by a different cast and in a different Indian language. I found all five plays to be powerful and vibrant, and truly enjoyed their diversity. It was also a treat to get to know some of the cast, directors, and staff at Naatak. In this post, I share a few images from the event along with some tips about photographing live indoor performances.
The lighting at Mela ’16 is first-rate, probably the best I’ve ever encountered when shooting live indoor performances. This aids photography in two ways: 1) The color balance appears quite natural, and 2) The lighting is bright enough that you can shoot using a fast shutter speed and still keep noise to a minimum by choosing a reasonable ISO setting.
The first play, “Immortal,” is presented in Bengali and is based on a short story by Satyajit Ray. It’s a mystery involving the unexpected death of a prominent scientist and treats themes of intellectual property rights, scientific ethics, and of course a love triangle.
 With good continuous tungsten lighting handled by a talented tech staff, live indoor performances are a joy to shoot. I used a fast normal lens and a fast portrait lens, both of them primes, so I could select a fast enough shutter speed to freeze action and still choose a slow enough ISO setting to minimize noise. Buy this photo
The second play, “The Goat Slaughter Game,” is presented in Tamil and based on a short story by well known children’s author Roald Dahl. It reminded me of an Agatha Christie mystery, but I won’t divulge which one so as not to give anything away.
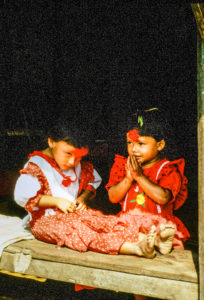
 During action scenes, try to anticipate the “decisive moment” when the drama unfolds. When something key is happening, shoot liberally so as to maximize chances of capturing just the right instant. This image is powerful because it captures the instant around which the whole play hinges, and because the fast shutter speed freezes that moment and the shallow depth-of-field isolates each of the two characters. Buy this photo
The third play, “Look How Artfully I protected You,” is presented in Gujarati and based on a work by George Bernard Shaw. This little farce is packed with drama and action, Bollywood-style. The costumes and set provide vibrant colors and contrasts. I loved shooting this piece.
 Once again, the key to making memorable images of performances is to capture just the right instant where the dramatic tension is high. In this image, the woman is trying to defuse a fight between her husband and her lover. In post-processing, I cropped the image slightly so as to increase the tension and maximize the storytelling potential. Buy this photo
The fourth play, “Logging Out,” is presented in Marathi and written by Dharmakiri Sumant. It tells the story of a boy and girl falling in love, but with the twist that the girl wants to keep their relationship online and not meet in real life. This piece was the most challenging to shoot because the two actors are physically separated within different areas of the stage and because the lighting was often very dim.
 In low-light situations, shoot with a large aperture (small f-stop number) and a high ISO setting, and wait for moments when the action slows down to prevent motion blurring. I like the moody atmosphere of this image, which reflects the loneliness of life online. Buy this photo
The final play, “The Mud Wall,” is presented in Hindi and written by Narendra Kohli. This was my favorite piece of the evening because it deals with many themes of modern Indian life, including wealth, class, bureaucracy, family dynamics, and treatment of women. It was also a joy to photograph because it had so much dramatic action and tension.
 This may be my favorite image from the whole event. I love the dramatic tension and the irony of the slogan on the sign above the terrified family. The usual tips apply here: use a fast lens, a fast shutter speed, and a reasonable ISO setting; frame the shot in advance on the area where the action will occur; and shoot many images. In post-processing, I cropped a bit for dramatic effect and lowered the black point so that the backdrop appears completely black for more contrast with the actors. Buy this photo
Mela ’16 is an exciting event and also very educational for those of us not intimately familiar with the varied cultures of India. Since I can’t travel all the time, I try to seek out global learning experiences in my own backyard, and Naatak delivers on this promise. If you live in the SF Bay Area, I encourage you to attend the final performance today. And not to worry, each play is presented with easy-to-read supertitles in English, just in case your Bengali, Tamil, Gujarati, Marathi, or Hindi are not up to snuff.
What performances excite you? Have you attended, or photographed, events that informed you about diverse cultural experiences? Please share your thoughts here.


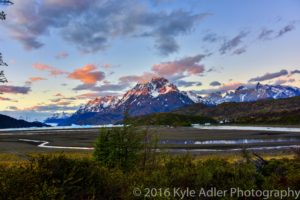 This HDR image of Lago Grey with its glacier and the peaks of Torres del Paine National Park in Chile was processed using Photoshop’s HDR tools. The colors appear unnaturally saturated and parts of the image (especially the tops of the mountains and the brush in the foreground) show some ghosting effects.
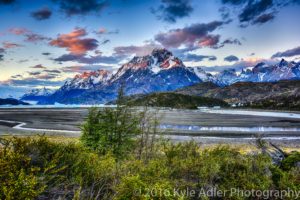 This version was processed using the Nik Collection’s HDR Efex Pro tools. The colors look much more natural and all parts of the image appear sharp and free from ghosting.
 As photographers, we want to ensure the colors in our final images reflect as best we can the original colors we perceived when first framing the scene. With proper color-calibration of the display screens we use to process our images, we can keep the colors as true and accurate as possible.


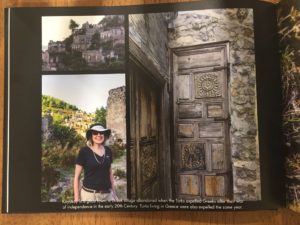
 Visit that exotic destination you’ve always wanted to see!


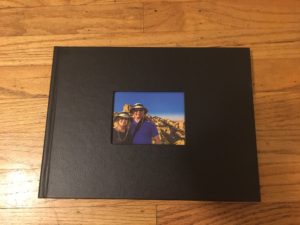
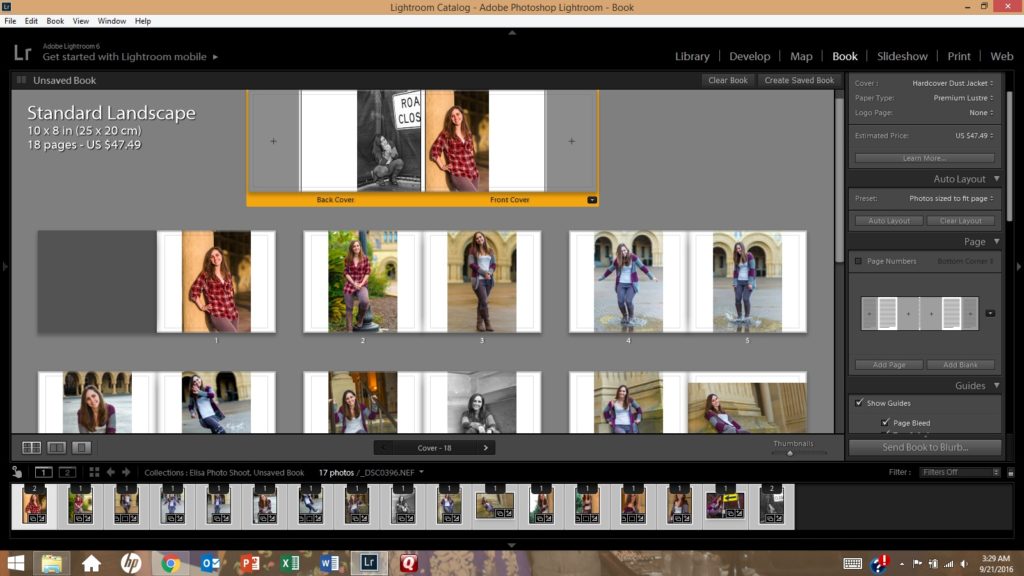 The process of creating a photo book using Lightroom’s Book module (shown here) is fairly straightforward. It’s even more intuitive using an online service such as Snapfish or Shutterfly.