It’s All in the Telling: Sharing images as a photo essay can help tell a story


When we share our images from a trip or from an event close to home, we become more than photographers; we become storytellers.  An individual image can tell a powerful story all by itself, and most of the best ones do.  But presenting a series of related images in the form of a photo essay is a great way to share a story with your viewers.  Each image serves a purpose in the structure of a photo essay, just as each sentence or paragraph does in a written essay.  In this post, I will revisit last weekend’s Sacramento Super Spartan Race (see Post on Spartan Race), taking the same 12 images from the earlier post but rearranging them in the form of a rudimentary photo essay.  We’ll discuss the purpose of each major type of image in creating the essay.  [Note: I am borrowing some of the organizational concepts presented in CUNY’s Photojournalism course materials at this site: http://photo.journalism.cuny.edu/week-5/.]

Establishing Shot: Usually the first image in a photo essay, the establishing shot should draw in the viewer by presenting the big picture.

The establishing shot sets the context of the essay.  Here I use an image of large contingents of athletes running over the hills.  I shot from a distance, using a telephoto lens to compress the perspective and emphasize the massive scale of the race.  Buy this photo

Alternatively, we could use the starting line image as our establishing shot.  Some essays lend themselves well to a chronological telling, in which case it’s good to start at the beginning.  In the case of this specific event, I prefer the establishing shot to be a big-picture overview of many athletes in the middle of their course.

The starting line is a good place to set the stage for your photo essay if you will be using a chronological method of telling the story.  Buy this photo

Portraits: Often the biggest portion of the photo essay, portraits tell the story through images of some of the people who are involved.  The portraits can be tight head-shots, full-body shots, or environmental portraits that show the setting as well as the person.  I like to use a combination of all of these compositional methods.  And it’s also fine to use a mix of posed shots and candids.  Variety can improve some photo essays, although in other cases you may opt for a consistent look-and-feel for many of your images so the mash-up of styles doesn’t distract the viewer from the story.

This environmental portrait shows the athlete in the context of the monkey bars obstacle, with other athletes and the background included in the frame.  Buy this photo

Portraits of athletes don’t have to be in the cliche pose of standing, legs apart, on the ground flexing their biceps.  Athletes are happy to pose in the midst of whatever they’re doing when they see a photographer nearby.  Buy this photo

Not all portraits have to show the subject’s face.  This environmental portrait works because it shows us what the athletes are doing from their point of view.  Buy this photo

This posed portrait is framed rather tightly, showing the power and the elation of the athletes after finishing the race.  The background, while bright and busy, is not overly distracting.  Buy this photo

For powerful portraits, I like to seek out people who have something special to say.  This racer stopped for a moment so I could make a portrait.  His flag makes a nice counterpoint to the rolling hills and featureless sky in the background.  Buy this photo

Interaction: Most photo essays can benefit from at least one shot showing the interaction between different people in the story.

Although Spartan Race athletes are fierce competitors, they also make an effort to support one another and cheer their fellow racers on.  I enjoy capturing these interactions because these moments often tell a strong story visually.  Buy this photo

This shot of kids playing in the shower area at the end of the race shows another type of interaction.  Buy this photo

Close-Up: It’s helpful to include some images that show the little details.  In the case of this particular event, I don’t have many close-up shots, so I’ll include this one fairly tight portrait as a placeholder.  It would be great to include a true close-up shot showing just the athlete’s gloved hands as she grasps the rope, perhaps with part of her face in the background, for example.  This could be done by tightly cropping this image.

This tight portrait shows great action and emotion.  While it’s not a true close-up image, which ordinarily would show only a few details rather than the full person, it can serve a similar function in the essay by focusing the viewer’s attention on a small specific part of the race.  Buy this photo

Closer: This will be the last image in the photo essay, so it needs to be a strong one.  It could be a climactic moment or, if the story is being told chronologically, an image made at the end of the race.  I’ll include two possible closing shots here.  The first captures an athlete jumping over the fire at the finish line; it’s both dramatic and symbolizes the end of the event.  The second shows a classic Spartan Race moment, where the athletes have to carry heavy buckets of sand along a muddy, hilly course; this image could make a good closer because it evokes a quintessentially Spartan Race sense of emotion.

The finish line itself is a dramatic vantage point.  In this particular race, athletes must jump over a line of fire to finish the course.  Buy this photo

An iconic Spartan Race image.  I captured the strenuous activity of carrying buckets filled with sand by shooting from a distance with a telephoto lens.  Buy this photo

Have you presented your images in the form of a photo essay?  How did you structure it?  What advice can you share for fellow photographers who would like to use this format?

Luck Favors the Prepared [Encore Publication]: Tools for planning your shot

It was Louis Pasteur who said, “Fortune favors the prepared mind.”  We usually hear the quote paraphrased as, “Luck favors the prepared.”  For travel photographers, there is often a great deal of luck involved in capturing a truly great image, but there are some very useful tools that we can use to help us plan to be in the right place at the right time with the right gear.  Let’s look at just a few of my favorites.

I’ll start with a quick review of the most obvious resources.  I would never plan an hour-long photo shoot, let alone a month-long trip to a far-flung travel destination, without doing some research.  What are the must-see locations, and what dates and times of day are perfect for each one?  What are the events or activities that most authentically represent the locations I am visiting?  Is there a livestock market, a street festival, or a religious celebration taking place while I’m in the region?  How can I build an itinerary that best incorporates all of these locations?  Great resources for this type of research include guidebooks (online and hardcopy), online review sites such as Trip Advisor and Yelp, mapping and navigation apps (Google Maps is still my all-around favorite, but several others have their own advantages), and local weather sites.  I like to build my itinerary by customizing an online map to show all of the locations I’d like to visit, then creating a routing that links the locations in the proper order.  If travel by air, rail, bus, or boat is involved, I research those schedules and fares to determine the best way to get from one place to the next.  Airline consolidation sites such as Orbitz can be quite helpful for finding the best flights at the best prices.  If the itinerary has been pre-planned by a travel company, then I will still do most of this background research to better understand the locations we’ll be visiting.

Once I know where I’ll be going and what events I plan to shoot, I develop a shot list.  Some photographers craft very detailed and specific shot lists, but I like to keep it quite flexible and informal, often simply jotting down my ideas in the calendar event on my phone that is associated with each planned shoot.  After all, if I adhere too closely to a shot list, I will just end up with the same images that hundreds or thousands of other visitors have captured after doing the same research.  Serendipity and the artist’s eye have their place in travel photography, too.  The research phase can also inform me as to what clothing, gear, and other essentials I should bring to each location.

Now I’d like to introduce three smartphone apps that I consider indispensable for travel photography.  First, there’s Photo Pills, an app that incorporates several essential tools into one package.  I use Photo Pills for planning shots where I need to know how to get all the elements, including location, date, and time of day, to come together.  For example, during the Perseid Meteor Shower, I wanted to find a dark sky location with a nice foreground and a view toward the galactic core of our Milky Way.  This way, I could capture images including the meteor shower, the Milky Way, and the pretty landscape in the foreground.  I had a location in mind, a beautiful spot where there isn’t too much light pollution and with a gorgeous view over a reservoir and the Santa Cruz Mountains.  The Planner tool in Photo Pills allowed me to visualize the foreground as viewed by my phone’s camera, superimposed against the Milky Way as it would appear on different days and times of day.  I planned the shot for a certain time on each of several consecutive days, confirmed that the Milky Way would be rising in the desired direction and that the nearly full moon would have already set, and then waited for clear weather.  The first night of the meteor shower was cloudy, but the second night was the charm, and I was able to capture this striking image.
Using the Photo Pills app on my smartphone, I was able to plan in advance for a location, date, and time that would maximize the chances of capturing the Perseid Meteor Shower and Milky Way over the lovely Crystal Springs Reservoir.  Buy this photo

Here’s a screenshot of the Planner tool in Photo Pills that I used to prepare for this shoot.

img_3452

The Photo Pills app has a number of tools to help plan and execute your shots.

Another useful app for planning the best locations, dates, and times for your shoots is TPE (The Photographer’s Ephemeris).  I find this tool to be especially helpful for visualizing the path of the sun and moon across the field of view for any location I select.  This app is very powerful, and I have only scratched the surface of what it can do to predict and prepare for photo opportunities.

img_3453

The Photographer’s Ephemeris (TPE) is a powerful tool for planning any outdoor photo shoots.

A final app I will mention here is called Easy Release.  Sometimes (read this post for details about model releases), we need a model release when a person or several people are clearly identifiable in a photo.  I know some photographers who carry hardcopy model releases with them wherever they travel, but I find this to be cumbersome and impractical when on the road shooting.  Instead, I use Easy Release on my phone, so I’m always ready to quickly prepare a release for a new friend to sign when they appear in my images.  Even though the app has the ability to translate the text of the release into several languages, there are situations in which it isn’t reasonable to try to explain to a local person what’s in the release and why it’s required.  Furthermore, I consider it to be exploitative if the person can’t reasonably be expected to understand what’s in the document or why they should be signing it.  But there are times when having immediate access to a model release that can be prepared, signed, and stored right on my phone is a big advantage.

img_3454

Easy Release is a convenient tool for creating, signing, sharing, and storing model releases when a person is clearly identifiable in photos.

With proper planning using readily available resources and various apps including the ones I’ve presented here, we can be better prepared to maximize our chances of capturing memorable images.  Happy shooting, and remember that luck favors the prepared!

Do you have a favorite tool you use to plan for your photo adventures?  How have you used this tool to get your shot?  Please share your experiences here.

Focus on Sacramento Spartan Race: Covering a Spartan Race can be an endurance event

Some events are just plain fun to shoot from beginning to end.  One of my favorite types of sporting events to cover is the Spartan Race.  Basically a combination of long-distance running with a supersized obstacle course, a Spartan Race is an extreme athletic event that attracts thousands of athletes from elite to weekend warrior.  I enjoy shooting these races because they offer so many exciting elements: color, drama, showmanship, grit, stamina, and humor.  Adding to the photographic fun quotient are the glorious natural surroundings, the photogenic and extraordinarily fit athletes, and the wide range of athletic rigors required of them.

In this post I’ll present some of my images from this past weekend’s Super Spartan Race held near Sacramento, California.  I will also share some tips on how to capture the best of a big and sprawling event like this one.

The Spartan Race organization recognizes and welcomes professional and enthusiast photographers more readily than do many US sporting authorities.  For any large sporting event, I apply several weeks in advance for a media (or press) pass so that I can bring in all my gear, shoot in all areas including those off-limits to spectators, gain free or reduced-price entrance and parking, and access VIP areas.  I’ve found the Spartan Race organizers to be quite helpful and understanding of what working photographers do.

img_3701
Yours truly with media badge.  This pass is important for the professional, as it allows access to otherwise off-limits areas and lets athletes and officials know you’re a working photographer.

One point to keep in mind when covering an endurance event spread out over long distances is that as a photographer, you will experience some portion of the rigors the athletes face.  The Super Spartan Race traverses a course about 8 miles long over steep and often muddy hills, interspersed with a couple of dozen obstacles of different types.  While I don’t typically try to cover all of the obstacles, it’s important to get a reasonable sample of the different challenges, so I do usually hike quite a few miles during the course of the day.  Photographers with a media pass have access to the whole course, but there are no special roads or ramps to get us there.  We have to trek up and down the same hills, through the same mud, and over the same terrain as the athletes do.  So come prepared for a bit of a workout!

The starting line is a good place to set the stage for your photo essay.  There is usually a DJ and music to get the athletes pumped up for the race.  Everyone is fresh, clean, and excited at this early stage.  Buy this photo

In addition to portraits and close-ups of individual athletes, it’s important to capture some establishing shots to set the context of the race.  I like to get some images of large contingents of athletes running over the hills.  I shoot from a distance, but often use a telephoto lens to compress the perspective and emphasize the massive scale of these races.  Buy this photo

When shooting individual athletes on the obstacles, use a fast shutter speed to freeze the action and a relatively small aperture to blur the background.  Buy this photo

Portraits of athletes don’t have to be in the cliche pose of standing, legs apart, on the ground flexing their biceps.  Athletes are happy to pose in the midst of whatever they’re doing when they see a photographer nearby.  Buy this photo

After finishing the course, athletes gather in the festival area.  This is a great place to make portraits.  The athletes are exhausted and muddy but in a celebratory mood.  Buy this photo

Spartan athletes in the festival area display strength as well as excitement for having completed the race.  Buy this photo

The finish line itself is a dramatic vantage point.  In this particular race, athletes must jump over a line of fire to finish the course.  I shot from a low perspective to emphasize the height of the jump, and used a fast shutter speed and small aperture to freeze the moment and isolate the athlete from the background.  Buy this photo

This image works so well because the shooting angle looking upward from below emphasizes the athlete’s power, and because the timing captured her expression at just the perfect moment.  I shot many frames to increase the likelihood of capturing the right moment, and, once again, I chose a fast shutter speed to freeze the motion along with a small aperture to blur the background.  Buy this photo

The shower area at the end of the race was taken over by hordes of kids who used the hoses for water play.  Humorous moments like this one lend a playful element to the day’s portfolio of images.  Buy this photo

An iconic Spartan Race image.  I captured the strenuous activity of carrying buckets filled with sand by shooting from a distance with a telephoto lens.  This technique compresses the perspective to include more athletes in the frame while still showing the strain on their faces.  Buy this photo

I like to seek out the athletes who have something special to say.  This racer stopped for a moment so I could make a portrait.  His flag makes a nice counterpoint to the rolling hills and featureless sky in the background.  Buy this photo

Although Spartan Race athletes are fierce competitors, they also make an effort to support one another and cheer their fellow racers on.  I enjoy capturing these interactions because these moments often tell a strong story visually.  Buy this photo

What are your favorite sporting events to shoot?  Do you have tips you can share for making great images of athletes?

Black-and-White to the Rescue: Converting a noisy or strangely colored image to monochrome can save the day

In yesterday’s post (Post on Circus Automatic), I shared several practical tips for shooting fast-moving indoor performances, using a recent circus performance as an example.  While I was happy with many of my images from that evening’s shoot, I discussed how the single-colored LED lights now used at many indoor performances can impart an unnatural color cast to photos that can be hard to correct in post-processing.  In today’s post, I show how converting these images to black-and-white can overcome some of the limitations of shooting under these adverse lighting conditions, with the added bonus that the noise imparted to the images (from having to shoot at a very high ISO setting) can also be less noticeable in black-and-white conversions.

First, a little background explanation on why these LED lights are so troublesome for the photographer to work with.  When we refer to the resolution, or number of pixels, in our camera’s sensor, that number is actually the total count of three different kinds of pixels, each kind sensitive to only one of the three primary colors (red, blue, and green).  Without going into the nitty-gritty technical details, suffice it to say that in most camera sensors, about 50% of the pixels record only green data, about 25% only red data, and about 25% only blue data.  My camera (the Nikon D810) is said to have a resolution of 36.3 megapixels (MP), but if my subject is lit by a single-colored red LED, in reality only about 9 MP of resolution is recorded.  The other two color channels will essentially contain no data.  This is bad for several reasons, most notably because the image will be cast unnaturally toward the red color channel and because its effective resolution will be low.

There’s very little we can do in post-processing to recover from the loss of resolution during capture, but we can adjust the color temperature to try to correct a little bit of the strange color cast.  Converting the image to black-and-white, though, can restore the image to a more natural appearance by masking the color cast.  This can be aided by using Lightroom’s contrast and color control sliders to adjust the balance of the black-and-white version until it appears closest to a normal tone.

Consider the following two versions of the same shot.  The first version is in color, and even after adjusting the color temperature and contrast, there is still a distracting red color cast.  There is also some noise apparent in the image as a result of the high ISO setting required to freeze the acrobats’ motion.

The color version of this image appears unnatural even after adjusting color temperature, due to the lighting which consisted of a red-colored LED array.

Now, take a look at the black-and-white version of the same image.  Creating this version required careful attention to the balance of each color and contrast setting to make the final image.  The good news: the monochrome image appears much more natural to the eye than does the color version.  The skin tones seem less artificial, and the curtain in the background does not distract as much.  Furthermore, there is less noise apparent in the black-and-white version.
The same shot appears more natural and less noisy when converted to a black-and-white photo.  Buy this photo

This next shot appears much more acceptable in its color version.  During a live performance, the lighting often changes drastically from one moment to the next, and in this image the LED lights didn’t impart as harsh a red cast as in the previous image.  Furthermore, the aerialist was dressed entirely in red and was working with red ropes, so what red color cast was present does not appear as unnatural.

This image is highly effective when presented in full color.  Buy this photo

While I like this image for its dramatic power and strikingly vibrant red colors, let’s take a look at a black-and-white conversion for comparison.  The monochrome version lacks the visceral impact of the strident red color, but it benefits from a more natural tone, a quasi-documentary look and feel, and a nice clean black background.  In this case, the black-and-white conversion doesn’t so much rescue the image as change the kind of feeling it elicits.  I like both versions.
The black-and-white version is cleaner and evokes a very different set of emotions than does the color version.  Buy this photo

When you are forced to shoot under very difficult lighting conditions, try converting to black-and-white during post-processing.  It just might rescue some of your images and can evoke a very different feel in other images.

For a refresher on the black-and-white conversion process and when you may want to use it, read this post: Post on B&W Conversion.

During post-processing, have you been able to rescue or improve images shot under challenging lighting conditions?  Did you convert to black-and-white, or use different techniques?  Please share your experiences here.


Sweet Release: What is a model release and when do you need one?

We photographers are passionate about many aspects of our trade.  We love the artistic expression, that feeling of capturing a special moment that otherwise would be lost to time, even the gear we use to make images.  But one aspect of the trade that few of us–professionals and amateurs alike–enjoy thinking about is the legal side of making and selling images.  And one legal element about which we need to be knowledgeable is the model release.  Unless you never plan to make any images in which any person is recognizable, you should learn what a model release is and when you may need to use one.

First, a disclaimer: I am not an attorney and the advice I provide in this post is not intended to replace consultation with a competent lawyer.  What I provide here is just some practical advice I’ve acquired over the years, in which course I’ve made plenty of mistakes.  And you should also be aware that laws governing when you can photograph a person and how that image can be used vary from country to country and even among states or provinces within some countries.  With these points made, let’s explore the basic concept of a model release and when you may need one.

In the simplest terms, a model release is a legal agreement between a photographer and any person who will be recognizable in images made by the photographer.  It spells out the conditions under which the image can be published and often specifies the compensation to which the model is entitled.  In the US, a valid model release must be signed and dated by the photographer, the model, and a witness.  If the model is a minor child, a parent or legal guardian also must sign.  This agreement protects the photographer against being sued for defaming or cheating the model, but equally it protects the model from being taken advantage of.


When I work with a professional model, like Laura here, I always obtain a signed release before the photo shoot.  This practice ensures she will be properly compensated and protected against inappropriate uses of her likeness, while I and any publisher will be protected against defamation claims by the model.  Having the release means I have more flexibility as to how the image can be used later.  Buy this photo

So, when do you need a model release?  Here are some situations (not an exhaustive list) in which you should have one:

  • A person can be recognized in your image.  Note that personally identifiable information doesn’t derive only from a direct likeness of the person’s face.  He or she could also be recognized from a special feature such as a tattoo or from the context such as a clearly identifiable location.
  • … AND … one or more of the following statements is true:
    • You may wish to sell the image for commercial purposes such as advertising or use in a business’s publicity or promotion.
    • You may wish to enter the image in a competition or contest.  Check the specific competition’s rules; some require a model release whenever a person is clearly identifiable in the photo, while others do not.
    • You may wish to provide the image (even if you’re not compensated) for other people to use in a context you can’t control.  A model release protects you and those who obtain a license to use your image from being sued by the model for using their likeness in a way that they don’t approve.

In contrast, there are plenty of situations in which you don’t need to have a signed model release.  Some of these include:

  • One or many people appear in the image but none is recognizable.  The subjects may be far away from the vantage point or they may all be obscured or facing away from the camera.  As long as they cannot be identified individually, there is no need for a model release.
  • You plan to use the image only for your own portfolio.
  • You plan to use the image only for editorial purposes.  If your photo is published in a newspaper, magazine, or website where the primary purpose is editorial rather than commercial, a release is not required.  Imagine if every reporter had to get a signed release before publishing the likeness of every person appearing in any news outlet.  This would have a chilling effect on journalism, which is a pillar of a free and democratic society.  So in most cases, if your photo will be used for editorial purposes (that is, it will appear in a newspaper or magazine’s news section rather than in an advertising section), then you and the outlet’s publishers don’t need a release.
  • The images can be considered fine art photography.  Photos can be published and sold without express permission from the person appearing in them if the primary purpose is fine art.  In the US, case law upholds artistic expression as a form of First Amendment free speech in most cases.

Kashgar, China
Images with news value, such as this one made of a Uighur girl in Kashgar’s Old Town days before her home was to be demolished by the Chinese government, may be published and sold for editorial purposes with no requirement for a signed model release.  Buy this photo

When you do believe that a model release would be helpful given your intended future use of an image, it is quite a simple task to obtain one.  Some photographers carry printed forms with them so they can ask a subject to sign their release as needed.  I use an app on my smartphone called “Easy Release,” which you can purchase for $9.99 on the iTunes Store: Easy Release app for iPhone.  This app simplifies the process of creating a model release, getting it signed by your model and yourself, sending it to others, and storing and managing it for future use.

Because “To Travel Hopefully” primarily treats the subject of travel photography, I want to share my own philosophy when it comes to asking for a model release while traveling.  Even if you understand the laws of the country in which you are shooting, there are potential ethical issues in asking your subject to sign a legal document that he or she probably can’t understand.  You may be able to get the text of the document translated into your subject’s local language, but even then the context of the agreement may not make sense to somebody from a very different culture than our own.  I try to exercise good judgment when it comes to compensating the people I photograph when traveling overseas and to how I use the images later.  You may want to read or reread my pillar post on photography as a bridge to local culture: Post on Travel Portraiture.

Many photographers, models, and publishers misunderstand the conditions under which a model release is or is not required, so there’s a lot of misinformation out there.  Please consider my points here as just a starting point for learning more about this topic.

What are your best practices regarding when and how to use a model release?  Please share your thoughts here.


The Camera Eats First [Encore Publication]: How to make delicious images of local food specialties

A big part of the joy of travel is learning about the local food and drink.  For the travel photographer, local culinary specialties represent a cornucopia of image possibilities.  In this post, we’ll look at some food images and discuss a few tips and tricks to make delectable photos of the victuals we meet while traveling.  Warning: Do not read this post while hungry.

When photographing plated food, it’s best to get in close.  Shoot straight down or at a slightly oblique angle, and always check your background to ensure it is as uncluttered as possible.  Be aware of your focal point and depth of field (how much of the image is in focus) so that the most important part(s) of your image are sharp.

For this photo of a cheese plate in Burgundy, France, I got in close to the subject and chose a small aperture to ensure all the different cheeses were sharply in focus.  Buy this photo

Don’t forget that  specialty drinks are also a big part of local culture.  For example, in Argentina the deep love of mate (pronounced MAH-tay), a local infusion, becomes almost a religious practice.  This image of the mate service engages all the senses with its bright colors, contrasting textures, and suggestion of the smell and taste of the drink. To capture a sense of the Argentinian obsession with mate, I shot this image of the serving of the drink with all its components.  I wanted to include some of the environment around the mate tray as well.  The scene was lit with natural light, which further saturated the bright colors.

Argentina’s national obsession, mate.  Buy this photo

Always be on the lookout for local dishes that are unusual or exotic to our own sensibilities.  This image of the local Peruvian specialty cuy, or guinea pig, has sold well on American and European stock photography sites because the main ingredient is so unfamiliar to our palettes.  I love the saturated colors and the humor inherent in the guinea pigs holding peppers in their mouths.  The ocher wall makes a lovely background to offset the colors of the dish.  To capture this image of Peruvian cuy served during a home-hosted lunch, I got in close as the hostess held up her dish, ensuring that the ocher wall behind was all that was visible in the background.  I chose a wide aperture to slightly blur one of the guinea pigs and the wall.  I used natural lighting with just a kiss of off-camera flash to accentuate the highlights.

 Cuy (guinea pig) is a Peruvian delicacy.  Buy this photo

Sometimes it is the ingredients rather than the final dish that are most interesting.  While on a shore excursion on the Greek island of Rhodes, my family saw these beautiful octopuses hanging to dry in the sun.  After photographing them, we ordered a plate of grilled octopus.  We very nearly missed the sailing of our ship, as the taverna’s cook took her time to grill the dish, but it was absolutely worth it!

Obviously, natural light was the way to go with this image.  I wanted to get in close, but not too tight, so that the lovely Rhodes scenery would be partly visible behind the drying octopus.  I used a medium-wide aperture to slightly soften the background.  Buy this photo

What’s even better than food images?  Portraits of local people making or serving the food!  Here’s a shot of a server holding up a tray of Istanbul’s best baklava.  The background is a bit cluttered, but I like this image for its blending of the beautiful dessert tray with the pride of the man serving it.

Often a street vendor, cook, or restaurant server will be reluctant to have their portrait made but will be happy to pose with their wares.  For this portrait of an Istanbul baklava server, I chose a wide-angle lens and got in very close to the food tray to emphasize the baklava while including the server in the composition.  Just natural light and balanced fill flash were used as lighting.  Buy this photo

Street markets are a wonderful source of travel images.  They tend to be bright, colorful, exotic, and characteristic of the location.  Be aware that some vendors will expect you to buy something if you want to photograph their wares.

I like the contrasting colors in this shot of Istanbul’s ancient Spice Market.  Buy this photo

Nearly every culture around the world has its own version of barbecue, and in my broad and diverse travel experience, it’s all good.  Here’s a photo of whole branzino (Mediterranean sea bass) fish being grilled topside by the captain of our small wooden sailing ship on the Turquoise Coast of Turkey.  It was nearly completely dark, so I lit this image using light from the burning coals and a touch of flash.  A relatively high ISO was required to balance the low natural light with the need for a small enough aperture to keep the whole subject in focus.

Whole fish on the grill aboard a gulet yacht in Turkey.  Buy this photo

Sometimes a local cuisine is all about diversity, such as the Dutch-Indonesian specialty rijsttafel (rice table).  Some presentations of rijsttafel in Amsterdam involve over a hundred different tiny plates, each containing a different food preparation.  To capture this tapestry of tastes, I stood on the bench and shot obliquely onto the table top, including as much of the spread as I could.

Indonesian rijsttafel served in Amsterdam.  Note that in restaurants at night we have little or no control over the artificial lighting, which can sometimes lead to an unnatural color cast on the food.  Shoot in RAW format so you can adjust the color balance during post-processing when you get home.  Buy this photo

I grew up in New England, and after traveling to more than 100 countries around the world I can say with authority that few meals can beat a good old-fashioned New England clambake with lobster.  To capture this iconic image, I shot up close and directly toward the lobster, using a normal lens with a medium aperture.  This allowed most of the meal to be sharply focused, but with some falloff in sharpness toward the edges in order to emphasize the Maine event.  The contrasting colors between lobster, clams, and corn make for a pleasing composition.

A lobster clambake in Maine showcases the contrasting colors and textures of this delicious meal.  Buy this photo

As a parting shot, I’ll leave you with this image of French haute cuisine.  The gloriously prepared and plated fish course at Paul Bocuse’s three-Michelin-starred restaurant made a fun subject because it is whimsical and artistic at the same time.  The available lighting was soft and subdued for artificial light, so no flash was needed.  I shot some closer compositions of just the plate, but preferred this one with some of the table setting included.

Bon appétit!  Buy this photo

What are your favorite food photos?  Do you have tips on how to make food images really pop?  Please share your comments.


Focus on Dia de los Muertos: When a local festival takes you around the world

Sometimes you can attend a local event and feel as though you’re transported to a far-off part of the world, or even feel like you’re traveling across a wide cultural tableau of a whole region.  That’s how I felt while shooting today’s Dia de los Muertas (Day of the Dead) celebrations in downtown San Jose.  Although I had traveled only half an hour from my house, this festival celebrating life and honoring departed relatives took me on a cultural and historic journey across all of Latin America and beyond.  In today’s post I will present a simple photo essay featuring some of my favorite images from this festival.
An Aztec dancer helps convene the day’s celebrations.  Buy this photo

The Aztec fire dance’s origins date back to pre-Columbian times.  Buy this photo

This shrine, erected on the back of a pickup truck, is dedicated to the memory of the owner’s deceased father and brother.  Buy this photo

The “elegant skull” face painting is an element of Day of the Dead celebrations in several Latin American countries.  Buy this photo

These lovely ladies awoke at 5 AM to paint their own faces and those of their family members.  Buy this photo

More wonderful face art.  Buy this photo

I love the cultural juxtaposition of Hello Kitty with Day of the Dead.  Buy this photo

Although this portrait of a couple also worked well in color, I love the dramatic impact it makes when converted to a high-contrast black-and-white image.  Buy this photo

Elegant and beautiful!  Buy this photo

I hope you’ve enjoyed this brief compilation of images from today’s festival and that it inspires you to seek out Day of the Dead celebrations near your own home.

What are some of your favorite cultural traditions?  Have you captured these traditions using your camera?  Please share your experiences in the comments box.

Want to see other posts about what to shoot while traveling and near home?  Find them all here: http://www.to-travel-hopefully.com/category/travel/shoot/

Happiness Quite Unshared [Encore Publication]: Top ten ways to share your images

With the holidays approaching, I thought readers of To Travel Hopefully might enjoy seeing an encore of this early, pre-launch post with ideas about how to share your favorite images with friends and family.

Sometimes you just get that feeling.  You know as soon as you depress the shutter button that you’ve just captured an incredible travel image.  Over the course of your trip, you will hopefully amass quite a few of these images that you will be eager to share with friends and family.  After the often laborious effort to cull your images and post-process the chosen few, it’s time to share these best photos with the world.

In olden times (pre-digital), there were fewer choices about how to share one’s travel photos.  Many of us shot with color transparency (slide) film, sent all the rolls off to a lab for processing, picked out the top slides by hand, and stored them in a slide tray or carousel for future viewing.  In the excitement just after a trip, we would likely invite a bunch of friends over, get them slightly inebriated, and subject them to a slide show using a projector and portable screen.  This almost literally captive audience would feign enjoyment over, or perhaps even genuinely enjoy, viewing the large projected images and hearing our stories about the recent adventure.  Then the guests would leave, and the slide trays would go back on a bookshelf to sit for months or years before anyone would look again.

In this brave new digital era, we have many more and better options for sharing our best travel photos.  This being the Internet, I’ll offer up a Top Ten list of favorite ways to get my travel images in front of key audiences (Number 7 will amaze you!):

  1. Social Media: While most social media platforms, including Facebook, Twitter, and Instagram, are image-intensive, it turns out that they aren’t particularly good at sharing fine art photography.  That said, these are important and obvious outlets for getting our favorite travel photos out to our friends promptly.  Some even post while traveling, but I do not recommend this approach unless you are completely certain your home is secure while you’re away.  Because these platforms encourage sharing, using them will allow your friends to pass them along to their friends, too.
  2. Online Photography Sites: Specialized photography platforms, such as SmugMug, Flickr, PhotoShelter, and 500px, are tailor-made for sharing (and even selling) your best images.  I use SmugMug to power my own professional photography website, but I also spend quite a bit of time browsing friends’ and even strangers’ photo galleries on the other platforms I mention here.
  3. The New Home Slideshow: Who needs the clunky white folding screens and finicky slide projectors of yesteryear?  Today most folks have a bright, high-definition display right in their living rooms, and it’s called a TV.  Photos on a PC or tablet can easily be shared on a smart TV via WiFi or specialized connecting cables.
  4. Your Phone: Today’s smart phones, whether iOS or Android, have easy ways to sync photos from your PC or tablet to the phone.  Once on your phone, your photos are ready to show to anyone from your mom to a random stranger on a train.  Not the biggest screen in the world, but it’s always with you and can store thousands of high resolution photos.
  5. Send them the files: It’s sometimes desirable to send some of your original image files to a few trusted friends.  Among the numerous methods for doing so are good ol’ trusty email (though attachment sizes are usually limited), Dropbox, and the download capability found in certain photography sites such as SmugMug.
  6. Albums and Books: Yes, the photo album is still alive and well, and it’s never been easier to create one.  Or you can go the extra mile and publish your own custom photography book.  Many photo sharing sites allow you to create your own albums and books featuring your images.
  7. Prints: The demise of the hardcopy print has been greatly exaggerated.  There’s something special and timeless about the look and feel of a well-printed photograph on real paper.  Do it yourself on a good home printer with high quality paper and ink, or send it to a professional lab, but a framed print on your wall or gifted to a friend to put up on their wall is a lovely way to share your very best images.
  8. Cards: Greeting cards, birthday cards, holiday cards–these days it’s easy to customize them with your own images and send them to friends and family.
  9. Calendars: Every year, I create a calendar with a photo from each month of the year just ended, and send copies to a few family members.  I also proudly display this calendar in my home and office.  What could be better than knowing you and your friends are viewing your photos every day of the year?
  10. Keepsakes: Novelty gifts from pencil holders to jigsaw puzzles, to clothing items can be easily and inexpensively made using your favorite photos.  We even have a cat food bowl sporting the likeness of our kitty.  My younger daughter enjoys specialty socks, so I’m looking into ways of putting some of our images onto hosiery.  Get creative!

Whatever methods you use to share your images with friends and family, I would encourage you to consider watermarking your photos.  A watermark is a pattern or image placed across a portion of the photograph to identify it as the work of a particular photographer.  While watermarks can be distracting to the viewer, they can be made quite discreet and they offer some protection against your image being stolen and passed off or even sold as the work of others.  Many photo editing software packages and photo sharing sites offer the capability of attaching watermarks to your photos.

How do you share your travel images?  Got a great idea for sharing that you’d like to add to the discussion?  Please leave a comment in the box at the end of this post.

Update–Google Trips now available: A new app for your smartphone can help plan and manage your next trip

Three weeks ago, I published a post alerting readers to the availability of a new smartphone app from Google that claimed to simplify the planning and management of travel.  I am republishing that post here, with an update now that I have tested the app in the field.

Product Update:

I tested Google Trips in the field during a recent two-week trip through Ireland and Scotland.  Overall, the app was pretty good at pointing out local (or sometimes not so local) attractions, but it fell short of meeting its most important promise, namely the ability to navigate around an area using downloaded map data with no need to access cellular data.

I had pretty good luck researching nearby attractions in most of the regions we visited, even when my phone’s cellular data roaming capability was turned off.  This feature worked more or less as advertised, and in some respects replaced my old-fashioned hardcopy guidebook.  However, when I tried to use the offline navigation feature to find my way from one attraction to another, the app did not deliver on its promise.  In most cases, Google Trips told me that the offline maps were not available for the applicable region, even though I had downloaded the relevant map data before leaving home for the trip.  This was disappointing and represents a serious shortcoming with the app.

From my limited experience using Google Trips during our recent travels, I can recommend the app as a planning and organizational tool prior to traveling, and as a reasonable source of offline data for what to do in each area during travel.  However, I cannot recommend Google Trips as a navigational aid during travel because its offline navigation feature does not seem to work reliably.  Hopefully these capabilities will improve as the app matures.  I will provide future updates as I further test the product.

Once again, please note that there are significant privacy concerns with this app.  You should learn about what data Google collects and how they intend to use it before agreeing to install and use this app.

My original post appears below in its entirety:

As I write this post, Google has just announced a new smartphone app (for iOS and Android) that claims to simplify the planning and management of travel.  Called Google Trips, the new tool appears to have some useful capabilities for many travelers, including travel photographers.  I’ve had a chance to download this free app and play around with it a little bit. Here’s what I found:

    • It’s handy to be able to consolidate all of your reservation info in one place. When I travel, I typically enter every flight, ground transportation segment, hotel, meal, and event as separate items in my phone’s calendar app.  I link the email messages containing each item’s confirmation info to that item.  This allows me to access all of my reservation info in one place, but to set it all up requires quite a lot of time and effort.  With Google Trips, you have the option of handling this consolidation in a simpler fashion.  I was not able to try this out, though, because it seems only to work for reservations made using gmail accounts, and I am not a gmail user.
    • The local content is helpful to have in your pocket. The only reason I still carry a small hardcopy guidebook on many of my trips is for quick and convenient access to information on local attractions, restaurants, and nightlife.  With Google Trips, this may no longer be necessary.  I looked at the content for two cities I plan to visit in Ireland, Dublin and Dingle.  For a large city like Dublin, the app seems to have hundreds of local listings, and a cursory glance confirms they appear to be fairly accurate.  However, for smaller towns like Dingle, most of the listings seem not to be local at all, but an assortment of attractions culled from the surrounding region.  One would expect the coverage to get better over time.
    • Far and away the best feature is the capability to download content. My international data plan, probably like yours, costs an arm and a leg, so when I travel I must turn off cellular data roaming on my phone and use it sparingly to avoid massive overage charges.  In one day of using the phone as a navigation tool to stroll around London, I incurred $50 of data charges.  Google Trips has the capability of downloading directly to your phone all of the maps and content about local attractions for your whole trip, which means it is always available even when there is no cellular data signal, and it won’t eat up your international data allowance.  I haven’t had a chance to test this feature in the field, but plan to do so on my next international trip.

In a single day of using my phone to navigate on a family trip in London, I incurred $50 in data surcharges.  Google Trips’s offline data feature could save a bundle in these situations.  Buy this photo

  • I like the ability to find out what is open nearby and to plan an itinerary to see all the attractions I want in a customized fashion. Just as a good guidebook can suggest an itinerary in a given location for one day, three days, or longer, so can Google Trips recommend top local sights to fit into the time you have available.  The difference is that this app can customize your itinerary to include just the sights you’re interested in, and can provide directions from each location to the next.
  • Be careful about privacy if you choose to use this app. I have concerns about what data Google says it may collect and how it may use this data.  I recommend you read their privacy policy carefully and make your own informed decision about whether to use this app.

You can learn more about the app right from the Google horse’s mouth here: https://googleblog.blogspot.com/2016/09/see-more-plan-less-try-google-trips.html.

Note that I don’t specifically endorse this app or Google products or services in general, nor have I had a chance to use this app in the field.  I am providing this information to my readers in the hope that it may be of interest to some.  There also appear to be some privacy concerns in this and other Google apps, so be sure to research what data will be collected and how it will be used before deciding whether to use this service.

Have you tried out Google Trips?  What do you think?  How does it work in the field while you’re traveling?  Please share your thoughts here.

When Someone Shows You Who They Are [Encore Publication]: How to make great portraits while traveling or near home

“When someone shows you who they are, believe them the first time.” ~Maya Angelou

I have long believed that travel equates to growth; that we cannot know our place in the world until we have experienced the lives of people in many different places.  Of all the joys of travel photography, to me the greatest is having the chance to meet people from very different backgrounds, to get to know them for a few minutes or for much longer, and to collaborate with them to make memorable images.

A recurring theme in this forum will be how to use our cameras as a bridge to learn about and to share insights into other cultures.  But the emphasis of this particular post is on the technical elements of creating portraits.  These techniques apply as well to shooting portraits across the street from our home as to making great people images halfway around the world.

Most portraits that we see published in magazines or photography books were made in the studio, where the photographer has complete control over the lighting and background, and often is working with a professional model.  But when we’re traveling, there’s often only a moment after getting to know a person and receiving their permission to photograph them, during which to set up our gear and shoot.  We have to live with whatever lighting is available and often must make do with a cluttered background.  To make this portrait of a woman enjoying a coffee break at a carpet-weaving collective in Turkey, I wanted to give the image a soft, flattering look and to bring out the rich, saturated colors of her clothing.  I chose a smaller than usual aperture to provide greater depth-of-field, so that the old house itself became part of the environment.  To accommodate the soft and dim natural indoor lighting, I used a higher ISO setting and a slower shutter speed.

Turkey This portrait set in a weaving collective in Turkey evokes a sense of place and a mood of quiet repose.  Buy this photo 

While trekking in Nepal, we stopped to rest at a teahouse where these two sisters were also taking a break along their journey.  I wished them “Namaste,” or well wishes, and they responded with a traditional hand gesture of greeting.  This image was made long before the digital era on a film camera with a normal lens and natural lighting only (had I had a flash unit handy, it would have helped to bring out the girls’ hair against the dark background).  I love the warmth of the girls’ expressions and the simple but bright colors of their dresses set off against the black background of the teahouse’s interior.

NepalA friendly welcome from these two young sisters at a rural teahouse in Nepal.  Buy this photo

Sometimes we want to tell the viewer more about our subject than what is possible in a simple close-up portrait.  An environmental portrait allows us to include more than just the subject by zooming out and bringing in other elements.  I photographed this maker of traditional Turkish instruments in his workshop while he tested a nearly-completed Bağlama, surrounded by other partially made instruments.  To my eye, the resulting portrait is more compelling than a close-up because it shows the subject in his environment.  To make this portrait, I used a wider focal-length and a narrower aperture so as to have more of the environmental elements in the frame and in focus.

TurkeyAn environmental portrait of a maker of traditional Turkish musical instruments.  Buy this photo

A portrait doesn’t have to portray a stock-still person posing for the camera.  Some of my favorite portraits evoke a strong sense of motion.  I made this portrait of a samba dancer during the Carnaval San Francisco annual parade by getting in close and shooting with a medium-length telephoto lens set to a small aperture to soften the background.  I used a fast shutter speed to freeze the action (although sometimes a slower shutter speed can be used to create a nice blurred effect).  In post-processing, I cropped the image to further isolate the dancer and emphasize the grace of the motion.

USA This dancer in a Brazilian Samba krewe was captured in a tight composition that was further cropped in post-processing to give a strong sense of motion.  Buy this photo

Keep an eye on the total composition when framing a portrait.  It’s more than just a matter of framing the subject within the image: other considerations include the background and the overall flow of the viewer’s eye across the image.  In this portrait of the proprietor of Maria’s Cafe in rural Cuba, I composed the image to use the brightly colored door, balcony, staircase, and tree to frame the subject herself.

CubaComposing a portrait involves thinking about the background and the viewer’s overall experience in looking across the image.  Buy this photo

A really good portrait should tell a story about the subject.  Here, Cuban tobacco farmer Benito relaxes in his drying barn with a cigar he just rolled from his tobacco harvest.  I got in close and used the natural light of his cigar lighter and the diffused sunlight within the barn, with no flash added.

CubaThis portrait of a Cuban tobacco farmer tells a story about who he is and what he does.  Buy this photo  

Consider the angle from which you shoot a portrait, as it has a strong influence on the emotional response of the viewer.  Most of the time we want to shoot a head shot or head-and-shoulders shot from a height midway between the top and bottom of the image, but to make this portrait of sisters on the outskirts of Arusha, Tanzania, I chose to shoot from slightly above.  It’s a fine line between giving a sense of vulnerability and causing the image to seem condescending, but I like this photo in part because I feel the unusual vantage point evokes a strong sense of emotion.

TanzaniaAn unusual shooting angle can enhance a portrait, but be careful not to overdo this effect.  Buy this photo

Another rule meant to be broken is freezing the action of a portrait’s subject.  During a fitness photoshoot with my friend Crystal, I shot mostly with a fast shutter speed to freeze her while she worked out.  But for this image, we wanted a blurred effect to create a sense of her forward motion while running, so I used a slower shutter speed.

A slower shutter speed can be used to give more sense of motion to a rapidly moving subject.  Buy this photo

Sometimes a perspective change can work wonders for a portrait.  In this image of the chief of a remote village in Swaziland, I got down low and shot with a wide-angle lens to portray her in the context of the hut behind her and the gourds she holds in her hands.  A wide view in a portrait can lead to less-flattering likenesses, so this effect should be used sparingly.

SwazilandA wide-angle lens and unusual perspective shooting from low to the ground lend this portrait of a Swaziland village leader a sense of connection to the place.  Buy this photo

A note on gear: My go-to portrait lens is the Nikon 85mm f/1.8G lens.  This is a classic portrait lens and provides a flattering perspective and great image quality when your subject is a human.  I use it for nearly all of my portrait work these days.  But this lens also shines for nature and action photography where you don’t need a really long focal length.  It renders really lovely “bokeh,” or the soft quality of the out-of-focus parts of the image.

Which of your portraits do you find most memorable, and why?  How did you create them?  Please share your thoughts here.

Please read this post for my essential tips on how to photograph people while traveling: Post on Travel Portraiture.

Architecture in Ireland and Scotland: Dating from the Neolithic to today, Ireland has remarkable buildings; here’s how to capture them

During our recent travels in Dublin, hiking across southwestern Ireland, and visiting Edinburgh, we encountered fascinating architecture at every turn.  From ruined farmhouses to stately manor houses, and from Neolithic-era “beehive huts” made of stone to modern fishing shacks, there is a wealth of diversity in the buildings in this region.  Here I present some images of the architecture we saw during our rambles, along with a few words about each.

Dublin’s Trinity College is one of the oldest universities in the world.  Famous as the home of the ancient Book of Kells, the college also boasts the Long Room, quite possibly the grandest study hall in the world.  This image was made with a wide-angle lens using only available light.  I used a relatively high ISO setting so that I could choose a small aperture for greater depth-of-field while still using a fast enough shutter speed to handhold the camera.  Buy this photo

Another perspective on the Long Room, this image captures only the upper gallery, emphasizing the repeating patterns of the ladders, arches, and shelves.  During post-processing I decided to render the photo in black-and-white to bring out the texture and pattern.  Buy this photo

An architectural photo doesn’t have to isolate the building from its surroundings.  I combined a shot of Dublin’s famous Olympia Theatre with a street scene by framing the theater and waiting for an interesting cast of characters to walk by.  Buy this photo

Dublin Castle was built during the Anglo-Norman period and has witnessed nearly the entire history of the city.  It is an austere but not particularly pretty building.  To capture this image I shot with a wide-angle lens and a polarizing filter to bring out the texture of the stonework and to attempt to enhance a rather undramatic grey sky.  Buy this photo

The interior of Dublin Castle is prettier than its exterior.  This shot was handheld, as tripods are not allowed inside.  I used a fast normal lens, but even with a high ISO setting the light was sufficiently low that I had to use a large aperture, resulting in a shallow depth-of-field.  Although the foreground objects are not in sharp focus, I think this scene works rather well to capture a sense of the place.  Buy this photo

In the remote and beautiful Gougane Barra Forest Park lie the ruins of a Sixth Century abbey founded by St. Finbarr.  To make this image, I shot from inside one of the cells where the monks lived, looking outward toward the ruins of the abbey walls and altar.  From this perspective the viewer gets a sense of what it would have been like to live a mostly solitary and austere life here many centuries ago.  Buy this photo

On the same tiny island where the ruined abbey is located on Gougane Barra, there is a more modern but quite lovely church.  We spent some time getting to know the American bride and groom who were celebrating their wedding here, and I shot them in front of the little chapel looking across the lake from the mainland.  Including people in the context of the building makes architectural photography more relatable and compelling.  Buy this photo

Hiking along the remote Sheep’s Head Way, we came across this old farmhouse.  I framed the image with an extreme wide-angle lens to lend it an interesting perspective, and I used a circular polarizing filter to saturate the colors of the building and to enhance the sky and lawn.  Buy this photo

The stately Bantry House lies at the end of the Sheep’s Head Way and has been owned by the same family since 1750.  This photo was made from the top of the hundred steps leading through the gardens and up a hill behind the house.  It’s a lovely vantage point from which to photograph the mansion, its gardens, and the gorgeous harbor and mountains in the background.  A polarizing filter was used to add drama to the sky and to saturate the colors of the water and gardens.  Buy this photo

This old farmhouse is now an interpretive center and shop open to the public to give a sense of what rural Irish life was like a century ago.  The front of the house is especially charming when framed to include the rustic surroundings.  Buy this photo

We started our walk in Killarney National Park at the lovely Derrycunnihy Church.  I framed this scene from a low angle looking slightly upward at the church and using a wide-angle lens.  The perspective gives a sense of the stark isolation of the church in this very remote wilderness setting.  As always when shooting upward with a wide-angle lens, one must take care not to distort the lines of the image too severely.  Buy this photo

Along the Gap of Dunloe we hiked past this bucolic scene around a ruined farmhouse.  I framed the image to include the horse carts and the rutted pathway.  Buy this photo

The Wild Atlantic Way showcases some of the most scenic views in all of Ireland as it winds through rolling hills toward the remote Blasket Islands.  Along the way the observant hiker will see dozens of strangely shaped stone enclosures called beehive huts, some of which date back to the Neolithic Period.  This image was shot with a telephoto lens to highlight the beehive huts and to compress the distance between the huts and the Blasket Islands dotting the coast of the Atlantic Ocean.  Buy this photo

The quaint seaside village of Dingle is chock full of charming stone houses with brightly painted doors and windows.  Because it was pouring rain all day and I was recovering from an illness, I brought only my phone’s camera.  Even so, I was able to make some nice images of the houses by using the Manual app to take control of the phone’s camera.  Buy this photo

Edinburgh, Scotland has a tremendous variety of architecture, which could be the subject of a separate post.  For today, I’ll close with this image of the ruins of the ancient abbey at Holyroodhouse at the end of the Royal Mile.  I shot with a wide-angle lens using a small aperture to maximize the depth-of-field and taking care to keep the horizon level so as not to distort the lines of the archways any more than necessary.  Buy this photo

For a refresher on architecture photography, check out this post: Post on Architecture Photography.

What are your favorite destinations for architecture?  Please share your thoughts in the comment box.


Sports Roundup [Encore Publication]: How to get amazing shots at sporting events

Whether we’re traveling afar or close to home, sporting events make for exciting photography.  The thrill of victory and the agony of defeat (credit: ABC’s Wide World of Sports), the heroic effort, and the little moments of humor and repose amidst the adrenaline rush of competition: all of these elements can be captured in images of athletic events.

While every sport has its own rhythm and rules, there are certain techniques that apply across a wide range of sports photography situations.  Let’s take a look at a few situations and discuss how to get the best images given the inherent challenges.  Note that these photos were all made during outdoor sporting events; there are special challenges with many indoor sports, such as basketball or hockey, because the action remains just as fast but there is less light to work with, and the artificial lighting can impart an unnatural color cast.  But that’s a topic for a different post.

Whatever the sport, I like to shoot from different perspectives, from wide to very close.  The wider views show the environment as well as the athletes, so these make good establishing shots.  But often the most compelling and dramatic sports images are the tight compositions, because they portray the athletes in a very personal and relatable way.

Below are two shots of the same rowing crew during the same race at a high school regatta.  The first image was composed from slightly farther away and with a less extreme focal length (300mm), so the resulting composition is more environmental.  It shows not only all the rowers and the coxswain in the shell, but also the width of the river and the surrounding scenery.  This shot establishes the setting and gives the big picture.
Environmental shot of a crew racing at a rowing regatta.  Buy this photo

Now here’s the same crew, but captured from a closer vantage point and using a longer focal length lens (750mm).  This perspective isolates the athletes from the background and shows their expressions and postures.  There’s certainly more drama here, at the expense of some insight into the environment.

A tighter shot of the same crew in the same race.  Buy this photo

There are exceptions, such as when you choose to blur the motion to give a sense of the athlete’s grace, but as rule you want to use a fast shutter speed to freeze the action in sports photography.  Very often that means shooting at 1/1000 of a second or even faster.  Choose the Shutter Priority mode on your camera to gain control over the shutter speed, and be sure to select a high enough ISO setting to allow the shutter speed you require.  If your camera has different auto-focus settings, you may find it helpful to choose a single-point focus setting if you know where the action will be, or a dynamic focus setting if the location of the action changes very quickly.  For this image of a professional beach volleyball tournament, I chose single-point auto-focus so I could select the exact spot where the players would be jumping.  I also find the best way to capture a great image in fast-moving sports (as with wildlife photography) is to set the camera to continuous or burst mode and continue to shoot rapidly through the action.  That way, you’ll have several different images to choose from, and with luck at least one will have caught that “decisive moment.”

A fast shutter speed and single-point auto-focus allow the fast action of a beach volleyball competition to be captured precisely.  Buy this photo

My favorite sports images portray the human element in a very personal way.  This photo from a Spartan Race (an extreme athletic event that combines long-distance running with a supersized obstacle course) captures the strength and the struggle of the athlete as he nears the end of a long race through the 100-degree California desert.  Keys to success in making this image were shooting from a vantage point low to the ground, using a medium-length prime telephoto lens with a large aperture to soften the background, and waiting for just the right moment.

An endurance athlete completes an obstacle near the end of a Spartan Race.  Buy this photo

The fun of shooting a sporting event doesn’t end when the competition is over.  Be sure to capture the dramatic and often humorous moments during award ceremonies and downtime during and after the action.

These athletes have finished their Spartan Race and strike a humorous pose at the finish line.  Buy this photo

Want to see more posts on what to shoot at home and while traveling?  See them all here: http://www.to-travel-hopefully.com/category/travel/shoot/

What sports do you enjoy shooting?  Do you have tips on how to get great sports images?  Please leave a comment in the box after this post.

Portraits from Irish Pubs: Ireland’s trad music scene is a visual as well as an aural treat

The Republic of Ireland has undergone tremendous social and financial changes over the last 20 years.  It’s now indisputably a modern global society with a strong diversified economic engine.  Yet it’s also a happy truth that today, as in days of old, the pub remains at the center of Irish social life.  Far more than a simple watering hole, the local Irish pub, whether in the center of cosmopolitan Dublin or in a tiny coastal fishing village, is a gathering place where stories are shared, traditional music is played, old friends catch up, and new friends are made.  Oh, and a pint or two might just be downed.

Many pubs feature live traditional, or “trad,” music on a nightly basis.  The casual informality of Ireland’s pub scene allows local amateur musicians to sit in with seasoned pros and pass down the songs from old to young.  Members of the “audience” (it’s hard to distinguish between performers and audience when the sessions are so participatory) are invited to step up to the “stage” (usually just a table covered with pints of beer) to sing a song at any time.  This informality allows the travel photographer to get to know these wonderful musicians over a few pints and to make authentic portraits without feeling like we’re intruding.

Today’s post is a simple photo essay featuring portraits I made of musicians and fellow customers at a variety of pubs across Ireland (plus one in Scotland).  I will forgo the usual technical details except to remind you that when shooting portraits in low-light settings where the use of flash is impossible, that a good fast portrait lens should be used along with a high ISO setting.

My current favorite lens of all is my Nikon 85mm f/1.8G lens.  This is a classic portrait lens and provides a flattering perspective and great image quality when your subject is a human being.  I use it for nearly all of my portrait work these days.  But this lens also shines for nature and action photography where you don’t need a really long focal length.  It renders really lovely “bokeh,” or the soft quality of the out-of-focus parts of the image.

This young singer and fiddler who we met at Dublin’s famous O’Donoghue’s Pub was already a seasoned pro.  In this portrait I sought to capture her expressiveness with hand gestures.  Even without hearing her sing, the viewer can tell that she is expert at weaving stories.  Buy this photo

O’Donoghue’s is widely known as the spot where bands such as the Dubliners sparked the Irish folk music revival in the 1960s.  This band carries on the tradition, sharing songs old and new.  With a wide aperture comes shallow depth-of-field, so when photographing several people at one time you may have to choose which part of the image will be in focus.  Here I wanted to place the emphasis on the guitarist, so the other players are in softer focus.  Buy this photo

Another of Dublin’s great spots for trad music is the Cobblestone Pub.  On this night they were holding a very casual session, where all musicians were invited to come and play some tunes together.  The informality gave me a chance to get to know most of the players over the course of the evening and to make portraits without feeling like an intruder.  Again, the shallow depth-of-field required artistic choices about which subject would be in sharp focus and which would be in softer focus.  Buy this photo

In lively Kenmare, we wandered into a pub where a fabulous folksinger was performing many of the Irish songs I remember from childhood in Boston.  I chatted with Pat during his set breaks and bought a couple of his CDs.  He was a great subject for some expressive portraits, too.  Buy this photo

We didn’t have to leave our hotel on our first night in Killarney to hear some wonderful trad music.  This trio played many of our favorite songs right in the hotel’s pub, and they got most of the audience up to sing and dance along.  Buy this photo

Surprisingly, we heard only one rendition of Cockles and Mussels (aka “Sweet Molly Malone”) during our whole stay in Ireland.  This brave soul stood up in front of the crowd to sing that old standard.  Buy this photo

There’s nothing like watching an Irish crowd respond to the playing and singing of “The Wild Rover” to get one’s blood pumping.  Be ready to capture action in the “audience” as well as on the “stage.”  Buy this photo

Our second night in Killarney brought us into the center of town to an old and lively pub.  The table next to ours had four generations of a local family in attendance, each enjoying the musical set in their own way.  The oldest generation was my favorite.  Buy this photo

I got to know this fiddler over the course of the evening in Killarney.  During the break between sets she was kind enough to let me make her portrait.  It can be difficult in these crowded settings to avoid a cluttered background, but using a wide aperture for a shallow depth-of-field can help, as can careful post-processing.  Buy this photo

Elements I look for when making a portrait are faces with character and colorful details.  I found both with this accordion player and his beautiful instrument.  Buy this photo


The tiny fishing hamlet of Dingle has a population of just 1900 people, yet it somehow supports 52 lively pubs.  My kind of town!  Over pints of ale and shots of local whiskey in this colorful old pub, we made new friends from across the street and from as far away as Newfoundland.  This portrait of a musician was made almost entirely with light from the fireplace.  Buy this photo

The Scottish traditional music scene is as vibrant as Ireland’s, as evidenced by this band we heard at Edinburgh’s Sandy Bell’s Pub.  This place was bustling and extremely crowded.  The cluttered background somehow doesn’t detract too much from the power of this portrait.  Buy this photo

Have you traveled in Ireland or Scotland?  Do you have favorite portraits of the generous and friendly people you encountered there?  Please share your thoughts in the comment box.

When You Get Back Home [Encore Publication]: An Introduction to the Essentials of Post-processing

You may want to share some of your favorite images with friends and family right out of the camera while you’re still traveling, and as long as you’re not sharing so broadly that potential thieves may be alerted to your absence from home, that’s a fine thing to do.  To enable immediate and easy sharing, you can choose the setting available on many cameras to shoot both RAW and JPG files; the JPG images will often look pretty decent for sharing when they come straight from the camera, and you still have your much more detailed image data saved in the RAW files.

But when you get home from your trip, it’s worth making the effort to catalog and post-process the RAW files of your favorite images so that they will look their very best and so you will be organized for finding them in the future.  I’ll cover how to organize your catalog of images in a later post, but for now let’s take a look at the essentials of post-processing.

There are many software applications available to perform these tasks, but I strongly encourage you to check out Adobe Lightroom.  I use this tool, and nearly all professional and enthusiast photographers I know also use it.  You can license it along with other Adobe software on a pay-per-month basis as part of Adobe’s Creative Cloud, but it can also be purchased with a perpetual license (i.e., you purchase the software once and can use it forever), which is how I acquired it.

Once you have Lightroom installed on your PC, it’s easy to import your images from your camera’s memory card or from your PC’s hard drive and to organize your catalog of images using the software’s Library module.  When your images are in your Lightroom catalog, the software allows you to perform all post-processing you desire using its Develop module.  After shooting the image, my second-favorite part of the digital photography process is enhancing the the image in the Develop module.  The software package even gets its name, Lightroom, as the new digital equivalent of the work we older photographers formerly had to do in the darkroom, such as dodging, burning, and cropping our film negatives to get the images looking their best.

As an example of how a little post-processing can dramatically enhance an image, let’s take a look at a night shot I made of Copenhagen’s Christiansborg Palace, the seat of the Danish Parliament.  Here’s the “Before” picture:


Lightroom’s Develop module

The beauty of Lightroom’s method is that it doesn’t actually change your original image files as you edit them.  Instead Lightroom saves a roadmap of the various edits you make and stores this list of adjustments along with a pointer to the original file.  This is called “non-destructive editing”, and it allows you to edit your images to your heart’s content without overwriting or changing the originals at all.  You can go back as many times as you want later to revisit your edits and change them again and again.

Let’s look at this process in more detail.  Here is the basic Lightroom Develop module screen:

lightroom develop module

The left bar shows a thumbnail of the image you’re working on and a list of the most recent edits you have made.  The central part of the screen shows a larger version of your image and this can be zoomed in and out to work on details or the whole image.  The right bar has a histogram (a graph showing how many pixels in the image are at each brightness level from totally black to totally white) at the top, then a toolbar from which you can choose some of the editing tools quickly, and then a large area with sliders (only some of which are shown in this screenshot) that you move left or right to adjust various elements of your image.  The editing tools in Lightroom are comprehensive enough that I find I very rarely need to import an image into Adobe Photoshop to make really sophisticated edits; nearly all of the time, I can perform all of my post-processing using only Lightroom.

Some photographers spend a lot of time making major enhancements to their images, but I like to try to adjust my camera’s settings precisely enough that the image is made in the camera the way I envisioned it when shooting, so that I need to make only minor adjustments in post-processing.  While the exact steps of post-processing will be different for every image, here is my basic workflow (note that for the most part, I work from the top to the bottom of the adjustment tools found in the right bar):

  1. Adjust the white balance as needed.  Remember my advice to always shoot in RAW mode.  One of the advantages of RAW files is that you can adjust the white balance in post-processing, regardless of what your camera’s white balance controls were set for while you were shooting the image.  In JPG files you have much less control over the white balance after the fact.  Just choose a different preset white balance type (such as Daylight, Shade, or Flash) from Lightroom’s menu, or create a custom white balance yourself.
  2. Adjust the exposure as needed.  Use the histogram and the image preview pane to lighten or darken the whole image until it looks best.
  3. Adjust the contrast as needed.  Increasing contrast gives more separation between the darkest and lightest portions of the image, while decreasing contrast does the opposite.  I find that most images require the contrast to be increased slightly to moderately.
  4. Adjust the highlights and shadows as needed.  Highlights are the brighter parts of the image, and I find that often these need to be reduced in brightness to regain some detail that may have been lost in the camera.  Shadows are the darker parts of the image, and often these need to be made brighter to bring out lost shadow detail.  After the highlights and shadows have been adjusted, you may need to adjust the whites and blacks (very brightest and very darkest points in your image) if there are extremes of contrast present.  Most of the time I do not need to change the white and black points.
  5. Adjust the clarity as needed.  The clarity slider changes the contrast of the middle tones (neither the darker nor the lighter parts) of the image.  Usually images need a subtle increase in clarity to bring out the details in the texture.  Don’t overuse this tool or the image can become unnatural looking.
  6. Adjust the vibrance and/or saturation as needed.  Both of these sliders will change the concentration of the colors in your image, but vibrance tries to avoid changing the color of skin tones so images with people will often look more natural after increasing the vibrance than after increasing saturation.  Occasionally you might need to make adjustments to both vibrance and saturation, but usually I find a subtle increase in vibrance is sufficient.  Again, don’t overuse these tools or your image will start to look exaggerated and surreal (unless you’re going for those effects).
  7. Adjust the concentration of individual colors as needed.  Each color channel has its own slider to increase or decrease its saturation.  I don’t use these sliders often, but occasionally you may want to increase or decrease the saturation of just a single color.  For example, when shooting a landscape with sky or water, you may want to increase the blue saturation to bring out those parts of the image.
  8. If you want to work on your image in black-and-white, the color channels area is the tool I use to do the conversion from color to monochrome.  Click on the “B&W” tab above the individual color channel sliders, and then adjust the mix of how the colors are blended by increasing or decreasing each color’s slider to see how the black-and-white image looks.  I find that I often have to readjust the contrast slider at this point to get the image looking its best in black-and-white.
  9. There is some sharpening already applied to your image file by default, but if it looks too soft in the important areas, you can dial in some additional sharpening.
  10. When the image you’re editing was shot at a high ISO (sensitivity) and/or a very long shutter speed, there will likely be some noise in the image.  This can be managed somewhat in Lightroom’s noise reduction tool.
  11. Under basic lens corrections I will usually select all three of the check box items.  Lightroom knows how most camera and lens combinations work and can eliminate many of the optical glitches that would otherwise show up in the image.  Under manual lens corrections, I may need to rotate the image if the horizon wasn’t level when it was shot.
  12. All of the above adjustments affect the entire image.  After completing these adjustments, it’s time to make any selective adjustments that affect only a selected part of the image.  These selective adjustment tools can be found in the toolbar just below the histogram.
  13. Of these selective adjustment tools, the most generally useful is the cropping tool, which of course allows you to remove unwanted portions of the image on the sides, top, or bottom.  It’s always best to try to compose the image correctly in the camera, but cropping is often still needed in post-processing.
  14. The spot removal, filters, and adjustment brush are more complicated selective adjustment tools that can easily be subjects of additional posts in their own right.

These steps usually won’t all be needed for any one image.  If you have several images that were shot under similar conditions, you can select them all in the Library module and turn on Auto Sync, which then allows you to make the adjustments only once and apply them to all the selected images.  Another big time saver is creating your own presets, which are saved routines that you can call at the click of a button to automate tasks that would otherwise have taken multiple steps.  Unlike Photoshop, Lightroom was designed by Adobe specifically for photographers to use, so it is set up in such a way as to make life much easier for us to organize, edit, and share our images.

Here is the “After” version of our sample image of Copenhagen by night.  You can see how a few simple edits during post-processing can really make an image pop.

Buy this photo

I hope you’ve found this very basic introduction to the essentials of post-processing to be helpful.  Now it’s your turn.  What are your go-to techniques in editing your images?  Do you have tips and tricks that you’ve found make your life easier after you return from a trip?  Please share your thoughts in the comment box at the end of this post.

Amazing Landscapes [Encore Publication]: How to Make Images that Capture the Spirit of the Place

I love landscape photography.  To create a really successful landscape image, several elements have to converge: the lighting must have a pleasing quality, objects in the foreground and/or middle ground should be intriguing, leading lines should take the viewer on a journey through the image, and (usually) the sky must be dramatic and compelling.  I shoot a lot more mediocre landscapes than great ones, but when all the stars align (sometimes literally, during astrophotography shoots) and all those compositional elements are in place, the results can be amazing.

Let’s take a look at some of my favorite landscape images and talk about how they were made.
Buy this photo

While traveling in Svalbard to view the total solar eclipse of March 2015, my wife and I booked a safari via snowmobile to search for polar bears.  We covered 80 miles by snowmobile, much of that after dark.  The temperature averaged -5 degrees, with wind chill about 25 below zero Fahrenheit.  We rode out to an area now used as a campground, where an early settler and his wife lived a century ago.  This was glorious, otherworldly scenery encompassing ice fields, mountains, and the icy Barents Sea.  Svalbard is located so far north (closer to the North Pole than to mainland Norway) that the sunsets last for hours, so I set up my gear at the edge of the Barents Sea, composed the frame so that the eye is led out to the horizon by the slabs of ice and the range of mountains, and waited for the best light.  A polarizing filter added some drama to the sky.  A very long exposure was not necessary because there was no point to trying in blur the frozen water.  I shot several frames before the light became too dim and the temperature too bitter to continue.  This shot was the keeper!

Buy this photo

This landscape was shot during a recent trip through Turkey and is a good example of how sometimes we photographers just get lucky.  On arriving in the Cappadocian village of Üçhisar, we were thrilled to learn our hotel room was inside an ancient cave dwelling.  We awoke at 5:30 AM the next morning to the sight out our cave-hotel’s window of hundreds of hot air balloons launching above the “fairy chimneys” that dominate the Cappadocian landscape.  I got (mostly) dressed and rushed out onto our balcony, set up the camera on the lightweight travel tripod I carried on the trip, put on a wide-angle zoom lens, and started shooting as the sun rose.  I bracketed the exposure but because the light was perfect in this one shot, I did not end up combining multiple exposures into an HDR (high dynamic range) image.  Instead, this shot, one of the first of the morning’s session, was the clear choice.

Buy this photo

Chile’s Torres del Paine National Park is catnip for landscape photographers.  There are so many glorious subjects here that you can go crazy trying to photograph everything.  But Patagonian weather is notoriously changeable, and group travel doesn’t always afford photographers the chance to shoot at the right place at the right time of day with the right weather.  Fortunately, on our second night at the lodge on Lago Gray, I could see all the conditions were lining up for an epic image.  I skipped most of an excellent dinner so that I could set up my gear on the deck: camera with wide-angle lens, polarizing filter, steady tripod, and remote release.  I framed the image with a nice balance between sky, mountains, glaciers, lake, and foreground foliage.  And I started shooting.  I bracketed the exposure with 7-shot bursts, each one stop apart.  Later, in postprocessing, I combined a few of the shots from one burst into an HDR (high dynamic range) image using Lightroom’s photomerge feature.

Buy this photo

Closer to home, Yosemite is another photographer’s dream location.  While hiking to Dog Lake in Yosemite’s Tuolumne Meadows area, a freak hailstorm hit.  Suddenly the sky was hurling hailstones in biblical style and the formerly placid surface of the lake turned black with the force of the pelting ice.  What’s a photographer to do?  Start shooting, of course!  A tripod was impractical under these conditions, so I used a relatively fast shutter speed and shot handheld.  I took a series of bracketed exposures and combined them later using Lightroom into an HDR (high dynamic range) image.  For me, this image works because of the tension between the peaceful foreground of tree trunk and reeds, contrasted with the ominous sky and turbulent water.  The fallen tree and edge of the grasses provide nice leading lines from the peaceful to the violent portions of the frame.

Buy this photo

Another California landscape, this image was shot in the gorgeous Point Lobos reserve on California’s Central Coast.  As sunset neared, I set up camera and tripod right on the beach, shooting down onto the rocks and Pacific Ocean.  I used a neutral density filter to allow a very long exposure so that the water would blur.  I also attached a polarizing filter in an attempt to darken the sky and add drama to the image, but having two filters on the wide-angle lens did lead to some vignetting (the blocking of light at the edges of the photo), which I had to crop out in postprocessing.  This image was made from a single exposure with only minor adjustments to bring out the shadow details and saturate the colors.

Buy this photo

This year’s Perseid Meteor Shower was more active than we’ve seen in many years.  At the peak night of the shower, I headed out to a spot where a break in the trees allows a view over Crystal Springs Reservoir and the Santa Cruz Mountains.  We waited until about 2 AM so that the meteor activity was at a peak and the lights of the nearby towns were no longer bright.  Shooting with a wide-angle lens and a heavy professional tripod, I framed the image to include a pleasing foreground with trees, reservoir, and mountains, with most of the frame covering the dark sky.  I used a star finder app to shoot toward the galactic core of the Milky Way.  I set the camera to make 25-second exposures at f/4 and ISO 1600.  At this focal length, exposures longer than 25 seconds will cause the stars to appear blurry due to the motion of the earth.  And then I just kept shooting, one exposure after another, for nearly two hours.  Four meteors passed through the part of the sky in my image area during this time, and I combined the images that included them into one merged image using a software application called StarStaX.  While I like this image a lot, it could have been improved by finding a darker sky area (the lights from a nearby city caused the orange glow at the top of the mountains) and by bringing out the Milky Way a bit more prominently.  Now I know what to do during next year’s Perseid Shower!

A good wide-angle zoom lens is a must for landscape photography.  Many of the images featured in this post were shot with my Nikon 16-35mm f/4 lens.  It’s got great image quality and is well built, and I find it’s a great alternative (except perhaps for astrophotography where the extra speed is required) to the popular but very expensive Nikon 14-24mm f/2.8.

Want to see more articles on how to shoot travel images?  Find them all here: http://www.to-travel-hopefully.com/category/travel/shoot/

Now I’d love to hear from you!  What are your favorite landscape images, and why?  To what lengths have you gone to capture landscape photos?  Please share your thoughts in the comment box at the end of this post.

A “Fixer” for the Rest of Us [Encore Publication]: How to leverage local resources to shoot like a pro

How do professional travel photographers on assignment create those amazing, make-your-jaw-drop images?  You know, the photos we see when browsing the pages of a major travel magazine or website?  There are several advantages the pros have, including technique honed over decades of practice, state-of-the-art equipment (with prices to match), and the ability to spend a lot of time at the same location, returning again and again until the time of day, lighting, weather conditions, and subject matter are perfectly aligned for a great shot.  But one advantage available to the pros can be borrowed, at least in part, by the rest of us who love travel photography, too.  That is the use of a “fixer,” a local expert who knows the region, the language, the culture, and the way to get things done, and whose expertise helps the travel photographer get those incredible shots.

While we were visiting a carpet weaving collective in Goreme, Turkey, our group’s trip leader introduced me to this worker who was enjoying a cup of Turkish coffee during her break.  Buy this photo

If you are traveling on a group trip run by a good travel company, you may already may have a fixer working to make your experience (including your photographic experience) as rewarding as possible.  The operator will likely have chosen an itinerary that will get you off the beaten path and into the settings where unusual and powerful images can be made.  They will have arranged your accommodations and transportation well in advance of your departure.  The company should have planned some activities and excursions that will allow you to interact with local people and see how they truly live.  And best of all, they have provided you with a local expert, often called a trip leader or program director, who knows the lay of the land, speaks the local language(s), and can facilitate your getting the kinds of shots you want.  This is of paramount importance when you want to have lots of interaction within a culture very different from your own, which I believe is the best part of traveling as a photographer.

For example, I made the above portrait after being introduced to the young worker at a carpet weaving collective by our trip leader in Turkey.  He translated so that she and I could get to know each other a little bit first, and then asked her if I could make her portrait.  It is certainly possible (I’ve done this countless times) to ask for yourself by using sign language, pointing to your camera, and smiling a lot, but having a local person with you can be a great help.

Sometimes, knowing where to go to seek out authentic cultural interactions works magic.  I captured this shot of our host family during a home-hosted lunch on an estancia (ranch) in Patagonia.

Our hosts, Chango and his extended family, were happy to pose for a portrait after we enjoyed their hospitality on their Patagonian ranch.  A local guide and good travel company can help arrange these kinds of authentic interactions.  Buy this photo


Visiting a rural elementary school in Tanzania afforded us the chance to meet kids in the classroom.  This type of experience would be hard to arrange while traveling independently, but a good group leader or guide can facilitate meaningful interactions with local people.  Buy this photo

When the trip is scheduled specifically to attend a special event, it is especially vital to have a good leader who is adept at working with local professionals to plan all the details.  For example, it was quite a major logistical feat to get a large group of scientists and photographers into place to study and view a total solar eclipse in a part of the world as remote and forbidding as Svalbard.  Our trip leader partnered with an astrophysicist who is a world authority on eclipses, beginning years in advance of the solar event, to ensure we had the best chance possible of clear weather conditions and the right vantage point from which to study and photograph the eclipse.  This is the sort of value that an expert fixer brings when you book a trip with one of the top companies.

Our eclipse expert and one of his students set up their gear on the morning of the total solar eclipse in Svalbard.  Buy this photo

To be sure, there are some compromises required for group travel, and having access to a shared program director is not the same as having a dedicated personal fixer to arrange your photo shoots for you.  I like to travel independently in places with developed infrastructure and where I can readily bridge the cultural or language gaps myself.  That said, I also love to travel in small groups run by excellent travel companies, in large part because their planning, coupled with the knowledge of the local trip leader, helps me make those memorable images.

Want to read other posts about planning your travel photography?  Find them all here: http://www.to-travel-hopefully.com/category/travel/plan/

Have you had a situation where you got your shot thanks to the knowledge of a local expert?  How do you arrange your travel when you’re visiting remote parts of the world or when you want to have lots of interaction within a culture very different from your own?  I’d love to hear your thoughts and experiences!  Please respond via the comment box.

Photography as a Bridge to Local Culture [Encore Publication]: Your camera is a great tool for meeting local people and learning about culture

I’ve heard certain travelers grumble that photography inhibits deep cultural learning and interaction when we visit new places.  Our cameras, this line of reasoning goes, isolate us from the local people we’re trying to get to know.  The lens, they believe, acts as a distancing device to turn locals into subjects and travelers into tourists.

I disagree emphatically!  Your camera is a great tool for meeting local people and learning about culture, immersing yourself even more deeply in the spirit of the place and the lives of the people who live there.  But only if you use it in the right way.  Allow me to explain.

While the local customs and even the laws governing whom it is acceptable to photograph, and when or where it is okay to make an image of them, do vary from place to place, there are a few common-sense guidelines that will help us travelers engage in a friendly, curious manner instead of upsetting people and causing social discord.  Here are a few key guidelines to keep in mind.

    • The Golden Rule: If it’s not okay in your home country, it’s probably not okay in other parts of the world.  Would you appreciate a stranger running up to you on your front lawn and shoving a lens in your face?  I’m guessing, no.  So please don’t behave in that way toward people in other places.
    • Make a portrait, don’t take a portrait: Get to know your subject first as a person, even if just for a brief exchange.  While there are occasionally situations where the moment or the expression will be lost by approaching your subject before shooting, I find that most of the time I make better images as well as have more meaningful interactions, when I say hello and ask the person first.

USA

I chatted for a while with these samba dancers as they were celebrating just after San Francisco’s Carnaval parade.  Getting to know them first made it easy to ask permission for a portrait. Buy this photo

    • Approach children with sensitivity: Kids can be amazing photographic subjects!  They are often uninhibited in front of the camera and they portray cultural practices and lifestyle in a relatable, endearing way.  But it’s especially important to understand when it’s okay to make a portrait with them.  While traveling in South Africa, I saw first-hand what can happen when travelers misunderstand social norms.  A fellow traveler in my group saw a young boy playing near where we were waiting for a border crossing.  She shouted excitedly, “Soooo cute!,” and rushed up to the child, camera extended toward his face, to take his picture.  In an instant the boy’s father ran over, irate, and yelled at me (he mistakenly thought I was the fellow traveler’s father), “How would you like it if we came to your country and started taking pictures of your children?”  A few minutes later I explained privately to the offending traveler why her actions caused a negative reaction.  She had no idea this behavior wasn’t okay.  When in doubt, refer to the Golden Rule, above.

Kashgar, China

We visited the old town in Kashgar just before the Chinese government began demolishing the homes there and relocating the mostly ethnic Uighur people.  It was and remains a complicated social situation, but I was fortunate to be able to make this memorable portrait of a young Uighur girl in traditional clothing sitting in front of her soon-to-be-destroyed family house.  I approached her mother first to make sure it was okay to photograph the girl.  Her expression of pride mixed with apprehension is what I feel makes this image strong.  Buy this photo

    • Getting to know you: It may seem difficult to talk with a stranger from a very different culture who likely speaks a very different language from our own.  For us introverts, it seems like even more of a challenge.  But I’ve learned a few tricks and tips that make it much easier to get to know a person before photographing them.  Learn a few words of the local language.  Just saying “hello” or “good day” can be a great icebreaker.  It’s a fairly universal gesture to point to your camera and extend your arm gently toward your hopeful subject to inquire, “Is it okay if I take your picture?”  Just as happens in our home countries, a subject may say no, but most of the time people are happy to be photographed if you are polite, respectful, and try to interact with them first.  A trip leader, guide, or local friend can often be a great help by introducing you to the person you’d like to photograph.

Turkey

At the start of our trip through Turkey, I asked our trip leader to introduce me to people we felt would be good portrait subjects.  With his help I was able to overcome the language and cultural difference and capture this striking portrait of an employee at a carpet weaving cooperative.  Buy this photo

    • How close is too close?: In most situations it is fine to make an image that includes a large group of people, none of whom will be too prominent in the photo.  For close-up images, though, in which an individual person or small group of people will be the obvious subject, it is best to ask first.
    • Money matters: When there is a commercial transaction between you and your subject, it often paves the way to ask to make their portrait.  I’ve had good experiences photographing local street vendors, musicians, artisans, and shopkeepers after purchasing their wares or tipping them for their services.  And of course it is usually fine to photograph singers, dancers, and musicians in a performance you have paid to attend, as long as local rules about photography are obeyed (sometimes you will have to pay extra for a license to photograph, and frequently flash is not permitted).  But it can become a slippery slope when people begin to expect to be paid just for having travelers photograph them.  In Peru we had many people, including young children, dress in traditional costumes and approach us to pose in photos for money.  In an Argentinian mountain village we were even asked to pay to photograph a gentleman’s Saint Bernard dogs.  In these situations, you’ll have to exercise your best judgment.
    • When can you shoot first and ask questions later?: It’s rare, but on occasion you will encounter situations when the “decisive moment” will be lost if you ask for permission to shoot.  This is another judgment call.  Just like when shooting street photography at home, I consider several factors when deciding whether to make an image of a stranger in a different part of the world.  When I do see an amazing expression, gesture, or moment and decide to capture it before getting to know the subject, I will usually approach them and show them the image on the camera’s display, attempting to query whether it’s okay.  A smile and an easygoing, open gesture can help when approaching.  If the response is clearly negative, I delete the image on the spot and in front of the subject. Again, see the Golden Rule, above, and keep in mind that courtesy and respect make all the difference.

Cuba

This was one of those situations when I shot first and asked questions later.  The proprietor of Maria’s Cafe in an eco-village in Cuba’s rural Vinales Valley was standing on a balcony above the cafe surveying the activity below.  I loved the way her contemplative expression and relaxed gesture were framed by the saturated Caribbean colors of the doorway, so I made this image right from our table.  Later, when Maria came down to talk with customers, I showed her the photo and she was pleased with it.  Buy this photo

Beyond these general guidelines, there are local variations.  Do get to know the customs that prevail in the countries and regions you plan to visit.  For example, in some cultures it is acceptable to stand very close to others when conversing, while in other cultures the social boundaries are much more pronounced.  Sometimes it is fine to approach a child directly, but in other cases the first contact should be made with the parent or teacher.  There’s quite a bit of local variation in the amount of small-talk people engage in before getting down to business.  Knowing the local customs not only helps you make better portraits of the people you meet, but will also encourage deeper interactions and mutual respect.

In my experience, the camera is a wonderful bridge that enhances, rather than detracts from, making meaningful cultural connections with people while traveling.  Just try to do it the right way!

Want to read other posts about what to shoot during your travels?  Find them all here: http://www.to-travel-hopefully.com/category/travel/shoot/

Do you have a good story to share about your experiences, positive or otherwise, in photographing people you met during your travels?  What’s your approach to making portraits while abroad?  How has photography enhanced your cultural interactions?  Please post your thoughts in the comment box.

People Pictures Beyond the Selfie: Why selfies don’t make great images, and how to get really good pictures including yourself

Several times in the pages of “To Travel Hopefully,” I’ve emphasized the importance of including yourself and your travel companions in some of your images.  Not only will you and your friends enjoy seeing yourselves captured in these travel photos, but the inclusion of people in travel images gives a sense of scale to the places you visited and tells a more compelling narrative than would be possible in photos without people.

The standard way of including yourself in a photo these days is to use your phone’s selfie camera, but there are a number of reasons why taking selfies is not the best way to capture your own likeness in an image.  First, the sensor in the front-facing (“selfie”) camera on your phone very likely has a much lower resolution than does the phone’s regular camera, so the picture quality is lower.  Second, it’s difficult to properly compose a photo when holding the camera out at arm’s (or selfie stick’s) length, let alone to smoothly release the shutter.  Third, the perspective imparted to the image when the camera is held above in selfie fashion is distorted and often unflattering.  It’s really quite unlikely that you’ll get professional quality images of people using the selfie technique.

A selfie doesn’t allow you to properly compose your image, is awkward to shoot, and uses a low-quality image sensor.  Instead, mount your camera on a tripod, compose the image exactly the way you want it, and release the shutter remotely or with the camera’s self-timer.  Or enlist the help of another photographer.  Buy this photo

Fortunately, there are better ways of including yourself in your photos, and they’re not difficult to implement.  The two most straightforward methods are placing the camera on a tripod and triggering the shutter with a self-timer or remote release, and setting up the camera for another person to shoot handheld.

The basic setup is the same for either method.  Have the other people you want included in the photo stand in the desired location.  If you’re the only person present, make a note of where your body will be placed in the composition.  Then compose your image from the best vantage point, with the camera either mounted on a tripod or handheld.  Configure your camera’s settings (focus, exposure, flash, etc.) the way you prefer, and test the settings by shooting a few frames without yourself in the image.  Then move into your predetermined position in the frame and either fire the shutter remotely with the self-timer or remote release, or ask another person to push the shutter button for you.

If you do choose to have another person press the shutter release button for you, you need to be thinking about two things: 1) ensure they know how to operate the camera and won’t run away with it, and 2) be aware that in many countries and regions the person who pushes the button owns the copyright for the image even if they did not contribute artistically to making it.  I prefer to use a tripod whenever practical, so as to have a higher likelihood of capturing the image I envision and to avoid any question as to who owns the copyright.

Do you have a favorite method for including yourself in your photos?  Please share your ideas in the comment box.

Want to see more posts on how to shoot while traveling?  See them all here: http://www.to-travel-hopefully.com/category/travel/shoot/.


Every Day I Write the Book: Even in the digital world, there’s a place for a hardcover photo book from your trip

In the brave new digital world, we have a lot of ways to share our travel photos after (and sometimes even before) we return from the trip: social media, on-screen slideshows, video montages, and of course the enduringly popular paper print.  Even with all of these very immediate sharing options, one of my favorite formats for preserving my travel images is the hardcopy photo book, and today there are more choices than ever before regarding how to create these wonderful keepsakes.

Our living room bookshelf and coffee table are home to more than a dozen photo books, each one showcasing the images and preserving the often fleeting memories of the details of a major trip we’ve taken.  Here’s why I love this method of sharing travel photography and how to create your own photo books.

img_3497

The leather cover of a photo book showcasing our recent travels in Turkey.

Why create a photo book?  Over time, new digital formats replace existing ones, and the very old ones become obsolete.  Within about 20 years, it is quite likely that none of our present formats of storing data will still be readable.  The printed page has much more staying power.  It is estimated that photos printed on high quality paper using high quality inks, and stored away from direct sunlight, can last for 100 years.  I’m a big fan of framed prints, as well, but a photo book is more cost-effective and space-efficient as a means to preserve many more photos than we could easily hang on our walls.  And because photo books can include customized captions to accompany the included images, they’re a great reference source for refreshing our memories about what we saw, when, and where.  Finally, photo books look great and are fun conversation-starters to tell the story of our travels when friends and family come to visit.

How do you create a photo book?  There are a number of methods, but unless you are a scrapbooker or handy with bookbinding, all of them involve sending your specifications and images to a vendor that will print the book, bind it, and mail it to you.  Some software packages, including Lightroom, have built-in modules for creating photo books.  And most photo sharing websites, including SmugMug (a fabulous site used by many professionals including me), Snapfish, Shutterfly, and Apple Photos, allow you to create and purchase photo books from your images.  These services vary in features, price, and quality, so shop carefully.  Most of my past photo books were created using Snapfish, but I am transitioning to using Lightroom’s and SmugMug’s services instead.  I will report on the results in a future post.

img_3493

Good book-creation software should allow you to choose from a wide range of formats on each page to display one or several photos plus text.

The basic process works similarly for any of these services.  You specify the book size, cover material, paper quality, printing quality, and other basic parameters for your book.  Then, you fill the pages of the book with your photos, specifying the layout you want for each page.  You can add captions for individual images or series of images, and you may be able to add various special effects.  At the end of the process, you place your order for the book to be printed and mailed to you.  Using the service offered by Blurb, which is available via SmugMug and Lightroom, you can self-publish a large or small print run of books and make them available for sale on Amazon or directly on your own website.

lightroom-book-module
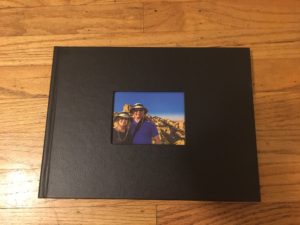
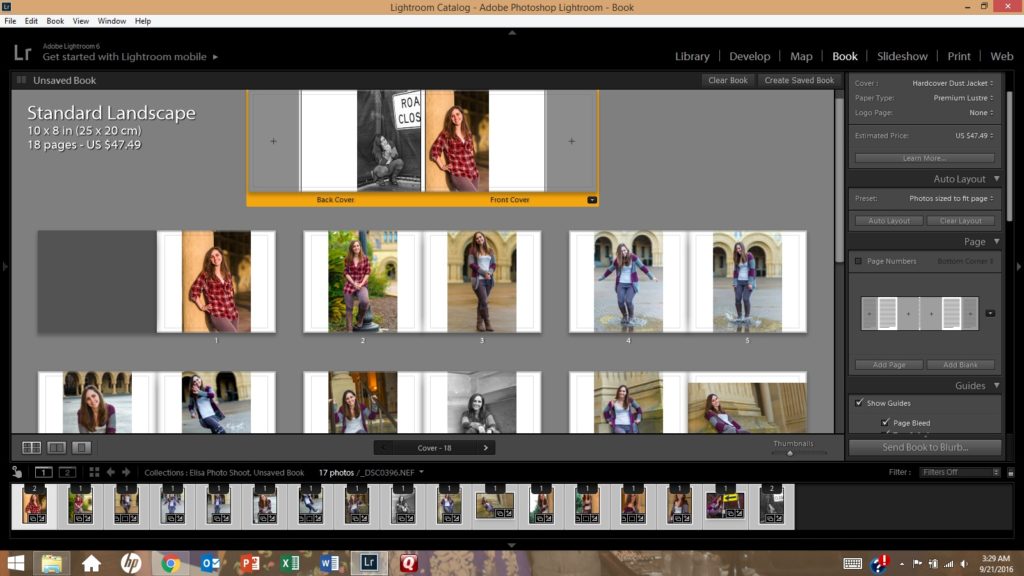
The process of creating a photo book using Lightroom’s Book module (shown here) is fairly straightforward.  It’s even more intuitive using an online service such as Snapfish or Shutterfly.

When you receive your photo book a few days after placing your order, you’ll have a keepsake suitable for sharing with visitors and for preserving your own precious travel memories.

img_3494

A two-page spread in our Turkey photo book showcases several images of the incredible rock formations in the Cappadocia region.

Have you created photo books from your travel images?  Which service did you use and how was your experience?  Please share your thoughts here.

Interested in reading more posts about sharing your travel images?  Click here to see them all: http://www.to-travel-hopefully.com/category/travel/share/.


News Flash–Google Trips now available: A new app for your smartphone can help plan and manage your next trip

As I write this post, Google has just announced a new smartphone app (for iOS and Android) that claims to simplify the planning and management of travel.  Called Google Trips, the new tool appears to have some useful capabilities for many travelers, including travel photographers.  I’ve had a chance to download this free app and play around with it a little bit. Here’s what I found:

    • It’s handy to be able to consolidate all of your reservation info in one place. When I travel, I typically enter every flight, ground transportation segment, hotel, meal, and event as separate items in my phone’s calendar app.  I link the email messages containing each item’s confirmation info to that item.  This allows me to access all of my reservation info in one place, but to set it all up requires quite a lot of time and effort.  With Google Trips, you have the option of handling this consolidation in a simpler fashion.  I was not able to try this out, though, because it seems only to work for reservations made using gmail accounts, and I am not a gmail user.
    • The local content is helpful to have in your pocket. The only reason I still carry a small hardcopy guidebook on many of my trips is for quick and convenient access to information on local attractions, restaurants, and nightlife.  With Google Trips, this may no longer be necessary.  I looked at the content for two cities I plan to visit in Ireland, Dublin and Dingle.  For a large city like Dublin, the app seems to have hundreds of local listings, and a cursory glance confirms they appear to be fairly accurate.  However, for smaller towns like Dingle, most of the listings seem not to be local at all, but an assortment of attractions culled from the surrounding region.  One would expect the coverage to get better over time.
    • Far and away the best feature is the capability to download content. My international data plan, probably like yours, costs an arm and a leg, so when I travel I must turn off cellular data roaming on my phone and use it sparingly to avoid massive overage charges.  In one day of using the phone as a navigation tool to stroll around London, I incurred $50 of data charges.  Google Trips has the capability of downloading directly to your phone all of the maps and content about local attractions for your whole trip, which means it is always available even when there is no cellular data signal, and it won’t eat up your international data allowance.  I haven’t had a chance to test this feature in the field, but plan to do so on my next international trip.

In a single day of using my phone to navigate on a family trip in London, I incurred $50 in data surcharges.  Google Trips’s offline data feature could save a bundle in these situations.  Buy this photo

  • I like the ability to find out what is open nearby and to plan an itinerary to see all the attractions I want in a customized fashion. Just as a good guidebook can suggest an itinerary in a given location for one day, three days, or longer, so can Google Trips recommend top local sights to fit into the time you have available.  The difference is that this app can customize your itinerary to include just the sights you’re interested in, and can provide directions from each location to the next.
  • Be careful about privacy if you choose to use this app. I have concerns about what data Google says it may collect and how it may use this data.  I recommend you read their privacy policy carefully and make your own informed decision about whether to use this app.

You can learn more about the app right from the Google horse’s mouth here: https://googleblog.blogspot.com/2016/09/see-more-plan-less-try-google-trips.html.

Note that I don’t specifically endorse this app or Google products or services in general, nor have I had a chance to use this app in the field.  I am providing this information to my readers in the hope that it may be of interest to some.  There also appear to be some privacy concerns in this and other Google apps, so be sure to research what data will be collected and how it will be used before deciding whether to use this service.

Have you tried out Google Trips?  What do you think?  How does it work in the field while you’re traveling?  Please share your thoughts here.

“Building” Your Portfolio: Architecture gives local flavor and makes a great subject for your photography

Travel photography is exciting in large part because it encompasses all types of subjects.  In a single day while traveling, we may have the opportunity to shoot landscapes of the scenery around us, portraits of the people we meet, wildlife images of the fauna in the region, night images after the sun goes down, and photos of the local architecture.  I’ve already covered how to shoot most of these subjects in previous posts.  Today we’ll focus on how to make compelling images of architecture, which includes both the exteriors and interiors of the buildings we encounter.

For architectural photography, it is essential to carry a good wide-angle lens.  While I’m a big fan of prime (fixed focal-length) lenses, architecture is one subject where a zoom lens comes in very handy.  That’s because it can be difficult to change our vantage point when shooting large buildings in crowded urban environments.  And when photographing buildings, the widest end of the zoom range should be quite wide, indeed.  I recommend a lens that can zoom out to 16mm (for full-frame cameras) or even wider.  The lens doesn’t have to be particularly fast, because buildings do not tend to move quickly and we can use a tripod to steady the camera for longer exposure times, but it must be of very high optical quality for architecture photography.  Cheaper wide-angle lenses are prone to several kinds of distortion that can lend an unprofessional appearance to photos of buildings.  I recommend ponying up for a good professional quality wide-angle zoom lens with a range of somewhere around 16-35mm, or even a fast 14-24mm lens if you have the budget for it.

I use the Nikon 16-35mm f/4 lens for architecture shoots.  It’s got great image quality and is very solid and well built, but at f/4 it is not super fast, and it is rather heavy and bulky.

When shooting the exterior of a building with a wide-angle lens, we need to make an effort not to distort the lines of the building or its surroundings.  A wide-angle lens, especially when pointed upward, has the tendency to exaggerate features so that parallel lines appear to be divergent.  If you have the option of moving to a higher vantage point so you can shoot parallel to the ground instead of upward at the subject, this distortion can be greatly reduced.  But for those frequent situations when you have no choice but to look up at a building from the street level, try to zoom out so that the entire subject can be included in the frame without pointing the lens too far upward.  This image of a stately old building in Buenos Aires was made with the camera pointed nearly parallel to the ground so that even though a very wide focal length was required to fit the building in the frame, there is relatively little distortion of the perspective.
When using a wide-angle lens from street level, try to keep the camera pointed parallel to the ground to avoid severe distortion of the building’s lines.  Buy this photo

In contrast, the next image was shot from a vantage point at the same elevation as the subject, the world’s northernmost church.  I climbed a snowy hill in front of Svalbard’s chapel to attain the same height as the center of the building, so that I could hold the camera exactly level to the ground and still include equal amounts of the church above and below the center of the image.  This minimized the distortion and resulted in a more natural rendering of this fascinating building.

To make this photo of Svalbard’s church, I chose a vantage point at the same elevation as the midpoint of the building, minimizing distortion.  Buy this photo

I like to seek interesting colors and recurring patterns in architecture.  The miners’ houses in Svalbard made an intriguing subject because they were lined up in an even line of identical structures, but they varied in color.  To make the image more compelling, I moved across the street and shot with a moderate telephoto lens (65mm) to compress the scene and make the houses appear closer together.  I based the exposure on the light reflected from the paint on the houses, so that the snow in front of and behind the buildings was nearly blown out.  In post-processing I increased the vibrance slightly to bring out the bold colors in this scene.

Look for architectural scenes featuring interesting patterns and colors, such as this view of miners’ cottages in Svalbard surrounded by snow.  Buy this photo

Sometimes the most effective images of architecture hone in on the details rather than including the whole of the building.  I’m always on the lookout for a characteristic or unusual feature of the buildings around me. In New Orleans’s French Quarter, I framed this shot of a lovely wrought iron balcony using a long telephoto lens so that only this one feature of the building was included.

Zoom in on just the most characteristic or compelling features of a building to make an arresting image of the details rather than the whole building.  Buy this photo

Shooting interiors of buildings poses some of the same challenges as shooting their exteriors.  In particular, since a wide-angle lens is most often required and is frequently pointed upward, it is important to look at the edges of the viewfinder to try to minimize distortion of the building’s lines.  To make this wide-angle image of the inside of a grand mosque in Istanbul, I kept the camera level using a tripod and the camera’s virtual horizon function.  There was still a good deal of distortion around the edges of the upper part of the scene, but I was able to control this to some degree by adjusting the images perspective using Lightroom software during post-processing.

This image of the interior of a mosque in Istanbul shows some distortion, but I was able to keep it under control by shooting level to the floor and adjusting the vertical lines using post-processing software.  Buy this photo

Do you have tips for shooting the interiors and exteriors of buildings?  Please share them here.


Revisitng Your Old Friends: Take a fresh look at your older images with new post-processing

In today’s digital photography world, images are made as much in post-processing as they are in the camera.  We only get one chance at creating the image in the camera: the choices we make to compose the image, focus, expose, and fire the shutter at just the right moment are behind us the instant the shutter is released.  But the choices we make after the fact, using image processing software such as Adobe Lightroom, can be revisited as many times as we wish.  Because Lightroom is a non-destructive editor, meaning it keeps the original image file intact and just records the editing choices we make in its catalog, we can return to the image again and again, making slightly or entirely different choices.

When I return from a trip, I try to select the best raw image files and apply some post-processing within a few days.  That’s so I don’t agonize endlessly about creative choices, which would severely increase the turnaround time for sharing the images with the world.  But increasingly I find it is a good practice to return with a fresh eye to images I made some time ago, applying some different post-processing choices to render the image differently.

There are three scenarios under which I often revisit my older images:

      • The images are very old and were shot using film in the pre-digitial era.  In this scenario, scan the transparency (slide), negative, or print and then apply post-processing to the digital scan.

lr-00559_s_r13akqwcgmq0559

Here’s the original scan of a 35mm color slide (transparency) shot during a 1991 trek in Nepal’s Anapurna region.  The image is grainy and the background behind the girls’ heads is distracting.  I decided to clean it up a bit using Lightroom.

NepalWith just a few minutes of tweaking using Lightroom, I was able to crop the image for more dramatic impact, render a true black background, reduce the grainy noise in the shadow areas, and enhance the saturation of the colors.  Buy this photo

    • The images were shot digitally but were made before I started routinely using image-processing software such as Lightroom.  In these cases, I like to apply post-processing to see what artistic options I may have missed in the earlier digital years.

This old Scandinavian stave church was shot as a color image in 2005.  It is so high-contrast that it appears nearly monochromatic on the display screen.  It’s a striking image, but looking at it today I wondered how much more effective it would be as a true black-and-white photo, so I decided to revisit the image using Lightroom.

Here’s the same digital image file, but converted to black-and-white using Lightroom’s color channel processing module.  I boosted the contrast even further and then adjusted each color’s saturation in the black-and-white mix to achieve the exquisite texture of the snow on the ancient building’s roof.  Buy this photo

  • The images are more recent, but I want to make some new creative choices.  Here the idea is to render the image in a different way to achieve a different end result.  For example, an image I initially processed in color may turn out to make a lovely black-and-white photo.  Or perhaps I crop a crowd scene to emphasize just one or a few of the people within it.  The choices are nearly limitless.

Reviewing my favorite images from a recent trip to New Orleans, I saw this shot of a characteristic French Quarter balcony and realized it would be even more powerful if certain colors were more saturated.

A brief session in Lightroom’s Develop module was all it took to boost the saturation of the blue and red channels and to adjust the shadow and black point tonalities.  The resulting image more closely reproduces the emotional experience I recall when viewing this scene live.  Buy this photo

Take a look at some of your older images.  Which ones would you like to revisit and give a fresh new look?  Do you regularly return to work on your library of existing images?  Please share your thoughts here.


The Harsh Realities: How to shoot in extreme conditions

Travel is exciting because it exposes us to new environments from which we can learn about the diversity of the world and our own place within it.  But travel also can expose our expensive and sensitive photo gear to extreme conditions.  Heat, cold, humidity, dryness, wind, dust, sand, salt, water, and physical shocks are among the harsh realities of travel photography.  Let’s examine some of these hazards and discuss how to mitigate the potential harm.

  • Cold: Extremely low temperatures can cause all kinds of problems with modern electronics, including cameras.  Batteries don’t hold their charges very well in frigid conditions, so you need to carry extra batteries and keep them warm in your pocket or inside your parka.  Also expect to be recharging them more frequently than in warmer climes.  The LCD displays on your camera (and other devices such as your smartphone) can stop working partially or completely in very cold temperatures.  I’ve found there isn’t much that can be done when this happens except to try to gently warm the device, but that can be difficult when in the field shooting.  Fortunately, most of the time the display will return to normal functioning when it warms up.  Remember that very cold air is usually also very dry air, so be careful of condensation when getting out of the cold and returning to the warmth of an indoor environment.  The moisture that condenses on the inside of our lenses and electronic equipment can be damaging, so it’s best to let the gear warm up again while inside a sealed bag to prevent excessive condensation.  A large freezer-style bag works well for this purpose; just remember to place your camera and lens in the bag before coming inside from the cold.  Avoid lens changes in extreme cold conditions whenever possible.
  • Extreme cold, such as in Svalbard, can cause problems with the operation of batteries and LCD displays, and with condensation.  Buy this photo
  • Humidity: Excessive humidity can also cause condensation and fogging of the glass surfaces and displays on your gear.  In very humid conditions there is lots of moisture in the air, while in air conditioned vehicles and hotel rooms there is less moisture.  That means your lenses and LCDs will likely fog up quickly after leaving the air conditioned comfort of your hotel or vehicle.  To mitigate this problem, try to store your gear in an area that is less air conditioned, such as a storage area or bathroom.  And when you leave your hotel or car, keep the gear inside your camera bag to help prevent the buildup of moisture.
  • Wind and Dust: Recall that we’ve discussed many times in other posts the need to keep a UV (or haze) filter permanently attached to all lenses.  This protects the lenses from scratching damage, but has the secondary effect of protecting against dust building up on the front surface of the lens.  Dusty areas are also a good place to keep your lens cap on except when you are actually shooting.  Rule Number 1 in dusty environments is never, ever to change lenses outside unless it is absolutely necessary.  I like to carry two camera bodies with different lenses so that I can shoot with both lenses without the need to change in the field.  And if you do get dust on the camera’s viewfinder, lens, LCD, or mirror, you should have a good blower brush and soft lens cloth with you so you can clean it off.  I do not recommend trying to clean your camera’s sensor yourself unless you are confident you have the skills and equipment to do it properly.  Instead, turn on your camera’s sensor-cleaning function, if it has one, to try to prevent dust buildup, and heed the caution never to change lenses in dusty or windy environments.  A few small specks of dust on the sensor can even be removed in post-processing, although this becomes very difficult if the sensor is badly marred by the stuff.  I have a friend who is an ophthalmologist as well as an avid photographer, and he is one of the few people I know who will clean his own camera’s sensor.  I have a wonderful photo of him in full surgical regalia, using a microscope and surgical instruments to do the job.  For the rest of us, bring the camera to a good repair shop after your trip ends and before the next big adventure begins.
  • Physical Shocks: Travel is the school of hard knocks for camera gear.  Safari vehicles, “puddle hopper” bush planes, and long bus rides over bumpy roads are the norm for adventure travelers.  Once the gear takes a punishing blow that damages it, there is very little to be done in the field.  My best advice is to carry your gear in a very good padded bag with snug fittings around each piece, and to bring a backup camera body and lenses in overlapping ranges of focal lengths to ensure redundancy in the event of a mishap.

Game drives while on safari are near the top of every photographer’s “bucket list,” but the harsh realities of jolts, dust, and humid heat can threaten your sensitive camera gear.  Buy this photo

There’s an old saying, “If you can’t run with the big dogs, stay at home on the porch.”  If we were the types of photographers who wanted to avoid all these hazards, we’d just stay at home, right?  But travel photographers are the adventurous sort, and we consider these risks to be a cost of the intense pleasure we derive from shooting all kinds of fascinating subjects in new environments all around the world.  Plan well to minimize problems, bring extra gear for redundancy, and when something does go wrong keep a positive attitude: you’ll be well rewarded when you get home and have unique images as a souvenir of your efforts!


Baggage Claim: A photographer’s guide to how to pack for a trip

 Special trips often require specialized gear.  To photograph the total solar eclipse in Svalbard in 2015, I had to pack a heavy professional tripod, 500mm super-telephoto lens, a remote release capable of functioning in extreme cold, and a custom-made solar filter.  Thankfully, most trips are easier to pack for.  Buy this photo

Packing is never the most fun part of a trip, and the special challenges we travel photographers face can be particularly vexing.  But with a few guidelines and some common sense, we can easily bring along just what photo gear we’re likely to need and still be able to make room for some socks and underwear.  Here is my very opinionated guide to how to pack for any length and type of trip.

    1. What type of trip are you taking?
      • If it’s a driving trip directly from your home, you can bring all the gear your heart desires.  Just be sure not to leave valuables in plain sight in the car when you step away for more than a moment (thieves love camera gear), and make sure you have a shoulder bag or backpack to carry just what you need for car-free excursions.
      • If you’re flying (unless you have your own private jet, in which case you also need to make room for me on your next trip), you’re going to have to reduce the gear you carry to just the essentials.  It is possible to customize the foam insert in a hard-sided case to hold your photography gear, and then you can check this bag in the hold of the aircraft, but this requires some effort to prepare the case for your specific gear and then you will likely find the case quite heavy to lug around for the land portion of your trip.  And woe to you if your bag is misrouted, lost, or stolen.  I recommend packing a carry-on item that meets your carrier’s size requirements and filling it with just the most essential gear you’ll need on your trip.  More on that topic in a moment.
      •  For most purposes, a backpack is a good packing solution.  There are many styles available for photo gear, but my favorites are these two:
        1.  For those times when you need to bring most or all of your gear on a trip, I like the Tamrac 5586 Expedition 6x Backpack.  It carries a lot of gear snugly and flexibly, and it doesn’t look like a camera bag so it’s less likely to invite the wrong kind of attention.  It is almost always accepted as carry-on, but it is a bit bulky and heavy for all-day, everyday use while traveling.  I’ll often use this bag to get all my gear to my first destination, then pack a day bag for just the gear I’ll need for each day of the trip.
        2. My current favorite bag for day use for nearly any shooting situation near home or while traveling is the Manfrotto MB MA-BP-TRV Advanced Travel Backpack.  It can fit a reasonable amount of gear while leaving room for non-photography items like a jacket or a water bottle (yes, even photographers occasionally have to drink or stay warm).  It disguises your gear pretty well, has good rain protection, and even sports a special sleeve for carrying the Manfrotto Be-Free Travel Tripod.
    2. What types of shooting will you be doing on the trip?
      • Will wildlife or astrophotography be involved?  If so, you’re going to have to strain your back, anger the airline staff, and enlist your travel partner to help, because there’s really no substitute for a long and heavy super-telephoto lens in this situation.  When I’m on safari or chasing a solar eclipse, I pack my massive 500mm lens into the larger of my two backpacks and accept my fate.  You’ll realize it was worth the effort when you get home and are able to share your amazing photos of a leopard in a tree or the sun’s corona on full display during a total solar eclipse.
      • For most other types of trips, you won’t need to pack a really long lens.  My general rule is to pack a range of zoom lenses that covers from fairly wide (about 16mm) through fairly long (about 300mm), including a couple of fast prime lenses for when the light is low and/or the very best optical quality is required.
    3. How much redundancy do you need on the trip?
      • Always bring a backup battery (or several) and a backup battery charger.  Murphy’s Rule as applied to travel photography guarantees that batteries will die just as you frame the shot of a lifetime.  Bring at least one extra.  And chargers are left in hotel rooms or in tented camps on the Serengeti with some regularity, and they tend to get fried when plugged into unusual power grids, so bring an extra one with you.
      • Don’t forget the little things.  Pack several power adapters of the type used in the countries where you’ll be traveling.  These get lost easily and can be hard to replace while traveling.  Bring twice as many memory cards as you think you’ll require; it’s easy to fill them up when you get to shooting a mountain gorilla or carnaval dancers.  If you plan to back up to a laptop or external hard drive, bring extra connecting cables.  While traveling, I back up to a second type of memory card using my camera’s second card slot, so I bring quite a few memory cards of both types with me.
      • Lenses are heavy and expensive, but they sometimes stop working, so if you’re on a particularly important trip you may want to bring several lenses in overlapping focal lengths.  That is, you could bring a wide-angle zoom lens and a wide-angle prime lens, plus a walkaround zoom lens and a “normal” prime lens (about 50mm for a full size sensor or about 35mm for a crop sensor), plus a telephoto zoom lens and a telephoto prime lens or two telephoto zooms with overlapping ranges.
      • If it’s a once-in-a-lifetime chance to build your portfolio with very special and irreplaceable images, I recommend bringing a backup camera in addition to your primary camera.  For a recent safari trip in East Africa, I brought two DSLR bodies as well as quite a few lenses so that I’d have a backup solution to any single point of failure.  The more exotic your destination, the more likely that dust, wind, salt, extreme heat or cold, and heavy shocks or drops will damage your gear, so for those amazing one-of-a-kind trips I suggest biting the bullet and carrying backups for any gear that could fail.
    4. What accessories do you need to accompany the rest of your gear?
      • Attach a UV filter to each of your lenses before you leave and keep it on to protect the front element of the lens throughout your trip.
      • Carry a polarizing filter and a range of neutral density filters in the correct diameters to fit at least your wide-angle lens and your walkaround lens.
      • For more on filters, read this post: Post on Filters
      • A flash unit is helpful to have on most trips, unless you’re sure there will be ample natural light or you’re willing to use your camera’s built-in flash.
      • A good lightweight travel tripod with a head and mounting plate that suit your needs is essential gear on many trips.
      • Don’t forget any special-purpose gear that you need for just this type of trip.  When I travel to see a solar eclipse, for example, I need to be sure I bring my solar filter that attaches to my super-telephoto lens.  I also need to bring my heavy-duty professional tripod instead of the lightweight one I typically carry on trips.
    5. How will you be shooting from day to day during the trip?
      • If you’ll have constant vehicle support or won’t be going far from your hotel, you may be able to make do with just the bag you brought on the plane.  Or you can bring along a small shoulder bag to carry just a few items for the day’s shoot.
      • Most of my trips involve considerable hiking and public transportation from day to day, so I either carry everything in my smaller backpack or bring it along in checked baggage during the flight.  Then I can transfer just the gear I need for each day’s shoot into the smaller pack, which makes life easier when hiking 10 or so miles per day.

For a safari you will need a long lens to capture small or distant wildlife.  I recommend bringing a beanbag for camera support instead of a tripod, as the latter cannot be used in a safari vehicle.  Be sure to bring an extra camera and lenses, and carry more batteries and memory cards than you think you’ll need.  Buy this photo

Of course, if you use a mirrorless camera with only a couple of compact lenses or an advanced point-and-shoot camera, you do not have to worry about many of these items, but still be sure to review the list above to ensure you bring all required accessories.

With an overall strategy tailored to your itinerary and shooting style, and careful attention to execution to ensure you don’t forget anything, it’s really not that difficult to pack just what gear you’ll need in a way that will allow you to enjoy your trip when you’re not shooting.  After all, travel is about gaining experiences, and not all of those experiences can or should be photographed.  Pack for your photography, but also for your overall travel enjoyment.

What are your hacks for packing your photo gear for a trip?  Please share your tips and tricks in the comments box here.

Luck Favors the Prepared: Tools for planning your shot

It was Louis Pasteur who said, “Fortune favors the prepared mind.”  We usually hear the quote paraphrased as, “Luck favors the prepared.”  For travel photographers, there is often a great deal of luck involved in capturing a truly great image, but there are some very useful tools that we can use to help us plan to be in the right place at the right time with the right gear.  Let’s look at just a few of my favorites.

I’ll start with a quick review of the most obvious resources.  I would never plan an hour-long photo shoot, let alone a month-long trip to a far-flung travel destination, without doing some research.  What are the must-see locations, and what dates and times of day are perfect for each one?  What are the events or activities that most authentically represent the locations I am visiting?  Is there a livestock market, a street festival, or a religious celebration taking place while I’m in the region?  How can I build an itinerary that best incorporates all of these locations?  Great resources for this type of research include guidebooks (online and hardcopy), online review sites such as Trip Advisor and Yelp, mapping and navigation apps (Google Maps is still my all-around favorite, but several others have their own advantages), and local weather sites.  I like to build my itinerary by customizing an online map to show all of the locations I’d like to visit, then creating a routing that links the locations in the proper order.  If travel by air, rail, bus, or boat is involved, I research those schedules and fares to determine the best way to get from one place to the next.  Airline consolidation sites such as Orbitz can be quite helpful for finding the best flights at the best prices.  If the itinerary has been pre-planned by a travel company, then I will still do most of this background research to better understand the locations we’ll be visiting.

Once I know where I’ll be going and what events I plan to shoot, I develop a shot list.  Some photographers craft very detailed and specific shot lists, but I like to keep it quite flexible and informal, often simply jotting down my ideas in the calendar event on my phone that is associated with each planned shoot.  After all, if I adhere too closely to a shot list, I will just end up with the same images that hundreds or thousands of other visitors have captured after doing the same research.  Serendipity and the artist’s eye have their place in travel photography, too.  The research phase can also inform me as to what clothing, gear, and other essentials I should bring to each location.

Now I’d like to introduce three smartphone apps that I consider indispensable for travel photography.  First, there’s Photo Pills, an app that incorporates several essential tools into one package.  I use Photo Pills for planning shots where I need to know how to get all the elements, including location, date, and time of day, to come together.  For example, during the Perseid Meteor Shower, I wanted to find a dark sky location with a nice foreground and a view toward the galactic core of our Milky Way.  This way, I could capture images including the meteor shower, the Milky Way, and the pretty landscape in the foreground.  I had a location in mind, a beautiful spot where there isn’t too much light pollution and with a gorgeous view over a reservoir and the Santa Cruz Mountains.  The Planner tool in Photo Pills allowed me to visualize the foreground as viewed by my phone’s camera, superimposed against the Milky Way as it would appear on different days and times of day.  I planned the shot for a certain time on each of several consecutive days, confirmed that the Milky Way would be rising in the desired direction and that the nearly full moon would have already set, and then waited for clear weather.  The first night of the meteor shower was cloudy, but the second night was the charm, and I was able to capture this striking image.
Using the Photo Pills app on my smartphone, I was able to plan in advance for a location, date, and time that would maximize the chances of capturing the Perseid Meteor Shower and Milky Way over the lovely Crystal Springs Reservoir.  Buy this photo

Here’s a screenshot of the Planner tool in Photo Pills that I used to prepare for this shoot.

img_3452

The Photo Pills app has a number of tools to help plan and execute your shots.

Another useful app for planning the best locations, dates, and times for your shoots is TPE (The Photographer’s Ephemeris).  I find this tool to be especially helpful for visualizing the path of the sun and moon across the field of view for any location I select.  This app is very powerful, and I have only scratched the surface of what it can do to predict and prepare for photo opportunities.

img_3453

The Photographer’s Ephemeris (TPE) is a powerful tool for planning any outdoor photo shoots.

A final app I will mention here is called Easy Release.  Sometimes (and exactly when is a good topic for a future post), we need a model release when a person or several people are clearly identifiable in a photo.  I know some photographers who carry hardcopy model releases with them wherever they travel, but I find this to be cumbersome and impractical when on the road shooting.  Instead, I use Easy Release on my phone, so I’m always ready to quickly prepare a release for a new friend to sign when they appear in my images.  Even though the app has the ability to translate the text of the release into several languages, there are situations in which it isn’t reasonable to try to explain to a local person what’s in the release and why it’s required.  Furthermore, I consider it to be exploitative if the person can’t reasonably be expected to understand what’s in the document or why they should be signing it.  But there are times when having immediate access to a model release that can be prepared, signed, and stored right on my phone is a big advantage.

img_3454

Easy Release is a convenient tool for creating, signing, sharing, and storing model releases when a person is clearly identifiable in photos.

With proper planning using readily available resources and various apps including the ones I’ve presented here, we can be better prepared to maximize our chances of capturing memorable images.  Happy shooting, and remember that luck favors the prepared!

Do you have a favorite tool you use to plan for your photo adventures?  How have you used this tool to get your shot?  Please share your experiences here.