Every Day I Write the Book [Encore Publication]: Even in the digital world, there’s a place for a hardcover photo book from your trip

In the brave new digital world, we have a lot of ways to share our travel photos after (and sometimes even before) we return from the trip: social media, on-screen slideshows, video montages, and of course the enduringly popular paper print.  Even with all of these very immediate sharing options, one of my favorite formats for preserving my travel images is the hardcopy photo book, and today there are more choices than ever before regarding how to create these wonderful keepsakes.

Our living room bookshelf and coffee table are home to more than a dozen photo books, each one showcasing the images and preserving the often fleeting memories of the details of a major trip we’ve taken.  Here’s why I love this method of sharing travel photography and how to create your own photo books.
img_3497

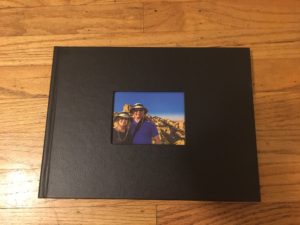
The leather cover of a photo book showcasing our recent travels in Turkey.

Why create a photo book?  Over time, new digital formats replace existing ones, and the very old ones become obsolete.  Within about 20 years, it is quite likely that none of our present formats of storing data will still be readable.  The printed page has much more staying power.  It is estimated that photos printed on high quality paper using high quality inks, and stored away from direct sunlight, can last for 100 years.  I’m a big fan of framed prints, as well, but a photo book is more cost-effective and space-efficient as a means to preserve many more photos than we could easily hang on our walls.  And because photo books can include customized captions to accompany the included images, they’re a great reference source for refreshing our memories about what we saw, when, and where.  Finally, photo books look great and are fun conversation-starters to tell the story of our travels when friends and family come to visit.

How do you create a photo book?  There are a number of methods, but unless you are a scrapbooker or handy with bookbinding, all of them involve sending your specifications and images to a vendor that will print the book, bind it, and mail it to you.  Some software packages, including Lightroom, have built-in modules for creating photo books.  And most photo sharing websites, including SmugMug (a fabulous site used by many professionals including me), Snapfish, Shutterfly, and Apple Photos, allow you to create and purchase photo books from your images.  These services vary in features, price, and quality, so shop carefully.  Most of my past photo books were created using Snapfish, but I am transitioning to using Lightroom’s and SmugMug’s services instead.  I will report on the results in a future post.
img_3493

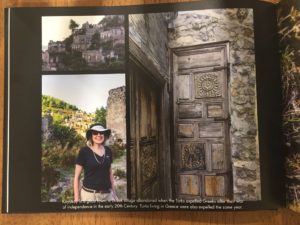
Good book-creation software should allow you to choose from a wide range of formats on each page to display one or several photos plus text.

The basic process works similarly for any of these services.  You specify the book size, cover material, paper quality, printing quality, and other basic parameters for your book.  Then, you fill the pages of the book with your photos, specifying the layout you want for each page.  You can add captions for individual images or series of images, and you may be able to add various special effects.  At the end of the process, you place your order for the book to be printed and mailed to you.  Using the service offered by Blurb, which is available via SmugMug and Lightroom, you can self-publish a large or small print run of books and make them available for sale on Amazon or directly on your own website.
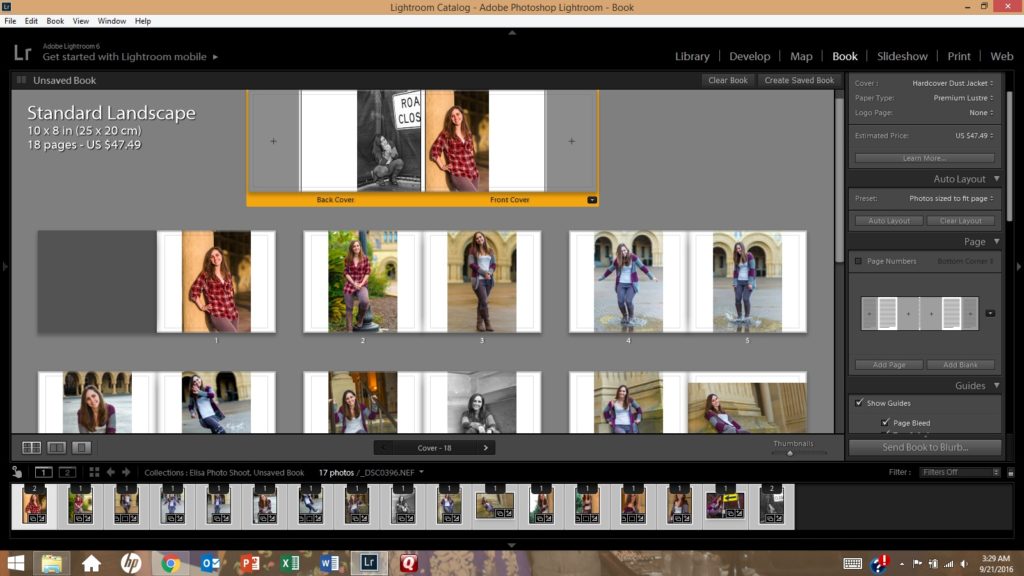
lightroom-book-moduleThe process of creating a photo book using Lightroom’s Book module (shown here) is fairly straightforward.  It’s even more intuitive using an online service such as Snapfish or Shutterfly.

When you receive your photo book a few days after placing your order, you’ll have a keepsake suitable for sharing with visitors and for preserving your own precious travel memories.

img_3494

A two-page spread in our Turkey photo book showcases several images of the incredible rock formations in the Cappadocia region.

Have you created photo books from your travel images?  Which service did you use and how was your experience?  Please share your thoughts here.

Interested in reading more posts about sharing your travel images?  Click here to see them all: http://www.to-travel-hopefully.com/category/travel/share/.

Cards, Calendars, and Keepsakes: Oh, My! [Encore Publication]: Ways to share your images beyond social media and prints

With the holidays fast approaching, now is a great time to think about creative ways to share your favorite images as gifts for family and friends or perhaps to enhance your own home.  Most commonly we share images via social media and, for more special occasions, as prints.  Review this classic post for a list of 10 ideas for sharing your images: Post on Image-Sharing Ideas.   

In today’s post, I discuss three of these methods that are particularly festive and well-suited to the holiday season: cards, calendars, and keepsakes.

5x7folded
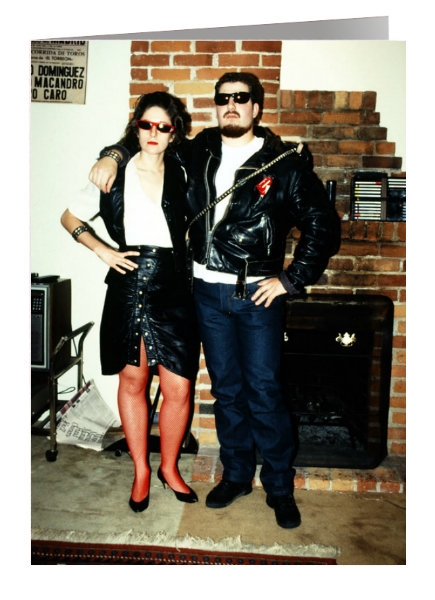
A  likeness of one of the earliest holiday cards my wife and I created.  The original version was in black-and-white and had a humorous caption at the bottom.  This version was made more recently using a modern digital process.

Cards: For the entire 31 years we’ve been together, my wife and I have sent our families and friends custom-made holiday cards.  We created our first card in 1986, the year we started dating.  The process was extremely complicated back then.  We had to take the photograph using a film camera, send the film to a lab for processing, wait for the prints to be mailed back to us, select the image we wanted to use, cut the print down to the right size, tape it onto a printed template we had to design ourselves using a primitive word processor, and photocopy it onto card stock at a graphics store.  It was strictly a black-and-white affair because color copying was very expensive in that era.  Even for black-and-white cards, the cost was quite high.

Today, the process is vastly simpler and less expensive, and the quality very high.  There are countless companies that will take your photo files and caption information, blend them with a design you choose from their library of sometimes up to hundreds of choices, and create an attractive customized card for a range of occasions.  Shop around carefully before selecting one, because price, quality, and flexibility vary tremendously.  My current favorite is Snapfish.  Even though I no longer use Snapfish to host my image galleries, I continue to create and order photo cards from this site because it offers a good range of card designs, reasonably high printing quality, and affordable pricing.  There are often very deep discounts available at Snapfish and other photo sharing sites.  Try using a search engine to find discount or coupon codes.  I rarely pay more than 60% of the listed price.

When creating a card on any platform, there are a few basic steps to follow.  First, you choose the card design from a library of choices.  There may be only a few designs for some types of occasions, but for the winter holidays there are usually dozens to choose from.  Then you upload your images if they’re not already on the site, and select where you want them to go in the card template.  Next, you add captions to customize the card.  You may be able to include a return address on the envelopes shipped with the cards.  Be sure to review your card carefully before ordering.  The final step is to place your order by specifying the quantity (per-unit prices usually drop when ordering larger quantities), shipping address, and payment information.

Calendars: Photo calendars make great holiday gifts because they are personal, functional, and seasonal (the weeks before the start of the new year is typically when your loved ones will be looking for a calendar).  Every year I create a calendar with images that present the past year in review.  I send it to several family members and keep one for my own home and one for my office.  As with cards, calendars can be ordered from a wide variety of companies with differing levels of quality and cost, so shop around.

Creating a calendar is similar to making a card.  You choose a size and design, upload your images, and lay them out on the calendar template.  Some sites allow you to further customize your calendar by including special dates such as birthdays, anniversaries, and other events important to your family or friends.  The better companies let you include a photo to represent each special date during the year, and will save these dates for creating new calendars in future years.  The ordering process for calendars is similar to that for cards: review the calendar and then place the order.  Again, you may be able to find discount or coupon codes that will substantially lower your cost.

Keepsakes: These days, it seems that images can be reproduced on nearly any type of item you can imagine.  This variety translates into a high likelihood of finding something for everyone on your gift list.  I use SmugMug, the platform that powers my online professional photography business, for nearly all of the keepsakes I order as gifts, and my clients also have been happy with their purchases of these items.  There’s a wide array of keepsake items to choose from, each customized with your image(s), including coffee mugs, coasters, smartphone cases, playing cards, desk organizers, and stickers.

To make a keepsake, simply upload your photo(s) if they’re not already on the site, select the type of item you want to order, ensure the image is cropped and/or sized appropriately for the item, and go through the checkout procedure.

This holiday season, get creative.  Share your images on holiday cards, calendars, and a range of keepsakes.  It’s never been as easy or inexpensive to make these items as it is right now, so have fun and experiment.

What are your favorite ways to share you images during the holiday season?  Please add a comment with your ideas.

Want to read more posts about sharing your images?  Find them all here: Posts on Sharing.

Every Day I Write the Book [Encore Publication]: Even in the digital world, there’s a place for a hardcover photo book from your trip

In the brave new digital world, we have a lot of ways to share our travel photos after (and sometimes even before) we return from the trip: social media, on-screen slideshows, video montages, and of course the enduringly popular paper print.  Even with all of these very immediate sharing options, one of my favorite formats for preserving my travel images is the hardcopy photo book, and today there are more choices than ever before regarding how to create these wonderful keepsakes.

Our living room bookshelf and coffee table are home to more than a dozen photo books, each one showcasing the images and preserving the often fleeting memories of the details of a major trip we’ve taken.  Here’s why I love this method of sharing travel photography and how to create your own photo books.

img_3497

The leather cover of a photo book showcasing our recent travels in Turkey.

Why create a photo book?  Over time, new digital formats replace existing ones, and the very old ones become obsolete.  Within about 20 years, it is quite likely that none of our present formats of storing data will still be readable.  The printed page has much more staying power.  It is estimated that photos printed on high quality paper using high quality inks, and stored away from direct sunlight, can last for 100 years.  I’m a big fan of framed prints, as well, but a photo book is more cost-effective and space-efficient as a means to preserve many more photos than we could easily hang on our walls.  And because photo books can include customized captions to accompany the included images, they’re a great reference source for refreshing our memories about what we saw, when, and where.  Finally, photo books look great and are fun conversation-starters to tell the story of our travels when friends and family come to visit.

How do you create a photo book?  There are a number of methods, but unless you are a scrapbooker or handy with bookbinding, all of them involve sending your specifications and images to a vendor that will print the book, bind it, and mail it to you.  Some software packages, including Lightroom, have built-in modules for creating photo books.  And most photo sharing websites, including SmugMug (a fabulous site used by many professionals including me), Snapfish, Shutterfly, and Apple Photos, allow you to create and purchase photo books from your images.  These services vary in features, price, and quality, so shop carefully.  Most of my past photo books were created using Snapfish, but I am transitioning to using Lightroom’s and SmugMug’s services instead.  I will report on the results in a future post.

img_3493

Good book-creation software should allow you to choose from a wide range of formats on each page to display one or several photos plus text.

The basic process works similarly for any of these services.  You specify the book size, cover material, paper quality, printing quality, and other basic parameters for your book.  Then, you fill the pages of the book with your photos, specifying the layout you want for each page.  You can add captions for individual images or series of images, and you may be able to add various special effects.  At the end of the process, you place your order for the book to be printed and mailed to you.  Using the service offered by Blurb, which is available via SmugMug and Lightroom, you can self-publish a large or small print run of books and make them available for sale on Amazon or directly on your own website.

lightroom-book-moduleThe process of creating a photo book using Lightroom’s Book module (shown here) is fairly straightforward.  It’s even more intuitive using an online service such as Snapfish or Shutterfly.

When you receive your photo book a few days after placing your order, you’ll have a keepsake suitable for sharing with visitors and for preserving your own precious travel memories.

img_3494

A two-page spread in our Turkey photo book showcases several images of the incredible rock formations in the Cappadocia region.

Have you created photo books from your travel images?  Which service did you use and how was your experience?  Please share your thoughts here.

Interested in reading more posts about sharing your travel images?  Click here to see them all: http://www.to-travel-hopefully.com/category/travel/share/.

It’s All in the Telling [Encore Publication]: Sharing images as a photo essay can help tell a story

When we share our images from a trip or from an event close to home, we become more than photographers; we become storytellers.  An individual image can tell a powerful story all by itself, and most of the best ones do.  But presenting a series of related images in the form of a photo essay is a great way to share a story with your viewers.  Each image serves a purpose in the structure of a photo essay, just as each sentence or paragraph does in a written essay.  In this post, I will revisit the Sacramento Super Spartan Race (see Post on Spartan Race), taking the same 12 images from the earlier post but rearranging them in the form of a rudimentary photo essay.  We’ll discuss the purpose of each major type of image in creating the essay.  [Note: I am borrowing some of the organizational concepts presented in CUNY’s Photojournalism course materials at this site: http://photo.journalism.cuny.edu/week-5/.]

Establishing Shot: Usually the first image in a photo essay, the establishing shot should draw in the viewer by presenting the big picture.

The establishing shot sets the context of the essay.  Here I use an image of large contingents of athletes running over the hills.  I shot from a distance, using a telephoto lens to compress the perspective and emphasize the massive scale of the race.  Buy this photo

Alternatively, we could use the starting line image as our establishing shot.  Some essays lend themselves well to a chronological telling, in which case it’s good to start at the beginning.  In the case of this specific event, I prefer the establishing shot to be a big-picture overview of many athletes in the middle of their course.

The starting line is a good place to set the stage for your photo essay if you will be using a chronological method of telling the story.  Buy this photo

Portraits: Often the biggest portion of the photo essay, portraits tell the story through images of some of the people who are involved.  The portraits can be tight head-shots, full-body shots, or environmental portraits that show the setting as well as the person.  I like to use a combination of all of these compositional methods.  And it’s also fine to use a mix of posed shots and candids.  Variety can improve some photo essays, although in other cases you may opt for a consistent look-and-feel for many of your images so the mash-up of styles doesn’t distract the viewer from the story.

This environmental portrait shows the athlete in the context of the monkey bars obstacle, with other athletes and the background included in the frame.  Buy this photo

Portraits of athletes don’t have to be in the cliche pose of standing, legs apart, on the ground flexing their biceps.  Athletes are happy to pose in the midst of whatever they’re doing when they see a photographer nearby.  Buy this photo

Not all portraits have to show the subject’s face.  This environmental portrait works because it shows us what the athletes are doing from their point of view.  Buy this photo

This posed portrait is framed rather tightly, showing the power and the elation of the athletes after finishing the race.  The background, while bright and busy, is not overly distracting.  Buy this photo

For powerful portraits, I like to seek out people who have something special to say.  This racer stopped for a moment so I could make a portrait.  His flag makes a nice counterpoint to the rolling hills and featureless sky in the background.  Buy this photo

Interaction: Most photo essays can benefit from at least one shot showing the interaction between different people in the story.

Although Spartan Race athletes are fierce competitors, they also make an effort to support one another and cheer their fellow racers on.  I enjoy capturing these interactions because these moments often tell a strong story visually.  Buy this photo

This shot of kids playing in the shower area at the end of the race shows another type of interaction.  Buy this photo

Close-Up: It’s helpful to include some images that show the little details.  In the case of this particular event, I don’t have many close-up shots, so I’ll include this one fairly tight portrait as a placeholder.  It would be great to include a true close-up shot showing just the athlete’s gloved hands as she grasps the rope, perhaps with part of her face in the background, for example.  This could be done by tightly cropping this image.

This tight portrait shows great action and emotion.  While it’s not a true close-up image, which ordinarily would show only a few details rather than the full person, it can serve a similar function in the essay by focusing the viewer’s attention on a small specific part of the race.  Buy this photo

Closer: This will be the last image in the photo essay, so it needs to be a strong one.  It could be a climactic moment or, if the story is being told chronologically, an image made at the end of the race.  I’ll include two possible closing shots here.  The first captures an athlete jumping over the fire at the finish line; it’s both dramatic and symbolizes the end of the event.  The second shows a classic Spartan Race moment, where the athletes have to carry heavy buckets of sand along a muddy, hilly course; this image could make a good closer because it evokes a quintessentially Spartan Race sense of emotion.

The finish line itself is a dramatic vantage point.  In this particular race, athletes must jump over a line of fire to finish the course.  Buy this photo

An iconic Spartan Race image.  I captured the strenuous activity of carrying buckets filled with sand by shooting from a distance with a telephoto lens.  Buy this photo

Have you presented your images in the form of a photo essay?  How did you structure it?  What advice can you share for fellow photographers who would like to use this format?

Want to read more posts about sharing your images?  Find them all here: Posts on Sharing.

Happiness Quite Unshared [Encore Publication]: You’re back home from your trip and you’ve got your images looking great: Now what?

Sometimes you just get that feeling.  You know as soon as you depress the shutter button that you’ve just captured an incredible travel image.  Over the course of your trip, you will hopefully amass quite a few of these images that you will be eager to share with friends and family.  After the often laborious effort to cull your images and post-process the chosen few, it’s time to share these best photos with the world.

In olden times (pre-digital), there were fewer choices about how to share one’s travel photos.  Many of us shot with color transparency (slide) film, sent all the rolls off to a lab for processing, picked out the top slides by hand, and stored them in a slide tray or carousel for future viewing.  In the excitement just after a trip, we would likely invite a bunch of friends over, get them slightly inebriated, and subject them to a slide show using a projector and portable screen.  This almost literally captive audience would feign enjoyment over, or perhaps even genuinely enjoy, viewing the large projected images and hearing our stories about the recent adventure.  Then the guests would leave, and the slide trays would go back on a bookshelf to sit for months or years before anyone would look again.

In this brave new digital era, we have many more and better options for sharing our best travel photos.  This being the Internet, I’ll offer up a Top Ten list of favorite ways to get my travel images in front of key audiences (Number 7 will amaze you!):

  1. Social Media: While most social media platforms, including Facebook, Twitter, and Instagram, are image-intensive, it turns out that they aren’t particularly good at sharing fine art photography.  That said, these are important and obvious outlets for getting our favorite travel photos out to our friends promptly.  Some even post while traveling, but I do not recommend this approach unless you are completely certain your home is secure while you’re away.  Because these platforms encourage sharing, using them will allow your friends to pass them along to their friends, too.
  2. Online Photography Sites: Specialized photography platforms, such as SmugMug, Flickr, PhotoShelter, and 500px, are tailor-made for sharing (and even selling) your best images.  I use SmugMug to power my own professional photography website, but I also spend quite a bit of time browsing friends’ and even strangers’ photo galleries on the other platforms I mention here.
  3. The New Home Slideshow: Who needs the clunky white folding screens and finicky slide projectors of yesteryear?  Today most folks have a bright, high-definition display right in their living rooms, and it’s called a TV.  Photos on a PC or tablet can easily be shared on a smart TV via WiFi or specialized connecting cables.
  4. Your Phone: Today’s smart phones, whether iOS or Android, have easy ways to sync photos from your PC or tablet to the phone.  Once on your phone, your photos are ready to show to anyone from your mom to a random stranger on a train.  Not the biggest screen in the world, but it’s always with you and can store thousands of high resolution photos.
  5. Send them the files: It’s sometimes desirable to send some of your original image files to a few trusted friends.  Among the numerous methods for doing so are good ol’ trusty email (though attachment sizes are usually limited), Dropbox, and the download capability found in certain photography sites such as SmugMug.
  6. Albums and Books: Yes, the photo album is still alive and well, and it’s never been easier to create one.  Or you can go the extra mile and publish your own custom photography book.  Many photo sharing sites allow you to create your own albums and books featuring your images.
  7. Prints: The demise of the hardcopy print has been greatly exaggerated.  There’s something special and timeless about the look and feel of a well-printed photograph on real paper.  Do it yourself on a good home printer with high quality paper and ink, or send it to a professional lab, but a framed print on your wall or gifted to a friend to put up on their wall is a lovely way to share your very best images.
  8. Cards: Greeting cards, birthday cards, holiday cards–these days it’s easy to customize them with your own images and send them to friends and family.
  9. Calendars: Every year, I create a calendar with a photo from each month of the year just ended, and send copies to a few family members.  I also proudly display this calendar in my home and office.  What could be better than knowing you and your friends are viewing your photos every day of the year?
  10. Keepsakes: Novelty gifts from pencil holders to jigsaw puzzles, to clothing items can be easily and inexpensively made using your favorite photos.  We even have a cat food bowl sporting the likeness of our kitty.  My younger daughter enjoys specialty socks, so I’m looking into ways of putting some of our images onto hosiery.  Get creative!

Whatever methods you use to share your images with friends and family, I would encourage you to consider watermarking your photos.  A watermark is a pattern or image placed across a portion of the photograph to identify it as the work of a particular photographer.  While watermarks can be distracting to the viewer, they can be made quite discreet and they offer some protection against your image being stolen and passed off or even sold as the work of others.  Many photo editing software packages and photo sharing sites offer the capability of attaching watermarks to your photos.

How do you share your travel images?  Got a great idea for sharing that you’d like to add to the discussion?  Please leave a comment in the box at the end of this post.

It’s All in the Telling [Encore Publication]: Sharing images as a photo essay can help tell a story

When we share our images from a trip or from an event close to home, we become more than photographers; we become storytellers.  An individual image can tell a powerful story all by itself, and most of the best ones do.  But presenting a series of related images in the form of a photo essay is a great way to share a story with your viewers.  Each image serves a purpose in the structure of a photo essay, just as each sentence or paragraph does in a written essay.  In this post, I will revisit the Sacramento Super Spartan Race (see Post on Spartan Race), taking the same 12 images from the earlier post but rearranging them in the form of a rudimentary photo essay.  We’ll discuss the purpose of each major type of image in creating the essay.  [Note: I am borrowing some of the organizational concepts presented in CUNY’s Photojournalism course materials at this site: http://photo.journalism.cuny.edu/week-5/.]

Establishing Shot: Usually the first image in a photo essay, the establishing shot should draw in the viewer by presenting the big picture.

The establishing shot sets the context of the essay.  Here I use an image of large contingents of athletes running over the hills.  I shot from a distance, using a telephoto lens to compress the perspective and emphasize the massive scale of the race.  Buy this photo

Alternatively, we could use the starting line image as our establishing shot.  Some essays lend themselves well to a chronological telling, in which case it’s good to start at the beginning.  In the case of this specific event, I prefer the establishing shot to be a big-picture overview of many athletes in the middle of their course.

The starting line is a good place to set the stage for your photo essay if you will be using a chronological method of telling the story.  Buy this photo

Portraits: Often the biggest portion of the photo essay, portraits tell the story through images of some of the people who are involved.  The portraits can be tight head-shots, full-body shots, or environmental portraits that show the setting as well as the person.  I like to use a combination of all of these compositional methods.  And it’s also fine to use a mix of posed shots and candids.  Variety can improve some photo essays, although in other cases you may opt for a consistent look-and-feel for many of your images so the mash-up of styles doesn’t distract the viewer from the story.

This environmental portrait shows the athlete in the context of the monkey bars obstacle, with other athletes and the background included in the frame.  Buy this photo

Portraits of athletes don’t have to be in the cliche pose of standing, legs apart, on the ground flexing their biceps.  Athletes are happy to pose in the midst of whatever they’re doing when they see a photographer nearby.  Buy this photo

Not all portraits have to show the subject’s face.  This environmental portrait works because it shows us what the athletes are doing from their point of view.  Buy this photo

This posed portrait is framed rather tightly, showing the power and the elation of the athletes after finishing the race.  The background, while bright and busy, is not overly distracting.  Buy this photo

For powerful portraits, I like to seek out people who have something special to say.  This racer stopped for a moment so I could make a portrait.  His flag makes a nice counterpoint to the rolling hills and featureless sky in the background.  Buy this photo

Interaction: Most photo essays can benefit from at least one shot showing the interaction between different people in the story.

Although Spartan Race athletes are fierce competitors, they also make an effort to support one another and cheer their fellow racers on.  I enjoy capturing these interactions because these moments often tell a strong story visually.  Buy this photo

This shot of kids playing in the shower area at the end of the race shows another type of interaction.  Buy this photo

Close-Up: It’s helpful to include some images that show the little details.  In the case of this particular event, I don’t have many close-up shots, so I’ll include this one fairly tight portrait as a placeholder.  It would be great to include a true close-up shot showing just the athlete’s gloved hands as she grasps the rope, perhaps with part of her face in the background, for example.  This could be done by tightly cropping this image.

This tight portrait shows great action and emotion.  While it’s not a true close-up image, which ordinarily would show only a few details rather than the full person, it can serve a similar function in the essay by focusing the viewer’s attention on a small specific part of the race.  Buy this photo

Closer: This will be the last image in the photo essay, so it needs to be a strong one.  It could be a climactic moment or, if the story is being told chronologically, an image made at the end of the race.  I’ll include two possible closing shots here.  The first captures an athlete jumping over the fire at the finish line; it’s both dramatic and symbolizes the end of the event.  The second shows a classic Spartan Race moment, where the athletes have to carry heavy buckets of sand along a muddy, hilly course; this image could make a good closer because it evokes a quintessentially Spartan Race sense of emotion.

The finish line itself is a dramatic vantage point.  In this particular race, athletes must jump over a line of fire to finish the course.  Buy this photo

An iconic Spartan Race image.  I captured the strenuous activity of carrying buckets filled with sand by shooting from a distance with a telephoto lens.  Buy this photo

Have you presented your images in the form of a photo essay?  How did you structure it?  What advice can you share for fellow photographers who would like to use this format?

Want to read more posts about sharing your images?  Find them all here: Posts on Sharing.

“Boundless Theft in Limited Professions” ~Shakespeare [Encore Publication]: What to do if your images are being stolen

Disclaimer: I am not an attorney and cannot dispense legal advice.  In this post I am simply sharing as-is my own experiences of learning about unauthorized use of my images and taking steps to correct this situation.  You should consult with a qualified lawyer if you are facing theft of your intellectual property.

I recently traveled to London to receive an award and attend the opening of the Travel Photographer of the Year winners exhibition.  When I returned from the trip, I performed a Google image search on my winning photograph to see if it had garnered more international press coverage in the wake of the show’s opening.  The good news: there were dozens of new articles featuring my winning image, and hundreds of articles in total, spanning dozens of countries around the world.  The bad news: I learned that my image was being used without my permission on dozens of sites.  A winner of Travel Photographer of the Year and shortlisted for National Geographic’s Travel Photography Awards, this particular image is an important asset in my professional photography portfolio.  And while I don’t always mind it being shared without authorization if it includes an attribution to me as the photographer, or at least includes my watermark, there were several quite egregious cases of my work literally being stolen.  In some of these cases, other people were trying to pass off my image as their own, one fellow even going to the point of claiming he had shot the photo “with a black-and-white camera.”  In a couple of other cases, my valuable intellectual property was being made available for download as a wallpaper image to the general public, without my permission.  Every one of these illegal downloads takes away the opportunity for me to sell the image on my own site or to earn a royalty through the image being sold by my authorized agents.

It has never been easier to steal intellectual property–in the form of photos, videos, or the written word–than in today’s interconnected digital world.  While it can be good for an artist’s reputation and business to have her or his work “go viral” on the web, the benefits only accrue when the work is attributed to the artist who created it.  If other people are passing the work off as their own or distributing it widely to others without authorization, then we have a problem.

After consulting with an intellectual property attorney (who also happens to be my brother), I realized that I need to act promptly to protect my rights.  I have started the process of identifying the worst cases of theft of my image and taking steps to stop the unauthorized use.  If you also have had your photographs used without your permission, here are some steps you may consider taking:

  1. Search the web for all uses of your image and identify the sites where it is being used without authorization: The remarkable technology to search the vast Internet for specific groupings of pixels that resemble your image is actually very easy to use.  Just right-click on your image and select “Search Google for image” from the drop-down menu.  You’ll see a listing of all likely matches to your image throughout the web.  From this listing, select the uses that are not authorized.  My image, for example, matched several hundred occurrences on the web, but most of these were valid press outlets reporting on the image’s success with Travel Photographer of the Year and National Geographic Travel Photography Awards.  I studied the list of sites to find the ones that were using my image without permission, and I further pared down this list to focus only on sites that were using my image without attribution to me and without my watermark.
  2. Identify the owners of the offending domains: Using a who-is directory search, you can often find contact information for the registered owner of the domain that is using your work illegally.  You can first try https://www.whois.net/, although other directory lookup services may provide better information.  Enter the domain (for example, reddit.com) from the URL of the site where your image is being misused, and who-is will provide some information on the domain owner.  You’re looking for the contact info about the owner so that you can complain about the abuse.  Look for a field like this one: “Registrar Abuse Contact Email: abusecomplaints@markmonitor.com”.
  3. Write and send DMCA Takedown Requests to the owners of the offending sites: The Digital Millennium Copyright Act, or DMCA, is a US copyright law that also provides some protection of intellectual property rights in certain other countries.  It provides for copyright owners (including photographers) to demand an unauthorized use of their property be taken down.  There is a standardized form called a DMCA Takedown Request that can be used to notify the owner of a site that they are using work you own without your permission, and to insist they remove promptly remove the infringement from their site.  There are numerous locations on the web where you can find sample Takedown Request forms.  Tailor one of these sample forms with your own info, the info about your property, and the location of the infringement of your copyright.  You will need to sign (electronically or physically) the form, including a statement that you swear under penalty of perjury that you own the copyright of the work in question.
  4. Follow up to ensure compliance with your DMCA Takedown Request: While the owner of the infringing site or domain is obligated to promptly remove the infringing post, frequently they may not do so in a timely manner, or they may ignore your request completely.  Two days after filing seven takedown requests, I have received only two responses, and both of them were from ISPs who claimed they were not responsible for the content their subscribers posted (I have since identified the actual owners of the infringing sites and directly sent them new takedown requests).  I plan to continue to follow up over the coming weeks to ensure compliance.
  5. Consider further legal action if required: So far, I have not asked for legal damages from the infringing site owners, but if they disregard my takedown requests and continue to either pass off my work as their own or propagate my photo in bulk to the general public, then I may choose to sue them for damages.  I will publish a followup to this post to share how this situation progresses, but I do want readers to be aware that there are further actions that can be taken beyond a DMCA Takedown Request.
  6. Consider registering your most valuable images: A photograph, like other forms of intellectual property, may be registered with the US Copyright Office at https://www.copyright.gov/.  Doing so it not required to initiate a DMCA Takedown Request, but having your copyright registered for your most valuable images may offer you more protection and give you standing for further legal action.

I hope that by sharing my own experiences with having my images stolen, readers may gain some context on the problem.  In this digital and interconnected era, most working photographers will likely see at least a few of their images used without permission.  We all need to be aware of the situation and how to deal with it.  Please consult with a qualified lawyer about the specifics of your own situation.  Nothing in this post should be interpreted as legal advice.

Have you had your images used without authorization?  Please share your experiences here.

What to read other posts about sharing your images?  Find them all here: Posts on Sharing Images.


Happiness Quite Unshared [Encore Publication]: You’re back home from your trip and you’ve got your images looking great: Now what?

With the holidays approaching, I thought readers of To Travel Hopefully might enjoy seeing an encore of this early, pre-launch post with ideas about how to share your favorite images with friends and family.

Sometimes you just get that feeling.  You know as soon as you depress the shutter button that you’ve just captured an incredible travel image.  Over the course of your trip, you will hopefully amass quite a few of these images that you will be eager to share with friends and family.  After the often laborious effort to cull your images and post-process the chosen few, it’s time to share these best photos with the world.

In olden times (pre-digital), there were fewer choices about how to share one’s travel photos.  Many of us shot with color transparency (slide) film, sent all the rolls off to a lab for processing, picked out the top slides by hand, and stored them in a slide tray or carousel for future viewing.  In the excitement just after a trip, we would likely invite a bunch of friends over, get them slightly inebriated, and subject them to a slide show using a projector and portable screen.  This almost literally captive audience would feign enjoyment over, or perhaps even genuinely enjoy, viewing the large projected images and hearing our stories about the recent adventure.  Then the guests would leave, and the slide trays would go back on a bookshelf to sit for months or years before anyone would look again.

In this brave new digital era, we have many more and better options for sharing our best travel photos.  This being the Internet, I’ll offer up a Top Ten list of favorite ways to get my travel images in front of key audiences (Number 7 will amaze you!):

  1. Social Media: While most social media platforms, including Facebook, Twitter, and Instagram, are image-intensive, it turns out that they aren’t particularly good at sharing fine art photography.  That said, these are important and obvious outlets for getting our favorite travel photos out to our friends promptly.  Some even post while traveling, but I do not recommend this approach unless you are completely certain your home is secure while you’re away.  Because these platforms encourage sharing, using them will allow your friends to pass them along to their friends, too.
  2. Online Photography Sites: Specialized photography platforms, such as SmugMug, Flickr, PhotoShelter, and 500px, are tailor-made for sharing (and even selling) your best images.  I use SmugMug to power my own professional photography website, but I also spend quite a bit of time browsing friends’ and even strangers’ photo galleries on the other platforms I mention here.
  3. The New Home Slideshow: Who needs the clunky white folding screens and finicky slide projectors of yesteryear?  Today most folks have a bright, high-definition display right in their living rooms, and it’s called a TV.  Photos on a PC or tablet can easily be shared on a smart TV via WiFi or specialized connecting cables.
  4. Your Phone: Today’s smart phones, whether iOS or Android, have easy ways to sync photos from your PC or tablet to the phone.  Once on your phone, your photos are ready to show to anyone from your mom to a random stranger on a train.  Not the biggest screen in the world, but it’s always with you and can store thousands of high resolution photos.
  5. Send them the files: It’s sometimes desirable to send some of your original image files to a few trusted friends.  Among the numerous methods for doing so are good ol’ trusty email (though attachment sizes are usually limited), Dropbox, and the download capability found in certain photography sites such as SmugMug.
  6. Albums and Books: Yes, the photo album is still alive and well, and it’s never been easier to create one.  Or you can go the extra mile and publish your own custom photography book.  Many photo sharing sites allow you to create your own albums and books featuring your images.
  7. Prints: The demise of the hardcopy print has been greatly exaggerated.  There’s something special and timeless about the look and feel of a well-printed photograph on real paper.  Do it yourself on a good home printer with high quality paper and ink, or send it to a professional lab, but a framed print on your wall or gifted to a friend to put up on their wall is a lovely way to share your very best images.
  8. Cards: Greeting cards, birthday cards, holiday cards–these days it’s easy to customize them with your own images and send them to friends and family.
  9. Calendars: Every year, I create a calendar with a photo from each month of the year just ended, and send copies to a few family members.  I also proudly display this calendar in my home and office.  What could be better than knowing you and your friends are viewing your photos every day of the year?
  10. Keepsakes: Novelty gifts from pencil holders to jigsaw puzzles, to clothing items can be easily and inexpensively made using your favorite photos.  We even have a cat food bowl sporting the likeness of our kitty.  My younger daughter enjoys specialty socks, so I’m looking into ways of putting some of our images onto hosiery.  Get creative!

Whatever methods you use to share your images with friends and family, I would encourage you to consider watermarking your photos.  A watermark is a pattern or image placed across a portion of the photograph to identify it as the work of a particular photographer.  While watermarks can be distracting to the viewer, they can be made quite discreet and they offer some protection against your image being stolen and passed off or even sold as the work of others.  Many photo editing software packages and photo sharing sites offer the capability of attaching watermarks to your photos.

How do you share your travel images?  Got a great idea for sharing that you’d like to add to the discussion?  Please leave a comment in the box at the end of this post.


It’s All in the Telling [Encore Publication]: Sharing images as a photo essay can help tell a story

When we share our images from a trip or from an event close to home, we become more than photographers; we become storytellers.  An individual image can tell a powerful story all by itself, and most of the best ones do.  But presenting a series of related images in the form of a photo essay is a great way to share a story with your viewers.  Each image serves a purpose in the structure of a photo essay, just as each sentence or paragraph does in a written essay.  In this post, I will revisit last weekend’s Sacramento Super Spartan Race (see Post on Spartan Race), taking the same 12 images from the earlier post but rearranging them in the form of a rudimentary photo essay.  We’ll discuss the purpose of each major type of image in creating the essay.  [Note: I am borrowing some of the organizational concepts presented in CUNY’s Photojournalism course materials at this site: http://photo.journalism.cuny.edu/week-5/.]

Establishing Shot: Usually the first image in a photo essay, the establishing shot should draw in the viewer by presenting the big picture.

The establishing shot sets the context of the essay.  Here I use an image of large contingents of athletes running over the hills.  I shot from a distance, using a telephoto lens to compress the perspective and emphasize the massive scale of the race.  Buy this photo

Alternatively, we could use the starting line image as our establishing shot.  Some essays lend themselves well to a chronological telling, in which case it’s good to start at the beginning.  In the case of this specific event, I prefer the establishing shot to be a big-picture overview of many athletes in the middle of their course.

The starting line is a good place to set the stage for your photo essay if you will be using a chronological method of telling the story.  Buy this photo

Portraits: Often the biggest portion of the photo essay, portraits tell the story through images of some of the people who are involved.  The portraits can be tight head-shots, full-body shots, or environmental portraits that show the setting as well as the person.  I like to use a combination of all of these compositional methods.  And it’s also fine to use a mix of posed shots and candids.  Variety can improve some photo essays, although in other cases you may opt for a consistent look-and-feel for many of your images so the mash-up of styles doesn’t distract the viewer from the story.

This environmental portrait shows the athlete in the context of the monkey bars obstacle, with other athletes and the background included in the frame.  Buy this photo

Portraits of athletes don’t have to be in the cliche pose of standing, legs apart, on the ground flexing their biceps.  Athletes are happy to pose in the midst of whatever they’re doing when they see a photographer nearby.  Buy this photo

Not all portraits have to show the subject’s face.  This environmental portrait works because it shows us what the athletes are doing from their point of view.  Buy this photo

This posed portrait is framed rather tightly, showing the power and the elation of the athletes after finishing the race.  The background, while bright and busy, is not overly distracting.  Buy this photo

For powerful portraits, I like to seek out people who have something special to say.  This racer stopped for a moment so I could make a portrait.  His flag makes a nice counterpoint to the rolling hills and featureless sky in the background.  Buy this photo

Interaction: Most photo essays can benefit from at least one shot showing the interaction between different people in the story.

Although Spartan Race athletes are fierce competitors, they also make an effort to support one another and cheer their fellow racers on.  I enjoy capturing these interactions because these moments often tell a strong story visually.  Buy this photo

This shot of kids playing in the shower area at the end of the race shows another type of interaction.  Buy this photo

Close-Up: It’s helpful to include some images that show the little details.  In the case of this particular event, I don’t have many close-up shots, so I’ll include this one fairly tight portrait as a placeholder.  It would be great to include a true close-up shot showing just the athlete’s gloved hands as she grasps the rope, perhaps with part of her face in the background, for example.  This could be done by tightly cropping this image.

This tight portrait shows great action and emotion.  While it’s not a true close-up image, which ordinarily would show only a few details rather than the full person, it can serve a similar function in the essay by focusing the viewer’s attention on a small specific part of the race.  Buy this photo

Closer: This will be the last image in the photo essay, so it needs to be a strong one.  It could be a climactic moment or, if the story is being told chronologically, an image made at the end of the race.  I’ll include two possible closing shots here.  The first captures an athlete jumping over the fire at the finish line; it’s both dramatic and symbolizes the end of the event.  The second shows a classic Spartan Race moment, where the athletes have to carry heavy buckets of sand along a muddy, hilly course; this image could make a good closer because it evokes a quintessentially Spartan Race sense of emotion.

The finish line itself is a dramatic vantage point.  In this particular race, athletes must jump over a line of fire to finish the course.  Buy this photo

An iconic Spartan Race image.  I captured the strenuous activity of carrying buckets filled with sand by shooting from a distance with a telephoto lens.  Buy this photo

Have you presented your images in the form of a photo essay?  How did you structure it?  What advice can you share for fellow photographers who would like to use this format?

Want to read more posts about sharing your images?  Find them all here: Posts on Sharing.

Cards, Calendars, and Keepsakes: Oh, My! [Encore Publication]: Ways to share your images beyond social media and prints

With the holidays fast approaching, now is a great time to think about creative ways to share your favorite images as gifts for family and friends or perhaps to enhance your own home.  Most commonly we share images via social media and, for more special occasions, as prints.  Review this classic post for a list of 10 ideas for sharing your images: Post on Image-Sharing Ideas.   

In today’s post, I discuss three of these methods that are particularly festive and well-suited to the holiday season: cards, calendars, and keepsakes.

5x7folded
A  likeness of one of the earliest holiday cards my wife and I created.  The original version was in black-and-white and had a humorous caption at the bottom.  This version was made more recently using a modern digital process.

Cards: For the entire 31 years we’ve been together, my wife and I have sent our families and friends custom-made holiday cards.  We created our first card in 1986, the year we started dating.  The process was extremely complicated back then.  We had to take the photograph using a film camera, send the film to a lab for processing, wait for the prints to be mailed back to us, select the image we wanted to use, cut the print down to the right size, tape it onto a printed template we had to design ourselves using a primitive word processor, and photocopy it onto card stock at a graphics store.  It was strictly a black-and-white affair because color copying was very expensive in that era.  Even for black-and-white cards, the cost was quite high.

Today, the process is vastly simpler and less expensive, and the quality very high.  There are countless companies that will take your photo files and caption information, blend them with a design you choose from their library of sometimes up to hundreds of choices, and create an attractive customized card for a range of occasions.  Shop around carefully before selecting one, because price, quality, and flexibility vary tremendously.  My current favorite is Snapfish.  Even though I no longer use Snapfish to host my image galleries, I continue to create and order photo cards from this site because it offers a good range of card designs, reasonably high printing quality, and affordable pricing.  There are often very deep discounts available at Snapfish and other photo sharing sites.  Try using a search engine to find discount or coupon codes.  I rarely pay more than 60% of the listed price.

When creating a card on any platform, there are a few basic steps to follow.  First, you choose the card design from a library of choices.  There may be only a few designs for some types of occasions, but for the winter holidays there are usually dozens to choose from.  Then you upload your images if they’re not already on the site, and select where you want them to go in the card template.  Next, you add captions to customize the card.  You may be able to include a return address on the envelopes shipped with the cards.  Be sure to review your card carefully before ordering.  The final step is to place your order by specifying the quantity (per-unit prices usually drop when ordering larger quantities), shipping address, and payment information.

Calendars: Photo calendars make great holiday gifts because they are personal, functional, and seasonal (the weeks before the start of the new year is typically when your loved ones will be looking for a calendar).  Every year I create a calendar with images that present the past year in review.  I send it to several family members and keep one for my own home and one for my office.  As with cards, calendars can be ordered from a wide variety of companies with differing levels of quality and cost, so shop around.

Creating a calendar is similar to making a card.  You choose a size and design, upload your images, and lay them out on the calendar template.  Some sites allow you to further customize your calendar by including special dates such as birthdays, anniversaries, and other events important to your family or friends.  The better companies let you include a photo to represent each special date during the year, and will save these dates for creating new calendars in future years.  The ordering process for calendars is similar to that for cards: review the calendar and then place the order.  Again, you may be able to find discount or coupon codes that will substantially lower your cost.

Keepsakes: These days, it seems that images can be reproduced on nearly any type of item you can imagine.  This variety translates into a high likelihood of finding something for everyone on your gift list.  I use SmugMug, the platform that powers my online professional photography business, for nearly all of the keepsakes I order as gifts, and my clients also have been happy with their purchases of these items.  There’s a wide array of keepsake items to choose from, each customized with your image(s), including coffee mugs, coasters, smartphone cases, playing cards, desk organizers, and stickers.

To make a keepsake, simply upload your photo(s) if they’re not already on the site, select the type of item you want to order, ensure the image is cropped and/or sized appropriately for the item, and go through the checkout procedure.

This holiday season, get creative.  Share your images on holiday cards, calendars, and a range of keepsakes.  It’s never been as easy or inexpensive to make these items as it is right now, so have fun and experiment.

What are your favorite ways to share you images during the holiday season?  Please add a comment with your ideas.

Want to read more posts about sharing your images?  Find them all here: Posts on Sharing.

Every Day I Write the Book [Encore Publication]: Even in the digital world, there’s a place for a hardcover photo book from your trip

In the brave new digital world, we have a lot of ways to share our travel photos after (and sometimes even before) we return from the trip: social media, on-screen slideshows, video montages, and of course the enduringly popular paper print.  Even with all of these very immediate sharing options, one of my favorite formats for preserving my travel images is the hardcopy photo book, and today there are more choices than ever before regarding how to create these wonderful keepsakes.

Our living room bookshelf and coffee table are home to more than a dozen photo books, each one showcasing the images and preserving the often fleeting memories of the details of a major trip we’ve taken.  Here’s why I love this method of sharing travel photography and how to create your own photo books.

img_3497

The leather cover of a photo book showcasing our recent travels in Turkey.

Why create a photo book?  Over time, new digital formats replace existing ones, and the very old ones become obsolete.  Within about 20 years, it is quite likely that none of our present formats of storing data will still be readable.  The printed page has much more staying power.  It is estimated that photos printed on high quality paper using high quality inks, and stored away from direct sunlight, can last for 100 years.  I’m a big fan of framed prints, as well, but a photo book is more cost-effective and space-efficient as a means to preserve many more photos than we could easily hang on our walls.  And because photo books can include customized captions to accompany the included images, they’re a great reference source for refreshing our memories about what we saw, when, and where.  Finally, photo books look great and are fun conversation-starters to tell the story of our travels when friends and family come to visit.

How do you create a photo book?  There are a number of methods, but unless you are a scrapbooker or handy with bookbinding, all of them involve sending your specifications and images to a vendor that will print the book, bind it, and mail it to you.  Some software packages, including Lightroom, have built-in modules for creating photo books.  And most photo sharing websites, including SmugMug (a fabulous site used by many professionals including me), Snapfish, Shutterfly, and Apple Photos, allow you to create and purchase photo books from your images.  These services vary in features, price, and quality, so shop carefully.  Most of my past photo books were created using Snapfish, but I am transitioning to using Lightroom’s and SmugMug’s services instead.  I will report on the results in a future post.

img_3493

Good book-creation software should allow you to choose from a wide range of formats on each page to display one or several photos plus text.

The basic process works similarly for any of these services.  You specify the book size, cover material, paper quality, printing quality, and other basic parameters for your book.  Then, you fill the pages of the book with your photos, specifying the layout you want for each page.  You can add captions for individual images or series of images, and you may be able to add various special effects.  At the end of the process, you place your order for the book to be printed and mailed to you.  Using the service offered by Blurb, which is available via SmugMug and Lightroom, you can self-publish a large or small print run of books and make them available for sale on Amazon or directly on your own website.

lightroom-book-moduleThe process of creating a photo book using Lightroom’s Book module (shown here) is fairly straightforward.  It’s even more intuitive using an online service such as Snapfish or Shutterfly.

When you receive your photo book a few days after placing your order, you’ll have a keepsake suitable for sharing with visitors and for preserving your own precious travel memories.

img_3494

A two-page spread in our Turkey photo book showcases several images of the incredible rock formations in the Cappadocia region.

Have you created photo books from your travel images?  Which service did you use and how was your experience?  Please share your thoughts here.

Interested in reading more posts about sharing your travel images?  Click here to see them all: http://www.to-travel-hopefully.com/category/travel/share/.
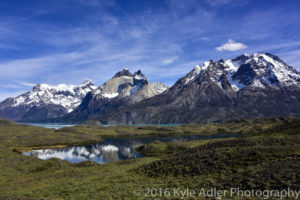
“Boundless Theft in Limited Professions” ~Shakespeare [Encore Publication]: What to do if your images are being stolen

Disclaimer: I am not an attorney and cannot dispense legal advice.  In this post I am simply sharing as-is my own experiences of learning about unauthorized use of my images and taking steps to correct this situation.  You should consult with a qualified lawyer if you are facing theft of your intellectual property.

I recently traveled to London to receive an award and attend the opening of the Travel Photographer of the Year winners exhibition.  When I returned from the trip, I performed a Google image search on my winning photograph to see if it had garnered more international press coverage in the wake of the show’s opening.  The good news: there were dozens of new articles featuring my winning image, and hundreds of articles in total, spanning dozens of countries around the world.  The bad news: I learned that my image was being used without my permission on dozens of sites.  A winner of Travel Photographer of the Year and shortlisted for National Geographic’s Travel Photography Awards, this particular image is an important asset in my professional photography portfolio.  And while I don’t mind it being shared without authorization if it includes an attribution to me as the photographer, or at least includes my watermark, there were several quite egregious cases of my work literally being stolen.  In some of these cases, other people were trying to pass off my image as their own, one fellow even going to the point of claiming he had shot the photo “with a black-and-white camera.”  In a couple of other cases, my valuable intellectual property was being made available for download as a wallpaper image to the general public, without my permission.  Every one of these illegal downloads takes away the opportunity for me to sell the image on my own site or to earn a royalty through the image being sold by my authorized agents.

It has never been easier to steal intellectual property–in the form of photos, videos, or the written word–than in today’s interconnected digital world.  While it can be good for an artist’s reputation and business to have her or his work “go viral” on the web, the benefits only accrue when the work is attributed to the artist who created it.  If other people are passing the work off as their own or distributing it widely to others without authorization, then we have a problem.

After consulting with an intellectual property attorney (who also happens to be my brother), I realized that I need to act promptly to protect my rights.  I have started the process of identifying the worst cases of theft of my image and taking steps to stop the unauthorized use.  If you also have had your photographs used without your permission, here are some steps you may consider taking:

  1. Search the web for all uses of your image and identify the sites where it is being used without authorization: The remarkable technology to search the vast Internet for specific groupings of pixels that resemble your image is actually very easy to use.  Just right-click on your image and select “Search Google for image” from the drop-down menu.  You’ll see a listing of all likely matches to your image throughout the web.  From this listing, select the uses that are not authorized.  My image, for example, matched several hundred occurrences on the web, but most of these were valid press outlets reporting on the image’s success with Travel Photographer of the Year and National Geographic Travel Photography Awards.  I studied the list of sites to find the ones that were using my image without permission, and I further pared down this list to focus only on sites that were using my image without attribution to me and without my watermark.
  2. Identify the owners of the offending domains: Using a who-is directory search, you can often find contact information for the registered owner of the domain that is using your work illegally.  You can first try https://www.whois.net/, although other directory lookup services may provide better information.  Enter the domain (for example, reddit.com) from the URL of the site where your image is being misused, and who-is will provide some information on the domain owner.  You’re looking for the contact info about the owner so that you can complain about the abuse.  Look for a field like this one: “Registrar Abuse Contact Email: abusecomplaints@markmonitor.com”.
  3. Write and send DMCA Takedown Requests to the owners of the offending sites: The Digital Millennium Copyright Act, or DMCA, is a US copyright law that also provides some protection of intellectual property rights in certain other countries.  It provides for copyright owners (including photographers) to demand an unauthorized use of their property be taken down.  There is a standardized form called a DMCA Takedown Request that can be used to notify the owner of a site that they are using work you own without your permission, and to insist they remove promptly remove the infringement from their site.  There are numerous locations on the web where you can find sample Takedown Request forms.  Tailor one of these sample forms with your own info, the info about your property, and the location of the infringement of your copyright.  You will need to sign (electronically or physically) the form, including a statement that you swear under penalty of perjury that you own the copyright of the work in question.
  4. Follow up to ensure compliance with your DMCA Takedown Request: While the owner of the infringing site or domain is obligated to promptly remove the infringing post, frequently they may not do so in a timely manner, or they may ignore your request completely.  Two days after filing seven takedown requests, I have received only two responses, and both of them were from ISPs who claimed they were not responsible for the content their subscribers posted (I have since identified the actual owners of the infringing sites and directly sent them new takedown requests).  I plan to continue to follow up over the coming weeks to ensure compliance.
  5. Consider further legal action if required: So far, I have not asked for legal damages from the infringing site owners, but if they disregard my takedown requests and continue to either pass off my work as their own or propagate my photo in bulk to the general public, then I may choose to sue them for damages.  I will publish a followup to this post to share how this situation progresses, but I do want readers to be aware that there are further actions that can be taken beyond a DMCA Takedown Request.
  6. Consider registering your most valuable images: A photograph, like other forms of intellectual property, may be registered with the US Copyright Office at https://www.copyright.gov/.  Doing so it not required to initiate a DMCA Takedown Request, but having your copyright registered for your most valuable images may offer you more protection and give you standing for further legal action.

I hope that by sharing my own experiences with having my images stolen, readers may gain some context on the problem.  In this digital and interconnected era, most working photographers will likely see at least a few of their images used without permission.  We all need to be aware of the situation and how to deal with it.  Please consult with a qualified lawyer about the specifics of your own situation.  Nothing in this post should be interpreted as legal advice.

Have you had your images used without authorization?  Please share your experiences here.

What to read other posts about sharing your images?  Find them all here: Posts on Sharing Images.


Happiness Quite Unshared [Encore Publication]: You’re back home from your trip and you’ve got your images looking great: Now what?

With the holidays approaching, I thought readers of To Travel Hopefully might enjoy seeing an encore of this early, pre-launch post with ideas about how to share your favorite images with friends and family.

Sometimes you just get that feeling.  You know as soon as you depress the shutter button that you’ve just captured an incredible travel image.  Over the course of your trip, you will hopefully amass quite a few of these images that you will be eager to share with friends and family.  After the often laborious effort to cull your images and post-process the chosen few, it’s time to share these best photos with the world.

In olden times (pre-digital), there were fewer choices about how to share one’s travel photos.  Many of us shot with color transparency (slide) film, sent all the rolls off to a lab for processing, picked out the top slides by hand, and stored them in a slide tray or carousel for future viewing.  In the excitement just after a trip, we would likely invite a bunch of friends over, get them slightly inebriated, and subject them to a slide show using a projector and portable screen.  This almost literally captive audience would feign enjoyment over, or perhaps even genuinely enjoy, viewing the large projected images and hearing our stories about the recent adventure.  Then the guests would leave, and the slide trays would go back on a bookshelf to sit for months or years before anyone would look again.

In this brave new digital era, we have many more and better options for sharing our best travel photos.  This being the Internet, I’ll offer up a Top Ten list of favorite ways to get my travel images in front of key audiences (Number 7 will amaze you!):

  1. Social Media: While most social media platforms, including Facebook, Twitter, and Instagram, are image-intensive, it turns out that they aren’t particularly good at sharing fine art photography.  That said, these are important and obvious outlets for getting our favorite travel photos out to our friends promptly.  Some even post while traveling, but I do not recommend this approach unless you are completely certain your home is secure while you’re away.  Because these platforms encourage sharing, using them will allow your friends to pass them along to their friends, too.
  2. Online Photography Sites: Specialized photography platforms, such as SmugMug, Flickr, PhotoShelter, and 500px, are tailor-made for sharing (and even selling) your best images.  I use SmugMug to power my own professional photography website, but I also spend quite a bit of time browsing friends’ and even strangers’ photo galleries on the other platforms I mention here.
  3. The New Home Slideshow: Who needs the clunky white folding screens and finicky slide projectors of yesteryear?  Today most folks have a bright, high-definition display right in their living rooms, and it’s called a TV.  Photos on a PC or tablet can easily be shared on a smart TV via WiFi or specialized connecting cables.
  4. Your Phone: Today’s smart phones, whether iOS or Android, have easy ways to sync photos from your PC or tablet to the phone.  Once on your phone, your photos are ready to show to anyone from your mom to a random stranger on a train.  Not the biggest screen in the world, but it’s always with you and can store thousands of high resolution photos.
  5. Send them the files: It’s sometimes desirable to send some of your original image files to a few trusted friends.  Among the numerous methods for doing so are good ol’ trusty email (though attachment sizes are usually limited), Dropbox, and the download capability found in certain photography sites such as SmugMug.
  6. Albums and Books: Yes, the photo album is still alive and well, and it’s never been easier to create one.  Or you can go the extra mile and publish your own custom photography book.  Many photo sharing sites allow you to create your own albums and books featuring your images.
  7. Prints: The demise of the hardcopy print has been greatly exaggerated.  There’s something special and timeless about the look and feel of a well-printed photograph on real paper.  Do it yourself on a good home printer with high quality paper and ink, or send it to a professional lab, but a framed print on your wall or gifted to a friend to put up on their wall is a lovely way to share your very best images.
  8. Cards: Greeting cards, birthday cards, holiday cards–these days it’s easy to customize them with your own images and send them to friends and family.
  9. Calendars: Every year, I create a calendar with a photo from each month of the year just ended, and send copies to a few family members.  I also proudly display this calendar in my home and office.  What could be better than knowing you and your friends are viewing your photos every day of the year?
  10. Keepsakes: Novelty gifts from pencil holders to jigsaw puzzles, to clothing items can be easily and inexpensively made using your favorite photos.  We even have a cat food bowl sporting the likeness of our kitty.  My younger daughter enjoys specialty socks, so I’m looking into ways of putting some of our images onto hosiery.  Get creative!

Whatever methods you use to share your images with friends and family, I would encourage you to consider watermarking your photos.  A watermark is a pattern or image placed across a portion of the photograph to identify it as the work of a particular photographer.  While watermarks can be distracting to the viewer, they can be made quite discreet and they offer some protection against your image being stolen and passed off or even sold as the work of others.  Many photo editing software packages and photo sharing sites offer the capability of attaching watermarks to your photos.

How do you share your travel images?  Got a great idea for sharing that you’d like to add to the discussion?  Please leave a comment in the box at the end of this post.


It’s All in the Telling [Encore Publication]: Sharing images as a photo essay can help tell a story

When we share our images from a trip or from an event close to home, we become more than photographers; we become storytellers.  An individual image can tell a powerful story all by itself, and most of the best ones do.  But presenting a series of related images in the form of a photo essay is a great way to share a story with your viewers.  Each image serves a purpose in the structure of a photo essay, just as each sentence or paragraph does in a written essay.  In this post, I will revisit last weekend’s Sacramento Super Spartan Race (see Post on Spartan Race), taking the same 12 images from the earlier post but rearranging them in the form of a rudimentary photo essay.  We’ll discuss the purpose of each major type of image in creating the essay.  [Note: I am borrowing some of the organizational concepts presented in CUNY’s Photojournalism course materials at this site: http://photo.journalism.cuny.edu/week-5/.]

Establishing Shot: Usually the first image in a photo essay, the establishing shot should draw in the viewer by presenting the big picture.

The establishing shot sets the context of the essay.  Here I use an image of large contingents of athletes running over the hills.  I shot from a distance, using a telephoto lens to compress the perspective and emphasize the massive scale of the race.  Buy this photo

Alternatively, we could use the starting line image as our establishing shot.  Some essays lend themselves well to a chronological telling, in which case it’s good to start at the beginning.  In the case of this specific event, I prefer the establishing shot to be a big-picture overview of many athletes in the middle of their course.

The starting line is a good place to set the stage for your photo essay if you will be using a chronological method of telling the story.  Buy this photo

Portraits: Often the biggest portion of the photo essay, portraits tell the story through images of some of the people who are involved.  The portraits can be tight head-shots, full-body shots, or environmental portraits that show the setting as well as the person.  I like to use a combination of all of these compositional methods.  And it’s also fine to use a mix of posed shots and candids.  Variety can improve some photo essays, although in other cases you may opt for a consistent look-and-feel for many of your images so the mash-up of styles doesn’t distract the viewer from the story.

This environmental portrait shows the athlete in the context of the monkey bars obstacle, with other athletes and the background included in the frame.  Buy this photo

Portraits of athletes don’t have to be in the cliche pose of standing, legs apart, on the ground flexing their biceps.  Athletes are happy to pose in the midst of whatever they’re doing when they see a photographer nearby.  Buy this photo

Not all portraits have to show the subject’s face.  This environmental portrait works because it shows us what the athletes are doing from their point of view.  Buy this photo

This posed portrait is framed rather tightly, showing the power and the elation of the athletes after finishing the race.  The background, while bright and busy, is not overly distracting.  Buy this photo

For powerful portraits, I like to seek out people who have something special to say.  This racer stopped for a moment so I could make a portrait.  His flag makes a nice counterpoint to the rolling hills and featureless sky in the background.  Buy this photo

Interaction: Most photo essays can benefit from at least one shot showing the interaction between different people in the story.

Although Spartan Race athletes are fierce competitors, they also make an effort to support one another and cheer their fellow racers on.  I enjoy capturing these interactions because these moments often tell a strong story visually.  Buy this photo

This shot of kids playing in the shower area at the end of the race shows another type of interaction.  Buy this photo

Close-Up: It’s helpful to include some images that show the little details.  In the case of this particular event, I don’t have many close-up shots, so I’ll include this one fairly tight portrait as a placeholder.  It would be great to include a true close-up shot showing just the athlete’s gloved hands as she grasps the rope, perhaps with part of her face in the background, for example.  This could be done by tightly cropping this image.

This tight portrait shows great action and emotion.  While it’s not a true close-up image, which ordinarily would show only a few details rather than the full person, it can serve a similar function in the essay by focusing the viewer’s attention on a small specific part of the race.  Buy this photo

Closer: This will be the last image in the photo essay, so it needs to be a strong one.  It could be a climactic moment or, if the story is being told chronologically, an image made at the end of the race.  I’ll include two possible closing shots here.  The first captures an athlete jumping over the fire at the finish line; it’s both dramatic and symbolizes the end of the event.  The second shows a classic Spartan Race moment, where the athletes have to carry heavy buckets of sand along a muddy, hilly course; this image could make a good closer because it evokes a quintessentially Spartan Race sense of emotion.

The finish line itself is a dramatic vantage point.  In this particular race, athletes must jump over a line of fire to finish the course.  Buy this photo

An iconic Spartan Race image.  I captured the strenuous activity of carrying buckets filled with sand by shooting from a distance with a telephoto lens.  Buy this photo

Have you presented your images in the form of a photo essay?  How did you structure it?  What advice can you share for fellow photographers who would like to use this format?

Want to read more posts about sharing your images?  Find them all here: Posts on Sharing.

Cards, Calendars, and Keepsakes: Oh, My! [Encore Publication]: Ways to share your images beyond social media and prints

With the holidays fast approaching, now is a great time to think about creative ways to share your favorite images as gifts for family and friends or perhaps to enhance your own home.  Most commonly we share images via social media and, for more special occasions, as prints.  Review this classic post for a list of 10 ideas for sharing your images: Post on Image-Sharing Ideas.   

In today’s post, I discuss three of these methods that are particularly festive and well-suited to the holiday season: cards, calendars, and keepsakes.

5x7folded
A  likeness of one of the earliest holiday cards my wife and I created.  The original version was in black-and-white and had a humorous caption at the bottom.  This version was made more recently using a modern digital process.

Cards: For the entire 31 years we’ve been together, my wife and I have sent our families and friends custom-made holiday cards.  We created our first card in 1986, the year we started dating.  The process was extremely complicated back then.  We had to take the photograph using a film camera, send the film to a lab for processing, wait for the prints to be mailed back to us, select the image we wanted to use, cut the print down to the right size, tape it onto a printed template we had to design ourselves using a primitive word processor, and photocopy it onto card stock at a graphics store.  It was strictly a black-and-white affair because color copying was very expensive in that era.  Even for black-and-white cards, the cost was quite high.

Today, the process is vastly simpler and less expensive, and the quality very high.  There are countless companies that will take your photo files and caption information, blend them with a design you choose from their library of sometimes up to hundreds of choices, and create an attractive customized card for a range of occasions.  Shop around carefully before selecting one, because price, quality, and flexibility vary tremendously.  My current favorite is Snapfish.  Even though I no longer use Snapfish to host my image galleries, I continue to create and order photo cards from this site because it offers a good range of card designs, reasonably high printing quality, and affordable pricing.  There are often very deep discounts available at Snapfish and other photo sharing sites.  Try using a search engine to find discount or coupon codes.  I rarely pay more than 60% of the listed price.

When creating a card on any platform, there are a few basic steps to follow.  First, you choose the card design from a library of choices.  There may be only a few designs for some types of occasions, but for the winter holidays there are usually dozens to choose from.  Then you upload your images if they’re not already on the site, and select where you want them to go in the card template.  Next, you add captions to customize the card.  You may be able to include a return address on the envelopes shipped with the cards.  Be sure to review your card carefully before ordering.  The final step is to place your order by specifying the quantity (per-unit prices usually drop when ordering larger quantities), shipping address, and payment information.

Calendars: Photo calendars make great holiday gifts because they are personal, functional, and seasonal (the weeks before the start of the new year is typically when your loved ones will be looking for a calendar).  Every year I create a calendar with images that present the past year in review.  I send it to several family members and keep one for my own home and one for my office.  As with cards, calendars can be ordered from a wide variety of companies with differing levels of quality and cost, so shop around.

Creating a calendar is similar to making a card.  You choose a size and design, upload your images, and lay them out on the calendar template.  Some sites allow you to further customize your calendar by including special dates such as birthdays, anniversaries, and other events important to your family or friends.  The better companies let you include a photo to represent each special date during the year, and will save these dates for creating new calendars in future years.  The ordering process for calendars is similar to that for cards: review the calendar and then place the order.  Again, you may be able to find discount or coupon codes that will substantially lower your cost.

Keepsakes: These days, it seems that images can be reproduced on nearly any type of item you can imagine.  This variety translates into a high likelihood of finding something for everyone on your gift list.  I use SmugMug, the platform that powers my online professional photography business, for nearly all of the keepsakes I order as gifts, and my clients also have been happy with their purchases of these items.  There’s a wide array of keepsake items to choose from, each customized with your image(s), including coffee mugs, coasters, smartphone cases, playing cards, desk organizers, and stickers.

To make a keepsake, simply upload your photo(s) if they’re not already on the site, select the type of item you want to order, ensure the image is cropped and/or sized appropriately for the item, and go through the checkout procedure.

This holiday season, get creative.  Share your images on holiday cards, calendars, and a range of keepsakes.  It’s never been as easy or inexpensive to make these items as it is right now, so have fun and experiment.

What are your favorite ways to share you images during the holiday season?  Please add a comment with your ideas.

Want to read more posts about sharing your images?  Find them all here: Posts on Sharing.

Happiness Quite Unshared [Encore Publication]: You’re back home from your trip and you’ve got your images looking great: Now what?

With the holidays approaching, I thought readers of To Travel Hopefully might enjoy seeing an encore of this early, pre-launch post with ideas about how to share your favorite images with friends and family.

Sometimes you just get that feeling.  You know as soon as you depress the shutter button that you’ve just captured an incredible travel image.  Over the course of your trip, you will hopefully amass quite a few of these images that you will be eager to share with friends and family.  After the often laborious effort to cull your images and post-process the chosen few, it’s time to share these best photos with the world.

In olden times (pre-digital), there were fewer choices about how to share one’s travel photos.  Many of us shot with color transparency (slide) film, sent all the rolls off to a lab for processing, picked out the top slides by hand, and stored them in a slide tray or carousel for future viewing.  In the excitement just after a trip, we would likely invite a bunch of friends over, get them slightly inebriated, and subject them to a slide show using a projector and portable screen.  This almost literally captive audience would feign enjoyment over, or perhaps even genuinely enjoy, viewing the large projected images and hearing our stories about the recent adventure.  Then the guests would leave, and the slide trays would go back on a bookshelf to sit for months or years before anyone would look again.

In this brave new digital era, we have many more and better options for sharing our best travel photos.  This being the Internet, I’ll offer up a Top Ten list of favorite ways to get my travel images in front of key audiences (Number 7 will amaze you!):

  1. Social Media: While most social media platforms, including Facebook, Twitter, and Instagram, are image-intensive, it turns out that they aren’t particularly good at sharing fine art photography.  That said, these are important and obvious outlets for getting our favorite travel photos out to our friends promptly.  Some even post while traveling, but I do not recommend this approach unless you are completely certain your home is secure while you’re away.  Because these platforms encourage sharing, using them will allow your friends to pass them along to their friends, too.
  2. Online Photography Sites: Specialized photography platforms, such as SmugMug, Flickr, PhotoShelter, and 500px, are tailor-made for sharing (and even selling) your best images.  I use SmugMug to power my own professional photography website, but I also spend quite a bit of time browsing friends’ and even strangers’ photo galleries on the other platforms I mention here.
  3. The New Home Slideshow: Who needs the clunky white folding screens and finicky slide projectors of yesteryear?  Today most folks have a bright, high-definition display right in their living rooms, and it’s called a TV.  Photos on a PC or tablet can easily be shared on a smart TV via WiFi or specialized connecting cables.
  4. Your Phone: Today’s smart phones, whether iOS or Android, have easy ways to sync photos from your PC or tablet to the phone.  Once on your phone, your photos are ready to show to anyone from your mom to a random stranger on a train.  Not the biggest screen in the world, but it’s always with you and can store thousands of high resolution photos.
  5. Send them the files: It’s sometimes desirable to send some of your original image files to a few trusted friends.  Among the numerous methods for doing so are good ol’ trusty email (though attachment sizes are usually limited), Dropbox, and the download capability found in certain photography sites such as SmugMug.
  6. Albums and Books: Yes, the photo album is still alive and well, and it’s never been easier to create one.  Or you can go the extra mile and publish your own custom photography book.  Many photo sharing sites allow you to create your own albums and books featuring your images.
  7. Prints: The demise of the hardcopy print has been greatly exaggerated.  There’s something special and timeless about the look and feel of a well-printed photograph on real paper.  Do it yourself on a good home printer with high quality paper and ink, or send it to a professional lab, but a framed print on your wall or gifted to a friend to put up on their wall is a lovely way to share your very best images.
  8. Cards: Greeting cards, birthday cards, holiday cards–these days it’s easy to customize them with your own images and send them to friends and family.
  9. Calendars: Every year, I create a calendar with a photo from each month of the year just ended, and send copies to a few family members.  I also proudly display this calendar in my home and office.  What could be better than knowing you and your friends are viewing your photos every day of the year?
  10. Keepsakes: Novelty gifts from pencil holders to jigsaw puzzles, to clothing items can be easily and inexpensively made using your favorite photos.  We even have a cat food bowl sporting the likeness of our kitty.  My younger daughter enjoys specialty socks, so I’m looking into ways of putting some of our images onto hosiery.  Get creative!

Whatever methods you use to share your images with friends and family, I would encourage you to consider watermarking your photos.  A watermark is a pattern or image placed across a portion of the photograph to identify it as the work of a particular photographer.  While watermarks can be distracting to the viewer, they can be made quite discreet and they offer some protection against your image being stolen and passed off or even sold as the work of others.  Many photo editing software packages and photo sharing sites offer the capability of attaching watermarks to your photos.

How do you share your travel images?  Got a great idea for sharing that you’d like to add to the discussion?  Please leave a comment in the box at the end of this post.


Every Day I Write the Book [Encore Publication]: Even in the digital world, there’s a place for a hardcover photo book from your trip

In the brave new digital world, we have a lot of ways to share our travel photos after (and sometimes even before) we return from the trip: social media, on-screen slideshows, video montages, and of course the enduringly popular paper print.  Even with all of these very immediate sharing options, one of my favorite formats for preserving my travel images is the hardcopy photo book, and today there are more choices than ever before regarding how to create these wonderful keepsakes.

Our living room bookshelf and coffee table are home to more than a dozen photo books, each one showcasing the images and preserving the often fleeting memories of the details of a major trip we’ve taken.  Here’s why I love this method of sharing travel photography and how to create your own photo books.

img_3497

The leather cover of a photo book showcasing our recent travels in Turkey.

Why create a photo book?  Over time, new digital formats replace existing ones, and the very old ones become obsolete.  Within about 20 years, it is quite likely that none of our present formats of storing data will still be readable.  The printed page has much more staying power.  It is estimated that photos printed on high quality paper using high quality inks, and stored away from direct sunlight, can last for 100 years.  I’m a big fan of framed prints, as well, but a photo book is more cost-effective and space-efficient as a means to preserve many more photos than we could easily hang on our walls.  And because photo books can include customized captions to accompany the included images, they’re a great reference source for refreshing our memories about what we saw, when, and where.  Finally, photo books look great and are fun conversation-starters to tell the story of our travels when friends and family come to visit.

How do you create a photo book?  There are a number of methods, but unless you are a scrapbooker or handy with bookbinding, all of them involve sending your specifications and images to a vendor that will print the book, bind it, and mail it to you.  Some software packages, including Lightroom, have built-in modules for creating photo books.  And most photo sharing websites, including SmugMug (a fabulous site used by many professionals including me), Snapfish, Shutterfly, and Apple Photos, allow you to create and purchase photo books from your images.  These services vary in features, price, and quality, so shop carefully.  Most of my past photo books were created using Snapfish, but I am transitioning to using Lightroom’s and SmugMug’s services instead.  I will report on the results in a future post.

img_3493

Good book-creation software should allow you to choose from a wide range of formats on each page to display one or several photos plus text.

The basic process works similarly for any of these services.  You specify the book size, cover material, paper quality, printing quality, and other basic parameters for your book.  Then, you fill the pages of the book with your photos, specifying the layout you want for each page.  You can add captions for individual images or series of images, and you may be able to add various special effects.  At the end of the process, you place your order for the book to be printed and mailed to you.  Using the service offered by Blurb, which is available via SmugMug and Lightroom, you can self-publish a large or small print run of books and make them available for sale on Amazon or directly on your own website.

lightroom-book-moduleThe process of creating a photo book using Lightroom’s Book module (shown here) is fairly straightforward.  It’s even more intuitive using an online service such as Snapfish or Shutterfly.

When you receive your photo book a few days after placing your order, you’ll have a keepsake suitable for sharing with visitors and for preserving your own precious travel memories.

img_3494

A two-page spread in our Turkey photo book showcases several images of the incredible rock formations in the Cappadocia region.

Have you created photo books from your travel images?  Which service did you use and how was your experience?  Please share your thoughts here.

Interested in reading more posts about sharing your travel images?  Click here to see them all: http://www.to-travel-hopefully.com/category/travel/share/.