Focus on Yosemite National Park [Encore Publication]: A photographer’s dream, Yosemite offers so much more than the postcard views

Those of us who live in the San Francisco Bay Area can count many blessings, but one I am most thankful for is our fairly close proximity to Yosemite National Park.  The second oldest national park in the US, Yosemite is a photographer’s dream.  Since the days when Ansel Adams helped make the park famous through his masterful landscape photography, shutterbugs of all stripes have been flocking there to try to capture some of its indescribable beauty.  Most of us will never be an Ansel Adams, but that doesn’t stop me from returning to Yosemite at least once per year to give it my best shot, as it were.

Without doubt, there are many iconic views in the park that are relatively easy for even novice photographers to render.  There is majesty in the panorama over Yosemite Valley as seen from the famous Tunnel View lookout.  One doesn’t even have to venture off the main park road to shoot a nice image of Half Dome or El Capitan.  But Yosemite offers so much more to the photographer who’s willing to look a bit more closely, to hike a little instead of jumping out of a car to shoot, or to come to a spot at unusual times, including the middle of the night.

In this post, I’ll share a few images I made in Yosemite National Park over the past year, but none of them will be a postcard-type shot that you’ve seen 1000 times before.  And we’ll talk a bit about how to find and capture these less discovered views.

While hiking in the Tuolumne Meadows area, 5000 feet above Yosemite Valley, we were caught in a freak hailstorm at the remote Dog Lake.  Instead of throwing a rain cover over my gear and running for shelter like a normal person would do, I set up my kit and started shooting.  This image plays off the contrasts between the peaceful and violent sides of nature and between the light and the shade.  It is a composite of several different shots made at different exposures, put together in Lightroom’s HDR (high dynamic range) merging tool.

Yosemite offers unusual and dramatic views to those willing to get away from the roads and brave some harsher conditions.  Buy this photo

Another less-visited attraction in the park is the wonderful Chilnualna Falls.  The lower waterfall is actually quite an easy hike from the parking area at the trailhead, and its little swimming hole makes for a refreshing break on a hot summer’s day.  Here’s a shot of my younger daughter enjoying a dip in the swimming hole just under the falls.  To blur the water, I used a slow shutter speed, which could only be achieved in the harsh mid-day light by attaching neutral-density filters to the lens.  Neutral-density (ND) filters are an essential accessory for the landscape photographer, because they block most of the available light from reaching the camera’s sensor, allowing you to use a slower shutter speed to blur motion and/or a wider aperture to throw the background out of focus.

These reduce the amount of light that reaches the camera’s sensor, so you can use slower shutter speeds to blur motion, or so you can use a wider aperture to get a shallow depth-of-field, even in bright sunlight.

A neutral-density filter allows a nicely blurred shot of the waterfall at Chilnualna Falls.  Buy this photo

Another lovely hike in the high country of Tuolumne Meadows is Cathedral Lakes.  On our way back from these pristine and remote lakes, we passed this granite rock dome.  I used a polarizing filter on a wide-angle lens to bring out the details on the surface of the rock and to lend more drama to the sky.  Then, in post-processing, I converted the image to black-and-white to emphasize the remarkable texture of the granite slab’s surface.  For more discussion about converting images to black-and-white, take a look at my earlier post: B&W Photography post.

Using a polarizing filter can darken and add drama to skies, reduce unwanted reflections, and render stunning detail on shiny surfaces.  Converting an image to black-and-white can bring out the textures and patterns that may be less prominent when viewed in a color image.  Buy this photo

Just because a place is glorious in its own right doesn’t mean we can’t include people in our photos.  Putting humans in a landscape adds a personal touch, provides a sense of scale, and often tells a more compelling story than would an image of the same place without people.  Here I’ve included my daughters in a landscape from the incomparable summit of Sentinel Dome.

Including people in landscapes layers a human narrative on top of the natural story.  I like the added color, and humor, from the addition of my daughters in their college logo hats.  I’ve chosen a wide aperture to soften the focus on the lovely background.  Buy this photo

You don’t have to stop shooting when the sun sets.  Some of the most wonderful images of Yosemite are made after dark.  I came to this spot not far from the edge of the meadow in Yosemite Valley, and right on the bank of the Merced River, quite late at night when the sky was very dark.  I set up my camera and wide-angle lens on a tripod and made a 25-second exposure at a high sensitivity (ISO) setting.  The resulting image shows the spectacle of the Milky Way arched above the terrestrial grandeur of Half Dome and other Yosemite landforms.  For more discussion of capturing the Milky Way, visit this post: Milky Way photography post.

A favorite image of mine: The Milky Way above Half Dome.  Note that not every landscape image needs to be in “landscape orientation”.  Buy this photo

Next time you are fortunate enough to visit Yosemite National Park, try to discover some new places, visit favorite places during less-visited times of the day (or night), and include some people for a human component to the story.  Your images will stand out from the millions of others made in this glorious park!

Do you have a favorite photographic experience from Yosemite to share?  Please leave a comment to let us know.

Want to see more posts on great travel photography destinations?  See them all here: http://www.to-travel-hopefully.com/category/destinations/.


I See a Red Door and I Want to Paint It Black [Encore Publication]: When a black-and-white image is better than color, and how to convert to B&W

Back in the day, a photographer had to choose in advance whether to shoot with color film or black-and-white film.  Conversions from color to B&W were cumbersome and expensive, and conversions from B&W to color were essentially impossible.  During the film era, I typically shot exclusively using color transparency film while traveling, and reserved B&W photography for particularly artistic shoots near home.

Thankfully, in today’s digital world, we no longer have to commit ourselves in advance to monochrome vs. color images.  It’s now a simple procedure to convert our color images to B&W during post-processing.  And that’s a great blessing, because there are plenty of times when a black-and-white photo is better than a color photo.

Consider the image of the alligator at the start of this post.  One of my favorite photos, this one works just fine in color, too.  But the real power of the image is revealed in B&W through the striking textures of the alligator’s skin as seen above the water and as reflected off the water’s surface.  The background above the water fades to a deep, nearly true, black, with the background of the water itself rendered slightly less darkly and showing some nice ripples of motion.  Black-and-white photography is especially powerful when there are contrasts of pattern, texture, and background as in this image.  Buy this photo

When else might we want to render an image in B&W?

Portraits made in monochrome have a timeless look that evokes the earlier years of photography, and this rendering can also bring out the true nature of the subject.  There’s a lovely look to the skin tones and hair when displayed in B&W, and there are fewer distracting elements from the color of clothing or background objects.

This portrait takes on a vintage, timeless look when shown in B&W.  Our eye can focus on the model’s face and hair without the distractions of the colors in her sweater or the building.  There’s almost a street photography kind of documentary quality to this image in monochrome that is lost when viewed in color.  Buy this photo

Color can be distracting in an image where we want to emphasize the essence of a person or place.  In this portrait I made recently for a couple who are fellow musicians and friends of mine, we had beautiful “golden hour” light to work with, and the background and clothing worked well in color.  But converted to B&W, this image really places the emphasis on the couple without the distractions of the color cast in the reflections off the eyeglasses or of the mixed lighting in the background.

In this portrait, black-and-white presentation places the viewer’s attention squarely on the the couple and their instruments, without distractions from the multiple colors of the clothing and background components.  (Client photo not available for purchase.)

When you’re shooting under “mixed lighting”, which means there are multiple light sources with different color temperatures (i.e., some light sources are warmer and others are cooler), converting the image to B&W can be a real problem solver.  Consider the image below, made in Bruges at night.  The light from the street lamps was warmer than the light coming from the spotlights on various buildings, and there was also a bright moon that night, so when seen in color the photo would look less appealing due to the contrasting of the color temperatures in the different parts of the image.  But viewed in B&W, it brings out the grandeur of the old buildings and the beauty of the reflections in the waters of the canal, without the distractions of the color casts.

This image of Bruges at night, when processed in B&W, removes the contrasting color temperatures of the multiple different light sources and allows the viewer to enjoy the stately old buildings with consistent tone and texture.  Buy this photo

Now that we’ve covered a few of the many situations in which a black-and-white image is preferable over a color image, let’s look at how to convert from color to B&W.  There are many ways to perform this conversion, but I recommend it be done using the Color Adjustments settings in the Develop module of Adobe Lightroom.  Here’s how:

Click on the “B&W” tab above the individual color channel sliders, and then adjust the mix of how the colors are blended by increasing or decreasing each color’s slider to see how the black-and-white image looks.  I find that I often have to readjust the contrast slider at this point to get the image looking its best in black-and-white.

For more on using Lightroom to post-process your images, check out my previous post: Previous post on using Lightroom to post-process images.

I do not recommend using your camera’s built-in black-and-white mode, as you will then lose the color information in the image file.  I also do not suggest using the settings some cameras have to make a copy of the image in B&W, because in most cases the camera’s built-in software will not do a very good job of rendering the image in monochrome.  For the best results, either use Lightroom or a dedicated black-and-white conversion application such as Silver Efex Pro 2 from Nik Software, which is available as a plug-in for Lightroom or Photoshop.

Want to read other posts about travel photography techniques?  Find them all here: http://www.to-travel-hopefully.com/category/techniques/

What do you love about a black-and-white image?  When do you convert an image to B&W rather than share it in color?  Any tips or tricks for how to make great B&W photos?  Please share your thoughts in the comment box!


Focus on Yosemite National Park [Encore Publication]: A photographer’s dream, Yosemite offers so much more than the postcard views

Those of us who live in the San Francisco Bay Area can count many blessings, but one I am most thankful for is our fairly close proximity to Yosemite National Park.  The second oldest national park in the US, Yosemite is a photographer’s dream.  Since the days when Ansel Adams helped make the park famous through his masterful landscape photography, shutterbugs of all stripes have been flocking there to try to capture some of its indescribable beauty.  Most of us will never be an Ansel Adams, but that doesn’t stop me from returning to Yosemite at least once per year to give it my best shot, as it were.

Without doubt, there are many iconic views in the park that are relatively easy for even novice photographers to render.  There is majesty in the panorama over Yosemite Valley as seen from the famous Tunnel View lookout.  One doesn’t even have to venture off the main park road to shoot a nice image of Half Dome or El Capitan.  But Yosemite offers so much more to the photographer who’s willing to look a bit more closely, to hike a little instead of jumping out of a car to shoot, or to come to a spot at unusual times, including the middle of the night.

In this post, I’ll share a few images I made in Yosemite National Park over the past year, but none of them will be a postcard-type shot that you’ve seen 1000 times before.  And we’ll talk a bit about how to find and capture these less discovered views.

While hiking in the Tuolumne Meadows area, 5000 feet above Yosemite Valley, we were caught in a freak hailstorm at the remote Dog Lake.  Instead of throwing a rain cover over my gear and running for shelter like a normal person would do, I set up my kit and started shooting.  This image plays off the contrasts between the peaceful and violent sides of nature and between the light and the shade.  It is a composite of several different shots made at different exposures, put together in Lightroom’s HDR (high dynamic range) merging tool.

Yosemite offers unusual and dramatic views to those willing to get away from the roads and brave some harsher conditions.  Buy this photo

Another less-visited attraction in the park is the wonderful Chilnualna Falls.  The lower waterfall is actually quite an easy hike from the parking area at the trailhead, and its little swimming hole makes for a refreshing break on a hot summer’s day.  Here’s a shot of my younger daughter enjoying a dip in the swimming hole just under the falls.  To blur the water, I used a slow shutter speed, which could only be achieved in the harsh mid-day light by attaching neutral-density filters to the lens.  Neutral-density (ND) filters are an essential accessory for the landscape photographer, because they block most of the available light from reaching the camera’s sensor, allowing you to use a slower shutter speed to blur motion and/or a wider aperture to throw the background out of focus.

These reduce the amount of light that reaches the camera’s sensor, so you can use slower shutter speeds to blur motion, or so you can use a wider aperture to get a shallow depth-of-field, even in bright sunlight.

A neutral-density filter allows a nicely blurred shot of the waterfall at Chilnualna Falls.  Buy this photo

Another lovely hike in the high country of Tuolumne Meadows is Cathedral Lakes.  On our way back from these pristine and remote lakes, we passed this granite rock dome.  I used a polarizing filter on a wide-angle lens to bring out the details on the surface of the rock and to lend more drama to the sky.  Then, in post-processing, I converted the image to black-and-white to emphasize the remarkable texture of the granite slab’s surface.  For more discussion about converting images to black-and-white, take a look at my earlier post: B&W Photography post.

Using a polarizing filter can darken and add drama to skies, reduce unwanted reflections, and render stunning detail on shiny surfaces.  Converting an image to black-and-white can bring out the textures and patterns that may be less prominent when viewed in a color image.  Buy this photo

Just because a place is glorious in its own right doesn’t mean we can’t include people in our photos.  Putting humans in a landscape adds a personal touch, provides a sense of scale, and often tells a more compelling story than would an image of the same place without people.  Here I’ve included my daughters in a landscape from the incomparable summit of Sentinel Dome.

Including people in landscapes layers a human narrative on top of the natural story.  I like the added color, and humor, from the addition of my daughters in their college logo hats.  I’ve chosen a wide aperture to soften the focus on the lovely background.  Buy this photo

You don’t have to stop shooting when the sun sets.  Some of the most wonderful images of Yosemite are made after dark.  I came to this spot not far from the edge of the meadow in Yosemite Valley, and right on the bank of the Merced River, quite late at night when the sky was very dark.  I set up my camera and wide-angle lens on a tripod and made a 25-second exposure at a high sensitivity (ISO) setting.  The resulting image shows the spectacle of the Milky Way arched above the terrestrial grandeur of Half Dome and other Yosemite landforms.  For more discussion of capturing the Milky Way, visit this post: Milky Way photography post.

A favorite image of mine: The Milky Way above Half Dome.  Note that not every landscape image needs to be in “landscape orientation”.  Buy this photo

Next time you are fortunate enough to visit Yosemite National Park, try to discover some new places, visit favorite places during less-visited times of the day (or night), and include some people for a human component to the story.  Your images will stand out from the millions of others made in this glorious park!

Do you have a favorite photographic experience from Yosemite to share?  Please leave a comment to let us know.

Want to see more posts on great travel photography destinations?  See them all here: http://www.to-travel-hopefully.com/category/destinations/.


In the Nik of Time [Updated]: Nik Collection 2 offers enhanced image editing tools

Note: DxO recently announced a new release of the Nik suite of image processing tools.  Nik Collection 2 is now available for initial purchase ($99) or for upgrading ($59).  Highlights of the new version include the addition of many new creative presets, as well as bundling with DxO’s PhotoLab photo editing platform.  This latter enhancement means that Nik users who don’t wish to run it as a plugin on top of Adobe Photoshop or Adobe Lightroom now have the option of running the Nik suite on top of PhotoLab instead.  I have not yet upgraded to the new version, but have been using the Nik Collection 1 for several years with great utility.  Read on for my review of that original release.

In 2012, Nik Software, a small company known for their image processing tools that emulated the look and feel of using old film, was quietly acquired by a somewhat larger company known as Google.  Google announced they were making the entire suite of Nik tools available for free to all users.  As mentioned above, Google ceased supporting the Nik suite as of 2017, but the software was quickly purchased by DxO who just announced their first release.  The good news is that with this new release the photography community now has a reasonable assurance that these industry-leading image editing tools will be supported well into the future.  The bad news is that the Nik suite is no longer free; DxO is charging $69 to download the software.  That’s still less than the $150 that Google charged users for this software prior to 2016, and it’s a very reasonable price for software of this scope and quality.

For photographers who wish to access the Nik tool set and don’t already own it, or for photographers for whom the tool set has ceased working, I recommend downloading the new release from DxO’s website now, as the introductory price of $50 will increase to $69 at the end of June, 2018.  For those of us who already have the software installed and for whom it’s still working just fine, I don’t see a need to upgrade to the paid version right now  That’s because the new release, while more stable and better documented than the free older version from Google, does contain the same tools with the same functionality.  Personally, I will choose to wait until a new O/S or Lightroom upgrade forces my hand.  But I am very pleased to know that these wonderful editing tools will continue to be supported and developed into the future!

Here are my notes from the past two years of using the Nik suite of image editing software tools.  Its capabilities are leading-edge and would be well worth spending hundreds of dollars to obtain.  It doesn’t do everything, but what it does, it does better than tools such as Photoshop and Lightroom, each of which costs a good deal of money.  That Nik’s great capabilities are available for download for less than $70 is a wonderful value, and I strongly recommend you give them a try.

It’s important to note that the Nik Collection of software tools is not intended to be standalone image processing software.  It consists of a set of plugins, each specialized for a different specific purpose, that must be accessed by a general-purpose image editing application such as Photoshop, Lightroom, or Aperture.  I use Lightroom for nearly all of my post-processing, so I used that application to access the Nik Collection.

Once you have your general image editing application installed, then you can download the Nik Collection modules at the DxO website listed above.  When you are working in your application of choice, you will then have access to the various Nik Collection tools in the editing menus.  For example, when I select an image in Lightroom, I can access six of the seven Nik modules by pulling down the “Photo” menu and then pulling down the “Edit In” sub-menu.  One of the Nik modules, the HDR Efex tool, is accessed instead under the “File” and “Export with Preset” menu choices.

These are the seven Nik Collection modules included in the download:

Analog Efex Pro

Explore the look and feel of classic cameras, films, and lenses.

Color Efex Pro

A comprehensive set of filters for color correction, retouching, and creative effects.

Silver Efex Pro

Master the art of black-and-white photography with darkroom-inspired controls.

Viveza

Selectively adjust the color and tonality of your images without complicated masks or selections.

HDR Efex Pro

From natural to artistic, explore the full potential of HDR photography.

Sharpener Pro

Bring out hidden details consistently with the professional’s choice for image sharpening.

Dfine

Improve your images with noise reduction tailored to your camera.

So far, I’ve played around with just three of these tools.
Silver Efex Pro did a very good job of converting my test images to monochrome.  I’m pretty good at using Lightroom’s tools to convert color images to black-and-white, but they take a lot of practice to master.  In Nik’s Silver Efex module I was able to make some good choices very quickly.  For those who want to fine-tune their black-and-white conversions, there are very good tools for detailed control over the process.
I used Nik’s Dfine module to attempt to reduce noise in a favorite shot of the Milky Way over Yosemite Valley’s Half Dome.  The results of my quick trial looked comparable to what I had done in Lightroom, but I suspect if I took the time to learn the Nik tool more thoroughly, I could end up with even better results.
Finally, I tested Nik’s HDR Efex Pro tool.  This little gem is a joy to use.  Just select the series of shots from which you want to build an HDR (High Dynamic Range) image, export them to HDR Efex, and click a couple of buttons to generate the base HRD image there.  My default image looked pretty good, but the Nik tool has a wide range of presets that allow you to generate different HDR effects with the click of a button.  I tried several of these presets until I found one that perfectly suited the scene.  A few more small tweaks using the detailed adjustment sliders, and I was ready to save the HDR image back into Lightroom.  In the past I have been very disappointed with Lightroom’s built-in HDR tools, and only slightly more satisfied with Photoshop’s HDR module, but the Nik HDR Efex Pro plugin does an amazing job.  It’s both easier to use and generates better results than the other HDR software I’ve used.  Specifically, the Nik tool does a much better job than the other tools at producing natural-looking colors and at removing the “ghosting” effects from when the underlying images are just a little bit different from one another.  Now I’m eager to find the time to go back to some of my favorite HDR images and rebuild them using the Nik software!
For comparison, here is a favorite HDR image of mine, first shown after processing in Photoshop’s HDR tools and then shown after processing in Nik’s HDR Efex Pro tools.
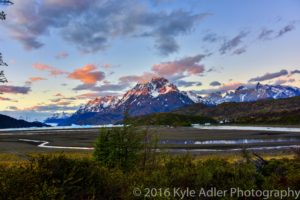
lrwm-lowres-5884This HDR image of Lago Grey with its glacier and the peaks of Torres del Paine National Park in Chile was processed using Photoshop’s HDR tools.  The colors appear unnaturally saturated and parts of the image (especially the tops of the mountains and the brush in the foreground) show some ghosting effects.
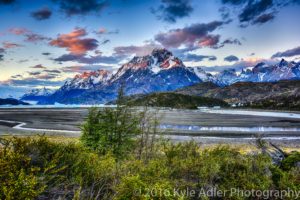
lrwm-lowres-5880-5884-hdrnikThis version was processed using the Nik Collection’s HDR Efex Pro tools.  The colors look much more natural and all parts of the image appear sharp and free from ghosting.
I am looking forward to revisiting many of my favorite images and reprocessing them using the Nik Collection’s tools.  I highly recommend this versatile, easy-to-use, and powerful suite of image editing modules.
Have you used the Nik Collection for your own photography?  What do you like and dislike?  Please share your thoughts here.
Want to read more posts about post-processing your images?  Find them all here: Posts on Post-Processing.

In the Nik of Time [Updated]: Now owned by DxO, the Nik Collection offers leading-edge image editing tools

Note: In 2017 Google announced that they would no longer provide support for the Nik suite of tools.  That meant you can still download the latest version of Nik, but it may not work with the other software you are running.  Many in the photography community were concerned because sooner or later as we upgrade our other software, Nik will cease working for us.  Fortunately, a company called DxO purchased the Nik suite of tools from Google a few months after Google ceased supporting the software, and just this month DxO announced their first Nik release.  Read on for more details about the Nik tools and DxO’s new release.

In 2012, Nik Software, a small company known for their image processing tools that emulated the look and feel of using old film, was quietly acquired by a somewhat larger company known as Google.  Google announced they were making the entire suite of Nik tools available for free to all users.  As mentioned above, Google ceased supporting the Nik suite as of 2017, but the software was quickly purchased by DxO who just announced their first release.  The good news is that with this new release the photography community now has a reasonable assurance that these industry-leading image editing tools will be supported well into the future.  The bad news is that the Nik suite is no longer free; DxO is charging $69 to download the software.  That’s still less than the $150 that Google charged users for this software prior to 2016, and it’s a very reasonable price for software of this scope and quality.

For photographers who wish to access the Nik tool set and don’t already own it, or for photographers for whom the tool set has ceased working, I recommend downloading the new release from DxO’s website now, as the introductory price of $50 will increase to $69 at the end of June, 2018.  For those of us who already have the software installed and for whom it’s still working just fine, I don’t see a need to upgrade to the paid version right now  That’s because the new release, while more stable and better documented than the free older version from Google, does contain the same tools with the same functionality.  Personally, I will choose to wait until a new O/S or Lightroom upgrade forces my hand.  But I am very pleased to know that these wonderful editing tools will continue to be supported and developed into the future!

Here are my notes from the past two years of using the Nik suite of image editing software tools.  Its capabilities are leading-edge and would be well worth spending hundreds of dollars to obtain.  It doesn’t do everything, but what it does, it does better than tools such as Photoshop and Lightroom, each of which costs a good deal of money.  That Nik’s great capabilities are available for download for less than $70 is a wonderful value, and I strongly recommend you give them a try.

It’s important to note that the Nik Collection of software tools is not intended to be standalone image processing software.  It consists of a set of plugins, each specialized for a different specific purpose, that must be accessed by a general-purpose image editing application such as Photoshop, Lightroom, or Aperture.  I use Lightroom for nearly all of my post-processing, so I used that application to access the Nik Collection.

Once you have your general image editing application installed, then you can download the Nik Collection modules at the DxO website listed above.  When you are working in your application of choice, you will then have access to the various Nik Collection tools in the editing menus.  For example, when I select an image in Lightroom, I can access six of the seven Nik modules by pulling down the “Photo” menu and then pulling down the “Edit In” sub-menu.  One of the Nik modules, the HDR Efex tool, is accessed instead under the “File” and “Export with Preset” menu choices.

These are the seven Nik Collection modules included in the download:

Analog Efex Pro

Explore the look and feel of classic cameras, films, and lenses.

Color Efex Pro

A comprehensive set of filters for color correction, retouching, and creative effects.

Silver Efex Pro

Master the art of black-and-white photography with darkroom-inspired controls.

Viveza

Selectively adjust the color and tonality of your images without complicated masks or selections.

HDR Efex Pro

From natural to artistic, explore the full potential of HDR photography.

Sharpener Pro

Bring out hidden details consistently with the professional’s choice for image sharpening.

Dfine

Improve your images with noise reduction tailored to your camera.

So far, I’ve played around with just three of these tools.
Silver Efex Pro did a very good job of converting my test images to monochrome.  I’m pretty good at using Lightroom’s tools to convert color images to black-and-white, but they take a lot of practice to master.  In Nik’s Silver Efex module I was able to make some good choices very quickly.  For those who want to fine-tune their black-and-white conversions, there are very good tools for detailed control over the process.
I used Nik’s Dfine module to attempt to reduce noise in a favorite shot of the Milky Way over Yosemite Valley’s Half Dome.  The results of my quick trial looked comparable to what I had done in Lightroom, but I suspect if I took the time to learn the Nik tool more thoroughly, I could end up with even better results.
Finally, I tested Nik’s HDR Efex Pro tool.  This little gem is a joy to use.  Just select the series of shots from which you want to build an HDR (High Dynamic Range) image, export them to HDR Efex, and click a couple of buttons to generate the base HRD image there.  My default image looked pretty good, but the Nik tool has a wide range of presets that allow you to generate different HDR effects with the click of a button.  I tried several of these presets until I found one that perfectly suited the scene.  A few more small tweaks using the detailed adjustment sliders, and I was ready to save the HDR image back into Lightroom.  In the past I have been very disappointed with Lightroom’s built-in HDR tools, and only slightly more satisfied with Photoshop’s HDR module, but the Nik HDR Efex Pro plugin does an amazing job.  It’s both easier to use and generates better results than the other HDR software I’ve used.  Specifically, the Nik tool does a much better job than the other tools at producing natural-looking colors and at removing the “ghosting” effects from when the underlying images are just a little bit different from one another.  Now I’m eager to find the time to go back to some of my favorite HDR images and rebuild them using the Nik software!
For comparison, here is a favorite HDR image of mine, first shown after processing in Photoshop’s HDR tools and then shown after processing in Nik’s HDR Efex Pro tools.
lrwm-lowres-5884This HDR image of Lago Grey with its glacier and the peaks of Torres del Paine National Park in Chile was processed using Photoshop’s HDR tools.  The colors appear unnaturally saturated and parts of the image (especially the tops of the mountains and the brush in the foreground) show some ghosting effects.
lrwm-lowres-5880-5884-hdrnikThis version was processed using the Nik Collection’s HDR Efex Pro tools.  The colors look much more natural and all parts of the image appear sharp and free from ghosting.
I am looking forward to revisiting many of my favorite images and reprocessing them using the Nik Collection’s tools.  I highly recommend this versatile, easy-to-use, and powerful suite of image editing modules.
Have you used the Nik Collection for your own photography?  What do you like and dislike?  Please share your thoughts here.
Want to read more posts about post-processing your images?  Find them all here: Posts on Post-Processing.

I See a Red Door and I Want to Paint It Black [Encore Publication]: When a black-and-white image is better than color, and how to convert to B&W

Back in the day, a photographer had to choose in advance whether to shoot with color film or black-and-white film.  Conversions from color to B&W were cumbersome and expensive, and conversions from B&W to color were essentially impossible.  During the film era, I typically shot exclusively using color transparency film while traveling, and reserved B&W photography for particularly artistic shoots near home.

Thankfully, in today’s digital world, we no longer have to commit ourselves in advance to monochrome vs. color images.  It’s now a simple procedure to convert our color images to B&W during post-processing.  And that’s a great blessing, because there are plenty of times when a black-and-white photo is better than a color photo.

Consider the image of the alligator at the start of this post.  One of my favorite photos, this one works just fine in color, too.  But the real power of the image is revealed in B&W through the striking textures of the alligator’s skin as seen above the water and as reflected off the water’s surface.  The background above the water fades to a deep, nearly true, black, with the background of the water itself rendered slightly less darkly and showing some nice ripples of motion.  Black-and-white photography is especially powerful when there are contrasts of pattern, texture, and background as in this image.  Buy this photo

When else might we want to render an image in B&W?

Portraits made in monochrome have a timeless look that evokes the earlier years of photography, and this rendering can also bring out the true nature of the subject.  There’s a lovely look to the skin tones and hair when displayed in B&W, and there are fewer distracting elements from the color of clothing or background objects.

This portrait takes on a vintage, timeless look when shown in B&W.  Our eye can focus on the model’s face and hair without the distractions of the colors in her sweater or the building.  There’s almost a street photography kind of documentary quality to this image in monochrome that is lost when viewed in color.  Buy this photo

Color can be distracting in an image where we want to emphasize the essence of a person or place.  In this portrait I made recently for a couple who are fellow musicians and friends of mine, we had beautiful “golden hour” light to work with, and the background and clothing worked well in color.  But converted to B&W, this image really places the emphasis on the couple without the distractions of the color cast in the reflections off the eyeglasses or of the mixed lighting in the background.

In this portrait, black-and-white presentation places the viewer’s attention squarely on the the couple and their instruments, without distractions from the multiple colors of the clothing and background components.  (Client photo not available for purchase.)

When you’re shooting under “mixed lighting”, which means there are multiple light sources with different color temperatures (i.e., some light sources are warmer and others are cooler), converting the image to B&W can be a real problem solver.  Consider the image below, made in Bruges at night.  The light from the street lamps was warmer than the light coming from the spotlights on various buildings, and there was also a bright moon that night, so when seen in color the photo would look less appealing due to the contrasting of the color temperatures in the different parts of the image.  But viewed in B&W, it brings out the grandeur of the old buildings and the beauty of the reflections in the waters of the canal, without the distractions of the color casts.

This image of Bruges at night, when processed in B&W, removes the contrasting color temperatures of the multiple different light sources and allows the viewer to enjoy the stately old buildings with consistent tone and texture.  Buy this photo

Now that we’ve covered a few of the many situations in which a black-and-white image is preferable over a color image, let’s look at how to convert from color to B&W.  There are many ways to perform this conversion, but I recommend it be done using the Color Adjustments settings in the Develop module of Adobe Lightroom.  Here’s how:

Click on the “B&W” tab above the individual color channel sliders, and then adjust the mix of how the colors are blended by increasing or decreasing each color’s slider to see how the black-and-white image looks.  I find that I often have to readjust the contrast slider at this point to get the image looking its best in black-and-white.

For more on using Lightroom to post-process your images, check out my previous post: Previous post on using Lightroom to post-process images.

I do not recommend using your camera’s built-in black-and-white mode, as you will then lose the color information in the image file.  I also do not suggest using the settings some cameras have to make a copy of the image in B&W, because in most cases the camera’s built-in software will not do a very good job of rendering the image in monochrome.  For the best results, either use Lightroom or a dedicated black-and-white conversion application such as Silver Efex Pro 2 from Nik Software, which is available as a plug-in for Lightroom or Photoshop.

Want to read other posts about travel photography techniques?  Find them all here: http://www.to-travel-hopefully.com/category/techniques/

What do you love about a black-and-white image?  When do you convert an image to B&W rather than share it in color?  Any tips or tricks for how to make great B&W photos?  Please share your thoughts in the comment box!


Focus on Yosemite National Park [Encore Publication]: A photographer’s dream, Yosemite offers so much more than the postcard views

Those of us who live in the San Francisco Bay Area can count many blessings, but one I am most thankful for is our fairly close proximity to Yosemite National Park.  The second oldest national park in the US, Yosemite is a photographer’s dream.  Since the days when Ansel Adams helped make the park famous through his masterful landscape photography, shutterbugs of all stripes have been flocking there to try to capture some of its indescribable beauty.  Most of us will never be an Ansel Adams, but that doesn’t stop me from returning to Yosemite at least once per year to give it my best shot, as it were.

Without doubt, there are many iconic views in the park that are relatively easy for even novice photographers to render.  There is majesty in the panorama over Yosemite Valley as seen from the famous Tunnel View lookout.  One doesn’t even have to venture off the main park road to shoot a nice image of Half Dome or El Capitan.  But Yosemite offers so much more to the photographer who’s willing to look a bit more closely, to hike a little instead of jumping out of a car to shoot, or to come to a spot at unusual times, including the middle of the night.

In this post, I’ll share a few images I made in Yosemite National Park over the past year, but none of them will be a postcard-type shot that you’ve seen 1000 times before.  And we’ll talk a bit about how to find and capture these less discovered views.

While hiking in the Tuolumne Meadows area, 5000 feet above Yosemite Valley, we were caught in a freak hailstorm at the remote Dog Lake.  Instead of throwing a rain cover over my gear and running for shelter like a normal person would do, I set up my kit and started shooting.  This image plays off the contrasts between the peaceful and violent sides of nature and between the light and the shade.  It is a composite of several different shots made at different exposures, put together in Lightroom’s HDR (high dynamic range) merging tool.

Yosemite offers unusual and dramatic views to those willing to get away from the roads and brave some harsher conditions.  Buy this photo

Another less-visited attraction in the park is the wonderful Chilnualna Falls.  The lower waterfall is actually quite an easy hike from the parking area at the trailhead, and its little swimming hole makes for a refreshing break on a hot summer’s day.  Here’s a shot of my younger daughter enjoying a dip in the swimming hole just under the falls.  To blur the water, I used a slow shutter speed, which could only be achieved in the harsh mid-day light by attaching neutral-density filters to the lens.  Neutral-density (ND) filters are an essential accessory for the landscape photographer, because they block most of the available light from reaching the camera’s sensor, allowing you to use a slower shutter speed to blur motion and/or a wider aperture to throw the background out of focus.

These reduce the amount of light that reaches the camera’s sensor, so you can use slower shutter speeds to blur motion, or so you can use a wider aperture to get a shallow depth-of-field, even in bright sunlight.

A neutral-density filter allows a nicely blurred shot of the waterfall at Chilnualna Falls.  Buy this photo

Another lovely hike in the high country of Tuolumne Meadows is Cathedral Lakes.  On our way back from these pristine and remote lakes, we passed this granite rock dome.  I used a polarizing filter on a wide-angle lens to bring out the details on the surface of the rock and to lend more drama to the sky.  Then, in post-processing, I converted the image to black-and-white to emphasize the remarkable texture of the granite slab’s surface.  For more discussion about converting images to black-and-white, take a look at my earlier post: B&W Photography post.

Using a polarizing filter can darken and add drama to skies, reduce unwanted reflections, and render stunning detail on shiny surfaces.  Converting an image to black-and-white can bring out the textures and patterns that may be less prominent when viewed in a color image.  Buy this photo

Just because a place is glorious in its own right doesn’t mean we can’t include people in our photos.  Putting humans in a landscape adds a personal touch, provides a sense of scale, and often tells a more compelling story than would an image of the same place without people.  Here I’ve included my daughters in a landscape from the incomparable summit of Sentinel Dome.

Including people in landscapes layers a human narrative on top of the natural story.  I like the added color, and humor, from the addition of my daughters in their college logo hats.  I’ve chosen a wide aperture to soften the focus on the lovely background.  Buy this photo

You don’t have to stop shooting when the sun sets.  Some of the most wonderful images of Yosemite are made after dark.  I came to this spot not far from the edge of the meadow in Yosemite Valley, and right on the bank of the Merced River, quite late at night when the sky was very dark.  I set up my camera and wide-angle lens on a tripod and made a 25-second exposure at a high sensitivity (ISO) setting.  The resulting image shows the spectacle of the Milky Way arched above the terrestrial grandeur of Half Dome and other Yosemite landforms.  For more discussion of capturing the Milky Way, visit this post: Milky Way photography post.

A favorite image of mine: The Milky Way above Half Dome.  Note that not every landscape image needs to be in “landscape orientation”.  Buy this photo

Next time you are fortunate enough to visit Yosemite National Park, try to discover some new places, visit favorite places during less-visited times of the day (or night), and include some people for a human component to the story.  Your images will stand out from the millions of others made in this glorious park!

Do you have a favorite photographic experience from Yosemite to share?  Please leave a comment to let us know.

Want to see more posts on great travel photography destinations?  See them all here: http://www.to-travel-hopefully.com/category/destinations/.


I See a Red Door and I Want to Paint It Black [Encore Publication]: When a black-and-white image is better than color, and how to convert to B&W

Back in the day, a photographer had to choose in advance whether to shoot with color film or black-and-white film.  Conversions from color to B&W were cumbersome and expensive, and conversions from B&W to color were essentially impossible.  During the film era, I typically shot exclusively using color transparency film while traveling, and reserved B&W photography for particularly artistic shoots near home.

Thankfully, in today’s digital world, we no longer have to commit ourselves in advance to monochrome vs. color images.  It’s now a simple procedure to convert our color images to B&W during post-processing.  And that’s a great blessing, because there are plenty of times when a black-and-white photo is better than a color photo.

Consider the image of the alligator at the start of this post.  One of my favorite photos, this one works just fine in color, too.  But the real power of the image is revealed in B&W through the striking textures of the alligator’s skin as seen above the water and as reflected off the water’s surface.  The background above the water fades to a deep, nearly true, black, with the background of the water itself rendered slightly less darkly and showing some nice ripples of motion.  Black-and-white photography is especially powerful when there are contrasts of pattern, texture, and background as in this image.  Buy this photo

When else might we want to render an image in B&W?

Portraits made in monochrome have a timeless look that evokes the earlier years of photography, and this rendering can also bring out the true nature of the subject.  There’s a lovely look to the skin tones and hair when displayed in B&W, and there are fewer distracting elements from the color of clothing or background objects.

This portrait takes on a vintage, timeless look when shown in B&W.  Our eye can focus on the model’s face and hair without the distractions of the colors in her sweater or the building.  There’s almost a street photography kind of documentary quality to this image in monochrome that is lost when viewed in color.  Buy this photo

Color can be distracting in an image where we want to emphasize the essence of a person or place.  In this portrait I made recently for a couple who are fellow musicians and friends of mine, we had beautiful “golden hour” light to work with, and the background and clothing worked well in color.  But converted to B&W, this image really places the emphasis on the couple without the distractions of the color cast in the reflections off the eyeglasses or of the mixed lighting in the background.

In this portrait, black-and-white presentation places the viewer’s attention squarely on the the couple and their instruments, without distractions from the multiple colors of the clothing and background components.  (Client photo not available for purchase.)

When you’re shooting under “mixed lighting”, which means there are multiple light sources with different color temperatures (i.e., some light sources are warmer and others are cooler), converting the image to B&W can be a real problem solver.  Consider the image below, made in Bruges at night.  The light from the street lamps was warmer than the light coming from the spotlights on various buildings, and there was also a bright moon that night, so when seen in color the photo would look less appealing due to the contrasting of the color temperatures in the different parts of the image.  But viewed in B&W, it brings out the grandeur of the old buildings and the beauty of the reflections in the waters of the canal, without the distractions of the color casts.

This image of Bruges at night, when processed in B&W, removes the contrasting color temperatures of the multiple different light sources and allows the viewer to enjoy the stately old buildings with consistent tone and texture.  Buy this photo

Now that we’ve covered a few of the many situations in which a black-and-white image is preferable over a color image, let’s look at how to convert from color to B&W.  There are many ways to perform this conversion, but I recommend it be done using the Color Adjustments settings in the Develop module of Adobe Lightroom.  Here’s how:

Click on the “B&W” tab above the individual color channel sliders, and then adjust the mix of how the colors are blended by increasing or decreasing each color’s slider to see how the black-and-white image looks.  I find that I often have to readjust the contrast slider at this point to get the image looking its best in black-and-white.

For more on using Lightroom to post-process your images, check out my previous post: Previous post on using Lightroom to post-process images.

I do not recommend using your camera’s built-in black-and-white mode, as you will then lose the color information in the image file.  I also do not suggest using the settings some cameras have to make a copy of the image in B&W, because in most cases the camera’s built-in software will not do a very good job of rendering the image in monochrome.  For the best results, either use Lightroom or a dedicated black-and-white conversion application such as Silver Efex Pro 2 from Nik Software, which is available as a plug-in for Lightroom or Photoshop.

Want to read other posts about travel photography techniques?  Find them all here: http://www.to-travel-hopefully.com/category/techniques/

What do you love about a black-and-white image?  When do you convert an image to B&W rather than share it in color?  Any tips or tricks for how to make great B&W photos?  Please share your thoughts in the comment box!


In the Nik of Time [Updated]: Now owned by DxO, the Nik Collection offers leading-edge image editing tools

Note: In 2017 Google announced that they would no longer provide support for the Nik suite of tools.  That meant you can still download the latest version of Nik, but it may not work with the other software you are running.  Many in the photography community were concerned because sooner or later as we upgrade our other software, Nik will cease working for us.  Fortunately, a company called DxO purchased the Nik suite of tools from Google a few months after Google ceased supporting the software, and just this month DxO announced their first Nik release.  Read on for more details about the Nik tools and DxO’s new release.

In 2012, Nik Software, a small company known for their image processing tools that emulated the look and feel of using old film, was quietly acquired by a somewhat larger company known as Google.  Google announced they were making the entire suite of Nik tools available for free to all users.  As mentioned above, Google ceased supporting the Nik suite as of 2017, but the software was quickly purchased by DxO who just announced their first release.  The good news is that with this new release the photography community now has a reasonable assurance that these industry-leading image editing tools will be supported well into the future.  The bad news is that the Nik suite is no longer free; DxO is charging $69 to download the software.  That’s still less than the $150 that Google charged users for this software prior to 2016, and it’s a very reasonable price for software of this scope and quality.

For photographers who wish to access the Nik tool set and don’t already own it, or for photographers for whom the tool set has ceased working, I recommend downloading the new release from DxO’s website now, as the introductory price of $50 will increase to $69 at the end of June, 2018.  For those of us who already have the software installed and for whom it’s still working just fine, I don’t see a need to upgrade to the paid version right now  That’s because the new release, while more stable and better documented than the free older version from Google, does contain the same tools with the same functionality.  Personally, I will choose to wait until a new O/S or Lightroom upgrade forces my hand.  But I am very pleased to know that these wonderful editing tools will continue to be supported and developed into the future!

Here are my notes from the past two years of using the Nik suite of image editing software tools.  Its capabilities are leading-edge and would be well worth spending hundreds of dollars to obtain.  It doesn’t do everything, but what it does, it does better than tools such as Photoshop and Lightroom, each of which costs a good deal of money.  That Nik’s great capabilities are available for download for less than $70 is a wonderful value, and I strongly recommend you give them a try.

It’s important to note that the Nik Collection of software tools is not intended to be standalone image processing software.  It consists of a set of plugins, each specialized for a different specific purpose, that must be accessed by a general-purpose image editing application such as Photoshop, Lightroom, or Aperture.  I use Lightroom for nearly all of my post-processing, so I used that application to access the Nik Collection.

Once you have your general image editing application installed, then you can download the Nik Collection modules at the DxO website listed above.  When you are working in your application of choice, you will then have access to the various Nik Collection tools in the editing menus.  For example, when I select an image in Lightroom, I can access six of the seven Nik modules by pulling down the “Photo” menu and then pulling down the “Edit In” sub-menu.  One of the Nik modules, the HDR Efex tool, is accessed instead under the “File” and “Export with Preset” menu choices.

These are the seven Nik Collection modules included in the download:

Analog Efex Pro

Explore the look and feel of classic cameras, films, and lenses.

Color Efex Pro

A comprehensive set of filters for color correction, retouching, and creative effects.

Silver Efex Pro

Master the art of black-and-white photography with darkroom-inspired controls.

Viveza

Selectively adjust the color and tonality of your images without complicated masks or selections.

HDR Efex Pro

From natural to artistic, explore the full potential of HDR photography.

Sharpener Pro

Bring out hidden details consistently with the professional’s choice for image sharpening.

Dfine

Improve your images with noise reduction tailored to your camera.

So far, I’ve played around with just three of these tools.
Silver Efex Pro did a very good job of converting my test images to monochrome.  I’m pretty good at using Lightroom’s tools to convert color images to black-and-white, but they take a lot of practice to master.  In Nik’s Silver Efex module I was able to make some good choices very quickly.  For those who want to fine-tune their black-and-white conversions, there are very good tools for detailed control over the process.
I used Nik’s Dfine module to attempt to reduce noise in a favorite shot of the Milky Way over Yosemite Valley’s Half Dome.  The results of my quick trial looked comparable to what I had done in Lightroom, but I suspect if I took the time to learn the Nik tool more thoroughly, I could end up with even better results.
Finally, I tested Nik’s HDR Efex Pro tool.  This little gem is a joy to use.  Just select the series of shots from which you want to build an HDR (High Dynamic Range) image, export them to HDR Efex, and click a couple of buttons to generate the base HRD image there.  My default image looked pretty good, but the Nik tool has a wide range of presets that allow you to generate different HDR effects with the click of a button.  I tried several of these presets until I found one that perfectly suited the scene.  A few more small tweaks using the detailed adjustment sliders, and I was ready to save the HDR image back into Lightroom.  In the past I have been very disappointed with Lightroom’s built-in HDR tools, and only slightly more satisfied with Photoshop’s HDR module, but the Nik HDR Efex Pro plugin does an amazing job.  It’s both easier to use and generates better results than the other HDR software I’ve used.  Specifically, the Nik tool does a much better job than the other tools at producing natural-looking colors and at removing the “ghosting” effects from when the underlying images are just a little bit different from one another.  Now I’m eager to find the time to go back to some of my favorite HDR images and rebuild them using the Nik software!
For comparison, here is a favorite HDR image of mine, first shown after processing in Photoshop’s HDR tools and then shown after processing in Nik’s HDR Efex Pro tools.
lrwm-lowres-5884This HDR image of Lago Grey with its glacier and the peaks of Torres del Paine National Park in Chile was processed using Photoshop’s HDR tools.  The colors appear unnaturally saturated and parts of the image (especially the tops of the mountains and the brush in the foreground) show some ghosting effects.
lrwm-lowres-5880-5884-hdrnikThis version was processed using the Nik Collection’s HDR Efex Pro tools.  The colors look much more natural and all parts of the image appear sharp and free from ghosting.
I am looking forward to revisiting many of my favorite images and reprocessing them using the Nik Collection’s tools.  I highly recommend this versatile, easy-to-use, and powerful suite of image editing modules.
Have you used the Nik Collection for your own photography?  What do you like and dislike?  Please share your thoughts here.
Want to read more posts about post-processing your images?  Find them all here: Posts on Post-Processing.

In the Nik of Time [Encore Publication]: Now owned by DxO, the Nik Collection offers leading-edge image editing tools

Update: Recently I updated to a new PC for my post-processing work and found that, not unexpectedly, the original free Google version of the Nik suite no longer worked with my new configuration.  Finally, my hand was tipped and it was time to upgrade to the paid version from DxO.  I’m pleased to report that this invaluable suite of image editing tools now works better than ever.  From my limited testing, it appears to run faster and with fewer issues than before.  The interface is also cleaner.  And of course we can now expect better support and more frequent fixes than when the tools were given away for free.

In 2017 Google announced that they would no longer provide support for the Nik suite of tools.  That meant you can still download the latest version of Nik, but it may not work with the other software you are running.  Many in the photography community were concerned because sooner or later as we upgrade our other software, Nik will cease working for us.  Fortunately, a company called DxO purchased the Nik suite of tools from Google a few months after Google ceased supporting the software, and just this month DxO announced their first Nik release.  Read on for more details about the Nik tools and DxO’s new release.

In 2012, Nik Software, a small company known for their image processing tools that emulated the look and feel of using old film, was quietly acquired by a somewhat larger company known as Google.  Google announced they were making the entire suite of Nik tools available for free to all users.  As mentioned above, Google ceased supporting the Nik suite as of 2017, but the software was quickly purchased by DxO who just announced their first release.  The good news is that with this new release the photography community now has a reasonable assurance that these industry-leading image editing tools will be supported well into the future.  The bad news is that the Nik suite is no longer free; DxO is charging $69 to download the software.  That’s still less than the $150 that Google charged users for this software prior to 2016, and it’s a very reasonable price for software of this scope and quality.

For photographers who wish to access the Nik tool set and don’t already own it, or for photographers for whom the tool set has ceased working, I recommend downloading the new release from DxO’s website now, as the introductory price of $50 will increase to $69 at the end of June, 2018.  For those of us who already have the software installed and for whom it’s still working just fine, I don’t see a need to upgrade to the paid version right now.  That’s because the new release, while more stable and better documented than the free older version from Google, does contain the same tools with the same functionality.  Personally, I will choose to wait until a new O/S or Lightroom upgrade forces my hand.  But I am very pleased to know that these wonderful editing tools will continue to be supported and developed into the future!

Here are my notes from the past two years of using the Nik suite of image editing software tools.  Its capabilities are leading-edge and would be well worth spending hundreds of dollars to obtain.  It doesn’t do everything, but what it does, it does better than tools such as Photoshop and Lightroom, each of which costs a good deal of money.  That Nik’s great capabilities are available for download for less than $70 is a wonderful value, and I strongly recommend you give them a try.

It’s important to note that the Nik Collection of software tools is not intended to be standalone image processing software.  It consists of a set of plugins, each specialized for a different specific purpose, that must be accessed by a general-purpose image editing application such as Photoshop, Lightroom, or Aperture.  I use Lightroom for nearly all of my post-processing, so I used that application to access the Nik Collection.

Once you have your general image editing application installed, then you can download the Nik Collection modules at the DxO website listed above.  When you are working in your application of choice, you will then have access to the various Nik Collection tools in the editing menus.  For example, when I select an image in Lightroom, I can access six of the seven Nik modules by pulling down the “Photo” menu and then pulling down the “Edit In” sub-menu.  One of the Nik modules, the HDR Efex tool, is accessed instead under the “File” and “Export with Preset” menu choices.

These are the seven Nik Collection modules included in the download:

Analog Efex Pro

Explore the look and feel of classic cameras, films, and lenses.

Color Efex Pro

A comprehensive set of filters for color correction, retouching, and creative effects.

Silver Efex Pro

Master the art of black-and-white photography with darkroom-inspired controls.

Viveza

Selectively adjust the color and tonality of your images without complicated masks or selections.

HDR Efex Pro

From natural to artistic, explore the full potential of HDR photography.

Sharpener Pro

Bring out hidden details consistently with the professional’s choice for image sharpening.

Dfine

Improve your images with noise reduction tailored to your camera.

So far, I’ve played around with just three of these tools.
Silver Efex Pro did a very good job of converting my test images to monochrome.  I’m pretty good at using Lightroom’s tools to convert color images to black-and-white, but they take a lot of practice to master.  In Nik’s Silver Efex module I was able to make some good choices very quickly.  For those who want to fine-tune their black-and-white conversions, there are very good tools for detailed control over the process.
I used Nik’s Dfine module to attempt to reduce noise in a favorite shot of the Milky Way over Yosemite Valley’s Half Dome.  The results of my quick trial looked comparable to what I had done in Lightroom, but I suspect if I took the time to learn the Nik tool more thoroughly, I could end up with even better results.
Finally, I tested Nik’s HDR Efex Pro tool.  This little gem is a joy to use.  Just select the series of shots from which you want to build an HDR (High Dynamic Range) image, export them to HDR Efex, and click a couple of buttons to generate the base HRD image there.  My default image looked pretty good, but the Nik tool has a wide range of presets that allow you to generate different HDR effects with the click of a button.  I tried several of these presets until I found one that perfectly suited the scene.  A few more small tweaks using the detailed adjustment sliders, and I was ready to save the HDR image back into Lightroom.  In the past I have been very disappointed with Lightroom’s built-in HDR tools, and only slightly more satisfied with Photoshop’s HDR module, but the Nik HDR Efex Pro plugin does an amazing job.  It’s both easier to use and generates better results than the other HDR software I’ve used.  Specifically, the Nik tool does a much better job than the other tools at producing natural-looking colors and at removing the “ghosting” effects from when the underlying images are just a little bit different from one another.  Now I’m eager to find the time to go back to some of my favorite HDR images and rebuild them using the Nik software!
For comparison, here is a favorite HDR image of mine, first shown after processing in Photoshop’s HDR tools and then shown after processing in Nik’s HDR Efex Pro tools.
lrwm-lowres-5884This HDR image of Lago Grey with its glacier and the peaks of Torres del Paine National Park in Chile was processed using Photoshop’s HDR tools.  The colors appear unnaturally saturated and parts of the image (especially the tops of the mountains and the brush in the foreground) show some ghosting effects.
lrwm-lowres-5880-5884-hdrnikThis version was processed using the Nik Collection’s HDR Efex Pro tools.  The colors look much more natural and all parts of the image appear sharp and free from ghosting.
I am looking forward to revisiting many of my favorite images and reprocessing them using the Nik Collection’s tools.  I highly recommend this versatile, easy-to-use, and powerful suite of image editing modules.
Have you used the Nik Collection for your own photography?  What do you like and dislike?  Please share your thoughts here.
Want to read more posts about post-processing your images?  Find them all here: Posts on Post-Processing.

In the Nik of Time [Encore Publication]: Now owned by DxO, the Nik Collection offers leading-edge image editing tools

Note: In 2017 Google announced that they would no longer provide support for the Nik suite of tools.  That meant you can still download the latest version of Nik, but it may not work with the other software you are running.  Many in the photography community were concerned because sooner or later as we upgrade our other software, Nik will cease working for us.  Fortunately, a company called DxO purchased the Nik suite of tools from Google a few months after Google ceased supporting the software, and just this month DxO announced their first Nik release.  Read on for more details about the Nik tools and DxO’s new release.

In 2012, Nik Software, a small company known for their image processing tools that emulated the look and feel of using old film, was quietly acquired by a somewhat larger company known as Google.  Google announced they were making the entire suite of Nik tools available for free to all users.  As mentioned above, Google ceased supporting the Nik suite as of 2017, but the software was quickly purchased by DxO who just announced their first release.  The good news is that with this new release the photography community now has a reasonable assurance that these industry-leading image editing tools will be supported well into the future.  The bad news is that the Nik suite is no longer free; DxO is charging $69 to download the software.  That’s still less than the $150 that Google charged users for this software prior to 2016, and it’s a very reasonable price for software of this scope and quality.

For photographers who wish to access the Nik tool set and don’t already own it, or for photographers for whom the tool set has ceased working, I recommend downloading the new release from DxO’s website now, as the introductory price of $50 will increase to $69 at the end of June, 2018.  For those of us who already have the software installed and for whom it’s still working just fine, I don’t see a need to upgrade to the paid version right now.  That’s because the new release, while more stable and better documented than the free older version from Google, does contain the same tools with the same functionality.  Personally, I will choose to wait until a new O/S or Lightroom upgrade forces my hand.  But I am very pleased to know that these wonderful editing tools will continue to be supported and developed into the future!

Here are my notes from the past two years of using the Nik suite of image editing software tools.  Its capabilities are leading-edge and would be well worth spending hundreds of dollars to obtain.  It doesn’t do everything, but what it does, it does better than tools such as Photoshop and Lightroom, each of which costs a good deal of money.  That Nik’s great capabilities are available for download for less than $70 is a wonderful value, and I strongly recommend you give them a try.

It’s important to note that the Nik Collection of software tools is not intended to be standalone image processing software.  It consists of a set of plugins, each specialized for a different specific purpose, that must be accessed by a general-purpose image editing application such as Photoshop, Lightroom, or Aperture.  I use Lightroom for nearly all of my post-processing, so I used that application to access the Nik Collection.

Once you have your general image editing application installed, then you can download the Nik Collection modules at the DxO website listed above.  When you are working in your application of choice, you will then have access to the various Nik Collection tools in the editing menus.  For example, when I select an image in Lightroom, I can access six of the seven Nik modules by pulling down the “Photo” menu and then pulling down the “Edit In” sub-menu.  One of the Nik modules, the HDR Efex tool, is accessed instead under the “File” and “Export with Preset” menu choices.

These are the seven Nik Collection modules included in the download:

Analog Efex Pro

Explore the look and feel of classic cameras, films, and lenses.

Color Efex Pro

A comprehensive set of filters for color correction, retouching, and creative effects.

Silver Efex Pro

Master the art of black-and-white photography with darkroom-inspired controls.

Viveza

Selectively adjust the color and tonality of your images without complicated masks or selections.

HDR Efex Pro

From natural to artistic, explore the full potential of HDR photography.

Sharpener Pro

Bring out hidden details consistently with the professional’s choice for image sharpening.

Dfine

Improve your images with noise reduction tailored to your camera.

So far, I’ve played around with just three of these tools.
Silver Efex Pro did a very good job of converting my test images to monochrome.  I’m pretty good at using Lightroom’s tools to convert color images to black-and-white, but they take a lot of practice to master.  In Nik’s Silver Efex module I was able to make some good choices very quickly.  For those who want to fine-tune their black-and-white conversions, there are very good tools for detailed control over the process.
I used Nik’s Dfine module to attempt to reduce noise in a favorite shot of the Milky Way over Yosemite Valley’s Half Dome.  The results of my quick trial looked comparable to what I had done in Lightroom, but I suspect if I took the time to learn the Nik tool more thoroughly, I could end up with even better results.
Finally, I tested Nik’s HDR Efex Pro tool.  This little gem is a joy to use.  Just select the series of shots from which you want to build an HDR (High Dynamic Range) image, export them to HDR Efex, and click a couple of buttons to generate the base HRD image there.  My default image looked pretty good, but the Nik tool has a wide range of presets that allow you to generate different HDR effects with the click of a button.  I tried several of these presets until I found one that perfectly suited the scene.  A few more small tweaks using the detailed adjustment sliders, and I was ready to save the HDR image back into Lightroom.  In the past I have been very disappointed with Lightroom’s built-in HDR tools, and only slightly more satisfied with Photoshop’s HDR module, but the Nik HDR Efex Pro plugin does an amazing job.  It’s both easier to use and generates better results than the other HDR software I’ve used.  Specifically, the Nik tool does a much better job than the other tools at producing natural-looking colors and at removing the “ghosting” effects from when the underlying images are just a little bit different from one another.  Now I’m eager to find the time to go back to some of my favorite HDR images and rebuild them using the Nik software!
For comparison, here is a favorite HDR image of mine, first shown after processing in Photoshop’s HDR tools and then shown after processing in Nik’s HDR Efex Pro tools.
lrwm-lowres-5884This HDR image of Lago Grey with its glacier and the peaks of Torres del Paine National Park in Chile was processed using Photoshop’s HDR tools.  The colors appear unnaturally saturated and parts of the image (especially the tops of the mountains and the brush in the foreground) show some ghosting effects.
lrwm-lowres-5880-5884-hdrnikThis version was processed using the Nik Collection’s HDR Efex Pro tools.  The colors look much more natural and all parts of the image appear sharp and free from ghosting.
I am looking forward to revisiting many of my favorite images and reprocessing them using the Nik Collection’s tools.  I highly recommend this versatile, easy-to-use, and powerful suite of image editing modules.
Have you used the Nik Collection for your own photography?  What do you like and dislike?  Please share your thoughts here.
Want to read more posts about post-processing your images?  Find them all here: Posts on Post-Processing.

I See a Red Door and I Want to Paint It Black [Encore Publication]: When a black-and-white image is better than color, and how to convert to B&W

Back in the day, a photographer had to choose in advance whether to shoot with color film or black-and-white film.  Conversions from color to B&W were cumbersome and expensive, and conversions from B&W to color were essentially impossible.  During the film era, I typically shot exclusively using color transparency film while traveling, and reserved B&W photography for particularly artistic shoots near home.

Thankfully, in today’s digital world, we no longer have to commit ourselves in advance to monochrome vs. color images.  It’s now a simple procedure to convert our color images to B&W during post-processing.  And that’s a great blessing, because there are plenty of times when a black-and-white photo is better than a color photo.

Consider the image of the alligator at the start of this post.  One of my favorite photos, this one works just fine in color, too.  But the real power of the image is revealed in B&W through the striking textures of the alligator’s skin as seen above the water and as reflected off the water’s surface.  The background above the water fades to a deep, nearly true, black, with the background of the water itself rendered slightly less darkly and showing some nice ripples of motion.  Black-and-white photography is especially powerful when there are contrasts of pattern, texture, and background as in this image.  Buy this photo

When else might we want to render an image in B&W?

Portraits made in monochrome have a timeless look that evokes the earlier years of photography, and this rendering can also bring out the true nature of the subject.  There’s a lovely look to the skin tones and hair when displayed in B&W, and there are fewer distracting elements from the color of clothing or background objects.

This portrait takes on a vintage, timeless look when shown in B&W.  Our eye can focus on the model’s face and hair without the distractions of the colors in her sweater or the building.  There’s almost a street photography kind of documentary quality to this image in monochrome that is lost when viewed in color.  Buy this photo

Color can be distracting in an image where we want to emphasize the essence of a person or place.  In this portrait I made recently for a couple who are fellow musicians and friends of mine, we had beautiful “golden hour” light to work with, and the background and clothing worked well in color.  But converted to B&W, this image really places the emphasis on the couple without the distractions of the color cast in the reflections off the eyeglasses or of the mixed lighting in the background.

In this portrait, black-and-white presentation places the viewer’s attention squarely on the the couple and their instruments, without distractions from the multiple colors of the clothing and background components.  (Client photo not available for purchase.)

When you’re shooting under “mixed lighting”, which means there are multiple light sources with different color temperatures (i.e., some light sources are warmer and others are cooler), converting the image to B&W can be a real problem solver.  Consider the image below, made in Bruges at night.  The light from the street lamps was warmer than the light coming from the spotlights on various buildings, and there was also a bright moon that night, so when seen in color the photo would look less appealing due to the contrasting of the color temperatures in the different parts of the image.  But viewed in B&W, it brings out the grandeur of the old buildings and the beauty of the reflections in the waters of the canal, without the distractions of the color casts.

This image of Bruges at night, when processed in B&W, removes the contrasting color temperatures of the multiple different light sources and allows the viewer to enjoy the stately old buildings with consistent tone and texture.  Buy this photo

Now that we’ve covered a few of the many situations in which a black-and-white image is preferable over a color image, let’s look at how to convert from color to B&W.  There are many ways to perform this conversion, but I recommend it be done using the Color Adjustments settings in the Develop module of Adobe Lightroom.  Here’s how:

Click on the “B&W” tab above the individual color channel sliders, and then adjust the mix of how the colors are blended by increasing or decreasing each color’s slider to see how the black-and-white image looks.  I find that I often have to readjust the contrast slider at this point to get the image looking its best in black-and-white.

For more on using Lightroom to post-process your images, check out my previous post: Previous post on using Lightroom to post-process images.

I do not recommend using your camera’s built-in black-and-white mode, as you will then lose the color information in the image file.  I also do not suggest using the settings some cameras have to make a copy of the image in B&W, because in most cases the camera’s built-in software will not do a very good job of rendering the image in monochrome.  For the best results, either use Lightroom or a dedicated black-and-white conversion application such as Silver Efex Pro 2 from Nik Software, which is available as a plug-in for Lightroom or Photoshop.

Want to read other posts about travel photography techniques?  Find them all here: http://www.to-travel-hopefully.com/category/techniques/

What do you love about a black-and-white image?  When do you convert an image to B&W rather than share it in color?  Any tips or tricks for how to make great B&W photos?  Please share your thoughts in the comment box!


In the Nik of Time [Encore Publication]: Now owned by DxO, the Nik Collection offers leading-edge image editing tools

Note: In 2017 Google announced that they would no longer provide support for the Nik suite of tools.  That meant you can still download the latest version of Nik, but it may not work with the other software you are running.  Many in the photography community were concerned because sooner or later as we upgrade our other software, Nik will cease working for us.  Fortunately, a company called DxO purchased the Nik suite of tools from Google a few months after Google ceased supporting the software, and just this month DxO announced their first Nik release.  Read on for more details about the Nik tools and DxO’s new release.

In 2012, Nik Software, a small company known for their image processing tools that emulated the look and feel of using old film, was quietly acquired by a somewhat larger company known as Google.  Google announced they were making the entire suite of Nik tools available for free to all users.  As mentioned above, Google ceased supporting the Nik suite as of 2017, but the software was quickly purchased by DxO who just announced their first release.  The good news is that with this new release the photography community now has a reasonable assurance that these industry-leading image editing tools will be supported well into the future.  The bad news is that the Nik suite is no longer free; DxO is charging $69 to download the software.  That’s still less than the $150 that Google charged users for this software prior to 2016, and it’s a very reasonable price for software of this scope and quality.

For photographers who wish to access the Nik tool set and don’t already own it, or for photographers for whom the tool set has ceased working, I recommend downloading the new release from DxO’s website now, as the introductory price of $50 will increase to $69 at the end of June, 2018.  For those of us who already have the software installed and for whom it’s still working just fine, I don’t see a need to upgrade to the paid version right now.  That’s because the new release, while more stable and better documented than the free older version from Google, does contain the same tools with the same functionality.  Personally, I will choose to wait until a new O/S or Lightroom upgrade forces my hand.  But I am very pleased to know that these wonderful editing tools will continue to be supported and developed into the future!

Here are my notes from the past two years of using the Nik suite of image editing software tools.  Its capabilities are leading-edge and would be well worth spending hundreds of dollars to obtain.  It doesn’t do everything, but what it does, it does better than tools such as Photoshop and Lightroom, each of which costs a good deal of money.  That Nik’s great capabilities are available for download for less than $70 is a wonderful value, and I strongly recommend you give them a try.

It’s important to note that the Nik Collection of software tools is not intended to be standalone image processing software.  It consists of a set of plugins, each specialized for a different specific purpose, that must be accessed by a general-purpose image editing application such as Photoshop, Lightroom, or Aperture.  I use Lightroom for nearly all of my post-processing, so I used that application to access the Nik Collection.

Once you have your general image editing application installed, then you can download the Nik Collection modules at the DxO website listed above.  When you are working in your application of choice, you will then have access to the various Nik Collection tools in the editing menus.  For example, when I select an image in Lightroom, I can access six of the seven Nik modules by pulling down the “Photo” menu and then pulling down the “Edit In” sub-menu.  One of the Nik modules, the HDR Efex tool, is accessed instead under the “File” and “Export with Preset” menu choices.

These are the seven Nik Collection modules included in the download:

Analog Efex Pro

Explore the look and feel of classic cameras, films, and lenses.

Color Efex Pro

A comprehensive set of filters for color correction, retouching, and creative effects.

Silver Efex Pro

Master the art of black-and-white photography with darkroom-inspired controls.

Viveza

Selectively adjust the color and tonality of your images without complicated masks or selections.

HDR Efex Pro

From natural to artistic, explore the full potential of HDR photography.

Sharpener Pro

Bring out hidden details consistently with the professional’s choice for image sharpening.

Dfine

Improve your images with noise reduction tailored to your camera.

So far, I’ve played around with just three of these tools.
Silver Efex Pro did a very good job of converting my test images to monochrome.  I’m pretty good at using Lightroom’s tools to convert color images to black-and-white, but they take a lot of practice to master.  In Nik’s Silver Efex module I was able to make some good choices very quickly.  For those who want to fine-tune their black-and-white conversions, there are very good tools for detailed control over the process.
I used Nik’s Dfine module to attempt to reduce noise in a favorite shot of the Milky Way over Yosemite Valley’s Half Dome.  The results of my quick trial looked comparable to what I had done in Lightroom, but I suspect if I took the time to learn the Nik tool more thoroughly, I could end up with even better results.
Finally, I tested Nik’s HDR Efex Pro tool.  This little gem is a joy to use.  Just select the series of shots from which you want to build an HDR (High Dynamic Range) image, export them to HDR Efex, and click a couple of buttons to generate the base HRD image there.  My default image looked pretty good, but the Nik tool has a wide range of presets that allow you to generate different HDR effects with the click of a button.  I tried several of these presets until I found one that perfectly suited the scene.  A few more small tweaks using the detailed adjustment sliders, and I was ready to save the HDR image back into Lightroom.  In the past I have been very disappointed with Lightroom’s built-in HDR tools, and only slightly more satisfied with Photoshop’s HDR module, but the Nik HDR Efex Pro plugin does an amazing job.  It’s both easier to use and generates better results than the other HDR software I’ve used.  Specifically, the Nik tool does a much better job than the other tools at producing natural-looking colors and at removing the “ghosting” effects from when the underlying images are just a little bit different from one another.  Now I’m eager to find the time to go back to some of my favorite HDR images and rebuild them using the Nik software!
For comparison, here is a favorite HDR image of mine, first shown after processing in Photoshop’s HDR tools and then shown after processing in Nik’s HDR Efex Pro tools.
lrwm-lowres-5884This HDR image of Lago Grey with its glacier and the peaks of Torres del Paine National Park in Chile was processed using Photoshop’s HDR tools.  The colors appear unnaturally saturated and parts of the image (especially the tops of the mountains and the brush in the foreground) show some ghosting effects.
lrwm-lowres-5880-5884-hdrnikThis version was processed using the Nik Collection’s HDR Efex Pro tools.  The colors look much more natural and all parts of the image appear sharp and free from ghosting.
I am looking forward to revisiting many of my favorite images and reprocessing them using the Nik Collection’s tools.  I highly recommend this versatile, easy-to-use, and powerful suite of image editing modules.
Have you used the Nik Collection for your own photography?  What do you like and dislike?  Please share your thoughts here.
Want to read more posts about post-processing your images?  Find them all here: Posts on Post-Processing.

Focus on Yosemite National Park [Encore Publication]: A photographer’s dream, Yosemite offers so much more than the postcard views

Those of us who live in the San Francisco Bay Area can count many blessings, but one I am most thankful for is our fairly close proximity to Yosemite National Park.  The second oldest national park in the US, Yosemite is a photographer’s dream.  Since the days when Ansel Adams helped make the park famous through his masterful landscape photography, shutterbugs of all stripes have been flocking there to try to capture some of its indescribable beauty.  Most of us will never be an Ansel Adams, but that doesn’t stop me from returning to Yosemite at least once per year to give it my best shot, as it were.

Without doubt, there are many iconic views in the park that are relatively easy for even novice photographers to render.  There is majesty in the panorama over Yosemite Valley as seen from the famous Tunnel View lookout.  One doesn’t even have to venture off the main park road to shoot a nice image of Half Dome or El Capitan.  But Yosemite offers so much more to the photographer who’s willing to look a bit more closely, to hike a little instead of jumping out of a car to shoot, or to come to a spot at unusual times, including the middle of the night.

In this post, I’ll share a few images I made in Yosemite National Park over the past year, but none of them will be a postcard-type shot that you’ve seen 1000 times before.  And we’ll talk a bit about how to find and capture these less discovered views.

While hiking in the Tuolumne Meadows area, 5000 feet above Yosemite Valley, we were caught in a freak hailstorm at the remote Dog Lake.  Instead of throwing a rain cover over my gear and running for shelter like a normal person would do, I set up my kit and started shooting.  This image plays off the contrasts between the peaceful and violent sides of nature and between the light and the shade.  It is a composite of several different shots made at different exposures, put together in Lightroom’s HDR (high dynamic range) merging tool.

Yosemite offers unusual and dramatic views to those willing to get away from the roads and brave some harsher conditions.  Buy this photo

Another less-visited attraction in the park is the wonderful Chilnualna Falls.  The lower waterfall is actually quite an easy hike from the parking area at the trailhead, and its little swimming hole makes for a refreshing break on a hot summer’s day.  Here’s a shot of my younger daughter enjoying a dip in the swimming hole just under the falls.  To blur the water, I used a slow shutter speed, which could only be achieved in the harsh mid-day light by attaching neutral-density filters to the lens.  Neutral-density (ND) filters are an essential accessory for the landscape photographer, because they block most of the available light from reaching the camera’s sensor, allowing you to use a slower shutter speed to blur motion and/or a wider aperture to throw the background out of focus.

These reduce the amount of light that reaches the camera’s sensor, so you can use slower shutter speeds to blur motion, or so you can use a wider aperture to get a shallow depth-of-field, even in bright sunlight.

A neutral-density filter allows a nicely blurred shot of the waterfall at Chilnualna Falls.  Buy this photo

Another lovely hike in the high country of Tuolumne Meadows is Cathedral Lakes.  On our way back from these pristine and remote lakes, we passed this granite rock dome.  I used a polarizing filter on a wide-angle lens to bring out the details on the surface of the rock and to lend more drama to the sky.  Then, in post-processing, I converted the image to black-and-white to emphasize the remarkable texture of the granite slab’s surface.  For more discussion about converting images to black-and-white, take a look at my earlier post: B&W Photography post.

Using a polarizing filter can darken and add drama to skies, reduce unwanted reflections, and render stunning detail on shiny surfaces.  Converting an image to black-and-white can bring out the textures and patterns that may be less prominent when viewed in a color image.  Buy this photo

Just because a place is glorious in its own right doesn’t mean we can’t include people in our photos.  Putting humans in a landscape adds a personal touch, provides a sense of scale, and often tells a more compelling story than would an image of the same place without people.  Here I’ve included my daughters in a landscape from the incomparable summit of Sentinel Dome.

Including people in landscapes layers a human narrative on top of the natural story.  I like the added color, and humor, from the addition of my daughters in their college logo hats.  I’ve chosen a wide aperture to soften the focus on the lovely background.  Buy this photo

You don’t have to stop shooting when the sun sets.  Some of the most wonderful images of Yosemite are made after dark.  I came to this spot not far from the edge of the meadow in Yosemite Valley, and right on the bank of the Merced River, quite late at night when the sky was very dark.  I set up my camera and wide-angle lens on a tripod and made a 25-second exposure at a high sensitivity (ISO) setting.  The resulting image shows the spectacle of the Milky Way arched above the terrestrial grandeur of Half Dome and other Yosemite landforms.  For more discussion of capturing the Milky Way, visit this post: Milky Way photography post.

A favorite image of mine: The Milky Way above Half Dome.  Note that not every landscape image needs to be in “landscape orientation”.  Buy this photo

Next time you are fortunate enough to visit Yosemite National Park, try to discover some new places, visit favorite places during less-visited times of the day (or night), and include some people for a human component to the story.  Your images will stand out from the millions of others made in this glorious park!

Do you have a favorite photographic experience from Yosemite to share?  Please leave a comment to let us know.

Want to see more posts on great travel photography destinations?  See them all here: http://www.to-travel-hopefully.com/category/destinations/.


In the Nik of Time [Updated]: Now owned by DxO, the Nik Collection offers leading-edge image editing tools

Note: In 2017 Google announced that they would no longer provide support for the Nik suite of tools.  That meant you can still download the latest version of Nik, but it may not work with the other software you are running.  Many in the photography community were concerned because sooner or later as we upgrade our other software, Nik will cease working for us.  Fortunately, a company called DxO purchased the Nik suite of tools from Google a few months after Google ceased supporting the software, and just this month DxO announced their first Nik release.  Read on for more details about the Nik tools and DxO’s new release.

In 2012, Nik Software, a small company known for their image processing tools that emulated the look and feel of using old film, was quietly acquired by a somewhat larger company known as Google.  Google announced they were making the entire suite of Nik tools available for free to all users.  As mentioned above, Google ceased supporting the Nik suite as of 2017, but the software was quickly purchased by DxO who just announced their first release.  The good news is that with this new release the photography community now has a reasonable assurance that these industry-leading image editing tools will be supported well into the future.  The bad news is that the Nik suite is no longer free; DxO is charging $69 to download the software.  That’s still less than the $150 that Google charged users for this software prior to 2016, and it’s a very reasonable price for software of this scope and quality.

For photographers who wish to access the Nik tool set and don’t already own it, or for photographers for whom the tool set has ceased working, I recommend downloading the new release from DxO’s website now, as the introductory price of $50 will increase to $69 at the end of June, 2018.  For those of us who already have the software installed and for whom it’s still working just fine, I don’t see a need to upgrade to the paid version right now  That’s because the new release, while more stable and better documented than the free older version from Google, does contain the same tools with the same functionality.  Personally, I will choose to wait until a new O/S or Lightroom upgrade forces my hand.  But I am very pleased to know that these wonderful editing tools will continue to be supported and developed into the future!

Here are my notes from the past two years of using the Nik suite of image editing software tools.  Its capabilities are leading-edge and would be well worth spending hundreds of dollars to obtain.  It doesn’t do everything, but what it does, it does better than tools such as Photoshop and Lightroom, each of which costs a good deal of money.  That Nik’s great capabilities are available for download for less than $70 is a wonderful value, and I strongly recommend you give them a try.

It’s important to note that the Nik Collection of software tools is not intended to be standalone image processing software.  It consists of a set of plugins, each specialized for a different specific purpose, that must be accessed by a general-purpose image editing application such as Photoshop, Lightroom, or Aperture.  I use Lightroom for nearly all of my post-processing, so I used that application to access the Nik Collection.

Once you have your general image editing application installed, then you can download the Nik Collection modules at the DxO website listed above.  When you are working in your application of choice, you will then have access to the various Nik Collection tools in the editing menus.  For example, when I select an image in Lightroom, I can access six of the seven Nik modules by pulling down the “Photo” menu and then pulling down the “Edit In” sub-menu.  One of the Nik modules, the HDR Efex tool, is accessed instead under the “File” and “Export with Preset” menu choices.

These are the seven Nik Collection modules included in the download:

Analog Efex Pro

Explore the look and feel of classic cameras, films, and lenses.

Color Efex Pro

A comprehensive set of filters for color correction, retouching, and creative effects.

Silver Efex Pro

Master the art of black-and-white photography with darkroom-inspired controls.

Viveza

Selectively adjust the color and tonality of your images without complicated masks or selections.

HDR Efex Pro

From natural to artistic, explore the full potential of HDR photography.

Sharpener Pro

Bring out hidden details consistently with the professional’s choice for image sharpening.

Dfine

Improve your images with noise reduction tailored to your camera.

So far, I’ve played around with just three of these tools.
Silver Efex Pro did a very good job of converting my test images to monochrome.  I’m pretty good at using Lightroom’s tools to convert color images to black-and-white, but they take a lot of practice to master.  In Nik’s Silver Efex module I was able to make some good choices very quickly.  For those who want to fine-tune their black-and-white conversions, there are very good tools for detailed control over the process.
I used Nik’s Dfine module to attempt to reduce noise in a favorite shot of the Milky Way over Yosemite Valley’s Half Dome.  The results of my quick trial looked comparable to what I had done in Lightroom, but I suspect if I took the time to learn the Nik tool more thoroughly, I could end up with even better results.
Finally, I tested Nik’s HDR Efex Pro tool.  This little gem is a joy to use.  Just select the series of shots from which you want to build an HDR (High Dynamic Range) image, export them to HDR Efex, and click a couple of buttons to generate the base HRD image there.  My default image looked pretty good, but the Nik tool has a wide range of presets that allow you to generate different HDR effects with the click of a button.  I tried several of these presets until I found one that perfectly suited the scene.  A few more small tweaks using the detailed adjustment sliders, and I was ready to save the HDR image back into Lightroom.  In the past I have been very disappointed with Lightroom’s built-in HDR tools, and only slightly more satisfied with Photoshop’s HDR module, but the Nik HDR Efex Pro plugin does an amazing job.  It’s both easier to use and generates better results than the other HDR software I’ve used.  Specifically, the Nik tool does a much better job than the other tools at producing natural-looking colors and at removing the “ghosting” effects from when the underlying images are just a little bit different from one another.  Now I’m eager to find the time to go back to some of my favorite HDR images and rebuild them using the Nik software!
For comparison, here is a favorite HDR image of mine, first shown after processing in Photoshop’s HDR tools and then shown after processing in Nik’s HDR Efex Pro tools.
lrwm-lowres-5884This HDR image of Lago Grey with its glacier and the peaks of Torres del Paine National Park in Chile was processed using Photoshop’s HDR tools.  The colors appear unnaturally saturated and parts of the image (especially the tops of the mountains and the brush in the foreground) show some ghosting effects.
lrwm-lowres-5880-5884-hdrnikThis version was processed using the Nik Collection’s HDR Efex Pro tools.  The colors look much more natural and all parts of the image appear sharp and free from ghosting.
I am looking forward to revisiting many of my favorite images and reprocessing them using the Nik Collection’s tools.  I highly recommend this versatile, easy-to-use, and powerful suite of image editing modules.
Have you used the Nik Collection for your own photography?  What do you like and dislike?  Please share your thoughts here.
Want to read more posts about post-processing your images?  Find them all here: Posts on Post-Processing.

In the Nik of Time [Encore Publication]: Google’s Nik Collection offers leading-edge image editing tools for free

Note: Google has announced that they will no longer provide support for the Nik suite of tools.  That means you can still download the latest version of Nik, but it may not work with the other software you are running; even if it works for you today, at some point in the future as you upgrade your other software, Nik will cease working for you.  This is regrettable, because I still have found no other similar tools that perform as well as the Nik collection for most of its purposes.  Please share your suggestions for replacement tools as a comment at the end of this post!

In 2012, Nik Software, a small company known for their image processing tools that emulated the look and feel of using old film, was quietly acquired by a somewhat larger company known as Google.  This past spring, Google announced they were making the entire suite of Nik tools available for free to all users.  I’m just getting around to testing this suite of image editing software now, and from what I’ve seen so far its capabilities are leading-edge and would be well worth spending hundreds of dollars to obtain.  It doesn’t do everything, but what it does, it does better than tools such as Photoshop and Lightroom, each of which costs a good deal of money.  That Nik’s great capabilities are available for download completely gratis is a wonderful gift from the folks at Google, and I strongly recommend you give them a try.

It’s important to note that the Nik Collection of software tools is not intended to be standalone image processing software.  It consists of a set of plugins, each specialized for a different specific purpose, that must be accessed by a general-purpose image editing application such as Photoshop, Lightroom, or Aperture.  I use Lightroom for nearly all of my post-processing, so I used that application to access the Nik Collection.

Once you have your general image editing application installed, then you can download the Nik Collection modules for free at this site: https://www.google.com/nikcollection/.  When you are working in your application of choice, you will then have access to the various Nik Collection tools in the editing menus.  For example, when I select an image in Lightroom, I can access six of the seven Nik modules by pulling down the “Photo” menu and then pulling down the “Edit In” sub-menu.  One of the Nik modules, the HDR Efex tool, is accessed instead under the “File” and “Export with Preset” menu choices.

These are the seven Nik Collection modules included in the free download:

Analog Efex Pro

Explore the look and feel of classic cameras, films, and lenses.

Color Efex Pro

A comprehensive set of filters for color correction, retouching, and creative effects.

Silver Efex Pro

Master the art of black-and-white photography with darkroom-inspired controls.

Viveza

Selectively adjust the color and tonality of your images without complicated masks or selections.

HDR Efex Pro

From natural to artistic, explore the full potential of HDR photography.

Sharpener Pro

Bring out hidden details consistently with the professional’s choice for image sharpening.

Dfine

Improve your images with noise reduction tailored to your camera.

So far, I’ve played around with just three of these tools.
Silver Efex Pro did a very good job of converting my test images to monochrome.  I’m pretty good at using Lightroom’s tools to convert color images to black-and-white, but they take a lot of practice to master.  In Nik’s Silver Efex module I was able to make some good choices very quickly.  For those who want to fine-tune their black-and-white conversions, there are very good tools for detailed control over the process.
I used Nik’s Dfine module to attempt to reduce noise in a favorite shot of the Milky Way over Yosemite Valley’s Half Dome.  The results of my quick trial looked comparable to what I had done in Lightroom, but I suspect if I took the time to learn the Nik tool more thoroughly, I could end up with even better results.
Finally, I tested Nik’s HDR Efex Pro tool.  This little gem is a joy to use.  Just select the series of shots from which you want to build an HDR (High Dynamic Range) image, export them to HDR Efex, and click a couple of buttons to generate the base HRD image there.  My default image looked pretty good, but the Nik tool has a wide range of presets that allow you to generate different HDR effects with the click of a button.  I tried several of these presets until I found one that perfectly suited the scene.  A few more small tweaks using the detailed adjustment sliders, and I was ready to save the HDR image back into Lightroom.  In the past I have been very disappointed with Lightroom’s built-in HDR tools, and only slightly more satisfied with Photoshop’s HDR module, but the Nik HDR Efex Pro plugin does an amazing job.  It’s both easier to use and generates better results than the other HDR software I’ve used.  Specifically, the Nik tool does a much better job than the other tools at producing natural-looking colors and at removing the “ghosting” effects from when the underlying images are just a little bit different from one another.  Now I’m eager to find the time to go back to some of my favorite HDR images and rebuild them using the Nik software!
For comparison, here is a favorite HDR image of mine, first shown after processing in Photoshop’s HDR tools and then shown after processing in Nik’s HDR Efex Pro tools.
lrwm-lowres-5884This HDR image of Lago Grey with its glacier and the peaks of Torres del Paine National Park in Chile was processed using Photoshop’s HDR tools.  The colors appear unnaturally saturated and parts of the image (especially the tops of the mountains and the brush in the foreground) show some ghosting effects.
lrwm-lowres-5880-5884-hdrnikThis version was processed using the Nik Collection’s HDR Efex Pro tools.  The colors look much more natural and all parts of the image appear sharp and free from ghosting.
I am looking forward to revisiting many of my favorite images and reprocessing them using the Nik Collection’s tools.  I highly recommend this versatile, easy-to-use, and powerful suite of image editing modules.  And the price can’t be beat.
Have you used the Nik Collection for your own photography?  What do you like and dislike?  Please share your thoughts here.
Want to read more posts about post-processing your images?  Find them all here: Posts on Post-Processing.

I See a Red Door and I Want to Paint It Black [Encore Publication]: When a black-and-white image is better than color, and how to convert to B&W

Back in the day, a photographer had to choose in advance whether to shoot with color film or black-and-white film.  Conversions from color to B&W were cumbersome and expensive, and conversions from B&W to color were essentially impossible.  During the film era, I typically shot exclusively using color transparency film while traveling, and reserved B&W photography for particularly artistic shoots near home.

Thankfully, in today’s digital world, we no longer have to commit ourselves in advance to monochrome vs. color images.  It’s now a simple procedure to convert our color images to B&W during post-processing.  And that’s a great blessing, because there are plenty of times when a black-and-white photo is better than a color photo.

Consider the image of the alligator at the start of this post.  One of my favorite photos, this one works just fine in color, too.  But the real power of the image is revealed in B&W through the striking textures of the alligator’s skin as seen above the water and as reflected off the water’s surface.  The background above the water fades to a deep, nearly true, black, with the background of the water itself rendered slightly less darkly and showing some nice ripples of motion.  Black-and-white photography is especially powerful when there are contrasts of pattern, texture, and background as in this image.  Buy this photo

When else might we want to render an image in B&W?

Portraits made in monochrome have a timeless look that evokes the earlier years of photography, and this rendering can also bring out the true nature of the subject.  There’s a lovely look to the skin tones and hair when displayed in B&W, and there are fewer distracting elements from the color of clothing or background objects.

This portrait takes on a vintage, timeless look when shown in B&W.  Our eye can focus on the model’s face and hair without the distractions of the colors in her sweater or the building.  There’s almost a street photography kind of documentary quality to this image in monochrome that is lost when viewed in color.  Buy this photo

Color can be distracting in an image where we want to emphasize the essence of a person or place.  In this portrait I made recently for a couple who are fellow musicians and friends of mine, we had beautiful “golden hour” light to work with, and the background and clothing worked well in color.  But converted to B&W, this image really places the emphasis on the couple without the distractions of the color cast in the reflections off the eyeglasses or of the mixed lighting in the background.

In this portrait, black-and-white presentation places the viewer’s attention squarely on the the couple and their instruments, without distractions from the multiple colors of the clothing and background components.  (Client photo not available for purchase.)

When you’re shooting under “mixed lighting”, which means there are multiple light sources with different color temperatures (i.e., some light sources are warmer and others are cooler), converting the image to B&W can be a real problem solver.  Consider the image below, made in Bruges at night.  The light from the street lamps was warmer than the light coming from the spotlights on various buildings, and there was also a bright moon that night, so when seen in color the photo would look less appealing due to the contrasting of the color temperatures in the different parts of the image.  But viewed in B&W, it brings out the grandeur of the old buildings and the beauty of the reflections in the waters of the canal, without the distractions of the color casts.

This image of Bruges at night, when processed in B&W, removes the contrasting color temperatures of the multiple different light sources and allows the viewer to enjoy the stately old buildings with consistent tone and texture.  Buy this photo

Now that we’ve covered a few of the many situations in which a black-and-white image is preferable over a color image, let’s look at how to convert from color to B&W.  There are many ways to perform this conversion, but I recommend it be done using the Color Adjustments settings in the Develop module of Adobe Lightroom.  Here’s how:

Click on the “B&W” tab above the individual color channel sliders, and then adjust the mix of how the colors are blended by increasing or decreasing each color’s slider to see how the black-and-white image looks.  I find that I often have to readjust the contrast slider at this point to get the image looking its best in black-and-white.

For more on using Lightroom to post-process your images, check out my previous post: Previous post on using Lightroom to post-process images.

I do not recommend using your camera’s built-in black-and-white mode, as you will then lose the color information in the image file.  I also do not suggest using the settings some cameras have to make a copy of the image in B&W, because in most cases the camera’s built-in software will not do a very good job of rendering the image in monochrome.  For the best results, either use Lightroom or a dedicated black-and-white conversion application such as Silver Efex Pro 2 from Nik Software, which is available as a plug-in for Lightroom or Photoshop.

Want to read other posts about travel photography techniques?  Find them all here: http://www.to-travel-hopefully.com/category/techniques/

What do you love about a black-and-white image?  When do you convert an image to B&W rather than share it in color?  Any tips or tricks for how to make great B&W photos?  Please share your thoughts in the comment box!


Focus on Yosemite National Park [Encore Publication]: A photographer’s dream, Yosemite offers so much more than the postcard views

Those of us who live in the San Francisco Bay Area can count many blessings, but one I am most thankful for is our fairly close proximity to Yosemite National Park.  The second oldest national park in the US, Yosemite is a photographer’s dream.  Since the days when Ansel Adams helped make the park famous through his masterful landscape photography, shutterbugs of all stripes have been flocking there to try to capture some of its indescribable beauty.  Most of us will never be an Ansel Adams, but that doesn’t stop me from returning to Yosemite at least once per year to give it my best shot, as it were.

Without doubt, there are many iconic views in the park that are relatively easy for even novice photographers to render.  There is majesty in the panorama over Yosemite Valley as seen from the famous Tunnel View lookout.  One doesn’t even have to venture off the main park road to shoot a nice image of Half Dome or El Capitan.  But Yosemite offers so much more to the photographer who’s willing to look a bit more closely, to hike a little instead of jumping out of a car to shoot, or to come to a spot at unusual times, including the middle of the night.

In this post, I’ll share a few images I made in Yosemite National Park over the past year, but none of them will be a postcard-type shot that you’ve seen 1000 times before.  And we’ll talk a bit about how to find and capture these less discovered views.

While hiking in the Tuolumne Meadows area, 5000 feet above Yosemite Valley, we were caught in a freak hailstorm at the remote Dog Lake.  Instead of throwing a rain cover over my gear and running for shelter like a normal person would do, I set up my kit and started shooting.  This image plays off the contrasts between the peaceful and violent sides of nature and between the light and the shade.  It is a composite of several different shots made at different exposures, put together in Lightroom’s HDR (high dynamic range) merging tool.

Yosemite offers unusual and dramatic views to those willing to get away from the roads and brave some harsher conditions.  Buy this photo

Another less-visited attraction in the park is the wonderful Chilnualna Falls.  The lower waterfall is actually quite an easy hike from the parking area at the trailhead, and its little swimming hole makes for a refreshing break on a hot summer’s day.  Here’s a shot of my younger daughter enjoying a dip in the swimming hole just under the falls.  To blur the water, I used a slow shutter speed, which could only be achieved in the harsh mid-day light by attaching neutral-density filters to the lens.  Neutral-density (ND) filters are an essential accessory for the landscape photographer, because they block most of the available light from reaching the camera’s sensor, allowing you to use a slower shutter speed to blur motion and/or a wider aperture to throw the background out of focus.

These reduce the amount of light that reaches the camera’s sensor, so you can use slower shutter speeds to blur motion, or so you can use a wider aperture to get a shallow depth-of-field, even in bright sunlight.

A neutral-density filter allows a nicely blurred shot of the waterfall at Chilnualna Falls.  Buy this photo

Another lovely hike in the high country of Tuolumne Meadows is Cathedral Lakes.  On our way back from these pristine and remote lakes, we passed this granite rock dome.  I used a polarizing filter on a wide-angle lens to bring out the details on the surface of the rock and to lend more drama to the sky.  Then, in post-processing, I converted the image to black-and-white to emphasize the remarkable texture of the granite slab’s surface.  For more discussion about converting images to black-and-white, take a look at my earlier post: B&W Photography post.

Using a polarizing filter can darken and add drama to skies, reduce unwanted reflections, and render stunning detail on shiny surfaces.  Converting an image to black-and-white can bring out the textures and patterns that may be less prominent when viewed in a color image.  Buy this photo

Just because a place is glorious in its own right doesn’t mean we can’t include people in our photos.  Putting humans in a landscape adds a personal touch, provides a sense of scale, and often tells a more compelling story than would an image of the same place without people.  Here I’ve included my daughters in a landscape from the incomparable summit of Sentinel Dome.

Including people in landscapes layers a human narrative on top of the natural story.  I like the added color, and humor, from the addition of my daughters in their college logo hats.  I’ve chosen a wide aperture to soften the focus on the lovely background.  Buy this photo

You don’t have to stop shooting when the sun sets.  Some of the most wonderful images of Yosemite are made after dark.  I came to this spot not far from the edge of the meadow in Yosemite Valley, and right on the bank of the Merced River, quite late at night when the sky was very dark.  I set up my camera and wide-angle lens on a tripod and made a 25-second exposure at a high sensitivity (ISO) setting.  The resulting image shows the spectacle of the Milky Way arched above the terrestrial grandeur of Half Dome and other Yosemite landforms.  For more discussion of capturing the Milky Way, visit this post: Milky Way photography post.

A favorite image of mine: The Milky Way above Half Dome.  Note that not every landscape image needs to be in “landscape orientation”.  Buy this photo

Next time you are fortunate enough to visit Yosemite National Park, try to discover some new places, visit favorite places during less-visited times of the day (or night), and include some people for a human component to the story.  Your images will stand out from the millions of others made in this glorious park!

Do you have a favorite photographic experience from Yosemite to share?  Please leave a comment to let us know.

Want to see more posts on great travel photography destinations?  See them all here: http://www.to-travel-hopefully.com/category/destinations/.


In the Nik of Time [Encore Publication]: Google’s Nik Collection offers leading-edge image editing tools for free

In 2012, Nik Software, a small company known for their image processing tools that emulated the look and feel of using old film, was quietly acquired by a somewhat larger company known as Google.  This past spring, Google announced they were making the entire suite of Nik tools available for free to all users.  I’m just getting around to testing this suite of image editing software now, and from what I’ve seen so far its capabilities are leading-edge and would be well worth spending hundreds of dollars to obtain.  It doesn’t do everything, but what it does, it does better than tools such as Photoshop and Lightroom, each of which costs a good deal of money.  That Nik’s great capabilities are available for download completely gratis is a wonderful gift from the folks at Google, and I strongly recommend you give them a try.

It’s important to note that the Nik Collection of software tools is not intended to be standalone image processing software.  It consists of a set of plugins, each specialized for a different specific purpose, that must be accessed by a general-purpose image editing application such as Photoshop, Lightroom, or Aperture.  I use Lightroom for nearly all of my post-processing, so I used that application to access the Nik Collection.

Once you have your general image editing application installed, then you can download the Nik Collection modules for free at this site: https://www.google.com/nikcollection/.  When you are working in your application of choice, you will then have access to the various Nik Collection tools in the editing menus.  For example, when I select an image in Lightroom, I can access six of the seven Nik modules by pulling down the “Photo” menu and then pulling down the “Edit In” sub-menu.  One of the Nik modules, the HDR Efex tool, is accessed instead under the “File” and “Export with Preset” menu choices.

These are the seven Nik Collection modules included in the free download:

Analog Efex Pro

Explore the look and feel of classic cameras, films, and lenses.

Color Efex Pro

A comprehensive set of filters for color correction, retouching, and creative effects.

Silver Efex Pro

Master the art of black-and-white photography with darkroom-inspired controls.

Viveza

Selectively adjust the color and tonality of your images without complicated masks or selections.

HDR Efex Pro

From natural to artistic, explore the full potential of HDR photography.

Sharpener Pro

Bring out hidden details consistently with the professional’s choice for image sharpening.

Dfine

Improve your images with noise reduction tailored to your camera.

So far, I’ve played around with just three of these tools.
Silver Efex Pro did a very good job of converting my test images to monochrome.  I’m pretty good at using Lightroom’s tools to convert color images to black-and-white, but they take a lot of practice to master.  In Nik’s Silver Efex module I was able to make some good choices very quickly.  For those who want to fine-tune their black-and-white conversions, there are very good tools for detailed control over the process.
I used Nik’s Dfine module to attempt to reduce noise in a favorite shot of the Milky Way over Yosemite Valley’s Half Dome.  The results of my quick trial looked comparable to what I had done in Lightroom, but I suspect if I took the time to learn the Nik tool more thoroughly, I could end up with even better results.
Finally, I tested Nik’s HDR Efex Pro tool.  This little gem is a joy to use.  Just select the series of shots from which you want to build an HDR (High Dynamic Range) image, export them to HDR Efex, and click a couple of buttons to generate the base HRD image there.  My default image looked pretty good, but the Nik tool has a wide range of presets that allow you to generate different HDR effects with the click of a button.  I tried several of these presets until I found one that perfectly suited the scene.  A few more small tweaks using the detailed adjustment sliders, and I was ready to save the HDR image back into Lightroom.  In the past I have been very disappointed with Lightroom’s built-in HDR tools, and only slightly more satisfied with Photoshop’s HDR module, but the Nik HDR Efex Pro plugin does an amazing job.  It’s both easier to use and generates better results than the other HDR software I’ve used.  Specifically, the Nik tool does a much better job than the other tools at producing natural-looking colors and at removing the “ghosting” effects from when the underlying images are just a little bit different from one another.  Now I’m eager to find the time to go back to some of my favorite HDR images and rebuild them using the Nik software!
For comparison, here is a favorite HDR image of mine, first shown after processing in Photoshop’s HDR tools and then shown after processing in Nik’s HDR Efex Pro tools.
lrwm-lowres-5884This HDR image of Lago Grey with its glacier and the peaks of Torres del Paine National Park in Chile was processed using Photoshop’s HDR tools.  The colors appear unnaturally saturated and parts of the image (especially the tops of the mountains and the brush in the foreground) show some ghosting effects.
lrwm-lowres-5880-5884-hdrnikThis version was processed using the Nik Collection’s HDR Efex Pro tools.  The colors look much more natural and all parts of the image appear sharp and free from ghosting.
I am looking forward to revisiting many of my favorite images and reprocessing them using the Nik Collection’s tools.  I highly recommend this versatile, easy-to-use, and powerful suite of image editing modules.  And the price can’t be beat.
Have you used the Nik Collection for your own photography?  What do you like and dislike?  Please share your thoughts here.
Want to read more posts about post-processing your images?  Find them all here: Posts on Post-Processing.

In the Nik of Time [Encore Publication]: Google’s Nik Collection offers leading-edge image editing tools for free

In 2012, Nik Software, a small company known for their image processing tools that emulated the look and feel of using old film, was quietly acquired by a somewhat larger company known as Google.  This past spring, Google announced they were making the entire suite of Nik tools available for free to all users.  I’m just getting around to testing this suite of image editing software now, and from what I’ve seen so far its capabilities are leading-edge and would be well worth spending hundreds of dollars to obtain.  It doesn’t do everything, but what it does, it does better than tools such as Photoshop and Lightroom, each of which costs a good deal of money.  That Nik’s great capabilities are available for download completely gratis is a wonderful gift from the folks at Google, and I strongly recommend you give them a try.

It’s important to note that the Nik Collection of software tools is not intended to be standalone image processing software.  It consists of a set of plugins, each specialized for a different specific purpose, that must be accessed by a general-purpose image editing application such as Photoshop, Lightroom, or Aperture.  I use Lightroom for nearly all of my post-processing, so I used that application to access the Nik Collection.

Once you have your general image editing application installed, then you can download the Nik Collection modules for free at this site: https://www.google.com/nikcollection/.  When you are working in your application of choice, you will then the various Nik Collection tools in the editing menus.  For example, when I select an image in Lightroom, I can access six of the seven Nik modules by pulling down the “Photo” menu and then pulling down the “Edit In” sub-menu.  One of the Nik modules, the HDR Efex tool, is accessed instead under the “File” and “Export with Preset” menu choices.

These are the seven Nik Collection modules included in the free download:

Analog Efex Pro

Explore the look and feel of classic cameras, films, and lenses.

Color Efex Pro

A comprehensive set of filters for color correction, retouching, and creative effects.

Silver Efex Pro

Master the art of black-and-white photography with darkroom-inspired controls.

Viveza

Selectively adjust the color and tonality of your images without complicated masks or selections.

HDR Efex Pro

From natural to artistic, explore the full potential of HDR photography.

Sharpener Pro

Bring out hidden details consistently with the professional’s choice for image sharpening.

Dfine

Improve your images with noise reduction tailored to your camera.

So far, I’ve played around with just three of these tools.
Silver Efex Pro did a very good job of converting my test images to monochrome.  I’m pretty good at using Lightroom’s tools to convert color images to black-and-white, but they take a lot of practice to master.  In Nik’s Silver Efex module I was able to make some good choices very quickly.  For those who want to fine-tune their black-and-white conversions, there are very good tools for detailed control over the process.
I used Nik’s Dfine module to attempt to reduce noise in a favorite shot of the Milky Way over Yosemite Valley’s Half Dome.  The results of my quick trial looked comparable to what I had done in Lightroom, but I suspect if I took the time to learn the Nik tool more thoroughly, I could end up with even better results.
Finally, I tested Nik’s HDR Efex Pro tool.  This little gem is a joy to use.  Just select the series of shots from which you want to build an HDR (High Dynamic Range) image, export them to HDR Efex, and click a couple of buttons to generate the base HRD image there.  My default image looked pretty good, but the Nik tool has a wide range of presets that allow you to generate different HDR effects with the click of a button.  I tried several of these presets until I found one that perfectly suited the scene.  A few more small tweaks using the detailed adjustment sliders, and I was ready to save the HDR image back into Lightroom.  In the past I have been very disappointed with Lightroom’s built-in HDR tools, and only slightly more satisfied with Photoshop’s HDR module, but the Nik HDR Efex Pro plugin does an amazing job.  It’s both easier to use and generates better results than the other HDR software I’ve used.  Specifically, the Nik tool does a much better job than the other tools at producing natural-looking colors and at removing the “ghosting” effects from when the underlying images are just a little bit different from one another.  Now I’m eager to find the time to go back to some of my favorite HDR images and rebuild them using the Nik software!
For comparison, here is a favorite HDR image of mine, first shown after processing in Photoshop’s HDR tools and then shown after processing in Nik’s HDR Efex Pro tools.
lrwm-lowres-5884This HDR image of Lago Grey with its glacier and the peaks of Torres del Paine National Park in Chile was processed using Photoshop’s HDR tools.  The colors appear unnaturally saturated and parts of the image (especially the tops of the mountains and the brush in the foreground) show some ghosting effects.
lrwm-lowres-5880-5884-hdrnikThis version was processed using the Nik Collection’s HDR Efex Pro tools.  The colors look much more natural and all parts of the image appear sharp and free from ghosting.
I am looking forward to revisiting many of my favorite images and reprocessing them using the Nik Collection’s tools.  I highly recommend this versatile, easy-to-use, and powerful suite of image editing modules.  And the price can’t be beat.
Have you used the Nik Collection for your own photography?  What do you like and dislike?  Please share your thoughts here.
Want to read more posts about post-processing your images?  Find them all here: Posts on Post-Processing.

Focus on Yosemite National Park [Encore Publication]: A photographer’s dream, Yosemite offers so much more than the postcard views

Those of us who live in the San Francisco Bay Area can count many blessings, but one I am most thankful for is our fairly close proximity to Yosemite National Park.  The second oldest national park in the US, Yosemite is a photographer’s dream.  Since the days when Ansel Adams helped make the park famous through his masterful landscape photography, shutterbugs of all stripes have been flocking there to try to capture some of its indescribable beauty.  Most of us will never be an Ansel Adams, but that doesn’t stop me from returning to Yosemite at least once per year to give it my best shot, as it were.

Without doubt, there are many iconic views in the park that are relatively easy for even novice photographers to render.  There is majesty in the panorama over Yosemite Valley as seen from the famous Tunnel View lookout.  One doesn’t even have to venture off the main park road to shoot a nice image of Half Dome or El Capitan.  But Yosemite offers so much more to the photographer who’s willing to look a bit more closely, to hike a little instead of jumping out of a car to shoot, or to come to a spot at unusual times, including the middle of the night.

In this post, I’ll share a few images I made in Yosemite National Park over the past year, but none of them will be a postcard-type shot that you’ve seen 1000 times before.  And we’ll talk a bit about how to find and capture these less discovered views.

While hiking in the Tuolumne Meadows area, 5000 feet above Yosemite Valley, we were caught in a freak hailstorm at the remote Dog Lake.  Instead of throwing a rain cover over my gear and running for shelter like a normal person would do, I set up my kit and started shooting.  This image plays off the contrasts between the peaceful and violent sides of nature and between the light and the shade.  It is a composite of several different shots made at different exposures, put together in Lightroom’s HDR (high dynamic range) merging tool.

Yosemite offers unusual and dramatic views to those willing to get away from the roads and brave some harsher conditions.  Buy this photo

Another less-visited attraction in the park is the wonderful Chilnualna Falls.  The lower waterfall is actually quite an easy hike from the parking area at the trailhead, and its little swimming hole makes for a refreshing break on a hot summer’s day.  Here’s a shot of my younger daughter enjoying a dip in the swimming hole just under the falls.  To blur the water, I used a slow shutter speed, which could only be achieved in the harsh mid-day light by attaching neutral-density filters to the lens.  Neutral-density (ND) filters are an essential accessory for the landscape photographer, because they block most of the available light from reaching the camera’s sensor, allowing you to use a slower shutter speed to blur motion and/or a wider aperture to throw the background out of focus.

These reduce the amount of light that reaches the camera’s sensor, so you can use slower shutter speeds to blur motion, or so you can use a wider aperture to get a shallow depth-of-field, even in bright sunlight.

A neutral-density filter allows a nicely blurred shot of the waterfall at Chilnualna Falls.  Buy this photo

Another lovely hike in the high country of Tuolumne Meadows is Cathedral Lakes.  On our way back from these pristine and remote lakes, we passed this granite rock dome.  I used a polarizing filter on a wide-angle lens to bring out the details on the surface of the rock and to lend more drama to the sky.  Then, in post-processing, I converted the image to black-and-white to emphasize the remarkable texture of the granite slab’s surface.  For more discussion about converting images to black-and-white, take a look at my earlier post: B&W Photography post.

Using a polarizing filter can darken and add drama to skies, reduce unwanted reflections, and render stunning detail on shiny surfaces.  Converting an image to black-and-white can bring out the textures and patterns that may be less prominent when viewed in a color image.  Buy this photo

Just because a place is glorious in its own right doesn’t mean we can’t include people in our photos.  Putting humans in a landscape adds a personal touch, provides a sense of scale, and often tells a more compelling story than would an image of the same place without people.  Here I’ve included my daughters in a landscape from the incomparable summit of Sentinel Dome.

Including people in landscapes layers a human narrative on top of the natural story.  I like the added color, and humor, from the addition of my daughters in their college logo hats.  I’ve chosen a wide aperture to soften the focus on the lovely background.  Buy this photo

You don’t have to stop shooting when the sun sets.  Some of the most wonderful images of Yosemite are made after dark.  I came to this spot not far from the edge of the meadow in Yosemite Valley, and right on the bank of the Merced River, quite late at night when the sky was very dark.  I set up my camera and wide-angle lens on a tripod and made a 25-second exposure at a high sensitivity (ISO) setting.  The resulting image shows the spectacle of the Milky Way arched above the terrestrial grandeur of Half Dome and other Yosemite landforms.  For more discussion of capturing the Milky Way, visit this post: Milky Way photography post.

A favorite image of mine: The Milky Way above Half Dome.  Note that not every landscape image needs to be in “landscape orientation”.  Buy this photo

Next time you are fortunate enough to visit Yosemite National Park, try to discover some new places, visit favorite places less visited times of the day (or night), and include some people for a human component to the story.  Your images will stand out from the millions of others made in this glorious park!

Do you have a favorite photographic experience from Yosemite to share?  Please leave a comment to let us know.

Want to see more posts on great travel photography destinations?  See them all here: http://www.to-travel-hopefully.com/category/destinations/.

I See a Red Door and I Want to Paint It Black [Encore Publication]: When a black-and-white image is better than color, and how to convert to B&W

Back in the day, a photographer had to choose in advance whether to shoot with color film or black-and-white film.  Conversions from color to B&W were cumbersome and expensive, and conversions from B&W to color were essentially impossible.  During the film era, I typically shot exclusively using color transparency film while traveling, and reserved B&W photography for particularly artistic shoots near home.

Thankfully, in today’s digital world, we no longer have to commit ourselves in advance to monochrome vs. color images.  It’s now a simple procedure to convert our color images to B&W during post-processing.  And that’s a great blessing, because there are plenty of times when a black-and-white photo is better than a color photo.

Consider the image of the alligator at the start of this post.  One of my favorite photos, this one works just fine in color, too.  But the real power of the image is revealed in B&W through the striking textures of the alligator’s skin as seen above the water and as reflected off the water’s surface.  The background above the water fades to a deep, nearly true, black, with the background of the water itself rendered slightly less darkly and showing some nice ripples of motion.  Black-and-white photography is especially powerful when there are contrasts of pattern, texture, and background as in this image.  Buy this photo

When else might we want to render an image in B&W?

Portraits made in monochrome have a timeless look that evokes the earlier years of photography, and this rendering can also bring out the true nature of the subject.  There’s a lovely look to the skin tones and hair when displayed in B&W, and there are fewer distracting elements from the color of clothing or background objects.

This portrait takes on a vintage, timeless look when shown in B&W.  Our eye can focus on the model’s face and hair without the distractions of the colors in her sweater or the building.  There’s almost a street photography kind of documentary quality to this image in monochrome that is lost when viewed in color.  Buy this photo

Color can be distracting in an image where we want to emphasize the essence of a person or place.  In this portrait I made recently for a couple who are fellow musicians and friends of mine, we had beautiful “golden hour” light to work with, and the background and clothing worked well in color.  But converted to B&W, this image really places the emphasis on the couple without the distractions of the color cast in the reflections off the eyeglasses or of the mixed lighting in the background.

In this portrait, black-and-white presentation places the viewer’s attention squarely on the the couple and their instruments, without distractions from the multiple colors of the clothing and background components.  (Client photo not available for purchase.)

When you’re shooting under “mixed lighting”, which means there are multiple light sources with different color temperatures (i.e., some light sources are warmer and others are cooler), converting the image to B&W can be a real problem solver.  Consider the image below, made in Bruges at night.  The light from the street lamps was warmer than the light coming from the spotlights on various buildings, and there was also a bright moon that night, so when seen in color the photo would look less appealing due to the contrasting of the color temperatures in the different parts of the image.  But viewed in B&W, it brings out the grandeur of the old buildings and the beauty of the reflections in the waters of the canal, without the distractions of the color casts.

This image of Bruges at night, when processed in B&W, removes the contrasting color temperatures of the multiple different light sources and allows the viewer to enjoy the stately old buildings with consistent tone and texture.  Buy this photo

Now that we’ve covered a few of the many situations in which a black-and-white image is preferable over a color image, let’s look at how to convert from color to B&W.  There are many ways to perform this conversion, but I recommend it be done using the Color Adjustments settings in the Develop module of Adobe Lightroom.  Here’s how:

Click on the “B&W” tab above the individual color channel sliders, and then adjust the mix of how the colors are blended by increasing or decreasing each color’s slider to see how the black-and-white image looks.  I find that I often have to readjust the contrast slider at this point to get the image looking its best in black-and-white.

For more on using Lightroom to post-process your images, check out my previous post: Previous post on using Lightroom to post-process images.

I do not recommend using your camera’s built-in black-and-white mode, as you will then lose the color information in the image file.  I also do not suggest using the settings some cameras have to make a copy of the image in B&W, because in most cases the camera’s built-in software will not do a very good job of rendering the image in monochrome.  For the best results, either use Lightroom or a dedicated black-and-white conversion application such as Silver Efex Pro 2 from Nik Software, which is available as a plug-in for Lightroom or Photoshop.

Want to read other posts about travel photography techniques?  Find them all here: http://www.to-travel-hopefully.com/category/techniques/

What do you love about a black-and-white image?  When do you convert an image to B&W rather than share it in color?  Any tips or tricks for how to make great B&W photos?  Please share your thoughts in the comment box!