Capturing the Creative Process [Encore Publication]: How to document an artist’s work using your own artistic vision

Capturing images of the performing arts is a specialty of mine, as well as one of my absolute favorite genres of photography.  But as gratifying as I find documenting live performances of dance, music, or theater, there’s a whole higher level of photographic joy available from capturing the artist’s creative process before their work reaches a public audience.  Today’s post focuses on a recent behind-the-scenes shoot that I did for a friend and longtime collaborator, Arina Hunter.

I arranged to shoot her dress rehearsal just before the first of two public performances as part of San Francisco’s SAFEhouse for the Arts RAW (Resident Artist Workshop) program.  Arina was preparing to perform an untitled work-in-progress which was quite complicated technically, so it was fascinating to watch her process of making artistic decisions and readying herself and the technical crew for the evening’s show.

Read on to see some of my favorite images from the rehearsal, accompanied by a few thoughts about my own artistic and technical process that went into the capture of Arina’s work.

All of these images are available for sale on my website.  Just click on any image to view them in the online gallery.

The creative process is about more than just practicing for a performance.  Try to include some wider views depicting the artist’s full environment including equipment, sets, and performance space.

The flip side is that it’s also important to get up-close and to capture the physical work that goes into preparing for a performance.

Shoot plenty of frames to maximize the chances of capturing the “decisive moment” when the artist’s work comes together as an integrated whole.

Typically there are several different moods evoked in a single piece of art.  This image captures a vulnerability and poignancy that informed Arina’s work even as much of her physical performance exudes strength.  Finding the right perspective to convey each mood is key to making successful images.

When post-processing my images, I ask myself how can my own technique best convey the artist’s intention.  For this image I decided a monochrome conversion would best render Arina’s physicality at this precise moment during her process.  Freeing the viewer from the anchor of color perception, a black-and-white image is graphic and timeless and allows us to focus on what is elemental: form, contrast, shadow, and light.  

I shot this image from a low perspective near the ground so as to juxtapose Arina’s body with the projected video image on the wall.  Always look for a different perspectives while shooting that can create compositions to get across your intent.

Another example of perspective: To make this image I climbed on top of a chair and shot down on Arina in her performance space. 

Sometimes the details convey the story better than the whole.  This closeup of Arina’s paint-covered hand framed by colorful canvas makes a powerful summary of her performance piece.

Today’s post has been a bit more conceptual and less technical than most of my posts.  The purpose is to get you thinking about how our own art of photography can be harnessed to capture the creative process of other artists.  The next time you are privileged to get to shoot an artist at work, think about how you can apply elements such as composition, perspective, color, texture, empty space, motion, and stasis to capture compelling images of the artist’s own vision!

Do you have techniques you’ve used to document other artists’ creative process?  Please share your thoughts here.

Want to read other posts about photographic techniques?  Find them all here: Posts about techniques.


Capturing the Creative Process: How to document an artist’s work using your own artistic vision

Capturing images of the performing arts is a specialty of mine, as well as one of my absolute favorite genres of photography.  But as gratifying as I find documenting live performances of dance, music, or theater, there’s a whole higher level of photographic joy available from capturing the artist’s creative process before their work reaches a public audience.  Today’s post focuses on a recent behind-the-scenes shoot that I did for a friend and longtime collaborator, Arina Hunter.

I arranged to shoot her dress rehearsal just before the first of two public performances as part of San Francisco’s SAFEhouse for the Arts RAW (Resident Artist Workshop) program.  Arina was preparing to perform an untitled work-in-progress which was quite complicated technically, so it was fascinating to watch her process of making artistic decisions and readying herself and the technical crew for the evening’s show.

Read on to see some of my favorite images from the rehearsal, accompanied by a few thoughts about my own artistic and technical process that went into the capture of Arina’s work.

All of these images are available for sale on my website.  Just click on any image to view them in the online gallery.

The creative process is about more than just practicing for a performance.  Try to include some wider views depicting the artist’s full environment including equipment, sets, and performance space.

The flip side is that it’s also important to get up-close and to capture the physical work that goes into preparing for a performance.

Shoot plenty of frames to maximize the chances of capturing the “decisive moment” when the artist’s work comes together as an integrated whole.

Typically there are several different moods evoked in a single piece of art.  This image captures a vulnerability and poignancy that informed Arina’s work even as much of her physical performance exudes strength.  Finding the right perspective to convey each mood is key to making successful images.

When post-processing my images, I ask myself how can my own technique best convey the artist’s intention.  For this image I decided a monochrome conversion would best render Arina’s physicality at this precise moment during her process.  Freeing the viewer from the anchor of color perception, a black-and-white image is graphic and timeless and allows us to focus on what is elemental: form, contrast, shadow, and light.  

I shot this image from a low perspective near the ground so as to juxtapose Arina’s body with the projected video image on the wall.  Always look for a different perspectives while shooting that can create compositions to get across your intent.

Another example of perspective: To make this image I climbed on top of a chair and shot down on Arina in her performance space. 

Sometimes the details convey the story better than the whole.  This closeup of Arina’s paint-covered hand framed by colorful canvas makes a powerful summary of her performance piece.

Today’s post has been a bit more conceptual and less technical than most of my posts.  The purpose is to get you thinking about how our own art of photography can be harnessed to capture the creative process of other artists.  The next time you are privileged to get to shoot an artist at work, think about how you can apply elements such as composition, perspective, color, texture, empty space, motion, and stasis to capture compelling images of the artist’s own vision!

Do you have techniques you’ve used to document other artists’ creative process?  Please share your thoughts here.

Want to read other posts about photographic techniques?  Find them all here: Posts about techniques.


ProCam 4 Update: Still the best iOS camera app I’ve ever used

I’ve been using the ProCam 4 iOS app for nearly two months now, and today’s post provides a brief update to my previous product review.  My original review can be found just after the quick update.

My already high opinion of ProCam 4 has only been enhanced further after spending several weeks using it in the field.  It’s rare to find an app that combines such a high degree of functionality with such an easy-to-use interface.  While I don’t use the in-app editing features, preferring to use Adobe Lightroom for my post-processing whenever possible, I’ve been using most of ProCam 4’s other powerful features including the manual control over ISO, shutter speed, white balance, and flash; capture in RAW+JPEG formats; exposure bracketing; and the different shutter release options.  Everything is pretty intuitive to use and it’s a joy to shoot with because all the main features are readily accessible “on the fly”.  The resulting images are higher quality than those I’ve been able to obtain with the same iPhone 6S camera hardware controlled by other apps.  Overall, I continue to believe ProCam 4 is the best iOS camera app I’ve seen.

Note to Android users: As far as I know, ProCam 4 still is not available for Android devices.

One more note: With this week’s release of iOS 10.2, there is some enhanced support for RAW capture, but the built-in Apple Camera app still does not support RAW mode, so you will continue to need to use a third-party iOS camera app to capture images in RAW.  I recommend ProCam, but there are many choices out there.

My original product review of the ProCam 4 app follows:

I’ve posted repeatedly about the importance of understanding how to take manual control of your camera in order to make images that are properly exposed and focused.  Whether you are using a professional DSLR, an advanced full-frame mirrorless ILC, a compact point-and-shoot, or the camera built into your smart phone, there is no way you will get consistently acceptable results if you leave the camera’s settings to its auto mode.  See this post for an overview: Post on Beyond the Auto Mode.

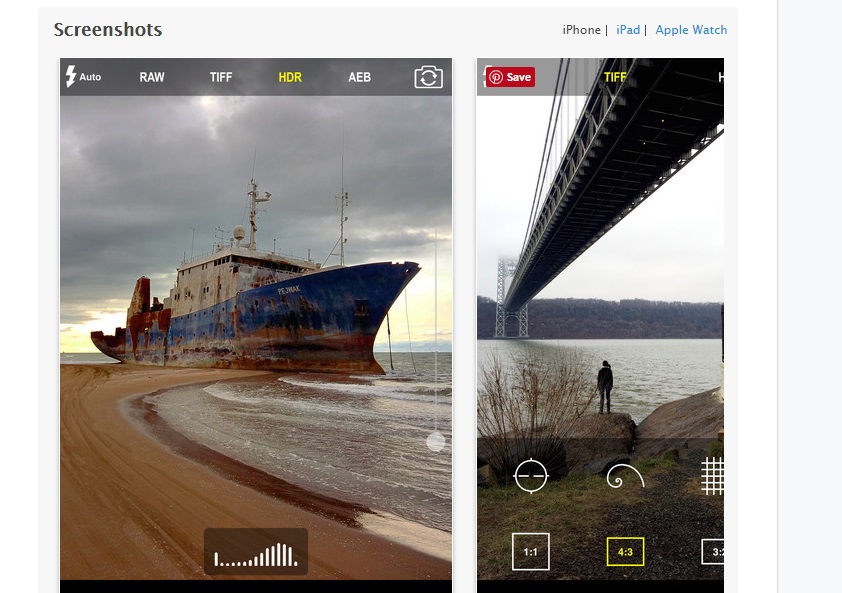
For the past two days I have been testing an iPhone app called “ProCam 4”, which is by far the best iOS camera app I’ve ever used.  Like the “Manual” camera app that I’ve been using for years, ProCam 4 allows the manual selection of ISO, shutter speed, exposure compensation, and focus distance (note that the iPhone camera’s lens has a fixed aperture, so F-stop cannot be manually set).  Also like the Manual app, ProCam 4 allows images to be captured using RAW mode, which has a great many advantages over capture in JPEG format (see this post for more information: Post on Raw Mode).  And both of these camera apps display a histogram to assist in setting exposure properly.  

But ProCam 4 offers far more functionality than does the Manual app or any other iOS camera app I’ve tried.  Here is a partial list of some of my favorite additional features:

  • Shutter Priority: You can choose an exposure mode in which you select the shutter speed first and the app will set the appropriate ISO.
  • Exposure Bracketing: You can shoot a series of four shots at different exposures to increase the likelihood that one of them will be at the best exposure for the lighting conditions.  The series of shots can also be combined using HDR tools found in Lightroom, Photoshop, and other editing software into a single image with a higher range of tones from very dark to very bright.
  • White Balance: You can adjust white balance in the app, which is often preferable to having to adjust it in your RAW files during post-processing.
  • Virtual Horizon: The display can show you when the horizon is level.
  • Slow Shutter Options: You can select long fixed shutter speeds as well as bulb mode to keep the shutter open for as long as you’d like.
  • RAW+JPEG: You can choose to store the image in both RAW and JPEG formats.
  • Editing Options: This app provides many advanced in-camera editing tools and filters.

With all this incremental functionality, your little phone’s camera begins to behave a lot like a more advanced standalone camera.  While the iPhone’s camera, with its small sensor and its tiny fixed-aperture non-interchangeable lens, still cannot compare to a professional or enthusiast DSLR or ILC camera, the results using ProCam 4 are vastly improved compared to using the phone’s native camera app.  At $4.99 to purchase via the iTunes Store, this app is a great buy and a serious enhancement to the iPhone’s built-in camera.

You can find the ProCam 4 app here: ProCam 4 app.

What app do you use to control your phone’s camera?  What do you like and dislike about it?  Please share your thoughts here.

Want to read more posts about photography gear?  Find them all here: Posts on Gear.

News Flash–RAW Capture on iOS Devices: Apple has quietly released the capability to shoot in RAW mode on iPhones and iPads

With the quiet recent announcement that Apple will support RAW image file capture on iPhone 6 and above (only with iOS 10 and only using certain third-party capture apps, not the built-in Apple camera app), smartphone photography becomes an even better option for serious photographers.  Of course, users of certain Android devices have had the capability of capturing RAW images for almost two years, but for those of us who use the iOS devices, this is big news.

To learn more about the benefits of shooting in RAW mode on any camera, read this post: Post on RAW Capture.  Because compressed image file formats like JPEG are destructive (every time they are edited and saved, more information is lost forever) and because these formats initially throw away much of the data from the camera’s sensor, RAW files allow photographers much more control over how our images look.  The addition of RAW capture to iPhones is a significant step for photographers seeking to make the best possible images using their mobile device’s built-in camera.

In order to use RAW capture, there are several conditions that must be met.  You must have a late-generation iPhone, specifically a Generation 6 or later model (6S, 6S Plus, or when available, the new iPhone 7).  You must be using the newly released iOS 10.  And you must install an app that supports RAW capture on your phone’s camera, because Apple’s built-in camera app does not yet support RAW shooting.  I use the excellent app called “Manual,” available for $3.99 via the App Store: Manual Camera App.  In addition to allowing you to capture both RAW and JPEG files for each shot you make, this app also gives you full manual control over your camera’s basic features, including focus, ISO, and shutter speed.

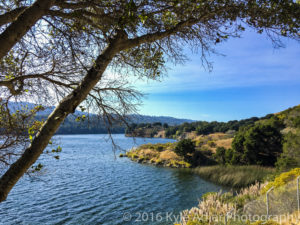
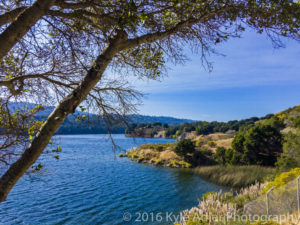
I made a few images using both RAW and JPEG capture, so we can compare them.  The upper image is the JPEG, and the lower one is the RAW file.  Both were processed the same way in Lightroom.  At the size and resolution shown in this post, you may not notice a huge difference in quality, but the differences would become very apparent if we were to magnify or crop the image, or if the image were shot under very challenging lighting conditions.  Even so, to my eye the RAW file shows more subtlety in the rendition of texture and color, and the transitions between areas of sky or water are more natural looking.

lrwm-3472

The JPEG version of the image has more jarring transitions between areas of different colors or textures.  

lrwm-0045

The RAW version of the same image, post-processed in the same way, shows more evenness and subtlety.  These differences would become much more apparent with larger images or those shot under challenging lighting conditions.

Please review this post for more information about making the best images possible when using your smartphone’s camera: Post on Using Your Phone’s Camera.  With the addition of RAW image capture, the phone’s camera becomes even more attractive as a tool for serious photography, although it still isn’t a full substitute for an excellent quality interchangeable lens camera with a larger, better sensor.

Have you worked with RAW capture on your iOS device?  Any tips or tricks about how to streamline workflow?  What do you like or dislike about the process?  Please share your experiences here.