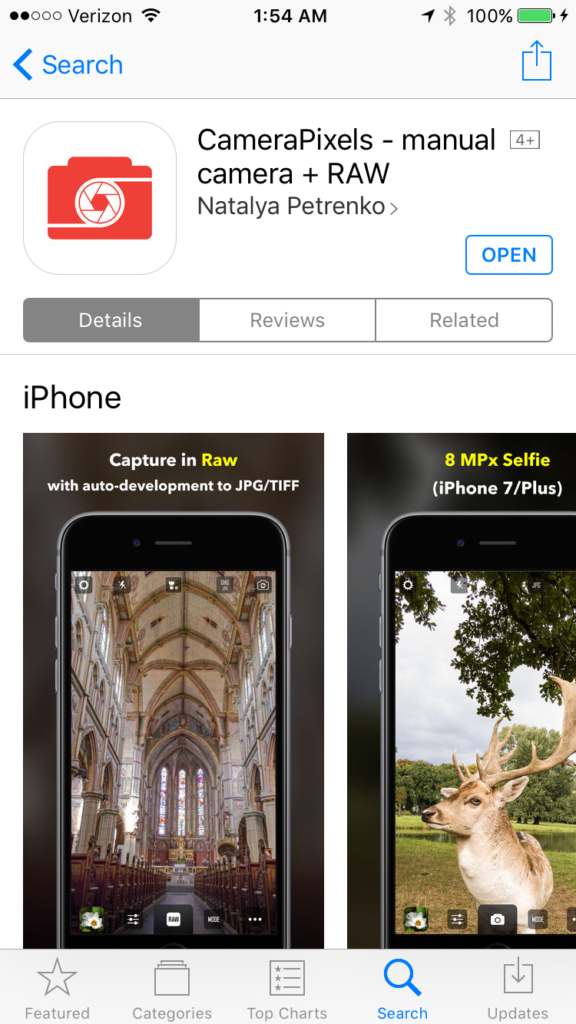
Camera Pixels App (Updated Review): Significant improvements in the new version make this a best-in-class app

I’ve posted repeatedly about the importance of understanding how to take manual control of your camera in order to make images that are properly exposed and focused.  Whether you are using a professional DSLR, an advanced full-frame mirrorless ILC, a compact point-and-shoot, or the camera built into your smart phone, there is no way you will get consistently acceptable results if you leave the camera’s settings to its auto mode.  See this post for an overview: Post on Beyond the Auto Mode.

About three months ago, I posted a review of an early version of an iPhone app called “Camera Pixels”.  In that review, I found the app to be a very promising concept due to its advanced DSLR-like features and intuitive controls, but I couldn’t fully endorse it in the earlier version because I found several bugs and interface quirks.  You can read that earlier review here: Previous review of early version of Camera Pixels app.  Since that review was published, I have had several discussions with the Camera Pixels support team to detail my concerns about the various issues I found.

For the past two days I have been testing a new version of the Camera Pixels app, and I can now recommend it wholeheartedly.  The new release preserves the advanced features and (relatively) simple interface of the earlier version, but it has addressed all of the significant issues I outlined in my review of the previous release.  Specifically:

  • the image flicker in the “viewfinder” area of the screen has been eliminated,
  • the bracketing of exposures now retains the proper requested spacing (unless at a physical limit of a setting),
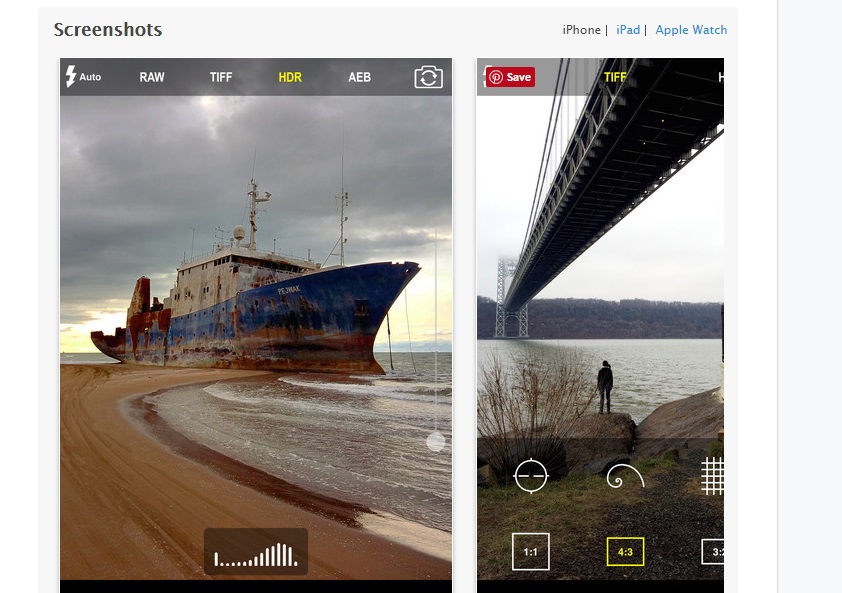
  • there is a new “Pro View” mode that keeps the manual settings toolbar always on the screen so any manual overrides are immediately apparent, and
  • the controls to separate the exposure point from the focus point are now more intuitive.

Like the “Manual” camera app that I’ve been using for years and the “ProCam 4” app that has been my go-to camera control app for the past several months, the new “Camera Pixels” app allows the manual selection of ISO, shutter speed, exposure compensation, and focus distance (note that the iPhone camera’s lens has a fixed aperture, so F-stop cannot be manually set).  Also like the Manual app and the ProCam 4 app, Camera Pixels allows images to be captured using RAW mode, which has a great many advantages over capture in JPEG format (see this post for more information: Post on RAW Capture).  And all three of these camera apps display a histogram to assist in setting exposure properly.  

In addition, both Camera Pixels and ProCam 4 (but not Manual) offer some very useful advanced camera control capabilities, including the following:

  • Shutter Priority: You can choose an exposure mode in which you select the shutter speed first and the app will set the appropriate ISO.
  • Exposure Bracketing: You can shoot a series of four shots at different exposures to increase the likelihood that one of them will be at the best exposure for the lighting conditions.  The series of shots can also be combined using HDR tools found in Lightroom, Photoshop, and other editing software into a single image with a higher range of tones from very dark to very bright.
  • White Balance: You can adjust white balance in the app, which is often preferable to having to adjust it in your RAW files during post-processing.
  • Virtual Horizon: The display can show you when the horizon is level.
  • Slow Shutter Options: You can select long fixed shutter speeds as well as bulb mode to keep the shutter open for as long as you’d like.
  • RAW+JPEG: You can choose to store the image in both RAW and JPEG formats.

With all this incremental functionality, your little phone’s camera begins to behave a lot like a more advanced standalone camera.  While the iPhone’s camera, with its small sensor and its tiny fixed-aperture non-interchangeable lens, still cannot compare to a professional or enthusiast DSLR or ILC camera, the results using an advanced manual camera control app such as Camera Pixels or ProCam 4 are vastly improved compared to using the phone’s native camera app.  At iTunes App Store pricing of $2.99 for Camera Pixels or $4.99 (temporarily reduced to $1.99) for ProCam 4, either of these apps is a great buy and a serious enhancement to the iPhone’s built-in camera.

There are some significant differences between Camera Pixels and ProCam 4.  ProCam 4 offers advanced image editing capabilities, while Camera Pixels does not.  However, Camera Pixels offers more flexible exposure bracketing options, the ability to separate exposure point from focus point, a better histogram, and more advanced RAW and video shooting options.  And a significant advantage of the new Camera Pixels app over ProCam 4 is its simple and intuitive user interface for setting and resetting the manual camera control features such as exposure compensation, shutter priority, and ISO priority.  In fact, the Camera Pixels app comes the closest I’ve ever found to the user interface of an advanced DSLR or mirrorless camera.

One note to enhance the usability of the Camera Pixels app: As far as I can tell, there is no built-in help content in the app itself, but there is a very useful online user guide available from the app’s developers.  You can find the user guide here: Camera Pixels app user guide.

In summary, the new Camera Pixels app is a great concept that comes closest of any camera control app I’ve found to the look-and-feel of an advanced standalone camera.  With the greatly improved new release, Camera Pixels has become the best option I’ve found for iPhone users wishing to control the phone’s built-in camera like an advanced DSLR or mirrorless standalone camera.  I now fully recommend this app, and I plan to use it as my first choice for advanced control of my iPhone’s camera.

Here’s the link to the Camera Pixels app on the Apple App Store: Camera Pixels app.

What app do you use to control your phone’s camera?  What do you like and dislike about it?  Please share your thoughts here.

Want to read more posts about photography gear?  Find them all here: Posts on Gear.


Followup–To JPEG or Not to JPEG [Encore Publication]: For many RAW shooters there is no need to use RAW+JPG

A few months ago, I published the following post in which I explained why I was transitioning away from shooting RAW+JPEG to shooting only in RAW format.  Just a quick follow-up to share that since then, I have executed several dozen photo shoots in RAW mode only, and I also have gone back to nearly all my archives of older shoots and deleted all the JPEG files where the same image was also stored in RAW format.  What are the results so far?  I’ve recovered about 20% of my hard disk drive’s space, so everything now runs faster on my PC and I’m not always struggling to free up enough space for each day’s new shots.  Furthermore, my shoots are going more smoothly because I don’t need to wait for the camera’s buffer to clear as it attempts to write both RAW and JPEG versions of each image to the memory card, and because I don’t need to change memory cards nearly as often.  And I’m happy to report that thus far I have had absolutely no issues as a result of making this major change to my workflow.  If you’re still shooting RAW+JPEG, now may be a good time to examine whether the extra burden is worthwhile in your own workflow.  The original article from two weeks ago follows.

=======ORIGINAL POST FROM FEB. 4, 2017=======

Regular readers of To Travel Hopefully already know that I always shoot in RAW mode, and most likely you do, too.  I’ve written repeatedly about the major advantages of RAW vs. JPEG format.  For a refresher, here’s a good summary post on the topic: Post on RAW Mode.  I concluded this previous post with a recommendation to shoot in RAW+JPEG mode, where the camera writes out the image data in both its native RAW format and in the familiar but problematic JPEG mode.  Here’s the relevant paragraph from that older post:

I recommend shooting in RAW+JPEG all the time, unless you know you will need the slightly faster shooting speed or extra storage space of JPEG alone.  Doing so will give you the best of both worlds: a quick and easy JPEG to share right out of the camera, and the much more detailed data in the RAW file from which to bring out the nuances in color, texture, and exposure later during post-processing.  If you use JPEG alone, you’ll be throwing away image information you may wish you had later.

But right now, I’m in the middle of making a major transition in my workflow.  I’ve stopped shooting in RAW+JPEG mode and am now storing my images only as RAW files.  Moreover, I’m cleaning up my PC’s hard drive by revisiting many of my directories from shoots over the past few years and deleting all of the original JPEG files (obviously, I am keeping the JPEGs that I exported from Lightroom after post-processing the original RAW files).

Why would I do such a thing, you may ask?  There are several major reasons:

  • I don’t end up using the JPEG files: Shooting in RAW+JPEG had become a crutch for me.  I had been using this mode because I was afraid of not having JPEG versions of all my images, in case I decided post-processing the RAW files was too much work or if I wanted to share certain images right out of the camera.  But I’ve been realizing that I never share JPEGs right after shooting.  They just don’t look good enough for most professional work, so I need to post-process the good ones before delivering them to anyone.  You may have clients who need to see some rough JPEGs immediately after the shoot.  I know some wedding photographers who promise this immediate preview to their clients.  But I don’t have this requirement, so the JPEGs were just sitting on my hard drive, unused, forever.  And it’s so easy to export quick-and-dirty JPEG files from Lightroom shortly after the shoot.
  • Duplicate JPEG files slow down shooting: The RAW+JPEG mode tells the camera to write out two different formats for every image you shoot.  This slows down your shooting by bogging down the camera’s processor, and it also fills up the camera’s buffer more quickly, requiring a disruptively long wait to resume shooting.  It also fills up memory cards more quickly.  While JPEG sizes vary from image to image due to compression algorithms, I find they average about 1/3 to 1/2 the size of my camera’s RAW files.  That’s a lot of extra space on the memory card, so I have to stop shooting to change cards more often.
  • Duplicate JPEG files take up a lot of disk space: Even though my main laptop PC has a 1.5 TB hard disk drive, I find it is always filling up, which considerably slows down workflow and requires bothersome housekeeping to clean up.  Storing unneeded JPEG versions of my many tens of thousands of images wastes a lot of disk space.
  • Those JPEGs slow down workflow: Even though Lightroom has a useful option to import only the RAW version into your catalog, and it keeps track of the duplicate JPEG version of the same image, having both files on your hard drive still slows down post-processing and image maintenance tasks.

I know that some photographers really do need to have JPEG files of their images.  They may be delivering images right out of the camera via a wireless connection to a cloud server that supports only JPEG format.  They may not get to post-processing for some time after the shoot and want to remember what the image looked like with the camera’s settings applied (although here one should note that Lightroom and other RAW viewers will access your camera’s settings via the thumbnail image embedded within your image’s RAW file).  They may really love their camera’s black-and-white conversion tool or other in-camera editing tools, which work only with the JPEG format.  There are quite a few situations in which you may truly require a JPEG version of your images.  But I haven’t encountered these situations in my own recent work and don’t expect to in the foreseeable future.

So, that’s the backstory on why I’m moving from shooting RAW+JPEG to RAW only.  I’m even taking the drastic step of going back to recent shoot directories on my PC and deleting the original JPEG versions of the images.  I’ll report back in a few weeks to provide an update on how this works out for me.  In the meantime, if you’re shooting in RAW+JPEG mode, you may also want to think about whether doing so genuinely helps your workflow or simply is wasting your resources.

Do you shoot RAW+JPEG, RAW only, or some different format?  Why?  Please share your experiences here.

Want to read more posts about photographic techniques?  Find them all here: Posts on Techniques.

Camera Pixels App (Updated Review): Significant improvements in the new version make this a best-in-class app

I’ve posted repeatedly about the importance of understanding how to take manual control of your camera in order to make images that are properly exposed and focused.  Whether you are using a professional DSLR, an advanced full-frame mirrorless ILC, a compact point-and-shoot, or the camera built into your smart phone, there is no way you will get consistently acceptable results if you leave the camera’s settings to its auto mode.  See this post for an overview: Post on Beyond the Auto Mode.

About three months ago, I posted a review of an early version of an iPhone app called “Camera Pixels”.  In that review, I found the app to be a very promising concept due to its advanced DSLR-like features and intuitive controls, but I couldn’t fully endorse it in the earlier version because I found several bugs and interface quirks.  You can read that earlier review here: Previous review of early version of Camera Pixels app.  Since that review was published, I have had several discussions with the Camera Pixels support team to detail my concerns about the various issues I found.

For the past two days I have been testing a new version of the Camera Pixels app, and I can now recommend it wholeheartedly.  The new release preserves the advanced features and (relatively) simple interface of the earlier version, but it has addressed all of the significant issues I outlined in my review of the previous release.  Specifically:

  • the image flicker in the “viewfinder” area of the screen has been eliminated,
  • the bracketing of exposures now retains the proper requested spacing (unless at a physical limit of a setting),
  • there is a new “Pro View” mode that keeps the manual settings toolbar always on the screen so any manual overrides are immediately apparent, and
  • the controls to separate the exposure point from the focus point are now more intuitive.

Like the “Manual” camera app that I’ve been using for years and the “ProCam 4” app that has been my go-to camera control app for the past several months, the new “Camera Pixels” app allows the manual selection of ISO, shutter speed, exposure compensation, and focus distance (note that the iPhone camera’s lens has a fixed aperture, so F-stop cannot be manually set).  Also like the Manual app and the ProCam 4 app, Camera Pixels allows images to be captured using RAW mode, which has a great many advantages over capture in JPEG format (see this post for more information: Post on RAW Capture).  And all three of these camera apps display a histogram to assist in setting exposure properly.  

In addition, both Camera Pixels and ProCam 4 (but not Manual) offer some very useful advanced camera control capabilities, including the following:

  • Shutter Priority: You can choose an exposure mode in which you select the shutter speed first and the app will set the appropriate ISO.
  • Exposure Bracketing: You can shoot a series of four shots at different exposures to increase the likelihood that one of them will be at the best exposure for the lighting conditions.  The series of shots can also be combined using HDR tools found in Lightroom, Photoshop, and other editing software into a single image with a higher range of tones from very dark to very bright.
  • White Balance: You can adjust white balance in the app, which is often preferable to having to adjust it in your RAW files during post-processing.
  • Virtual Horizon: The display can show you when the horizon is level.
  • Slow Shutter Options: You can select long fixed shutter speeds as well as bulb mode to keep the shutter open for as long as you’d like.
  • RAW+JPEG: You can choose to store the image in both RAW and JPEG formats.

With all this incremental functionality, your little phone’s camera begins to behave a lot like a more advanced standalone camera.  While the iPhone’s camera, with its small sensor and its tiny fixed-aperture non-interchangeable lens, still cannot compare to a professional or enthusiast DSLR or ILC camera, the results using an advanced manual camera control app such as Camera Pixels or ProCam 4 are vastly improved compared to using the phone’s native camera app.  At iTunes App Store pricing of $2.99 for Camera Pixels or $4.99 (temporarily reduced to $1.99) for ProCam 4, either of these apps is a great buy and a serious enhancement to the iPhone’s built-in camera.

There are some significant differences between Camera Pixels and ProCam 4.  ProCam 4 offers advanced image editing capabilities, while Camera Pixels does not.  However, Camera Pixels offers more flexible exposure bracketing options, the ability to separate exposure point from focus point, a better histogram, and more advanced RAW and video shooting options.  And a significant advantage of the new Camera Pixels app over ProCam 4 is its simple and intuitive user interface for setting and resetting the manual camera control features such as exposure compensation, shutter priority, and ISO priority.  In fact, the Camera Pixels app comes the closest I’ve ever found to the user interface of an advanced DSLR or mirrorless camera.

One note to enhance the usability of the Camera Pixels app: As far as I can tell, there is no built-in help content in the app itself, but there is a very useful online user guide available from the app’s developers.  You can find the user guide here: Camera Pixels app user guide.

In summary, the new Camera Pixels app is a great concept that comes closest of any camera control app I’ve found to the look-and-feel of an advanced standalone camera.  With the greatly improved new release, Camera Pixels has become the best option I’ve found for iPhone users wishing to control the phone’s built-in camera like an advanced DSLR or mirrorless standalone camera.  I now fully recommend this app, and I plan to use it as my first choice for advanced control of my iPhone’s camera.

Here’s the link to the Camera Pixels app on the Apple App Store: Camera Pixels app.

What app do you use to control your phone’s camera?  What do you like and dislike about it?  Please share your thoughts here.

Want to read more posts about photography gear?  Find them all here: Posts on Gear.
 

Camera Pixels App (Updated Review): Significant improvements in the new version make this a best-in-class app

I’ve posted repeatedly about the importance of understanding how to take manual control of your camera in order to make images that are properly exposed and focused.  Whether you are using a professional DSLR, an advanced full-frame mirrorless ILC, a compact point-and-shoot, or the camera built into your smart phone, there is no way you will get consistently acceptable results if you leave the camera’s settings to its auto mode.  See this post for an overview: Post on Beyond the Auto Mode.

About three months ago, I posted a review of an early version of an iPhone app called “Camera Pixels”.  In that review, I found the app to be a very promising concept due to its advanced DSLR-like features and intuitive controls, but I couldn’t fully endorse it in the earlier version because I found several bugs and interface quirks.  You can read that earlier review here: Previous review of early version of Camera Pixels app.  Since that review was published, I have had several discussions with the Camera Pixels support team to detail my concerns about the various issues I found.

For the past two days I have been testing a new version of the Camera Pixels app, and I can now recommend it wholeheartedly.  The new release preserves the advanced features and (relatively) simple interface of the earlier version, but it has addressed all of the significant issues I outlined in my review of the previous release.  Specifically:

  • the image flicker in the “viewfinder” area of the screen has been eliminated,
  • the bracketing of exposures now retains the proper requested spacing (unless at a physical limit of a setting),
  • there is a new “Pro View” mode that keeps the manual settings toolbar always on the screen so any manual overrides are immediately apparent, and
  • the controls to separate the exposure point from the focus point are now more intuitive.

Like the “Manual” camera app that I’ve been using for years and the “ProCam 4” app that has been my go-to camera control app for the past several months, the new “Camera Pixels” app allows the manual selection of ISO, shutter speed, exposure compensation, and focus distance (note that the iPhone camera’s lens has a fixed aperture, so F-stop cannot be manually set).  Also like the Manual app and the ProCam 4 app, Camera Pixels allows images to be captured using RAW mode, which has a great many advantages over capture in JPEG format (see this post for more information: Post on RAW Capture).  And all three of these camera apps display a histogram to assist in setting exposure properly.  

In addition, both Camera Pixels and ProCam 4 (but not Manual) offer some very useful advanced camera control capabilities, including the following:

  • Shutter Priority: You can choose an exposure mode in which you select the shutter speed first and the app will set the appropriate ISO.
  • Exposure Bracketing: You can shoot a series of four shots at different exposures to increase the likelihood that one of them will be at the best exposure for the lighting conditions.  The series of shots can also be combined using HDR tools found in Lightroom, Photoshop, and other editing software into a single image with a higher range of tones from very dark to very bright.
  • White Balance: You can adjust white balance in the app, which is often preferable to having to adjust it in your RAW files during post-processing.
  • Virtual Horizon: The display can show you when the horizon is level.
  • Slow Shutter Options: You can select long fixed shutter speeds as well as bulb mode to keep the shutter open for as long as you’d like.
  • RAW+JPEG: You can choose to store the image in both RAW and JPEG formats.

With all this incremental functionality, your little phone’s camera begins to behave a lot like a more advanced standalone camera.  While the iPhone’s camera, with its small sensor and its tiny fixed-aperture non-interchangeable lens, still cannot compare to a professional or enthusiast DSLR or ILC camera, the results using an advanced manual camera control app such as Camera Pixels or ProCam 4 are vastly improved compared to using the phone’s native camera app.  At iTunes App Store pricing of $2.99 for Camera Pixels or $4.99 (temporarily reduced to $1.99) for ProCam 4, either of these apps is a great buy and a serious enhancement to the iPhone’s built-in camera.

There are some significant differences between Camera Pixels and ProCam 4.  ProCam 4 offers advanced image editing capabilities, while Camera Pixels does not.  However, Camera Pixels offers more flexible exposure bracketing options, the ability to separate exposure point from focus point, a better histogram, and more advanced RAW and video shooting options.  And a significant advantage of the new Camera Pixels app over ProCam 4 is its simple and intuitive user interface for setting and resetting the manual camera control features such as exposure compensation, shutter priority, and ISO priority.  In fact, the Camera Pixels app comes the closest I’ve ever found to the user interface of an advanced DSLR or mirrorless camera.

One note to enhance the usability of the Camera Pixels app: As far as I can tell, there is no built-in help content in the app itself, but there is a very useful online user guide available from the app’s developers.  You can find the user guide here: Camera Pixels app user guide.

In summary, the new Camera Pixels app is a great concept that comes closest of any camera control app I’ve found to the look-and-feel of an advanced standalone camera.  With the greatly improved new release, Camera Pixels has become the best option I’ve found for iPhone users wishing to control the phone’s built-in camera like an advanced DSLR or mirrorless standalone camera.  I now fully recommend this app, and I plan to use it as my first choice for advanced control of my iPhone’s camera.

Here’s the link to the Camera Pixels app on the Apple App Store: Camera Pixels app.

What app do you use to control your phone’s camera?  What do you like and dislike about it?  Please share your thoughts here.

Want to read more posts about photography gear?  Find them all here: Posts on Gear.


Followup–To JPEG or Not to JPEG [Encore Publication]: For many RAW shooters there is no need to use RAW+JPG

A few months ago, I published the following post in which I explained why I was transitioning away from shooting RAW+JPEG to shooting only in RAW format.  Just a quick follow-up to share that since then, I have executed several dozen photo shoots in RAW mode only, and I also have gone back to nearly all my archives of older shoots and deleted all the JPEG files where the same image was also stored in RAW format.  What are the results so far?  I’ve recovered about 20% of my hard disk drive’s space, so everything now runs faster on my PC and I’m not always struggling to free up enough space for each day’s new shots.  Furthermore, my shoots are going more smoothly because I don’t need to wait for the camera’s buffer to clear as it attempts to write both RAW and JPEG versions of each image to the memory card, and because I don’t need to change memory cards nearly as often.  And I’m happy to report that thus far I have had absolutely no issues as a result of making this major change to my workflow.  If you’re still shooting RAW+JPEG, now may be a good time to examine whether the extra burden is worthwhile in your own workflow.  The original article from two weeks ago follows.

=======ORIGINAL POST FROM FEB. 4, 2017=======

Regular readers of To Travel Hopefully already know that I always shoot in RAW mode, and most likely you do, too.  I’ve written repeatedly about the major advantages of RAW vs. JPEG format.  For a refresher, here’s a good summary post on the topic: Post on RAW Mode.  I concluded this previous post with a recommendation to shoot in RAW+JPEG mode, where the camera writes out the image data in both its native RAW format and in the familiar but problematic JPEG mode.  Here’s the relevant paragraph from that older post:

I recommend shooting in RAW+JPEG all the time, unless you know you will need the slightly faster shooting speed or extra storage space of JPEG alone.  Doing so will give you the best of both worlds: a quick and easy JPEG to share right out of the camera, and the much more detailed data in the RAW file from which to bring out the nuances in color, texture, and exposure later during post-processing.  If you use JPEG alone, you’ll be throwing away image information you may wish you had later.

But right now, I’m in the middle of making a major transition in my workflow.  I’ve stopped shooting in RAW+JPEG mode and am now storing my images only as RAW files.  Moreover, I’m cleaning up my PC’s hard drive by revisiting many of my directories from shoots over the past few years and deleting all of the original JPEG files (obviously, I am keeping the JPEGs that I exported from Lightroom after post-processing the original RAW files).

Why would I do such a thing, you may ask?  There are several major reasons:

  • I don’t end up using the JPEG files: Shooting in RAW+JPEG had become a crutch for me.  I had been using this mode because I was afraid of not having JPEG versions of all my images, in case I decided post-processing the RAW files was too much work or if I wanted to share certain images right out of the camera.  But I’ve been realizing that I never share JPEGs right after shooting.  They just don’t look good enough for most professional work, so I need to post-process the good ones before delivering them to anyone.  You may have clients who need to see some rough JPEGs immediately after the shoot.  I know some wedding photographers who promise this immediate preview to their clients.  But I don’t have this requirement, so the JPEGs were just sitting on my hard drive, unused, forever.  And it’s so easy to export quick-and-dirty JPEG files from Lightroom shortly after the shoot.
  • Duplicate JPEG files slow down shooting: The RAW+JPEG mode tells the camera to write out two different formats for every image you shoot.  This slows down your shooting by bogging down the camera’s processor, and it also fills up the camera’s buffer more quickly, requiring a disruptively long wait to resume shooting.  It also fills up memory cards more quickly.  While JPEG sizes vary from image to image due to compression algorithms, I find they average about 1/3 to 1/2 the size of my camera’s RAW files.  That’s a lot of extra space on the memory card, so I have to stop shooting to change cards more often.
  • Duplicate JPEG files take up a lot of disk space: Even though my main laptop PC has a 1.5 TB hard disk drive, I find it is always filling up, which considerably slows down workflow and requires bothersome housekeeping to clean up.  Storing unneeded JPEG versions of my many tens of thousands of images wastes a lot of disk space.
  • Those JPEGs slow down workflow: Even though Lightroom has a useful option to import only the RAW version into your catalog, and it keeps track of the duplicate JPEG version of the same image, having both files on your hard drive still slows down post-processing and image maintenance tasks.

I know that some photographers really do need to have JPEG files of their images.  They may be delivering images right out of the camera via a wireless connection to a cloud server that supports only JPEG format.  They may not get to post-processing for some time after the shoot and want to remember what the image looked like with the camera’s settings applied (although here one should note that Lightroom and other RAW viewers will access your camera’s settings via the thumbnail image embedded within your image’s RAW file).  They may really love their camera’s black-and-white conversion tool or other in-camera editing tools, which work only with the JPEG format.  There are quite a few situations in which you may truly require a JPEG version of your images.  But I haven’t encountered these situations in my own recent work and don’t expect to in the foreseeable future.

So, that’s the backstory on why I’m moving from shooting RAW+JPEG to RAW only.  I’m even taking the drastic step of going back to recent shoot directories on my PC and deleting the original JPEG versions of the images.  I’ll report back in a few weeks to provide an update on how this works out for me.  In the meantime, if you’re shooting in RAW+JPEG mode, you may also want to think about whether doing so genuinely helps your workflow or simply is wasting your resources.

Do you shoot RAW+JPEG, RAW only, or some different format?  Why?  Please share your experiences here.

Want to read more posts about photographic techniques?  Find them all here: Posts on Techniques.

Camera Pixels App Review: A great concept but still needs work

I’ve posted repeatedly about the importance of understanding how to take manual control of your camera in order to make images that are properly exposed and focused.  Whether you are using a professional DSLR, an advanced full-frame mirrorless ILC, a compact point-and-shoot, or the camera built into your smart phone, there is no way you will get consistently acceptable results if you leave the camera’s settings to its auto mode.  See this post for an overview: Post on Beyond the Auto Mode.

For the past two days I have been testing an iPhone app called “Camera Pixels”.  Full Disclosure: The developer of Camera Pixels requested I test their new app and offered me a free download for trial, but to preserve my independence I paid for the download myself.

Like the “Manual” camera app that I’ve been using for years and the “ProCam 4” app that has been my go-to camera control app for the past several months, the new “Camera Pixels” app allows the manual selection of ISO, shutter speed, exposure compensation, and focus distance (note that the iPhone camera’s lens has a fixed aperture, so F-stop cannot be manually set).  Also like the Manual app, ProCam 4 allows images to be captured using RAW mode, which has a great many advantages over capture in JPEG format (see this post for more information: Post on RAW Capture).  And all three of these camera apps display a histogram to assist in setting exposure properly.  

In addition, both Camera Pixels and ProCam 4 (but not Manual) offer some very useful advanced camera control capabilities, including the following:

  • Shutter Priority: You can choose an exposure mode in which you select the shutter speed first and the app will set the appropriate ISO.
  • Exposure Bracketing: You can shoot a series of four shots at different exposures to increase the likelihood that one of them will be at the best exposure for the lighting conditions.  The series of shots can also be combined using HDR tools found in Lightroom, Photoshop, and other editing software into a single image with a higher range of tones from very dark to very bright.
  • White Balance: You can adjust white balance in the app, which is often preferable to having to adjust it in your RAW files during post-processing.
  • Virtual Horizon: The display can show you when the horizon is level.
  • Slow Shutter Options: You can select long fixed shutter speeds as well as bulb mode to keep the shutter open for as long as you’d like.
  • RAW+JPEG: You can choose to store the image in both RAW and JPEG formats.

With all this incremental functionality, your little phone’s camera begins to behave a lot like a more advanced standalone camera.  While the iPhone’s camera, with its small sensor and its tiny fixed-aperture non-interchangeable lens, still cannot compare to a professional or enthusiast DSLR or ILC camera, the results using an advanced manual camera control app such as Camera Pixels or ProCam 4 are vastly improved compared to using the phone’s native camera app.  At iTunes Store pricing of $3.99 for Camera Pixels or $4.99 for ProCam 4, either of these apps is a great buy and a serious enhancement to the iPhone’s built-in camera.

There are some significant differences between Camera Pixels and ProCam 4.  ProCam 4 offers advanced image editing capabilities, while Camera Pixels does not.  However, Camera Pixels offers more flexible exposure bracketing options, the ability to separate exposure point from focus point, a better histogram, and more advanced RAW and video shooting options.  And a significant advantage of the new Camera Pixels app over ProCam 4 is its user interface for setting and resetting the manual camera control features such as exposure compensation, shutter priority, and ISO priority.  In fact, the Camera Pixels app comes the closest I’ve ever found to the user interface of an advanced DSLR or mirrorless camera.

Unfortunately, in its current state I cannot unreservedly recommend the Camera Pixels app.  I encountered too many glitches during my brief testing to be able to give this app a glowing review at this time.  Here are a few of the issues I noted:

  • The “viewfinder” (image preview on the screen) flickers intermittently, which can be very distracting when trying to compose images.
  • The bracketing exposure settings are sometimes incorrectly spaced, i.e., instead of being exposed at -3, -2, -1, 0, +1, +2, and +3; the sequence may be exposed at -3, -2, -1, 0, +1, +1, and +1.
  • It can be hard to tell if manual overrides are set, leading to incorrect exposures.
  • The very useful feature to separate the exposure point from the focus point doesn’t always work.

In summary, the new Camera Pixels app is a great concept that comes closest of any camera control app I’ve found to the look-and-feel of an advanced standalone camera; however, there are significant bugs in the current version that hamper the shooting experience.  With further development to fix the problems, Camera Pixels could become an excellent option for iPhone users wishing to control the phone’s built-in camera like an advanced DSLR or mirrorless standalone camera.  I will eagerly await the next revision of this app.

Here’s the link to the Camera Pixels app on the Apple App Store: Camera Pixels app.

You can find the ProCam 4 app here: ProCam 4 app.

What app do you use to control your phone’s camera?  What do you like and dislike about it?  Please share your thoughts here.

Want to read more posts about photography gear?  Find them all here: Posts on Gear.

Camera Pixels App Review: A great concept but still needs work


I’ve posted repeatedly about the importance of understanding how to take manual control of your camera in order to make images that are properly exposed and focused.  Whether you are using a professional DSLR, an advanced full-frame mirrorless ILC, a compact point-and-shoot, or the camera built into your smart phone, there is no way you will get consistently acceptable results if you leave the camera’s settings to its auto mode.  See this post for an overview: Post on Beyond the Auto Mode.

For the past two days I have been testing an iPhone app called “Camera Pixels”.  Full Disclosure: The developer of Camera Pixels requested I test their new app and offered me a free download for trial, but to preserve my independence I paid for the download myself.

Like the “Manual” camera app that I’ve been using for years and the “ProCam 4” app that has been my go-to camera control app for the past several months, the new “Camera Pixels” app allows the manual selection of ISO, shutter speed, exposure compensation, and focus distance (note that the iPhone camera’s lens has a fixed aperture, so F-stop cannot be manually set).  Also like the Manual app, ProCam 4 allows images to be captured using RAW mode, which has a great many advantages over capture in JPEG format (see this post for more information: Post on RAW Capture).  And all three of these camera apps display a histogram to assist in setting exposure properly.  

In addition, both Camera Pixels and ProCam 4 (but not Manual) offer some very useful advanced camera control capabilities, including the following:

  • Shutter Priority: You can choose an exposure mode in which you select the shutter speed first and the app will set the appropriate ISO.
  • Exposure Bracketing: You can shoot a series of four shots at different exposures to increase the likelihood that one of them will be at the best exposure for the lighting conditions.  The series of shots can also be combined using HDR tools found in Lightroom, Photoshop, and other editing software into a single image with a higher range of tones from very dark to very bright.
  • White Balance: You can adjust white balance in the app, which is often preferable to having to adjust it in your RAW files during post-processing.
  • Virtual Horizon: The display can show you when the horizon is level.
  • Slow Shutter Options: You can select long fixed shutter speeds as well as bulb mode to keep the shutter open for as long as you’d like.
  • RAW+JPEG: You can choose to store the image in both RAW and JPEG formats.

With all this incremental functionality, your little phone’s camera begins to behave a lot like a more advanced standalone camera.  While the iPhone’s camera, with its small sensor and its tiny fixed-aperture non-interchangeable lens, still cannot compare to a professional or enthusiast DSLR or ILC camera, the results using an advanced manual camera control app such as Camera Pixels or ProCam 4 are vastly improved compared to using the phone’s native camera app.  At iTunes Store pricing of $3.99 for Camera Pixels or $4.99 for ProCam 4, either of these apps is a great buy and a serious enhancement to the iPhone’s built-in camera.

There are some significant differences between Camera Pixels and ProCam 4.  ProCam 4 offers advanced image editing capabilities, while Camera Pixels does not.  However, Camera Pixels offers more flexible exposure bracketing options, the ability to separate exposure point from focus point, a better histogram, and more advanced RAW and video shooting options.  And a significant advantage of the new Camera Pixels app over ProCam 4 is its user interface for setting and resetting the manual camera control features such as exposure compensation, shutter priority, and ISO priority.  In fact, the Camera Pixels app comes the closest I’ve ever found to the user interface of an advanced DSLR or mirrorless camera.

Unfortunately, in its current state I cannot unreservedly recommend the Camera Pixels app.  I encountered too many glitches during my brief testing to be able to give this app a glowing review at this time.  Here are a few of the issues I noted:

  • The “viewfinder” (image preview on the screen) flickers intermittently, which can be very distracting when trying to compose images.
  • The bracketing exposure settings are sometimes incorrectly spaced, i.e., instead of being exposed at -3, -2, -1, 0, +1, +2, and +3; the sequence may be exposed at -3, -2, -1, 0, +1, +1, and +1.
  • It can be hard to tell if manual overrides are set, leading to incorrect exposures.
  • The very useful feature to separate the exposure point from the focus point doesn’t always work.

In summary, the new Camera Pixels app is a great concept that comes closest of any camera control app I’ve found to the look-and-feel of an advanced standalone camera; however, there are significant bugs in the current version that hamper the shooting experience.  With further development to fix the problems, Camera Pixels could become an excellent option for iPhone users wishing to control the phone’s built-in camera like an advanced DSLR or mirrorless standalone camera.  I will eagerly await the next revision of this app.

Here’s the link to the Camera Pixels app on the Apple App Store: Camera Pixels app.

You can find the ProCam 4 app here: ProCam 4 app.

What app do you use to control your phone’s camera?  What do you like and dislike about it?  Please share your thoughts here.

Want to read more posts about photography gear?  Find them all here: Posts on Gear.
The Raw Truth [Encore Publication]: Why you should always shoot in RAW mode

Editor’s Note: Since publishing the original version of this post several months ago, I have made a major change to my workflow and now shoot in RAW format only (i.e., with no JPEG version saved in addition to the RAW version of each image).  Shooting RAW+JPEG was a crutch that I used for a couple of years as I transitioned from JPEG to RAW format, but I realized I never use the JPEG files right out of the camera, and saving duplicate JPEG files takes a lot of disk space and time.  Please read my update in this recent post: Post on RAW vs. RAW+JPEG.  The original post on RAW mode follows:

======================

For many years after I took the plunge into digital photography, I had my camera set to store image files in the JPEG format only.  I now realize that during those years I was throwing away a lot of very valuable information with every photo I made.  There are two main reasons for this information loss.  First, the JPEG format does not store the detailed data for each pixel in the camera’s sensor but instead does some processing according to your settings and then saves only stripped-down information from each area of your image.  Second, the JPEG standard is what’s referred to as a “lossy” format; every time it is opened and resaved, the image loses more detailed data.  Once your image data is thrown away, you cannot retrieve it.

By contrast, the RAW file format keeps all the data your camera’s sensor “sees” for every pixel in the image.  Yes, RAW files are bigger and take a bit longer to store on your camera’s memory card than JPEG files, and yes, they take up more space on the memory card and on your PC’s hard drive later.  For those early years of digital photography, I avoided shooting in RAW mode because I was concerned about having reduced shooting speed and storage space for these monster-sized files.  I also was concerned that it would be too much work to shoot in RAW mode because RAW images require post-processing in order to look their best.  I now realize that I had been making a big mistake.  Shooting in RAW all the time, even when high speed is needed for action shots, ensures that you’ll always have the most image data to work with later.  You will be able to crop your images more tightly, print them to larger sizes, and especially important, refine the exposure and color with far more control if they were shot in RAW format rather than in JPEG or other compressed formats.

I now shoot nearly exclusively using my camera’s setting to save files as both RAW and JPEG.  Having the JPEG version of each image can be helpful if I want to share the photo right out of the camera.  It will look pretty decent without any post-processing because the JPEG file is stored with all of the camera’s settings for white balance, sharpening, and so on.  But when I come home from a trip, I always do my post-processing on the best images using RAW files exclusively.  Because the RAW format stores so much more information about the color and brightness of every single pixel of the image, I have much more freedom in how I choose to develop the image using my editing software (typically Adobe Lightroom, but occasionally I also use Adobe Photoshop).

Below, I show two files of the same image of my wife and me by a “fairy chimney” rock formation in Cappadocia, Turkey, both processed in exactly same the same way in Lightroom, but the first one was originally saved by the camera as a JPEG while the second was originally saved in RAW mode.  While the differences may be subtle at the size and resolution shown in this post, you can still make out more details in the RAW file, especially in areas shrouded in shadow.  The color of the sky is deeper.  Colors and shapes are rendered with more accuracy.  And of course, if we needed to crop or enlarge these images to a much bigger size, the quality of the JPEG file would deteriorate much sooner than would the RAW file.

 The JPEG version of this image.

 The RAW version of the same image.

I recommend shooting in RAW+JPEG all the time, unless you know you will need the slightly faster shooting speed or extra storage space of JPEG alone.  Doing so will give you the best of both worlds: a quick and easy JPEG to share right out of the camera, and the much more detailed data in the RAW file from which to bring out the nuances in color, texture, and exposure later during post-processing.  If you use JPEG alone, you’ll be throwing away image information you may wish you had later.

Do you shoot in RAW mode?  If so, what do you like about it?  If not, why not?  Please share your thoughts here.

Want to read more posts about photographic techniques?  Find them all here: Posts on Techniques.


Followup–To JPEG or Not to JPEG: For many RAW shooters there is no need to use RAW+JPG

Two weeks ago, I published the following post in which I explained why I was transitioning away from shooting RAW+JPEG to shooting only in RAW format.  Just a quick follow-up to share that over the last two weeks, I have executed more than a dozen photo shoots in RAW mode only, and I also have gone back to nearly all my archives of older shoots and deleted all the JPEG files where the same image was also stored in RAW format.  What are the results so far?  I’ve recovered about 20% of my hard disk drive’s space, so everything now runs faster on my PC and I’m not always struggling to free up enough space for each day’s new shots.  Furthermore, my shoots are going more smoothly because I don’t need to wait for the camera’s buffer to clear as it attempts to write both RAW and JPEG versions of each image to the memory card, and because I don’t need to change memory cards nearly as often.  And I’m happy to report that thus far I have had absolutely no issues as a result of making this major change to my workflow.  If you’re still shooting RAW+JPEG, now may be a good time to examine whether the extra burden is worthwhile in your own workflow.  The original article from two weeks ago follows.

=======ORIGINAL POST FROM FEB. 4, 2017=======

Regular readers of To Travel Hopefully already know that I always shoot in RAW mode, and most likely you do, too.  I’ve written repeatedly about the major advantages of RAW vs. JPEG format.  For a refresher, here’s a good summary post on the topic: Post on RAW Mode.  I concluded this previous post with a recommendation to shoot in RAW+JPEG mode, where the camera writes out the image data in both its native RAW format and in the familiar but problematic JPEG mode.  Here’s the relevant paragraph from that older post:

I recommend shooting in RAW+JPEG all the time, unless you know you will need the slightly faster shooting speed or extra storage space of JPEG alone.  Doing so will give you the best of both worlds: a quick and easy JPEG to share right out of the camera, and the much more detailed data in the RAW file from which to bring out the nuances in color, texture, and exposure later during post-processing.  If you use JPEG alone, you’ll be throwing away image information you may wish you had later.

But right now, I’m in the middle of making a major transition in my workflow.  I’ve stopped shooting in RAW+JPEG mode and am now storing my images only as RAW files.  Moreover, I’m cleaning up my PC’s hard drive by revisiting many of my directories from shoots over the past few years and deleting all of the original JPEG files (obviously, I am keeping the JPEGs that I exported from Lightroom after post-processing the original RAW files).

Why would I do such a thing, you may ask?  There are several major reasons:

  • I don’t end up using the JPEG files: Shooting in RAW+JPEG had become a crutch for me.  I had been using this mode because I was afraid of not having JPEG versions of all my images, in case I decided post-processing the RAW files was too much work or if I wanted to share certain images right out of the camera.  But I’ve been realizing that I never share JPEGs right after shooting.  They just don’t look good enough for most professional work, so I need to post-process the good ones before delivering them to anyone.  You may have clients who need to see some rough JPEGs immediately after the shoot.  I know some wedding photographers who promise this immediate preview to their clients.  But I don’t have this requirement, so the JPEGs were just sitting on my hard drive, unused, forever.  And it’s so easy to export quick-and-dirty JPEG files from Lightroom shortly after the shoot.
  • Duplicate JPEG files slow down shooting: The RAW+JPEG mode tells the camera to write out two different formats for every image you shoot.  This slows down your shooting by bogging down the camera’s processor, and it also fills up the camera’s buffer more quickly, requiring a disruptively long wait to resume shooting.  It also fills up memory cards more quickly.  While JPEG sizes vary from image to image due to compression algorithms, I find they average about 1/3 to 1/2 the size of my camera’s RAW files.  That’s a lot of extra space on the memory card, so I have to stop shooting to change cards more often.
  • Duplicate JPEG files take up a lot of disk space: Even though my main laptop PC has a 1.5 TB hard disk drive, I find it is always filling up, which considerably slows down workflow and requires bothersome housekeeping to clean up.  Storing unneeded JPEG versions of my many tens of thousands of images wastes a lot of disk space.
  • Those JPEGs slow down workflow: Even though Lightroom has a useful option to import only the RAW version into your catalog, and it keeps track of the duplicate JPEG version of the same image, having both files on your hard drive still slows down post-processing and image maintenance tasks.

I know that some photographers really do need to have JPEG files of their images.  They may be delivering images right out of the camera via a wireless connection to a cloud server that supports only JPEG format.  They may not get to post-processing for some time after the shoot and want to remember what the image looked like with the camera’s settings applied (although here one should note that Lightroom and other RAW viewers will access your camera’s settings via the thumbnail image embedded within your image’s RAW file).  They may really love their camera’s black-and-white conversion tool or other in-camera editing tools, which work only with the JPEG format.  There are quite a few situations in which you may truly require a JPEG version of your images.  But I haven’t encountered these situations in my own recent work and don’t expect to in the foreseeable future.

So, that’s the backstory on why I’m moving from shooting RAW+JPEG to RAW only.  I’m even taking the drastic step of going back to recent shoot directories on my PC and deleting the original JPEG versions of the images.  I’ll report back in a few weeks to provide an update on how this works out for me.  In the meantime, if you’re shooting in RAW+JPEG mode, you may also want to think about whether doing so genuinely helps your workflow or simply is wasting your resources.

Do you shoot RAW+JPEG, RAW only, or some different format?  Why?  Please share your experiences here.

Want to read more posts about photographic techniques?  Find them all here: Posts on Techniques.

To JPEG or Not to JPEG: For many RAW shooters there is no need to use RAW+JPG

Regular readers of To Travel Hopefully already know that I always shoot in RAW mode, and most likely you do, too.  I’ve written repeatedly about the major advantages of RAW vs. JPEG format.  For a refresher, here’s a good summary post on the topic: Post on RAW Mode.  I concluded this previous post with a recommendation to shoot in RAW+JPEG mode, where the camera writes out the image data in both its native RAW format and in the familiar but problematic JPEG mode.  Here’s the relevant paragraph from that older post:

I recommend shooting in RAW+JPEG all the time, unless you know you will need the slightly faster shooting speed or extra storage space of JPEG alone.  Doing so will give you the best of both worlds: a quick and easy JPEG to share right out of the camera, and the much more detailed data in the RAW file from which to bring out the nuances in color, texture, and exposure later during post-processing.  If you use JPEG alone, you’ll be throwing away image information you may wish you had later.

But right now, I’m in the middle of making a major transition in my workflow.  I’ve stopped shooting in RAW+JPEG mode and am now storing my images only as RAW files.  Moreover, I’m cleaning up my PC’s hard drive by revisiting many of my directories from shoots over the past few years and deleting all of the original JPEG files (obviously, I am keeping the JPEGs that I exported from Lightroom after post-processing the original RAW files).

Why would I do such a thing, you may ask?  There are several major reasons:

  • I don’t end up using the JPEG files: Shooting in RAW+JPEG had become a crutch for me.  I had been using this mode because I was afraid of not having JPEG versions of all my images, in case I decided post-processing the RAW files was too much work or if I wanted to share certain images right out of the camera.  But I’ve been realizing that I never share JPEGs right after shooting.  They just don’t look good enough for most professional work, so I need to post-process the good ones before delivering them to anyone.  You may have clients who need to see some rough JPEGs immediately after the shoot.  I know some wedding photographers who promise this immediate preview to their clients.  But I don’t have this requirement, so the JPEGs were just sitting on my hard drive, unused, forever.  And it’s so easy to export quick-and-dirty JPEG files from Lightroom shortly after the shoot.
  • Duplicate JPEG files slow down shooting: The RAW+JPEG mode tells the camera to write out two different formats for every image you shoot.  This slows down your shooting by bogging down the camera’s processor, and it also fills up the camera’s buffer more quickly, requiring a disruptively long wait to resume shooting.  It also fills up memory cards more quickly.  While JPEG sizes vary from image to image due to compression algorithms, I find they average about 1/3 to 1/2 the size of my camera’s RAW files.  That’s a lot of extra space on the memory card, so I have to stop shooting to change cards more often.
  • Duplicate JPEG files take up a lot of disk space: Even though my main laptop PC has a 1.5 TB hard disk drive, I find it is always filling up, which considerably slows down workflow and requires bothersome housekeeping to clean up.  Storing unneeded JPEG versions of my many tens of thousands of images wastes a lot of disk space.
  • Those JPEGs slow down workflow: Even though Lightroom has a useful option to import only the RAW version into your catalog, and it keeps track of the duplicate JPEG version of the same image, having both files on your hard drive still slows down post-processing and image maintenance tasks.

I know that some photographers really do need to have JPEG files of their images.  They may be delivering images right out of the camera via a wireless connection to a cloud server that supports only JPEG format.  They may not get to post-processing for some time after the shoot and want to remember what the image looked like with the camera’s settings applied (although here one should note that Lightroom and other RAW viewers will access your camera’s settings via the thumbnail image embedded within your image’s RAW file).  They may really love their camera’s black-and-white conversion tool or other in-camera editing tools, which work only with the JPEG format.  There are quite a few situations in which you may truly require a JPEG version of your images.  But I haven’t encountered these situations in my own recent work and don’t expect to in the foreseeable future.

So, that’s the backstory on why I’m moving from shooting RAW+JPEG to RAW only.  I’m even taking the drastic step of going back to recent shoot directories on my PC and deleting the original JPEG versions of the images.  I’ll report back in a few weeks to provide an update on how this works out for me.  In the meantime, if you’re shooting in RAW+JPEG mode, you may also want to think about whether doing so genuinely helps your workflow or simply is wasting your resources.

Do you shoot RAW+JPEG, RAW only, or some different format?  Why?  Please share your experiences here.

Want to read more posts about photographic techniques?  Find them all here: Posts on Techniques.


ProCam 4 Update: Still the best iOS camera app I’ve ever used

I’ve been using the ProCam 4 iOS app for nearly two months now, and today’s post provides a brief update to my previous product review.  My original review can be found just after the quick update.

My already high opinion of ProCam 4 has only been enhanced further after spending several weeks using it in the field.  It’s rare to find an app that combines such a high degree of functionality with such an easy-to-use interface.  While I don’t use the in-app editing features, preferring to use Adobe Lightroom for my post-processing whenever possible, I’ve been using most of ProCam 4’s other powerful features including the manual control over ISO, shutter speed, white balance, and flash; capture in RAW+JPEG formats; exposure bracketing; and the different shutter release options.  Everything is pretty intuitive to use and it’s a joy to shoot with because all the main features are readily accessible “on the fly”.  The resulting images are higher quality than those I’ve been able to obtain with the same iPhone 6S camera hardware controlled by other apps.  Overall, I continue to believe ProCam 4 is the best iOS camera app I’ve seen.

Note to Android users: As far as I know, ProCam 4 still is not available for Android devices.

One more note: With this week’s release of iOS 10.2, there is some enhanced support for RAW capture, but the built-in Apple Camera app still does not support RAW mode, so you will continue to need to use a third-party iOS camera app to capture images in RAW.  I recommend ProCam, but there are many choices out there.

My original product review of the ProCam 4 app follows:

I’ve posted repeatedly about the importance of understanding how to take manual control of your camera in order to make images that are properly exposed and focused.  Whether you are using a professional DSLR, an advanced full-frame mirrorless ILC, a compact point-and-shoot, or the camera built into your smart phone, there is no way you will get consistently acceptable results if you leave the camera’s settings to its auto mode.  See this post for an overview: Post on Beyond the Auto Mode.

For the past two days I have been testing an iPhone app called “ProCam 4”, which is by far the best iOS camera app I’ve ever used.  Like the “Manual” camera app that I’ve been using for years, ProCam 4 allows the manual selection of ISO, shutter speed, exposure compensation, and focus distance (note that the iPhone camera’s lens has a fixed aperture, so F-stop cannot be manually set).  Also like the Manual app, ProCam 4 allows images to be captured using RAW mode, which has a great many advantages over capture in JPEG format (see this post for more information: Post on Raw Mode).  And both of these camera apps display a histogram to assist in setting exposure properly.  

But ProCam 4 offers far more functionality than does the Manual app or any other iOS camera app I’ve tried.  Here is a partial list of some of my favorite additional features:

  • Shutter Priority: You can choose an exposure mode in which you select the shutter speed first and the app will set the appropriate ISO.
  • Exposure Bracketing: You can shoot a series of four shots at different exposures to increase the likelihood that one of them will be at the best exposure for the lighting conditions.  The series of shots can also be combined using HDR tools found in Lightroom, Photoshop, and other editing software into a single image with a higher range of tones from very dark to very bright.
  • White Balance: You can adjust white balance in the app, which is often preferable to having to adjust it in your RAW files during post-processing.
  • Virtual Horizon: The display can show you when the horizon is level.
  • Slow Shutter Options: You can select long fixed shutter speeds as well as bulb mode to keep the shutter open for as long as you’d like.
  • RAW+JPEG: You can choose to store the image in both RAW and JPEG formats.
  • Editing Options: This app provides many advanced in-camera editing tools and filters.

With all this incremental functionality, your little phone’s camera begins to behave a lot like a more advanced standalone camera.  While the iPhone’s camera, with its small sensor and its tiny fixed-aperture non-interchangeable lens, still cannot compare to a professional or enthusiast DSLR or ILC camera, the results using ProCam 4 are vastly improved compared to using the phone’s native camera app.  At $4.99 to purchase via the iTunes Store, this app is a great buy and a serious enhancement to the iPhone’s built-in camera.

You can find the ProCam 4 app here: ProCam 4 app.

What app do you use to control your phone’s camera?  What do you like and dislike about it?  Please share your thoughts here.

Want to read more posts about photography gear?  Find them all here: Posts on Gear.

The Raw Truth [Encore Publication]: Why you should always shoot in RAW mode

For many years after I took the plunge into digital photography, I had my camera set to store image files in the JPEG format only.  I now realize that during those years I was throwing away a lot of very valuable information with every photo I made.  There are two main reasons for this information loss.  First, the JPEG format does not store the detailed data for each pixel in the camera’s sensor but instead does some processing according to your settings and then saves only stripped-down information from each area of your image.  Second, the JPEG standard is what’s referred to as a “lossy” format; every time it is opened and resaved, the image loses more detailed data.  Once your image data is thrown away, you cannot retrieve it.

By contrast, the RAW file format keeps all the data your camera’s sensor “sees” for every pixel in the image.  Yes, RAW files are bigger and take a bit longer to store on your camera’s memory card than JPEG files, and yes, they take up more space on the memory card and on your PC’s hard drive later.  For those early years of digital photography, I avoided shooting in RAW mode because I was concerned about having reduced shooting speed and storage space for these monster-sized files.  I also was concerned that it would be too much work to shoot in RAW mode because RAW images require post-processing in order to look their best.  I now realize that I had been making a big mistake.  Shooting in RAW all the time, even when high speed is needed for action shots, ensures that you’ll always have the most image data to work with later.  You will be able to crop your images more tightly, print them to larger sizes, and especially important, refine the exposure and color with far more control if they were shot in RAW format rather than in JPEG or other compressed formats.

I now shoot nearly exclusively using my camera’s setting to save files as both RAW and JPEG.  Having the JPEG version of each image can be helpful if I want to share the photo right out of the camera.  It will look pretty decent without any post-processing because the JPEG file is stored with all of the camera’s settings for white balance, sharpening, and so on.  But when I come home from a trip, I always do my post-processing on the best images using RAW files exclusively.  Because the RAW format stores so much more information about the color and brightness of every single pixel of the image, I have much more freedom in how I choose to develop the image using my editing software (typically Adobe Lightroom, but occasionally I also use Adobe Photoshop).

Below, I show two files of the same image of my wife and me by a “fairy chimney” rock formation in Cappadocia, Turkey, both processed in exactly same the same way in Lightroom, but the first one was originally saved by the camera as a JPEG while the second was originally saved in RAW mode.  While the differences may be subtle at the size and resolution shown in this post, you can still make out more details in the RAW file, especially in areas shrouded in shadow.  The color of the sky is deeper.  Colors and shapes are rendered with more accuracy.  And of course, if we needed to crop or enlarge these images to a much bigger size, the quality of the JPEG file would deteriorate much sooner than would the RAW file.

 The JPEG version of this image.

 The RAW version of the same image.

I recommend shooting in RAW+JPEG all the time, unless you know you will need the slightly faster shooting speed or extra storage space of JPEG alone.  Doing so will give you the best of both worlds: a quick and easy JPEG to share right out of the camera, and the much more detailed data in the RAW file from which to bring out the nuances in color, texture, and exposure later during post-processing.  If you use JPEG alone, you’ll be throwing away image information you may wish you had later.

Do you shoot in RAW mode?  If so, what do you like about it?  If not, why not?  Please share your thoughts here.

Want to read more posts about photographic techniques?  Find them all here: Posts on Techniques.


The Raw Truth: Why you should always shoot in RAW mode

For many years after I took the plunge into digital photography, I had my camera set to store image files in the JPEG format only.  I now realize that during those years I was throwing away a lot of very valuable information with every photo I made.  There are two main reasons for this information loss.  First, the JPEG format does not store the detailed data for each pixel in the camera’s sensor but instead does some processing according to your settings and then saves only stripped-down information from each area of your image.  Second, the JPEG standard is what’s referred to as a “lossy” format; every time it is opened and resaved, the image loses more detailed data.  Once your image data is thrown away, you cannot retrieve it.

By contrast, the RAW file format keeps all the data your camera’s sensor “sees” for every pixel in the image.  Yes, RAW files are bigger and take a bit longer to store on your camera’s memory card than JPEG files, and yes, they take up more space on the memory card and on your PC’s hard drive later.  For those early years of digital photography, I avoided shooting in RAW mode because I was concerned about having reduced shooting speed and storage space for these monster-sized files.  I also was concerned that it would be too much work to shoot in RAW mode because RAW images require post-processing in order to look their best.  I now realize that I had been making a big mistake.  Shooting in RAW all the time, even when high speed is needed for action shots, ensures that you’ll always have the most image data to work with later.  You will be able to crop your images more tightly, print them to larger sizes, and especially important, refine the exposure and color with far more control if they were shot in RAW format rather than in JPEG or other compressed formats.

I now shoot nearly exclusively using my camera’s setting to save files as both RAW and JPEG.  Having the JPEG version of each image can be helpful if I want to share the photo right out of the camera.  It will look pretty decent without any post-processing because the JPEG file is stored with all of the camera’s settings for white balance, sharpening, and so on.  But when I come home from a trip, I always do my post-processing on the best images using RAW files exclusively.  Because the RAW format stores so much more information about the color and brightness of every single pixel of the image, I have much more freedom in how I choose to develop the image using my editing software (typically Adobe Lightroom, but occasionally I also use Adobe Photoshop).

Below, I show two files of the same image of my wife and me by a “fairy chimney” rock formation in Cappadocia, Turkey, both processed in exactly same the same way in Lightroom, but the first one was originally saved by the camera as a JPEG while the second was originally saved in RAW mode.  While the differences may be subtle at the size and resolution shown in this post, you can still make out more details in the RAW file, especially in areas shrouded in shadow.  The color of the sky is deeper.  Colors and shapes are rendered with more accuracy.  And of course, if we needed to crop or enlarge these images to a much bigger size, the quality of the JPEG file would deteriorate much sooner than would the RAW file.

 The JPEG version of this image.

 The RAW version of the same image.

I recommend shooting in RAW+JPEG all the time, unless you know you will need the slightly faster shooting speed or extra storage space of JPEG alone.  Doing so will give you the best of both worlds: a quick and easy JPEG to share right out of the camera, and the much more detailed data in the RAW file from which to bring out the nuances in color, texture, and exposure later during post-processing.  If you use JPEG alone, you’ll be throwing away image information you may wish you had later.

Do you shoot in RAW mode?  If so, what do you like about it?  If not, why not?  Please share your thoughts here.