A “Fixer” for the Rest of Us [Encore Publication]: How you can leverage local resources to shoot like a pro

How do professional travel photographers on assignment create those amazing, make-your-jaw-drop images?  You know, the photos we see when browsing the pages of a major travel magazine or website?  There are several advantages the pros have, including technique honed over decades of practice, state-of-the-art equipment (with prices to match), and the ability to spend a lot of time at the same location, returning again and again until the time of day, lighting, weather conditions, and subject matter are perfectly aligned for a great shot.  But one advantage available to the pros can be borrowed, at least in part, by the rest of us who love travel photography, too.  That is the use of a “fixer,” a local expert who knows the region, the language, the culture, and the way to get things done, and whose expertise helps the travel photographer get those incredible shots.

While we were visiting a carpet weaving collective in Goreme, Turkey, our group’s trip leader introduced me to this worker who was enjoying a cup of Turkish coffee during her break.  Buy this photo

If you are traveling on a group trip run by a good travel company, you may already may have a fixer working to make your experience (including your photographic experience) as rewarding as possible.  The operator will likely have chosen an itinerary that will get you off the beaten path and into the settings where unusual and powerful images can be made.  They will have arranged your accommodations and transportation well in advance of your departure.  The company should have planned some activities and excursions that will allow you to interact with local people and see how they truly live.  And best of all, they have provided you with a local expert, often called a trip leader or program director, who knows the lay of the land, speaks the local language(s), and can facilitate your getting the kinds of shots you want.  This is of paramount importance when you want to have lots of interaction within a culture very different from your own, which I believe is the best part of traveling as a photographer.

For example, I made the above portrait after being introduced to the young worker at a carpet weaving collective by our trip leader in Turkey.  He translated so that she and I could get to know each other a little bit first, and then asked her if I could make her portrait.  It is certainly possible (I’ve done this countless times) to ask for yourself by using sign language, pointing to your camera, and smiling a lot, but having a local person with you can be a great help.

Sometimes, knowing where to go to seek out authentic cultural interactions works magic.  I captured this shot of our host family during a home-hosted lunch on an estancia (ranch) in Patagonia.

Our hosts, Chango and his extended family, were happy to pose for a portrait after we enjoyed their hospitality on their Patagonian ranch.  A local guide and good travel company can help arrange these kinds of authentic interactions.  Buy this photo


Visiting a rural elementary school in Tanzania afforded us the chance to meet kids in the classroom.  This type of experience would be hard to arrange while traveling independently, but a good group leader or guide can facilitate meaningful interactions with local people.  Buy this photo

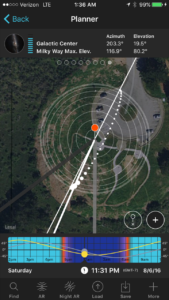
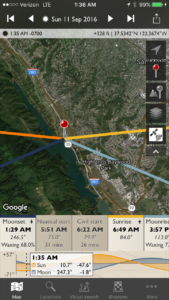
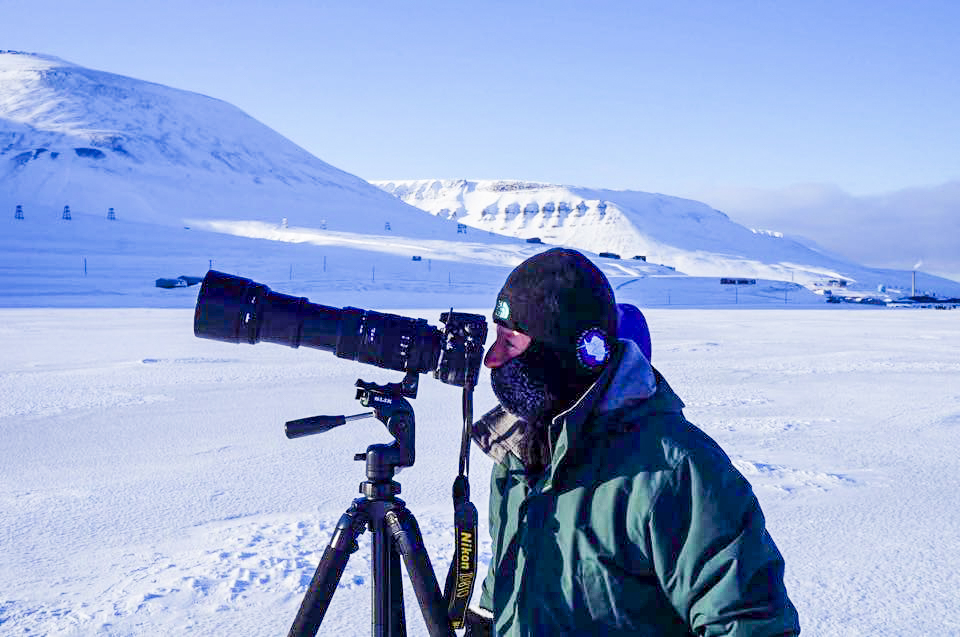
When the trip is scheduled specifically to attend a special event, it is especially vital to have a good leader who is adept at working with local professionals to plan all the details.  For example, it was quite a major logistical feat to get a large group of scientists and photographers into place to study and view a total solar eclipse in a part of the world as remote and forbidding as Svalbard.  Our trip leader partnered with an astrophysicist who is a world authority on eclipses, beginning years in advance of the solar event, to ensure we had the best chance possible of clear weather conditions and the right vantage point from which to study and photograph the eclipse.  This is the sort of value that an expert fixer brings when you book a trip with one of the top companies.

Our eclipse expert and one of his students set up their gear on the morning of the total solar eclipse in Svalbard.  Buy this photo

To be sure, there are some compromises required for group travel, and having access to a shared program director is not the same as having a dedicated personal fixer to arrange your photo shoots for you.  I like to travel independently in places with developed infrastructure and where I can readily bridge the cultural or language gaps myself.  That said, I also love to travel in small groups run by excellent travel companies, in large part because their planning, coupled with the knowledge of the local trip leader, helps me make those memorable images.

Want to read other posts about planning your travel photography?  Find them all here: http://www.to-travel-hopefully.com/category/travel/plan/

Have you had a situation where you got your shot thanks to the knowledge of a local expert?  How do you arrange your travel when you’re visiting remote parts of the world or when you want to have lots of interaction within a culture very different from your own?  I’d love to hear your thoughts and experiences!  Please respond via the comment box.

I See a Red Door and I Want to Paint It Black [Encore Publication]: When a black-and-white image is better than color, and how to convert to B&W

Back in the day, a photographer had to choose in advance whether to shoot with color film or black-and-white film.  Conversions from color to B&W were cumbersome and expensive, and conversions from B&W to color were essentially impossible.  During the film era, I typically shot exclusively using color transparency film while traveling, and reserved B&W photography for particularly artistic shoots near home.

Thankfully, in today’s digital world, we no longer have to commit ourselves in advance to monochrome vs. color images.  It’s now a simple procedure to convert our color images to B&W during post-processing.  And that’s a great blessing, because there are plenty of times when a black-and-white photo is better than a color photo.

Consider the image of the alligator at the start of this post.  One of my favorite photos, this one works just fine in color, too.  But the real power of the image is revealed in B&W through the striking textures of the alligator’s skin as seen above the water and as reflected off the water’s surface.  The background above the water fades to a deep, nearly true, black, with the background of the water itself rendered slightly less darkly and showing some nice ripples of motion.  Black-and-white photography is especially powerful when there are contrasts of pattern, texture, and background as in this image.  Buy this photo

When else might we want to render an image in B&W?

Portraits made in monochrome have a timeless look that evokes the earlier years of photography, and this rendering can also bring out the true nature of the subject.  There’s a lovely look to the skin tones and hair when displayed in B&W, and there are fewer distracting elements from the color of clothing or background objects.

This portrait takes on a vintage, timeless look when shown in B&W.  Our eye can focus on the model’s face and hair without the distractions of the colors in her sweater or the building.  There’s almost a street photography kind of documentary quality to this image in monochrome that is lost when viewed in color.  Buy this photo

Color can be distracting in an image where we want to emphasize the essence of a person or place.  In this portrait I made recently for a couple who are fellow musicians and friends of mine, we had beautiful “golden hour” light to work with, and the background and clothing worked well in color.  But converted to B&W, this image really places the emphasis on the couple without the distractions of the color cast in the reflections off the eyeglasses or of the mixed lighting in the background.

In this portrait, black-and-white presentation places the viewer’s attention squarely on the the couple and their instruments, without distractions from the multiple colors of the clothing and background components.  (Client photo not available for purchase.)

When you’re shooting under “mixed lighting”, which means there are multiple light sources with different color temperatures (i.e., some light sources are warmer and others are cooler), converting the image to B&W can be a real problem solver.  Consider the image below, made in Bruges at night.  The light from the street lamps was warmer than the light coming from the spotlights on various buildings, and there was also a bright moon that night, so when seen in color the photo would look less appealing due to the contrasting of the color temperatures in the different parts of the image.  But viewed in B&W, it brings out the grandeur of the old buildings and the beauty of the reflections in the waters of the canal, without the distractions of the color casts.

This image of Bruges at night, when processed in B&W, removes the contrasting color temperatures of the multiple different light sources and allows the viewer to enjoy the stately old buildings with consistent tone and texture.  Buy this photo

Now that we’ve covered a few of the many situations in which a black-and-white image is preferable over a color image, let’s look at how to convert from color to B&W.  There are many ways to perform this conversion, but I recommend it be done using the Color Adjustments settings in the Develop module of Adobe Lightroom.  Here’s how:

Click on the “B&W” tab above the individual color channel sliders, and then adjust the mix of how the colors are blended by increasing or decreasing each color’s slider to see how the black-and-white image looks.  I find that I often have to readjust the contrast slider at this point to get the image looking its best in black-and-white.

For more on using Lightroom to post-process your images, check out my previous post: Previous post on using Lightroom to post-process images.

I do not recommend using your camera’s built-in black-and-white mode, as you will then lose the color information in the image file.  I also do not suggest using the settings some cameras have to make a copy of the image in B&W, because in most cases the camera’s built-in software will not do a very good job of rendering the image in monochrome.  For the best results, either use Lightroom or a dedicated black-and-white conversion application such as Silver Efex Pro 2 from Nik Software, which is available as a plug-in for Lightroom or Photoshop.

Want to read other posts about travel photography techniques?  Find them all here: http://www.to-travel-hopefully.com/category/techniques/

What do you love about a black-and-white image?  When do you convert an image to B&W rather than share it in color?  Any tips or tricks for how to make great B&W photos?  Please share your thoughts in the comment box!


Focus on New Orleans [Encore Publication]: This iconic US city pulsates with jazz, creole, and historic beauty

Some places are magnets that draw us back again and again.  I’ve made at least a dozen visits to New Orleans and each time, I find something new.  It’s an iconic US city that also defies easy categorization.  Home to unique and cutting-edge forms of music, cuisine, and culture, it is also steeped in a grand historic past that evokes France, Spain, Africa, and the Deep South of the US.  Quite simply, there is no other place like New Orleans, and nowhere else do travel photographers find more charismatic subjects.  Here are a few of my favorite images from a recent visit to NOLA, along with a few words about what they depict and how they were made.

Aside from Paris, I can’t think of any other city that has influenced the cocktail more than New Orleans.  Here I captured my older daughter enjoying a classic NOLA libation during dinner on our first night in the Big Easy.  I used only natural light and selected a large aperture to soften the background.  Laissez les bons temps rouler!  Buy this photo

It’s boozy, vomit-filled, sophomoric, touristy, overpriced, and downright awful, but Bourbon Street is a part of the landscape and is worth a quick walk-by.  At night, it’s neon assault can almost seem romantic.  This shot was handheld using a high ISO setting and a small aperture for greater depth of field.  Buy this photo

The lovely Spanish colonial architecture of the French Quarter cries out to be photographed.  I made this shot of a wrought iron balcony using a telephoto lens and enhanced the color vibrancy during post-processing.  Buy this photo

It’s the tiny cheap eateries as much as the temples of haute gastronomy that keep New Orleans at the top of the list of cities for dining.  Be sure to grab some po’ boys, beignets, or muffulettas at these humbler places, and bring your camera to catch some of the action.  This image of workers in a po’ boy shop was shot from the hip, street photography style, using a high ISO to allow for a quick shutter speed.  Buy this photo

New Orleans is rightly famous for its jazz, which seems to seep through every crack in the pavement of the city and can be heard in places humble or elevated.  None is better than the iconic Preservation Hall.  As with many performance venues, this hall allows photography without flash, but it is always better to ask permission first and to be discrete during shows.  Use a fast lens and high ISO setting to allow a fast shutter speed.  Buy this photo

A short trip outside of the city quickly reminds you that New Orleans is a part of the American Deep South.  This image was shot from an airboat plying the bayous of Jean Lafitte National Historic Preserve.  I metered the exposure on the lush vegetation lining the waterway so as to avoid overexposure from the bright reflections.  Buy this photo

I captured this image of an alligator seeking the sun on an overcast winter’s day by framing tightly around the gator and its reflection.  In post-processing, I cropped to emphasize the symmetry of reptile and reflection and converted the image to black-and-white, while increasing its contrast a bit.  Buy this photo

I’m a big fan of food photography, especially when the plate is as strikingly beautiful as this one served at Brigtsen’s Restaurant.  I framed the shot tightly with a fast prime lens and a wide aperture to reduce the depth of field.  Buy this photo

Wherever we travel, we should make images that bring out a sense of place.  This image of my daughters strolling in the Garden District works because it captures the iconic symbols of this neighborhood–the stately mansions and live oak trees–while being a bit playful and framed in an unexpected way.  And as I’ve said many times, remember to capture your travel companions in some of your shots.  Buy this photo

Have you visited New Orleans with a camera in hand?  Please share your experiences.  Where do you like to visit and what do you like to shoot?

Want to read more posts about travel photography destinations?  Find them all here: Posts on Destinations.

Sports Roundup [Encore Publication]: How to get amazing shots at sporting events

Whether we’re traveling afar or close to home, sporting events make for exciting photography.  The thrill of victory and the agony of defeat (credit: ABC’s Wide World of Sports), the heroic effort, and the little moments of humor and repose amidst the adrenaline rush of competition: all of these elements can be captured in images of athletic events.

While every sport has its own rhythm and rules, there are certain techniques that apply across a wide range of sports photography situations.  Let’s take a look at a few situations and discuss how to get the best images given the inherent challenges.  Note that these photos were all made during outdoor sporting events; there are special challenges with many indoor sports, such as basketball or hockey, because the action remains just as fast but there is less light to work with, and the artificial lighting can impart an unnatural color cast.  But that’s a topic for a different post.

Whatever the sport, I like to shoot from different perspectives, from wide to very close.  The wider views show the environment as well as the athletes, so these make good establishing shots.  But often the most compelling and dramatic sports images are the tight compositions, because they portray the athletes in a very personal and relatable way.

Below are two shots of the same rowing crew during the same race at a high school regatta.  The first image was composed from slightly farther away and with a less extreme focal length (300mm), so the resulting composition is more environmental.  It shows not only all the rowers and the coxswain in the shell, but also the width of the river and the surrounding scenery.  This shot establishes the setting and gives the big picture.
Environmental shot of a crew racing at a rowing regatta.  Buy this photo

Now here’s the same crew, but captured from a closer vantage point and using a longer focal length lens (750mm).  This perspective isolates the athletes from the background and shows their expressions and postures.  There’s certainly more drama here, at the expense of some insight into the environment.

A tighter shot of the same crew in the same race.  Buy this photo

There are exceptions, such as when you choose to blur the motion to give a sense of the athlete’s grace, but as rule you want to use a fast shutter speed to freeze the action in sports photography.  Very often that means shooting at 1/1000 of a second or even faster.  Choose the Shutter Priority mode on your camera to gain control over the shutter speed, and be sure to select a high enough ISO setting to allow the shutter speed you require.  If your camera has different auto-focus settings, you may find it helpful to choose a single-point focus setting if you know where the action will be, or a dynamic focus setting if the location of the action changes very quickly.  For this image of a professional beach volleyball tournament, I chose single-point auto-focus so I could select the exact spot where the players would be jumping.  I also find the best way to capture a great image in fast-moving sports (as with wildlife photography) is to set the camera to continuous or burst mode and continue to shoot rapidly through the action.  That way, you’ll have several different images to choose from, and with luck at least one will have caught that “decisive moment.”

A fast shutter speed and single-point auto-focus allow the fast action of a beach volleyball competition to be captured precisely.  Buy this photo

My favorite sports images portray the human element in a very personal way.  This photo from a Spartan Race (an extreme athletic event that combines long-distance running with a supersized obstacle course) captures the strength and the struggle of the athlete as he nears the end of a long race through the 100-degree California desert.  Keys to success in making this image were shooting from a vantage point low to the ground, using a medium-length prime telephoto lens with a large aperture to soften the background, and waiting for just the right moment.

An endurance athlete completes an obstacle near the end of a Spartan Race.  Buy this photo

The fun of shooting a sporting event doesn’t end when the competition is over.  Be sure to capture the dramatic and often humorous moments during award ceremonies and downtime during and after the action.

These athletes have finished their Spartan Race and strike a humorous pose at the finish line.  Buy this photo

Want to see more posts on what to shoot at home and while traveling?  See them all here: http://www.to-travel-hopefully.com/category/travel/shoot/

What sports do you enjoy shooting?  Do you have tips on how to get great sports images?  Please leave a comment in the box after this post.


If You Can’t Be with The Camera You Love [Encore Publication]: How to make the best of it when you don’t have ideal kit with you

There’s an old adage that goes, “The best camera is the one you have with you.”  That is never more true than for travel photography.  As travelers, we have to compromise regarding what gear we pack for a whole trip, and then we have to compromise again with respect to what equipment we can pack on a particular day’s outing during the trip.  If a flight is involved, we’re often obligated to leave much of our gear at home so as to avoid having to check our precious photography equipment.  If a good deal of hiking, biking, or travel via public transportation is required, we may have to leave bulky or heavy items in the hotel room for the day.

Fortunately, it’s never been easier to ensure we always have at least some backup solution to keep shooting even when a key camera, lens, filter, or tripod has to be left behind.  The smartphone that nearly everyone carries with them at all times likely has a pretty darn good camera attached to it.  My Apple iPhone 6s, for example, comes with a 12 MP camera, incorporating a decent if small sensor and a tolerable quality and moderately fast (f/2.2) lens.  Even the smaller “selfie” camera has a 5 MP sensor.

No one will confuse the images made using this camera phone with those made using my professional DSLR camera and collection of lenses, but in a pinch I can get acceptable quality shots with just the phone’s camera.  The trick is understanding how to use your smartphone’s camera, or your small point-and-shoot camera, in the right way to capture the images, and then to post-process the images in such a way as to overcome the compromises built into the camera.

Just yesterday I found myself on a family day trip to the annual Scottish Highland Gathering and Games without my professional camera gear.  I made the best of things and shot all day with just my camera’s phone.  I’m fairly pleased with the resulting images, even though of course they would have been better had I had access to my regular camera and a few choice lenses and accessories.  Here are a few of my images along with some tips on how to get the best out of a not-so-great camera.

First of all, learn how to control your phone’s camera manually so that you can choose what part of the image you want to be in focus and what part of the image you want to drive the exposure.  Nearly all modern phone’s cameras allow you to touch the screen to select where on the image you want to set the focus and exposure.  In this photo of a Scottish traditional music performance, I set the focus point on the fiddler to ensure sharp focus on the musicians.  Then I adjusted the exposure by moving the vertical slider upward, in order to add some brightness to the image and avoid underexposing the backlit performers.

Touch your smartphone camera’s screen to select the focus point, and then move the exposure slider up or down to adjust the exposure separately from the focus point.  Buy this photo on my website

Better yet, take full manual control over your phone’s camera by installing an app.  There are good free and inexpensive apps for both iOS and Android.  The one I use for iOS is called “Manual” and is available on the Apple App Store: Manual app.  With such an app installed on your camera, you can specify manually exactly what settings you want to use for the focus point, aperture, shutter speed, ISO, flash, etc.  This level of control was essential for a shot like the one below.  The tossin’ of the caber, a “heavy athletics” event in which the contestants throw a 75-pound tree trunk as far as possible, requires a fast shutter speed in order to freeze the rapid action.

Note: Since I first wrote this post, I have started using a different iOS app to take manual control over my phone’s camera.  It’s called “ProCam 4” and it’s quite a bit more sophisticated, but as easy to use, as the “Manual” app.  You can purchase it on the Apple iTunes Store here: ProCam 4 App.

Using the “Manual” app I was able to focus on the athlete and choose a fast shutter speed to freeze the rapidly moving caber.   Buy this photo on my website

To capture this action shot of an indoor sheepdog trial, I had to set a fast shutter speed and increase the camera sensor’s sensitivity (ISO) to accommodate the quick action and the low-light setting.  Again, the Manual app allowed for this flexibility.  I also cropped the image during post-processing because the phone’s camera does not have a long enough focal length lens to zoom in closely on the subject.

Both manual selection of the ISO and shutter speed and cropping during post-processing are required to get a decent shot of action like this sheepdog trial.  Buy this photo on my website

To capture this image of a girl teaching young children how to dance around the maypole, I had to use all the elements we’ve been discussing here.  I used manual settings to choose a focus and exposure that were correct for this subject, forced the camera’s flash to fire to try to even out the harsh shadows across the girl’s face, and employed cropping and lighting adjustments during post-processing to achieve a pleasing composition.

Bringing it all together: To make this image of the maypole celebration, I manually selected the focus, exposure, and flash, and then cropped and adjusted exposure during post-processing.  Buy this photo on my website

Next time you can’t or just don’t have the best equipment with you, use the tips we’ve covered here to make the best of a challenging situation.

When did you have to make do with less than ideal gear for a shoot?  How did you make the best of it?  Do you have tips or tricks you can add?  Please contribute your thoughts using the comment box at the end of this post.

Want to read more post about photographic gear?  Find them all here: Posts on Gear.

Baggage Claim [Encore Publication]: A photographer’s guide to how to pack for a trip

 Special trips often require specialized gear.  To photograph the total solar eclipse in Svalbard in 2015, I had to pack a heavy professional tripod, 500mm super-telephoto lens, a remote release capable of functioning in extreme cold, and a custom-made solar filter.  Thankfully, most trips are easier to pack for.  Buy this photo

Packing is never the most fun part of a trip, and the special challenges we travel photographers face can be particularly vexing.  But with a few guidelines and some common sense, we can easily bring along just what photo gear we’re likely to need and still be able to make room for some socks and underwear.  Here is my very opinionated guide to how to pack for any length and type of trip.

    1. What type of trip are you taking?
      • If it’s a driving trip directly from your home, you can bring all the gear your heart desires.  Just be sure not to leave valuables in plain sight in the car when you step away for more than a moment (thieves love camera gear), and make sure you have a shoulder bag or backpack to carry just what you need for car-free excursions.
      • If you’re flying (unless you have your own private jet, in which case you also need to make room for me on your next trip), you’re going to have to reduce the gear you carry to just the essentials.  It is possible to customize the foam insert in a hard-sided case to hold your photography gear, and then you can check this bag in the hold of the aircraft, but this requires some effort to prepare the case for your specific gear and then you will likely find the case quite heavy to lug around for the land portion of your trip.  And woe to you if your bag is misrouted, lost, or stolen.  I recommend packing a carry-on item that meets your carrier’s size requirements and filling it with just the most essential gear you’ll need on your trip.  More on that topic in a moment.
      •  For most purposes, a backpack is a good packing solution.  There are many styles available for photo gear, but my favorites are these two:
        1.  For those times when you need to bring most or all of your gear on a trip, I like the Tamrac 5586 Expedition 6x Backpack.  It carries a lot of gear snugly and flexibly, and it doesn’t look like a camera bag so it’s less likely to invite the wrong kind of attention.  It is almost always accepted as carry-on, but it is a bit bulky and heavy for all-day, everyday use while traveling.  I’ll often use this bag to get all my gear to my first destination, then pack a day bag for just the gear I’ll need for each day of the trip.
        2. My current favorite bag for day use for nearly any shooting situation near home or while traveling is the Manfrotto MB MA-BP-TRV Advanced Travel Backpack.  It can fit a reasonable amount of gear while leaving room for non-photography items like a jacket or a water bottle (yes, even photographers occasionally have to drink or stay warm).  It disguises your gear pretty well, has good rain protection, and even sports a special sleeve for carrying the Manfrotto Be-Free Travel Tripod.
    2. What types of shooting will you be doing on the trip?
      • Will wildlife or astrophotography be involved?  If so, you’re going to have to strain your back, anger the airline staff, and enlist your travel partner to help, because there’s really no substitute for a long and heavy super-telephoto lens in this situation.  When I’m on safari or chasing a solar eclipse, I pack my massive 500mm lens into the larger of my two backpacks and accept my fate.  You’ll realize it was worth the effort when you get home and are able to share your amazing photos of a leopard in a tree or the sun’s corona on full display during a total solar eclipse.
      • For most other types of trips, you won’t need to pack a really long lens.  My general rule is to pack a range of zoom lenses that covers from fairly wide (about 16mm) through fairly long (about 300mm), including a couple of fast prime lenses for when the light is low and/or the very best optical quality is required.
    3. How much redundancy do you need on the trip?
      • Always bring a backup battery (or several) and a backup battery charger.  Murphy’s Rule as applied to travel photography guarantees that batteries will die just as you frame the shot of a lifetime.  Bring at least one extra.  And chargers are left in hotel rooms or in tented camps on the Serengeti with some regularity, and they tend to get fried when plugged into unusual power grids, so bring an extra one with you.
      • Don’t forget the little things.  Pack several power adapters of the type used in the countries where you’ll be traveling.  These get lost easily and can be hard to replace while traveling.  Bring twice as many memory cards as you think you’ll require; it’s easy to fill them up when you get to shooting a mountain gorilla or carnaval dancers.  If you plan to back up to a laptop or external hard drive, bring extra connecting cables.  While traveling, I back up to a second type of memory card using my camera’s second card slot, so I bring quite a few memory cards of both types with me.
      • Lenses are heavy and expensive, but they sometimes stop working, so if you’re on a particularly important trip you may want to bring several lenses in overlapping focal lengths.  That is, you could bring a wide-angle zoom lens and a wide-angle prime lens, plus a walkaround zoom lens and a “normal” prime lens (about 50mm for a full size sensor or about 35mm for a crop sensor), plus a telephoto zoom lens and a telephoto prime lens or two telephoto zooms with overlapping ranges.
      • If it’s a once-in-a-lifetime chance to build your portfolio with very special and irreplaceable images, I recommend bringing a backup camera in addition to your primary camera.  For a recent safari trip in East Africa, I brought two DSLR bodies as well as quite a few lenses so that I’d have a backup solution to any single point of failure.  The more exotic your destination, the more likely that dust, wind, salt, extreme heat or cold, and heavy shocks or drops will damage your gear, so for those amazing one-of-a-kind trips I suggest biting the bullet and carrying backups for any gear that could fail.  For more on shooting in extreme conditions, read this post: Post on Extreme Conditions
    4. What accessories do you need to accompany the rest of your gear?
      • Attach a UV filter to each of your lenses before you leave and keep it on to protect the front element of the lens throughout your trip.
      • Carry a polarizing filter and a range of neutral density filters in the correct diameters to fit at least your wide-angle lens and your walkaround lens.
      • For more on filters, read this post: Post on Filters
      • A flash unit is helpful to have on most trips, unless you’re sure there will be ample natural light or you’re willing to use your camera’s built-in flash.
      • A good lightweight travel tripod with a head and mounting plate that suit your needs is essential gear on many trips.
      • Don’t forget any special-purpose gear that you need for just this type of trip.  When I travel to see a solar eclipse, for example, I need to be sure I bring my solar filter that attaches to my super-telephoto lens.  I also need to bring my heavy-duty professional tripod instead of the lightweight one I typically carry on trips.
    5. How will you be shooting from day to day during the trip?
      • If you’ll have constant vehicle support or won’t be going far from your hotel, you may be able to make do with just the bag you brought on the plane.  Or you can bring along a small shoulder bag to carry just a few items for the day’s shoot.
      • Most of my trips involve considerable hiking and public transportation from day to day, so I either carry everything in my smaller backpack or bring it along in checked baggage during the flight.  Then I can transfer just the gear I need for each day’s shoot into the smaller pack, which makes life easier when hiking 10 or so miles per day.

For a safari you will need a long lens to capture small or distant wildlife.  I recommend bringing a beanbag for camera support instead of a tripod, as the latter cannot be used in a safari vehicle.  Be sure to bring an extra camera and lenses, and carry more batteries and memory cards than you think you’ll need.  Buy this photo

Of course, if you use a mirrorless camera with only a couple of compact lenses or an advanced point-and-shoot camera, you do not have to worry about many of these items, but still be sure to review the list above to ensure you bring all required accessories.

With an overall strategy tailored to your itinerary and shooting style, and careful attention to execution to ensure you don’t forget anything, it’s really not that difficult to pack just what gear you’ll need in a way that will allow you to enjoy your trip when you’re not shooting.  After all, travel is about gaining experiences, and not all of those experiences can or should be photographed.  Pack for your photography, but also for your overall travel enjoyment.

What are your hacks for packing your photo gear for a trip?  Please share your tips and tricks in the comments box here.

Want to read more posts about how to plan for your travel photography?  Find them all here: Posts on Planning.

Luck Favors the Prepared [Encore Publication]: Tools for planning your shot

It was Louis Pasteur who said, “Fortune favors the prepared mind.”  We usually hear the quote paraphrased as, “Luck favors the prepared.”  For travel photographers, there is often a great deal of luck involved in capturing a truly great image, but there are some very useful tools that we can use to help us plan to be in the right place at the right time with the right gear.  Let’s look at just a few of my favorites.

I’ll start with a quick review of the most obvious resources.  I would never plan an hour-long photo shoot, let alone a month-long trip to a far-flung travel destination, without doing some research.  What are the must-see locations, and what dates and times of day are perfect for each one?  What are the events or activities that most authentically represent the locations I am visiting?  Is there a livestock market, a street festival, or a religious celebration taking place while I’m in the region?  How can I build an itinerary that best incorporates all of these locations?  Great resources for this type of research include guidebooks (online and hardcopy), online review sites such as Trip Advisor and Yelp, mapping and navigation apps (Google Maps is still my all-around favorite, but several others have their own advantages), and local weather sites.  I like to build my itinerary by customizing an online map to show all of the locations I’d like to visit, then creating a routing that links the locations in the proper order.  If travel by air, rail, bus, or boat is involved, I research those schedules and fares to determine the best way to get from one place to the next.  Airline consolidation sites such as Orbitz can be quite helpful for finding the best flights at the best prices.  If the itinerary has been pre-planned by a travel company, then I will still do most of this background research to better understand the locations we’ll be visiting.

Once I know where I’ll be going and what events I plan to shoot, I develop a shot list.  Some photographers craft very detailed and specific shot lists, but I like to keep it quite flexible and informal, often simply jotting down my ideas in the calendar event on my phone that is associated with each planned shoot.  After all, if I adhere too closely to a shot list, I will just end up with the same images that hundreds or thousands of other visitors have captured after doing the same research.  Serendipity and the artist’s eye have their place in travel photography, too.  The research phase can also inform me as to what clothing, gear, and other essentials I should bring to each location.

Now I’d like to introduce three smartphone apps that I consider indispensable for travel photography.  First, there’s Photo Pills, an app that incorporates several essential tools into one package.  I use Photo Pills for planning shots where I need to know how to get all the elements, including location, date, and time of day, to come together.  For example, during the Perseid Meteor Shower, I wanted to find a dark sky location with a nice foreground and a view toward the galactic core of our Milky Way.  This way, I could capture images including the meteor shower, the Milky Way, and the pretty landscape in the foreground.  I had a location in mind, a beautiful spot where there isn’t too much light pollution and with a gorgeous view over a reservoir and the Santa Cruz Mountains.  The Planner tool in Photo Pills allowed me to visualize the foreground as viewed by my phone’s camera, superimposed against the Milky Way as it would appear on different days and times of day.  I planned the shot for a certain time on each of several consecutive days, confirmed that the Milky Way would be rising in the desired direction and that the nearly full moon would have already set, and then waited for clear weather.  The first night of the meteor shower was cloudy, but the second night was the charm, and I was able to capture this striking image.
Using the Photo Pills app on my smartphone, I was able to plan in advance for a location, date, and time that would maximize the chances of capturing the Perseid Meteor Shower and Milky Way over the lovely Crystal Springs Reservoir.  Buy this photo

Here’s a screenshot of the Planner tool in Photo Pills that I used to prepare for this shoot.

img_3452

The Photo Pills app has a number of tools to help plan and execute your shots.

Another useful app for planning the best locations, dates, and times for your shoots is TPE (The Photographer’s Ephemeris).  I find this tool to be especially helpful for visualizing the path of the sun and moon across the field of view for any location I select.  This app is very powerful, and I have only scratched the surface of what it can do to predict and prepare for photo opportunities.

img_3453

The Photographer’s Ephemeris (TPE) is a powerful tool for planning any outdoor photo shoots.

A final app I will mention here is called Easy Release.  Sometimes (read this post for details about model releases), we need a model release when a person or several people are clearly identifiable in a photo.  I know some photographers who carry hardcopy model releases with them wherever they travel, but I find this to be cumbersome and impractical when on the road shooting.  Instead, I use Easy Release on my phone, so I’m always ready to quickly prepare a release for a new friend to sign when they appear in my images.  Even though the app has the ability to translate the text of the release into several languages, there are situations in which it isn’t reasonable to try to explain to a local person what’s in the release and why it’s required.  Furthermore, I consider it to be exploitative if the person can’t reasonably be expected to understand what’s in the document or why they should be signing it.  But there are times when having immediate access to a model release that can be prepared, signed, and stored right on my phone is a big advantage.

img_3454

Easy Release is a convenient tool for creating, signing, sharing, and storing model releases when a person is clearly identifiable in photos.

With proper planning using readily available resources and various apps including the ones I’ve presented here, we can be better prepared to maximize our chances of capturing memorable images.  Happy shooting, and remember that luck favors the prepared!

Do you have a favorite tool you use to plan for your photo adventures?  How have you used this tool to get your shot?  Please share your experiences here.

Want to read more posts about tools for planning your travel photography?  Find them all here: Posts on Planning.

The Raw Truth [Encore Publication]: Why you should always shoot in RAW mode

Editor’s Note: Since publishing the original version of this post several months ago, I have made a major change to my workflow and now shoot in RAW format only (i.e., with no JPEG version saved in addition to the RAW version of each image).  Shooting RAW+JPEG was a crutch that I used for a couple of years as I transitioned from JPEG to RAW format, but I realized I never use the JPEG files right out of the camera, and saving duplicate JPEG files takes a lot of disk space and time.  Please read my update in this recent post: Post on RAW vs. RAW+JPEG.  The original post on RAW mode follows:

======================

For many years after I took the plunge into digital photography, I had my camera set to store image files in the JPEG format only.  I now realize that during those years I was throwing away a lot of very valuable information with every photo I made.  There are two main reasons for this information loss.  First, the JPEG format does not store the detailed data for each pixel in the camera’s sensor but instead does some processing according to your settings and then saves only stripped-down information from each area of your image.  Second, the JPEG standard is what’s referred to as a “lossy” format; every time it is opened and resaved, the image loses more detailed data.  Once your image data is thrown away, you cannot retrieve it.

By contrast, the RAW file format keeps all the data your camera’s sensor “sees” for every pixel in the image.  Yes, RAW files are bigger and take a bit longer to store on your camera’s memory card than JPEG files, and yes, they take up more space on the memory card and on your PC’s hard drive later.  For those early years of digital photography, I avoided shooting in RAW mode because I was concerned about having reduced shooting speed and storage space for these monster-sized files.  I also was concerned that it would be too much work to shoot in RAW mode because RAW images require post-processing in order to look their best.  I now realize that I had been making a big mistake.  Shooting in RAW all the time, even when high speed is needed for action shots, ensures that you’ll always have the most image data to work with later.  You will be able to crop your images more tightly, print them to larger sizes, and especially important, refine the exposure and color with far more control if they were shot in RAW format rather than in JPEG or other compressed formats.

I now shoot nearly exclusively using my camera’s setting to save files as both RAW and JPEG.  Having the JPEG version of each image can be helpful if I want to share the photo right out of the camera.  It will look pretty decent without any post-processing because the JPEG file is stored with all of the camera’s settings for white balance, sharpening, and so on.  But when I come home from a trip, I always do my post-processing on the best images using RAW files exclusively.  Because the RAW format stores so much more information about the color and brightness of every single pixel of the image, I have much more freedom in how I choose to develop the image using my editing software (typically Adobe Lightroom, but occasionally I also use Adobe Photoshop).

Below, I show two files of the same image of my wife and me by a “fairy chimney” rock formation in Cappadocia, Turkey, both processed in exactly same the same way in Lightroom, but the first one was originally saved by the camera as a JPEG while the second was originally saved in RAW mode.  While the differences may be subtle at the size and resolution shown in this post, you can still make out more details in the RAW file, especially in areas shrouded in shadow.  The color of the sky is deeper.  Colors and shapes are rendered with more accuracy.  And of course, if we needed to crop or enlarge these images to a much bigger size, the quality of the JPEG file would deteriorate much sooner than would the RAW file.

 The JPEG version of this image.

 The RAW version of the same image.

I recommend shooting in RAW+JPEG all the time, unless you know you will need the slightly faster shooting speed or extra storage space of JPEG alone.  Doing so will give you the best of both worlds: a quick and easy JPEG to share right out of the camera, and the much more detailed data in the RAW file from which to bring out the nuances in color, texture, and exposure later during post-processing.  If you use JPEG alone, you’ll be throwing away image information you may wish you had later.

Do you shoot in RAW mode?  If so, what do you like about it?  If not, why not?  Please share your thoughts here.

Want to read more posts about photographic techniques?  Find them all here: Posts on Techniques.


Rock Solid [Encore Publication]: Why you should always have a tripod with you

Tripods have had their ups and down, so to speak.  When photography was in its infancy, the wet plates used to make the images were very slow, so extremely long exposures were required and the cameras were big and bulky, so use of a big, heavy wooden tripod was essential.  It’s all the more remarkable when looking at the incomparable work of Ansel Adams to realize that in order to make these images he had to hike miles up steep mountain trails with a heavy view camera, several big and fragile plates, and an enormous tree trunk of a tripod.  As cameras became smaller and film faster, tripods went out of style except for certain low-light situations for professionals.  Now, more and more enthusiast photographers are recognizing the value of a sturdy tripod for capturing the best possible quality images of landscapes, buildings, and of course night scenes.  In some iconic travel spots, it’s hard to find space to shoot amidst the ocean of tripods.

Sure, they’re heavy and bulky, particularly when we’re hiking or walking for long stretches.  But a good solid tripod is essential for so many types of shots that I now carry one with me at nearly all times.

An example of a technique requiring a tripod even in bright light is high dynamic range (HDR) photography.  To make an HDR image, you shoot a series of photos of the exact same scene in rapid succession, varying the exposure by a little bit between each frame, and then use special software during post-processing to bring out all brightness levels in the image, from the dark shadows to the brilliant highlights.  But if the camera moves at all between the shots, it becomes harder to stitch the shots together into a beautiful HDR image.  I’ve been known to handhold some HDR shots, but I strongly recommend shooting them using a tripod.  Of course, you’ll also want a tripod for low-light and nighttime photography, and they’re very useful for landscape images where the high resolution of your camera’s sensor is called upon to render extremely fine detail throughout the scene.  And let’s not forget that to include yourself in a scene, use of a tripod makes life a lot easier.

Although I was shooting in bright sunlight, I needed a tripod to make this HDR image of Yosemite Valley peaks reflected in the Merced River.  If the camera moves at all between frames, it is harder to combine them into the final photo.  Buy this photo

For most travel situations, you’ll want a lightweight tripod that folds up to a portable size but still offers enough stability for most uses.  There are times, though, when I need to bring along my heavy and bulky professional tripod.  Whatever tripod you choose, be sure to fit it with a good quality head–ball heads provide a lot of flexibility and ease of use for travelers–and remember to take along the plate that attaches the tripod to your camera, if required.

My go-to lightweight travel tripod is the Manfrotto Be Free.  It folds up to an incredibly small size yet affords a surprising amount of stability.  The included ball head works well but is difficult to adjust for sensitivity.  This tripod is designed to fit into a specially designed pouch in my favorite travel photography backpack, also made by Manfrotto.

The SLIK 615-315 is a great tripod for use close to home or on trips where you will have constant vehicle support.  It’s very solid, supports a tremendous amount of weight, and can be adjusted for nearly any shooting situation.  I recommend you fit it with a good ball head for maximum flexibility.

A monopod can be a real problem solver when you need more stability than handholding or resting your camera on a vehicle or table will afford, but you can’t carry or use a full tripod.  I use the Manfrotto 681B model.

To be sure, if you know 100 photographers, you’ll hear 110 different opinions about tripods and the heads and plates that go with them.  The products listed above are my recommendations only, but I’ve had good experiences using them.  For those with a lot more money to spend, tripods and heads made by Really Right Stuff are much beloved by professional and well-heeled enthusiast photographers.

What combination of tripod, head, and plate do you use, and why?  Please share your recommendations here.  Tripods are one piece of gear with which we’re constantly experimenting, so bring it on!

Want to read more posts about photography gear?  Find them all here: Posts on Gear


Beyond the Auto Mode [Encore Publication]: Take control of your images by learning to manually set exposure, focus, and more

Travel photography is so exciting and satisfying in part because it requires us to capture every kind of image in all kinds of shooting environments.  You could be heading out to shoot landscapes when suddenly a rare sighting of an animal transforms your activity into a wildlife shoot.  Or you may be on the road for your next destination when you stumble upon a colorful local festival, and now you’re shooting portraits of the revelers.  This rich diversity of subjects also creates one of the biggest challenges for travel photographers: how to be prepared for anything that comes our way.  For beginning photographers there is some comfort in using the Auto mode that nearly every camera offers.  After all, we’re more likely to get an acceptable shot this way, when the subject turns quickly from fast action to landscapes to the low light of evening, or to an indoor performance.  But in most cases, your camera’s Auto mode, which attempts to make its best guesses as to what settings to use given existing conditions, will yield only acceptable photos and not the striking and memorable images we’re after.

There is a better way.  Take control of your images by learning how to manually set your exposure, focus, and other aspects of your photo.  All advanced point-and-shoot cameras and all mirrorless and DSLR cameras allow you to set most functions manually.  Even some basic point-and-shoot models have a way to go manual, but often this will involve options buried deep in a menu somewhere.  And there are apps available for both iOS and Android smart phones that allow you to take manual control over your phone’s camera.  I use an iPhone 6S, and I’ve found the “ProCam 4” app to work very nicely for providing control over the phone’s camera setting for exposure, focus, and flash.  You can find it for less than $5 on the Apple App Store: ProCam 4 App.  Even without using an app, most smart phone cameras do allow you to override the automatic settings by clicking on the part of the image you want to be in focus and used for the exposure setting; usually you can also set the exposure based on a different area of the image from the area that you want to be in focus.  But the dedicated apps will give you greater control, as they allow you to choose the shutter speed, aperture, and ISO for each shot.

For this image of a whirling dervish in Goreme, Turkey, I wanted to blur the dancer so as to give a sense of the continual turning motion in the ceremony, so I used my camera’s shutter-priority exposure mode and selected a slower shutter speed.  Buy this photo

The key to successfully using your camera’s manual settings is to learn how they work and to practice at home, long before you actually take a trip.  Like anything else, selecting the settings we want on a camera takes practice.  In this digital era, it’s easier to learn because you can see the results of each setting immediately on your camera’s screen.  So dig out that camera user guide, or find it online, or search for a good tutorial.  But do learn how to adjust the key settings manually.

The first manual setting every photographer should learn is how to turn off your camera’s flash.  This sounds very basic, but I’m always amazed to see so many flashes going off in inappropriate places: museums that don’t allow flash photography, cultural performances, sports stadiums where the subject is thousands of feet away from the camera (the flash will only provide acceptable lighting for a few dozen feet, at most), and even the shy octopus exhibit at our local aquarium.  Believe me, you do not want to flash the octopus.  So learn how to turn your flash off, and be sure you actually do turn it off when you’re in a venue where flash is inappropriate or won’t help your image be better exposed.  Remember that glass reflects light, so you don’t want your flash on when shooting through windows of a vehicle or the glass windows of animal enclosures at zoos or aquariums.

Next, learn how to set your camera’s exposure manually.  The light meters built into today’s cameras are very smart, but they are also easily fooled by tricky lighting conditions.  The most common problem is backlighting.  If your subject is lit from behind, as many outdoor subjects are, your camera’s auto mode will likely expose for the brighter background and will leave your main subject underexposed.  You can adjust for this is several ways.  It may be good enough to just use your camera’s exposure compensation button to dial in, say, one extra stop of exposure.  Use your camera’s LCD screen and (if it has one) the histogram, to see how the subject is exposed with varying levels of compensation.  In some cases, you can use fill flash to fix backlighting problems.  To do so, manually turn on your camera’s flash, or attach a separate flash unit, and choose the setting for “fill flash” or “balanced TTL” (through the lens) flash mode.  Again, check exposure using your camera’s screen and histogram.  I find I usually get good results in tricky lighting conditions by using my camera’s spot metering mode, which tells the camera’s meter to use only the very center (or whatever area I select) of the image when choosing the exposure.

Other than allowing you to properly expose your main subject, manually setting the exposure also gives you control over what combination of shutter speed (how long the exposure lasts), aperture (how wide the lens is open), and ISO (how sensitive the camera is to light) you want for each shot.  If you’re shooting fast moving action like sports or wildlife, you will likely want to choose a fast shutter speed to freeze the motion (unless you want a blur effect as an artistic choice).  If you’re photographing a waterfall or sky and want to get some nice blurring of the water and/or clouds, you will probably want to choose a slower shutter speed.  Many times you want only certain parts of the image to be in focus.  A wide aperture (low F-stop number such as f/1.8) will give you a shallow depth-of-field, allowing only one part of the image to be in focus and blurring the other parts.  Conversely, a narrow aperture (high F-stop number such as f/16) will allow all parts of the photo to be in focus.  The final element determining exposure is the sensitivity of the camera’s sensor, measured by an ISO number.  Select a higher ISO (such as 1600 or above) only when you really need the extra sensitivity for very low-light subjects when a longer shutter speed or wider aperture is not suitable.  When you use very high ISO settings, the image will tend to have a lot of noise.  Today’s cameras are getting better at limiting noise at high ISO settings, and there are ways to reduce some of the effects of the noise using post-processing software, so my approach is to use as high an ISO as is required after considering the range of available shutter speeds and apertures.

To capture these professional beach volleyball players in sharp focus and to freeze the moment, I selected single-focus-point focus mode and chose the exact spot in the viewfinder where the players would be positioned, and also used my camera’s shutter-priority exposure mode to select a very fast shutter speed.  Buy this photo

The other major type of manual setting that you need to know how to use is focus.  Most cameras today do a pretty good job of choosing the right part of the image to focus on, but they often need some help from the photographer.  From simple smart phone cameras through professional DSLRs, the autofocus function almost always lets the photographer select what part of the image they want to be in focus.  If you keep your camera in fully autofocus mode and don’t help by selecting where your main subject is, it may very well guess incorrectly and put another part of the image as the center of focus.  So, learn how to select the focus point even while letting your camera’s autofocus mechanism actually choose the focus distance.  Sometimes a camera’s autofocus capability may not work for the conditions under which you’re shooting, and in these cases you need to turn off autofocus completely, and focus in manual mode.  Some instances when this is necessary are when shooting in very low light conditions, or when shooting in poor contrast environments (for example, your subject’s texture looks a lot like that of its background, or you’re shooting into the bright sun).  In these cases, turn off the autofocus function and adjust focus manually until the subject looks sharp.

It’s still fine to walk around during your travels with your camera set in fully Auto mode, just in case something very unexpected comes up.  But do know how to set the main functions manually so you’ll get the best possible images in the 95% of the shooting situations when you do have time to set up first.

Want to read other posts about photographic techniques?  Find them all here: http://www.to-travel-hopefully.com/category/techniques/

Do you have tips and tricks you can share on manually adjusting the camera’s settings to get great shots?  How about a time you kept the camera on Auto mode and got disappointing results?  Please share your thoughts using the comment box at the end of this post.

Amazing Landscapes [Encore Publication]: How to make images that capture the spirit of the place

I love landscape photography.  To create a really successful landscape image, several elements have to converge: the lighting must have a pleasing quality, objects in the foreground and/or middle ground should be intriguing, leading lines should take the viewer on a journey through the image, and (usually) the sky must be dramatic and compelling.  I shoot a lot more mediocre landscapes than great ones, but when all the stars align (sometimes literally, during astrophotography shoots) and all those compositional elements are in place, the results can be amazing.

Let’s take a look at some of my favorite landscape images and talk about how they were made.
Buy this photo

While traveling in Svalbard to view the total solar eclipse of March 2015, my wife and I booked a safari via snowmobile to search for polar bears.  We covered 80 miles by snowmobile, much of that after dark.  The temperature averaged -5 degrees, with wind chill about 25 below zero Fahrenheit.  We rode out to an area now used as a campground, where an early settler and his wife lived a century ago.  This was glorious, otherworldly scenery encompassing ice fields, mountains, and the icy Barents Sea.  Svalbard is located so far north (closer to the North Pole than to mainland Norway) that the sunsets last for hours, so I set up my gear at the edge of the Barents Sea, composed the frame so that the eye is led out to the horizon by the slabs of ice and the range of mountains, and waited for the best light.  A polarizing filter added some drama to the sky.  A very long exposure was not necessary because there was no point to trying in blur the frozen water.  I shot several frames before the light became too dim and the temperature too bitter to continue.  This shot was the keeper!

Buy this photo

This landscape was shot during a recent trip through Turkey and is a good example of how sometimes we photographers just get lucky.  On arriving in the Cappadocian village of Üçhisar, we were thrilled to learn our hotel room was inside an ancient cave dwelling.  We awoke at 5:30 AM the next morning to the sight out our cave-hotel’s window of hundreds of hot air balloons launching above the “fairy chimneys” that dominate the Cappadocian landscape.  I got (mostly) dressed and rushed out onto our balcony, set up the camera on the lightweight travel tripod I carried on the trip, put on a wide-angle zoom lens, and started shooting as the sun rose.  I bracketed the exposure but because the light was perfect in this one shot, I did not end up combining multiple exposures into an HDR (high dynamic range) image.  Instead, this shot, one of the first of the morning’s session, was the clear choice.

Buy this photo

Chile’s Torres del Paine National Park is catnip for landscape photographers.  There are so many glorious subjects here that you can go crazy trying to photograph everything.  But Patagonian weather is notoriously changeable, and group travel doesn’t always afford photographers the chance to shoot at the right place at the right time of day with the right weather.  Fortunately, on our second night at the lodge on Lago Gray, I could see all the conditions were lining up for an epic image.  I skipped most of an excellent dinner so that I could set up my gear on the deck: camera with wide-angle lens, polarizing filter, steady tripod, and remote release.  I framed the image with a nice balance between sky, mountains, glaciers, lake, and foreground foliage.  And I started shooting.  I bracketed the exposure with 7-shot bursts, each one stop apart.  Later, in postprocessing, I combined a few of the shots from one burst into an HDR (high dynamic range) image using Lightroom’s photomerge feature.

Buy this photo

Closer to home, Yosemite is another photographer’s dream location.  While hiking to Dog Lake in Yosemite’s Tuolumne Meadows area, a freak hailstorm hit.  Suddenly the sky was hurling hailstones in biblical style and the formerly placid surface of the lake turned black with the force of the pelting ice.  What’s a photographer to do?  Start shooting, of course!  A tripod was impractical under these conditions, so I used a relatively fast shutter speed and shot handheld.  I took a series of bracketed exposures and combined them later using Lightroom into an HDR (high dynamic range) image.  For me, this image works because of the tension between the peaceful foreground of tree trunk and reeds, contrasted with the ominous sky and turbulent water.  The fallen tree and edge of the grasses provide nice leading lines from the peaceful to the violent portions of the frame.

Buy this photo

Another California landscape, this image was shot in the gorgeous Point Lobos reserve on California’s Central Coast.  As sunset neared, I set up camera and tripod right on the beach, shooting down onto the rocks and Pacific Ocean.  I used a neutral density filter to allow a very long exposure so that the water would blur.  I also attached a polarizing filter in an attempt to darken the sky and add drama to the image, but having two filters on the wide-angle lens did lead to some vignetting (the blocking of light at the edges of the photo), which I had to crop out in postprocessing.  This image was made from a single exposure with only minor adjustments to bring out the shadow details and saturate the colors.

Buy this photo

This year’s Perseid Meteor Shower was more active than we’ve seen in many years.  At the peak night of the shower, I headed out to a spot where a break in the trees allows a view over Crystal Springs Reservoir and the Santa Cruz Mountains.  We waited until about 2 AM so that the meteor activity was at a peak and the lights of the nearby towns were no longer bright.  Shooting with a wide-angle lens and a heavy professional tripod, I framed the image to include a pleasing foreground with trees, reservoir, and mountains, with most of the frame covering the dark sky.  I used a star finder app to shoot toward the galactic core of the Milky Way.  I set the camera to make 25-second exposures at f/4 and ISO 1600.  At this focal length, exposures longer than 25 seconds will cause the stars to appear blurry due to the motion of the earth.  And then I just kept shooting, one exposure after another, for nearly two hours.  Four meteors passed through the part of the sky in my image area during this time, and I combined the images that included them into one merged image using a software application called StarStaX.  While I like this image a lot, it could have been improved by finding a darker sky area (the lights from a nearby city caused the orange glow at the top of the mountains) and by bringing out the Milky Way a bit more prominently.  Now I know what to do during next year’s Perseid Shower!

A good wide-angle zoom lens is a must for landscape photography.  Many of the images featured in this post were shot with my Nikon 16-35mm f/4 lens.  It’s got great image quality and is well built, and I find it’s a great alternative (except perhaps for astrophotography where the extra speed is required) to the popular but very expensive Nikon 14-24mm f/2.8.

Want to see more articles on how to shoot travel images?  Find them all here: http://www.to-travel-hopefully.com/category/travel/shoot/

Now I’d love to hear from you!  What are your favorite landscape images, and why?  To what lengths have you gone to capture landscape photos?  Please share your thoughts in the comment box at the end of this post.

Followup–To JPEG or Not to JPEG: For many RAW shooters there is no need to use RAW+JPG

Two weeks ago, I published the following post in which I explained why I was transitioning away from shooting RAW+JPEG to shooting only in RAW format.  Just a quick follow-up to share that over the last two weeks, I have executed more than a dozen photo shoots in RAW mode only, and I also have gone back to nearly all my archives of older shoots and deleted all the JPEG files where the same image was also stored in RAW format.  What are the results so far?  I’ve recovered about 20% of my hard disk drive’s space, so everything now runs faster on my PC and I’m not always struggling to free up enough space for each day’s new shots.  Furthermore, my shoots are going more smoothly because I don’t need to wait for the camera’s buffer to clear as it attempts to write both RAW and JPEG versions of each image to the memory card, and because I don’t need to change memory cards nearly as often.  And I’m happy to report that thus far I have had absolutely no issues as a result of making this major change to my workflow.  If you’re still shooting RAW+JPEG, now may be a good time to examine whether the extra burden is worthwhile in your own workflow.  The original article from two weeks ago follows.

=======ORIGINAL POST FROM FEB. 4, 2017=======

Regular readers of To Travel Hopefully already know that I always shoot in RAW mode, and most likely you do, too.  I’ve written repeatedly about the major advantages of RAW vs. JPEG format.  For a refresher, here’s a good summary post on the topic: Post on RAW Mode.  I concluded this previous post with a recommendation to shoot in RAW+JPEG mode, where the camera writes out the image data in both its native RAW format and in the familiar but problematic JPEG mode.  Here’s the relevant paragraph from that older post:

I recommend shooting in RAW+JPEG all the time, unless you know you will need the slightly faster shooting speed or extra storage space of JPEG alone.  Doing so will give you the best of both worlds: a quick and easy JPEG to share right out of the camera, and the much more detailed data in the RAW file from which to bring out the nuances in color, texture, and exposure later during post-processing.  If you use JPEG alone, you’ll be throwing away image information you may wish you had later.

But right now, I’m in the middle of making a major transition in my workflow.  I’ve stopped shooting in RAW+JPEG mode and am now storing my images only as RAW files.  Moreover, I’m cleaning up my PC’s hard drive by revisiting many of my directories from shoots over the past few years and deleting all of the original JPEG files (obviously, I am keeping the JPEGs that I exported from Lightroom after post-processing the original RAW files).

Why would I do such a thing, you may ask?  There are several major reasons:

  • I don’t end up using the JPEG files: Shooting in RAW+JPEG had become a crutch for me.  I had been using this mode because I was afraid of not having JPEG versions of all my images, in case I decided post-processing the RAW files was too much work or if I wanted to share certain images right out of the camera.  But I’ve been realizing that I never share JPEGs right after shooting.  They just don’t look good enough for most professional work, so I need to post-process the good ones before delivering them to anyone.  You may have clients who need to see some rough JPEGs immediately after the shoot.  I know some wedding photographers who promise this immediate preview to their clients.  But I don’t have this requirement, so the JPEGs were just sitting on my hard drive, unused, forever.  And it’s so easy to export quick-and-dirty JPEG files from Lightroom shortly after the shoot.
  • Duplicate JPEG files slow down shooting: The RAW+JPEG mode tells the camera to write out two different formats for every image you shoot.  This slows down your shooting by bogging down the camera’s processor, and it also fills up the camera’s buffer more quickly, requiring a disruptively long wait to resume shooting.  It also fills up memory cards more quickly.  While JPEG sizes vary from image to image due to compression algorithms, I find they average about 1/3 to 1/2 the size of my camera’s RAW files.  That’s a lot of extra space on the memory card, so I have to stop shooting to change cards more often.
  • Duplicate JPEG files take up a lot of disk space: Even though my main laptop PC has a 1.5 TB hard disk drive, I find it is always filling up, which considerably slows down workflow and requires bothersome housekeeping to clean up.  Storing unneeded JPEG versions of my many tens of thousands of images wastes a lot of disk space.
  • Those JPEGs slow down workflow: Even though Lightroom has a useful option to import only the RAW version into your catalog, and it keeps track of the duplicate JPEG version of the same image, having both files on your hard drive still slows down post-processing and image maintenance tasks.

I know that some photographers really do need to have JPEG files of their images.  They may be delivering images right out of the camera via a wireless connection to a cloud server that supports only JPEG format.  They may not get to post-processing for some time after the shoot and want to remember what the image looked like with the camera’s settings applied (although here one should note that Lightroom and other RAW viewers will access your camera’s settings via the thumbnail image embedded within your image’s RAW file).  They may really love their camera’s black-and-white conversion tool or other in-camera editing tools, which work only with the JPEG format.  There are quite a few situations in which you may truly require a JPEG version of your images.  But I haven’t encountered these situations in my own recent work and don’t expect to in the foreseeable future.

So, that’s the backstory on why I’m moving from shooting RAW+JPEG to RAW only.  I’m even taking the drastic step of going back to recent shoot directories on my PC and deleting the original JPEG versions of the images.  I’ll report back in a few weeks to provide an update on how this works out for me.  In the meantime, if you’re shooting in RAW+JPEG mode, you may also want to think about whether doing so genuinely helps your workflow or simply is wasting your resources.

Do you shoot RAW+JPEG, RAW only, or some different format?  Why?  Please share your experiences here.

Want to read more posts about photographic techniques?  Find them all here: Posts on Techniques.

Will Photography Soon Be Obsolete? [Encore Publicaton]: Musings on AI as artist

A friend recently pondered via a social media post whether we will have photography as we know it in the future, or if artificial intelligence (AI) will soon generate all of our images.  With tens of millions of people now capturing snapshots on their phones’ cameras and instantly applying AI-generated filters to enhance or modify the images, we can certainly observe an increasing trend toward computer involvement in the making of photos.  But I don’t believe AI will replace the artist’s eye in the making of fine-art photographs for quite some time to come.  Here are a few semi-random musings on this theme.

A machine can certainly generate bad art.  In college in the mid-1980s, I wrote a program for my Computer Science final exam that composed musical canons (pieces in which each voice plays the same melody together, but starting at different times).  My code used a semi-random configuration of musical intervals as the opening melody, then applied a simplified set of the rules of counterpoint (how musical lines are allowed to fit together) to complete the canon.  I received an “A” for this project, but truth to tell, any listener familiar with classical music could instantly discern that the pieces composed by my program weren’t anything like the lovely canons written by Telemann, for example.  In other words, my AI didn’t pass the Turing Test.

In the more than 30 years since I wrote that program, AI has progressed by leaps and bounds.  Computers can now generate poetry, classical and jazz music, and even paintings that many non-experts judge as products of human artistic creativity.  I’m fascinated by the progress, but so far the best of the AI-generated “art” is really just imitation and trickery: it takes a seed of something original such as a photograph or a melody, and transforms it using a set of complex rules that could be described as a pre-programmed artistic style into something pleasant enough but not inspiring.

In his landmark 1979 book, “Gödel, Escher, Bach: An Eternal Golden Braid,” Douglas Hofstadter amazed the world by demonstrating comparable interlocking themes of grace and elegance among the very different disciplines of mathematics, visual art, and music.  He even speculated on the ability of machines to create works of great insight.  But Hofstadter’s proposed approach differed from that of the AI field that has developed since then in that he favored teaching machines to create via an understanding of how the human mind creates, as opposed to today’s AI approach of taking mountains of data and throwing brute force calculations at it.  To my eye, ear, and mind, this brute force method is the reason most of today’s attempts to artificially emulate the creative process are not insightful and do not add anything to their genres.  And so far, the vast majority of these attempts fail their respective Turing Tests.  That is, humans can tell it is a machine and not a human generating the “art.”

Applying these musings to the art of photography, what do see today?  To be sure, more images are being generated today than ever before in human history, and the art of photography is being devalued by its sheer pervasiveness.  Everyone captures images now, and most of them believe that makes them photographers.  While photographers have always required the involvement of a machine in the creation of their art, good photographers have always relied on their artistic vision, the so-called artist’s eye, to create images that are special.  I don’t believe that all the Meitu and similar AI filters that abound today are creating any photographic art that adds insight or helps interpret the world around us.

One very central component in photography is composition.  How does the photographer choose what elements to include in the image, and how will these elements be combined?  Read my recent post on composition here: Post on Composition.  This vital aspect of photography does use some “rules”, such as the Rule of Thirds, Leading Lines, Framing Elements, Point of View, Foreground/Background, and Symmetry and Patterns.  Rules, of course, can be programmed into an AI so that the machine can emulate the way humans create.  But in photographic composition, the “rules” are really just guidelines for getting started.  A good photographer knows when to break the rules for artistic impact.

Even the dumbest devices are capable of generating images.  Security cameras can capture images that we would consider to be rudimentary documentary photographs.  Given long enough, a security camera might accidentally capture what we would consider to be a good street photography image, because after capturing millions of dull scenes, sooner or later the camera will catch a random alignment of interesting elements.  It’s like thousands of monkeys typing random characters: given enough time, one of them will coincidentally type out a Shakespeare sonnet or even a full play.  As wearable computing devices become more pervasive, many people’s lives will be documented in real-time via the capture of millions of images.  Some of these may be interesting to their friends and perhaps the general public.  A few may even have artistic value.  But true artistry isn’t characterized by coincidence.

I don’t doubt that eventually we will get to the point where machines can create images as good as much of what humans can create.  I think we’ll get there, but it will take a long, long time.  And in the meantime, the role of photographer as artist, experimenter, and interpreter of the world around us will continue to be central to our society’s need for communication and expression.

What do you think about the future of photography?  Will we soon see machines creating much of our imagery?  How about our good, artistic imagery?  Please share your thoughts here.

Cool, Calm, and Composed [Encore Publication]: All the technology in the world can’t replace your vision when composing images

Photographic composition is the process of determining which elements to include in the image and how to combine them in an artistically pleasing way.

What makes a great photograph?  You’ll hear many different answers to this question from different people, but to me a great photograph needs to integrate at least three of these four elements: compelling subject, beautiful light, flawless technical execution, and thoughtful composition.  Assuming we can find a great subject and either find or manufacture lovely lighting, the technology in modern cameras can assist us in certain technical matters such as exposure and focus.  But even the best of today’s AI technology can’t replace the artist’s vision when it comes to photographic composition.  For more of my musings on the application of AI to photography, see yesterday’s post: Post on AI and Photography.

Today’s post presents a quick primer on some of the guidelines that can help us compose our images.  But keep in mind that there are no hard-and-fast rules when it comes to composition.  The photographer must choose which “rules” to use when composing, and when to break some rules.

      • Rule of Thirds: One of the first compositional tools most beginning photographers learn is the so-called Rule of Thirds, which states that strong composition is achieved by placing key elements along the imaginary lines that divide the frame into thirds vertically and horizontally; better yet, try to place the most important parts of the subject at the intersection of a pair of these lines.  This portrait I made of two sisters in Arusha, Tanzania, places each sister’s dominant eye at an intersection point of two of the imaginary dividing lines.

Tanzania Buy this photo

          • Leading Lines: Another tool to aid in composing strong images is using the natural lines in the image to draw the viewer’s eye into the frame.  This landscape made while hiking part of the Sheep’s Head Way in southwestern Ireland incorporates the leading lines of the ancient stone wall, the rainbow, and the coastline to draw the eye down to the sea, over the rainbow, and across the coast.

 Buy this photo

          • Framing Elements: Using natural frames within the image to set off the main subject can be a useful technique.  Look for doors and windows in a population center, or for natural arches, trees, and other landforms in a natural setting.  This night landscape made in Yosemite National Park frames the Milky Way within a ring of trees and granite walls.

 Buy this photo

          • Point-of-View: Think about how the different elements in the image will appear in the perspective of your location.  I could have shot this portrait of a man with his duck at a street fair in San Francisco straight on with them both looking into the lens.  Instead, I chose a viewpoint that was very close to the duck’s head, shooting up from its perspective and relegating the human to the background and edge of the frame, nearly out of focus.  This changes the nature of the portrait to a more humorous and offbeat tone, which matched the occasion of the How Weird Street Faire.

USA Buy this photo

          • Background: Always be at least as aware of your background as your foreground subject matter.  Careful choice of background to support your image’s overall theme is one of the surest ways to elevate your image.  In many cases it is desirable to have a clean, uncluttered background, but for this image of the San Francisco Pride Parade, I wanted the background to support the theme of solidarity and strength in numbers.  While the main subject in the front is the only element in crisp focus, the layers of marchers with flags behind him supports the concept he is not alone.

 Buy this photo

        • Patterns: Composing an image around a recurring pattern can add considerable dramatic impact.  I framed this image of miners’ cottages in Svalbard, Norway by isolating the repeating pattern of houses, each in a different vivid color, against the stark white of the snow and bleak sky.

 Buy this photo

  • Symmetry: Images with symmetry along one or more dimensions are often striking and artistically pleasing.  The subject can have natural symmetry, such as in a face, or can be framed with its reflection to create symmetry.  I framed this image of a resting alligator with its reflection in the Louisiana bayou waters to create a dramatic symmetry.

 Buy this photo

Keep these guidelines in mind as you choose how to compose your images, but remember that which one(s) you apply will depend on the image, that its okay to break the rules, and that ultimately you are the artist and what you envision, not what the rules state, is correct for you.

What guidelines help you compose your best images?  Please share your thoughts here.

Want to read more posts about photographic techniques?  Find them all here: Posts on Techniques.

The Things We Carry [Encore Publication]: Basic Gear for Travel Photography, Part II

Kyle Adler photographer travel photography

Let’s pick up the gear discussion where we left off on the recent post.  Last time, we covered cameras and lenses.  Now we’ll talk about flashes, tripods, accessories, bags, and other essential kit.

Flash Units

Your camera most likely has a built-in flash, and in many cases that can be good enough to provide some fill-in lighting for backlit subjects or even to serve as a main light in very dark situations.  But for more flexible control over how much light you want, the quality of that light, and where that light comes from and goes to, you will likely want to have a separate flash unit.  I use the Nikon SB-910, which is powerful and flexible enough for most settings.  It has been discontinued and replaced by the Nikon SB-5000, but the older model is often still available.

Whatever flash you use, it is best to attach a diffuser of some sort to soften the otherwise very harsh light of the flash.  I also keep my camera set to lower the flash output by 1 stop, and I only override this setting occasionally.  Flash is often best when used sparingly.

Tripods

For most travel situations, you’ll want a lightweight tripod that folds up to a nice portable size but still offers enough stability for most uses.  There are times, though, when I need to bring along my heavy and bulky professional tripod.  Whatever tripod you choose, be sure to fit it with a good quality head (ball heads provide a lot of flexibility and ease of use for travelers) and remember to take along the plate that attaches the tripod to your camera, if required.

My go-to lightweight travel tripod is the Manfrotto Be Free.  It folds up to an incredibly small size yet affords a surprising amount of stability.  The included ball head works well but is difficult to adjust for sensitivity.  This tripod is designed to fit into a special pouch in my favorite travel photography backpack, also made by Manfrotto.

The SLIK 615-315 is a great tripod for use close to home or on trips where you will have constant vehicle support.  It’s very solid, supports a tremendous amount of weight, and can be adjusted for nearly any shooting situation.  I recommend you fit it with a good ball head for maximum flexibility.

A monopod can be a real problem solver when you need more stability than handholding or resting your camera on a vehicle or table will afford, but you can’t carry or use a full tripod.  I use the Manfrotto 681B model.

Accessories

We photographers love our toys!  While it is easy to get carried away and purchase every cool accessory that comes along, I will try to limit the recommendations here to a handful of truly essential items.  And don’t forget the little things like lens cleaning cloths, a blower brush for dust, and of course extra batteries and chargers for your camera and flash.

Three kinds of filters are essential gear for most photographers.  I’ll cover each type below.  Note that you must use a filter that is the correct size to attach to your lens.

It’s a good idea to keep a UV filter attached to your lenses at all times, as this helps protect the front element of the lens from scratches.  Use a good quality filter, though, as the poorer ones can affect image quality.  I would recommend removing the UV filter when shooting with certain other combinations of filters, as the edges of the image can be cut off (vignetting) with too thick a stack of filters on the end of the lens.  I’ve had good luck with Hoya UV filters.

The second must-have type of filter is the circular polarizer.  A polarizing filter can reduce glaring reflections and can darken skies and enhance natural colors.  This little gadget is almost a secret weapon for making images that really pop.  Again, I like the Hoya products, which are thin, well made, and perform as they should.

The final essential filter is the neutral density filter.  These reduce the amount of light that reaches the camera’s sensor, so you can use slower shutter speeds to blur motion, or so you can use a wider aperture to get a shallow depth-of-field, even in bright sunlight.

Another essential is a good remote release for your camera.  I know plenty of photographers who still use the good old trusty wired (or cable) releases.  I like to be able to move away from the camera when shooting remotely, so I favor a wireless release such as the RFN-4s Wireless Remote Shutter Release.

Smartphones

Most of us would never consider leaving home without our phone, and there are additional good reasons to carry yours with you when you are photographing at home or around the globe.  First, the cameras in today’s better phones are now good enough to make quite good images.  I’ve been very impressed with the quality of the main camera, and even the selfie camera, on my Apple iPhone 6S.  But your phone is also an essential photography tool because there are some very good apps to help you plan, shoot, and share your images.  There are too many to list here, but I’ll plan a future post to share some of my favorites.

Bags

Aside from cameras and lenses, no other category of gear gets photographers arguing quite so heatedly as bags.  For a travel photographer, your bag must be highly protective and durable yet lightweight, fit your gear well but with the flexibility to change out kit as needed, and preferably not advertise that you have expensive camera equipment inside.  The choice of what bag to use is a very personal one, but I’m still going to recommend my three favorites.

For those times when you need to bring most or all of your gear on a trip, I like the Tamrac 5586 Expedition 6x Backpack.  It carries a lot of gear snugly and flexibly, and it doesn’t look like a camera bag so it’s less likely to invite the wrong kind of attention.  It will almost always be accepted as carryon on flights, but it is a bit bulky and heavy for all-day, everyday use while traveling.  I’ll often use this bag to get all my gear to my first destination, then pack a day bag for just the gear I’ll need for each day of the trip.

My current favorite bag for day use for nearly any shooting situation near home or while traveling is the Manfrotto MB MA-BP-TRV Advanced Travel Backpack.  It can fit a reasonable amount of gear while leaving room for non-photography items like a jacket or a water bottle (yes, even photographers occasionally have to drink or stay warm).  It disguises your gear pretty well, has good rain protection, and even sports a special sleeve for carrying the Manfrotto Be-Free Travel Tripod.

For carrying just a few pieces of gear around town or close to home or hotel, a shoulder bag can work well.  This is the best setup for quickly accessing your gear while shooting, but it can be tiring to carry the weight across one side of your body if you have a lot of trekking to do.

Software

For post-processing my images, I use both Adobe Lightroom and Adobe Photoshop Elements.  I can do 90% of my processing using just Lightroom, but occasionally I do need the added power of Photoshop.  While I still use the perpetual license software versions, by now most photographers have gone over to the monthly licensing structure that Adobe calls the Creative Cloud.

What gear can’t you live without?  Have you discovered any little gadgets that improve your images or make life easier for photographers?  Please share your thoughts in the comment box.  I’d love to get your ideas!

Want to read more posts about photographic gear?  Find them all here: Posts on Gear.


The Things We Carry [Encore Publication]: Basic Gear for Travel Photography, Part I

In today’s post, we’ll cover cameras and lenses.  I’ll post again soon with Part II, which will discuss flash units, tripods, accessories, bags, and other essential gear.

One of the biggest challenges we face as travel photographers is what gear to carry with us.  On the one hand, we have to be ready for anything.  It’s quite possible we will have to shoot landscapes, wildlife, portraits, architecture, indoor performances, and night scenes, often all on the same day.  On the other hand, there’s a practical limit to how much we can carry without being turned away by airline personnel or damaging our bodies.  And who really wants to travel with 75 pounds of photo kit?

Here is my basic setup for travel.  Note that my gear is suitable for a professional or enthusiast photographer on a not-unlimited budget (my wife keeps me from getting carried away).  There are less expensive alternatives for most of the gear I carry, and those on unlimited budgets can spend much, much more than this.  I will adjust what I bring depending on the specifics of the trip.  For a safari in East Africa, that 500mm lens is essential, but I wouldn’t want to lug it on a hiking trip in Ireland.  On a trip to view a total solar eclipse, I’ll need that rock solid but very heavy professional tripod, but on most trips my lightweight travel tripod is good enough, thank you.  But the following list of items comprises the core of my basic travel gear.

Cameras

There is no one-size-fits-all when it comes to your choice of camera.  These days, even a simple point-and-shoot camera or a smartphone camera is capable of making very good images.  But if you’re willing to carry a bit more weight and to learn how to use it before you take it on your first trip, a mirrorless interchangeable lens camera or a digital single-lens reflex (DSLR) camera will give you much more flexibility.  I use a DSLR, but more and more of my photographer friends are switching over to mirrorless cameras.  It’s really a matter of personal choice, and if you’re not planning to carry a lot of specialized (and heavy) lenses with you, the smaller size and lighter weight of a mirrorless camera may make up for the loss of certain features.  For very photo-intensive trips where it would be impossible to replace a lost or broken camera, such as an African safari, I will pack two DSLR camera bodies, but often I take a chance and bring just one.  Whatever camera you take on your trip, make sure you know how to use all its features and have tested it thoroughly before you leave, and if you’ve been using it for a while, have it cleaned in advance of your departure.  Note that while I am a Nikon shooter, comparable gear is available from Canon for DSLR afficianadoes.  In the high-end mirrorless arena, Sony’s Alpha a7R II is favored by many professionals and enthusiasts.

My go-to camera is the Nikon D810.  This is a professional model and not for beginners, but it really does do it all.  The resolution is extraordinary, it performs superbly in very low-light situations, the autofocus is fast and flexible, it’s continuous burst shooting speed is good enough, and I love the feel of the camera in my hands and the control it offers over all settings quickly.  I’ve put this baby through hell and high water, but it always comes through for me.

Lenses

For beginning users of interchangeable lens cameras, or for seasoned photographers who need to travel light, a small and lightweight “walkaround lens” may be all that you need to bring for a day’s shooting.  Mine is the Nikon 24-85mm f/3.5-4.5 lens.  It’s a good value for a well-built if not quite professional grade lens, and while not particularly fast, it does offer vibration reduction which allows you to shoot at slower shutter speeds while controlling for camera shake.  I recommend this lens for users of cameras with full-frame sensors who want a small, light, and fairly durable lens for those situations when you want to be ready for most anything.

It’s a good idea to have a wide-angle zoom lens for landscapes, architecture, and other situations where you need to include a lot of area in the frame or want a more uncluttered or exaggerated perspective.  I use the Nikon 16-35mm f/4 lens for this purpose.  It’s got great image quality and is well built, but it is rather heavy and bulky.

A telephoto zoom lens is a must-have for most travel photographers, as it allows you to shoot many wildlife subjects as well as emphasize details in all subjects you encounter.  A longer lens also can be used to provide a compressed perspective that makes far-away subjects appear to be closer to foreground subjects; this perspective can be very powerful in landscape images.  My primary tele zoom is the Nikon 70-300mm f/4.5-5.6 VR lens.  While this lens is built on aging technology and doesn’t always feel as solid as more professional lenses, it is relatively small and lightweight, fairly inexpensive, and provides a very effective vibration reduction function.  This lens has been a staple in my bag for many years, during which time I’ve used it to capture some of my favorite images.


You may never need a super-telephoto lens.  They tend to be expensive, bulky, and heavy, and on many trips you won’t need it.  But for those trips when you expect to encounter lots of wildlife or want to capture astronomical events like an eclipse or transit of a planet, a very long lens is essential.  Mine is the Sigma 150-500mm f/5-6.3 lens.  It’s more economical than a Nikon or Canon super-tele, and it produces reasonably sharp images even when used at its widest aperture.  You can spend much more on this type of big glass if you want or need to, but I’ve found this lens works quite well for me.

So far, we’ve talked about zoom lenses.  It’s also a good idea to carry a few prime (fixed focal length) lenses.  These tend to be faster, higher quality, and less expensive than zoom lenses in the same category.  The downside, of course, is that you have to “zoom with your feet,” that is, find a vantage point that works to compose your image without benefit of changing the lens’ focal length.

If you pack only one prime lens, it most likely will be a “normal” lens, that is one with a focal length of about 50mm for a full-frame camera or about 35mm for a crop-sensor camera.  I carry the Nikon 50mm f/1.4G lens.  This is the one I use in very low-light situations or to get a really shallow depth-of-field.

I think my current favorite lens of all is my Nikon 85mm f/1.8G lens.  This is a classic portrait lens and provides a flattering perspective and great image quality when your subject is a human being.  I use it for nearly all of my portrait work these days.  But this lens also shines for nature and action photography where you don’t need a really long focal length.  It renders really lovely “bokeh”, or the soft quality of the out-of-focus parts of the image.

A wide angle prime lens can be useful for landscapes, architecture and interiors, and astrophotography, among other purposes.  I like the Nikon 24mm f/1.8.


Stay tuned for Part II of our gear discussion, to be posted soon on this same Bat Channel.

What’s your go-to camera and which are your indispensable lenses?  Add your thoughts to the comment box at the end of this post!

Want to read more posts about photographic gear?  Find them all here: Posts on Gear.


Focus on Svalbard [Encore Publication]: Breathtaking beauty at the top of the world

My wife and I area avid eclipse chasers.  One of the joys of seeking out total solar eclipses is their geographic dispersion: each total eclipse can be viewed only from a narrow band of land or sea whose swatch could cut across any corner of the globe.  This means the dedicated eclipse junkie could, and eventually will, end up traveling to nearly any given remote spot on the planet.  In March, 2015, we had the opportunity to observe and photograph a total solar eclipse in Longyearbyen, the only population center in Svalbard, the vast island in the Norwegian Arctic.  This wonderful trip was conducted by A Classic Tour Collection (http://aclassictour.com/travel-company/), specialists in eclipse tours. Home to more polar bears than humans, Svalbard is a place of remarkable pristine beauty located closer to the North Pole than it is to mainland Norway.

In a previous post I provided a primer on eclipse photography.  You can review that post here: Post on Eclipse Photography.  And don’t forget you can join my wife and me for our photography tour including the total solar eclipse and the Pacific Northwest in August-September 2017: Eclipse and Pacific Northwest Photography Tour.

Today’s post focuses on Svalbard’s photographic treasures.  The village of Longyearbyen itself is very distinctive.  The world’s northernmost permanent settlement, it was built to enable the mining industry in the region.  The landscape and architecture are very unusual and starkly beautiful.

This row of miner’s cottages, each painted a vibrant color, makes a nice subject.  I overexposed the foreground and background snow to emphasize the richly saturated colors of the houses.  Buy this photo

Any Arctic location affords the possibility of seeing the Aurora Borealis (Northern Lights).  The conditions must align properly: dark sky, clear weather, and it helps to be near a peak in the solar cycle.  While I’ve seen more impressive displays in the past, the aurora we observed in Svalbard was still impressive.

To capture the Northern Lights, use a fast wide-angle lens and a sturdy tripod.  As a starting point for exposure, try an ISO setting of about 800 and shutter speeds from about 4-15 seconds.  Experiment to see what works best.  Buy this photo

The stark icy landscapes surrounding Longyearbyen are otherworldly.  I photographed this glacier-covered mountain near sunset, and we enjoyed the excitement of climbing it the next day.

To make this image of an icy butte on the outskirts of the village, I used a tripod and exposed using spot metering for the rocky parts of the mountain.  Buy this photo

When shooting in very cold climates like Svalbard in March, it’s important to keep both your gear and yourself safe and functional.  Check out this post on shooting in extreme conditions: Post on Extreme Conditions.

One of the trip highlights was a polar bear safari by snowmobile.  Zipping along pristine ice fields at speeds up to 75 km/hour while the Arctic sun slowly set was thrilling.  Our turnaround point was an old campsite on the shore of the Barents Sea.  It truly felt like the edge of the world.  Due to an incident earlier in the day, in which a group of campers was attacked by a polar bear and forced to shoot it, we did not encounter any of the skittish bears that night.  We did, however, see the doomed animal’s footprints in the fresh snow.

My wife hikes alongside the tracks of a polar bear shot to death earlier the same day.  This dramatic image was made in near total darkness, so I was forced to use flash as the main lighting source.  In these situations, I dial down the power of the flash by at least one stop and try to position it for maximum dramatic impact.  Buy this photo

One of my favorite images from the trip, this was made on the shore of the Barents Sea at sunset.  Landscapes like this one need to be composed especially carefully to best showcase elements in the foreground, middle ground, and background.  I chose a vantage point low to the ground to emphasize the ice floes.  While I also experimented with using a bit of fill flash, I preferred this image with natural light only.  Buy this photo

On eclipse day, there is a palpable air of excitement.  Here is a shot of astronomer and leading eclipse expert Jay Pasachoff preparing for the eclipse along with one of his students.

Even during an exciting event like a total solar eclipse, it’s important to remember to document the people and activities in your group.  Buy this photo

The diamond ring effect signals the start of the period of totality.  Buy this photo

After the eclipse viewing, we enjoyed a dogsled ride back to Longyearbyen village.  I wanted to capture the feeling of exhilaration as the dogs pulled us rapidly along the snow fields into a wide-open horizon.  To capture that emotion, I shot from the perspective of the rider, handheld, using a fast shutter speed and a fairly wide focal length.  Buy this photo

Wildlife is a favorite genre of photography in nearly any region.  During our ascent of a glacier-covered mountain, we were fortunate to observe several Svalbard reindeer, the world’s smallest subspecies.  I used a telephoto lens and exposed for the animal’s fur, as using an auto mode would have underexposed the main subject due to the bright snowy background.  Buy this photo

Longyearbyen is the world’s northernmost settlement, so it stands to reason it would contain the world’s northernmost church.  Care must be taken when photographing architecture using a wide-angle lens not to distort the perspective.  Buy this photo

Your intrepid author photographing the total solar eclipse.  Buy this photo

Parting shot: After returning from Svalbard, I created this montage of several images each depicting a different phase of the eclipse.  Buy this photo

I hope this article inspires you to want to visit Svalbard.  While extra effort is required to visit the world’s most remote and extreme destinations, the returns are enormous in terms of the beauty and unique photographic experiences.

Have you visited Svalbard or other Arctic destinations?  What was most memorable?  Please share your thoughts here.

Want to read more posts about travel photography destinations?  Find them all here: Posts on Destinations.

Focus on Dance Brigade’s “Gracias a la Vida: Love in a Bitter Time” [Encore Publication]: Creative approaches to shooting inspiring performances

This weekend, I had the privilege of shooting the dress rehearsal for a new show highlighting 40 years of activism through the arts, presented by San Francisco feminist and multi-cultural dance company, Dance Brigade.  Their work was extremely powerful and moving.  Not only was it artistically and technically astonishing, but the show was truly inspiring as a testament to the power of artists fighting for social justice.  In the current era we need this power to be wielded widely and wisely to balance the widespread injustice all around us.

When shooting work as inspiring as this, I often choose less traditional and more creative approaches to presenting my images.  In short, the medium should match the message, so when the message is as powerful as Dance Brigade’s performance, I believe the medium should rise to the occasion.  So, in addition to making some traditional documentary images shot looking directly toward the performers with an eye toward capturing the obvious, I also strove to capture some different and unusual perspectives on the performance.  I present some of them in the post with short descriptions of my intent for each image.

The usual rules for shooting a live indoor performance still apply.  Gain permission to shoot in advance directly from the show’s producer.  Use a fast lens and high ISO setting so as to be able to preserve a fast shutter speed to freeze action while still avoiding use of flash, which distracts performers and crew.  Turn off your LCD display and check your images only when there’s a break in the action.  Use the quietest shutter mode your camera supports.  And never use a tripod or monopod unless you have explicit permission from the producer.

Wait for the telling moment: There are instants during live performances that distill the overall message down to its essence.  Seek those moments.  Buy this photo

Tell a story: Just as a good performance is designed to reveal key messages to the audience at the appropriate time, so should the photographer capture images that disclose the underlying narrative.  This image of the climax from a piece on the plight of refugees captures the essence of the story.  Buy this photo

Find an unusual perspective: When shooting behind-the-scenes such as at a dress rehearsal, you have the opportunity to find just the right combination of vantage point and lens to make your images really pop.  This image was made from the lip of the stage.  I had to lean forward across the front of the stage and shoot upward.  I love this shot because it captures the artist from her eye level just at a decisive moment in the drama.  Buy this photo

Document the power of the performance: This piece started quietly and worked up slowly to a frenzy of pent-up anger and activism.  I found the best vantage point and waited for the perfect moment.  Buy this photo

Know when to break the basic rules of composition: Sure, most of the time you want to avoid cutting a performer’s head off.  But I saw the latent energy inherent in the unorthodox framing of this image.  By shooting from the static artist’s level and capturing only part of the jumping artist’s body, I transformed the image into a bolder statement that supported the message of the piece.  Buy this photo

Gain perspective: Not every image needs to include the whole environment.  Sometimes it’s more powerful to capture just the salient part.  Buy this photo

Capture a moment of pure joy: Shoot lots of images so that you can choose the ones that really make an impact.  The bold colors, shallow depth-of-field, and simple composition of this image work to emphasize the dancer’s aura of joyful triumph.  Buy this photo

Use black-and-white: This image cried out for me to convert it to monochrome.  Its raw documentary power and gritty, graphic nature are more compelling in black-and-white.  Buy this photo

Don’t be afraid to use selective focus: It’s okay for certain elements of your subject not to be in sharp focus.  I chose a narrow depth-of-field in order to obtain selective focus on just the performers in the middle of this triumphant circle.  The soft focus on the dancers in the foreground and far background only serve to enhance the dramatic power of the image.  Buy this photo

I hope this essay provides some ideas for how to shoot creative images that amplify the power of your message.  Modern digital photography provides us with so many tools for making images that go beyond the pure documentary function to also enchant our viewers with imagination.  A performance as moving as Dance Brigade’s “Gracias a la Vida: Love in a Bitter Time” deserves more than a straightforward narrative capture.  I tried to make some images that supported their messaging with a creative visual style.  Continue to capture the obvious message in your images, but keep shooting to go beyond the documentary.  Go wild, and see what you can achieve!

How do you go beyond the obvious to capture images that pop?  Please share your ideas here?

Want to read more posts about what to shoot while traveling or near home?  Find them all here: Posts on What to Shoot.

Approach with Care [Encore Publication]: Sensitive photographic practices help keep wildlife wild and healthy

Photographing wildlife in its natural habitat is one of the most exciting and rewarding activities I can imagine.  From researching the species’ behavior to seeking it (sometimes for days) in the field, to that wonderful moment its image is captured on our memory card and to the thrill of viewing that image when we return from the field, there’s something truly magical about this genre of photography.

Observing and photographing animals in the wild, such as this rare wildcat along Turkey’s Turquoise Coast, is thrilling.  Strive to put the animal’s welfare ahead of your image-making.  Buy this photo

Done properly, wildlife photography can have zero to very modest negative impact on the creatures whose images we capture.  In fact, photographers have done a great deal over the decades to help preserve wildlife through sharing images that inspire local people, governments, and the public to protect endangered species.

But by stalking and encroaching on a species’ territory, we photographers also put wildlife at risk of harm.  Improperly engaging with animals with the intent of photographing them can cause a predator to starve by allowing its prey to escape, cause another creature to become prey by distracting it from its natural wariness, stress the animal to harmful levels, or acclimatize them to being around humans.

Here are some important guidelines for photographing wildlife in as safe a manner as possible:

  1. Do your homework: The more you know before you set out to encounter a creature, the less likely you are to cause it harm inadvertently.  If you will be going with a safari or tour, research the outfit first to make sure they follow the highest ethical standards.  Get to know the behavior of the species you are seeking.  What is their daily and seasonal routine?  Where is their habitat?  What do they eat and what eats them?  What is a safe distance from which to view them?
  2. Keep a respectful distance: As kids we were told to keep away from wildlife for our safety, but as photographers we also need to consider how far away we must stay in order not to cause the animals undue stress.  Knowing where their meal ticket comes from, some safari and tour operators are willing to break park or preserve rules and approach the animals very closely so their clients can get great photos.  Do not encourage this.  Aside from the harm this stress can cause the animal, a stressed animal will look stressed in your photo and is more likely to bolt and leave you with no photo at all.  So, use a long telephoto lens, keep your distance, and both your subject and your images will be the better for it.
  3. Show special respect for the young: Baby animals are extremely vulnerable and should be treated with special care.  If you are traveling with a tour, defer to your guide’s knowledge.  If you’re on your own, be sure you’ve done your homework first, and err on the side of caution.Young animals, such as this baby baboon in Tanzania’s Serengeti National Park, should be photographed with special care.  I made this image using a long telephoto lens and shot from a safari vehicle parked at a respectful distance.  Buy this photo
  4. No kidding–don’t feed the animals: It seems almost too obvious to have to state, and yet nearly every day I encounter humans attempting to feed wildlife.  In Yosemite National Park, a number of bears must be killed each year because they have become dependent on humans for food.  At your local city park, you’ll probably observe people trying to feed the birds or squirrels.  And of course there are the big news stories (the recent major one was about the killing of the beloved Cecil the Lion) about hunters baiting animals with food.  A well placed and properly maintained bird feeder in the backyard may be okay, but no other attempts should be made to feel wildlife.
  5. Come back another time: In today’s networked world, word about rare animal sightings travels quickly.  If you hear about a sighting while traveling or near home, chances are many other photographers and watchers have also heard about it.  Multitudes of humans crowding around an animal will put it under undue stress and will also ensure you won’t make a great portrait of it.  Come back another time when there are fewer other people.  No photo opportunity is so irreplaceable that we should put the wildlife at risk.

With a little knowledge and courtesy, photographers can make great wildlife images while helping preserve and protect their subjects and keeping the wildlife wild.  Conversely, without respect or information about the local fauna, we run the risk of putting them at grave risk.  As the saying goes, make good choices!

The world’s smallest species of reindeer, the Svalbard reindeer is at risk due to global climate change.  Cautious and respectful photographers can use their images to help protect and preserve at-risk species.  Buy this photo

Do you have best practices about shooting (with a camera, that is) wildlife in the field?  Have you observed human behavior–positive or negative–that serves as an example?  Please share your thoughts here.

Want to read more posts about what to shoot while traveling or near home?  Find them all here: Posts on What to Shoot.


New Year’s Resolutions [Encore Publication]: My opinionated list of the top 5 promises all travel photographers should make and keep

Personally, I’m not a big fan of new year’s resolutions.  Common sense dictates that if we really want to make change in our lives, we should resolve to take specific steps toward that change every day.  Promises we make on December 31 each year will most likely be broken by January 15.  That’s certainly what I’ve observed over many years on the running trails and gyms where I’ve run or worked out daily.  A huge surge in attendance begins on January 1 and dissipates within about two weeks.

So I waited a couple of weeks to share my thoughts on what we travel photographers should resolve to do differently.  Since these aren’t technically “new year’s resolutions,” it’s my hope that these practices will stick.

  1. Book that once-in-a-lifetime trip now:
    Visit that exotic destination you’ve always wanted to see!  Buy this photo
    That travel photography “bucket list” needs to be emptied before you kick the proverbial bucket.  I know too many people who always found excuses to put off taking the trips they most desired, until it became too late for them.  The kids are too young, my job is too demanding right now, I can’t afford the cost.  I’ve made these excuses, too.  But the one thing we can’t live a full life without and can’t ever lose once we’ve attained it is experience.  Every trip I’ve taken helped me grow as a person and as a photographer, and also helped me grow closer to my family and other travel companions.  So book that trip today and go this year.  You won’t regret it.
  2. Just get out there and shoot:
    USAThere are countless exciting subjects for your photography within a few miles of your home.  Buy this photo
    Even professional travel photographers can’t be on a lengthy shoot in an exotic part of the globe all the time.  So, book those once (or a few times) in a lifetime trips as soon as feasible, but in the meantime find some wonderful local attractions where you can hone your craft by making compelling images.  I love to shoot little-known local cultural events such as street fairs and performances of dance, theater, and music.  It’s also a great pleasure to find scenic spots near home where we can make some striking landscape images that haven’t been shot thousands of times before.  Remember, you’re the local expert near your home, so seek out frequent opportunities to shoot in your own community.
  3.  Learn to use your camera as a tool to bridge the gap between your culture and the culture of the land you’re visiting:
    CubaPhotography can bring us closer to the people we meet on our journeys.  Buy this photo
    Instead of letting your photography separate you from the people you’ve come to learn from, resolve to turn your image-making into an opportunity to meet more people and get to know them more deeply.  Check out my pillar post on how to do this: Post on Photography as a Cultural Bridging Tool.
  4. Approach wildlife with respect:
    The more we learn about and respect the fauna we encounter during our travels, the healthier they will emerge from the experience (and the better our images will turn out).  Buy this photo
    A photo safari is a life-changing experience and should be on every travel photographer’s list.  But just as our cameras can be used either to alienate local people or to bond with them, so can photographing animals be used to harm them or to respect and help preserve them.  Read this post for more detailed tips (Post on Wildlife Photography), but in the meantime I will summarize by emphasizing the importance of prioritizing the animal’s welfare ahead of our desire to get an amazing shot of it.  Getting too close to wildlife will stress the animal and could even cause it to become lunch (or cause a predator to starve by losing its meal).  The more we get to know a species’ behavior before encountering it in the wild, the better our images will be and the healthier the animal will emerge from the encounter.
  5. Continually improve technique:
    I strive to hone my technique with every shoot.  Buy this photo
    There are more important elements in photography than technique, but a mastery of technique does help us make the images we want, so I always work to improve mine.  If you haven’t already gained the confidence to shoot in manual mode, start learning now.  Remember that while cameras have become very smart, they aren’t artists and they can’t know what the photographer is trying to achieve, so learn to take control of your camera’s settings today.  Here’s a short post listing five key techniques that will help your images stand out: Post on Top Five photography “hacks”.

So, resolve to take that trip of a lifetime, shoot locally while you’re waiting for it, learn to use your camera as a tool to interact beneficially with the people and the wildlife you meet during your travels, and work to hone your technique.  I’ll be doing the same!  Happy trails in 2017.

What do you resolve to do in 2017?  Please share your thoughts here.

To JPEG or Not to JPEG: For many RAW shooters there is no need to use RAW+JPG

Regular readers of To Travel Hopefully already know that I always shoot in RAW mode, and most likely you do, too.  I’ve written repeatedly about the major advantages of RAW vs. JPEG format.  For a refresher, here’s a good summary post on the topic: Post on RAW Mode.  I concluded this previous post with a recommendation to shoot in RAW+JPEG mode, where the camera writes out the image data in both its native RAW format and in the familiar but problematic JPEG mode.  Here’s the relevant paragraph from that older post:

I recommend shooting in RAW+JPEG all the time, unless you know you will need the slightly faster shooting speed or extra storage space of JPEG alone.  Doing so will give you the best of both worlds: a quick and easy JPEG to share right out of the camera, and the much more detailed data in the RAW file from which to bring out the nuances in color, texture, and exposure later during post-processing.  If you use JPEG alone, you’ll be throwing away image information you may wish you had later.

But right now, I’m in the middle of making a major transition in my workflow.  I’ve stopped shooting in RAW+JPEG mode and am now storing my images only as RAW files.  Moreover, I’m cleaning up my PC’s hard drive by revisiting many of my directories from shoots over the past few years and deleting all of the original JPEG files (obviously, I am keeping the JPEGs that I exported from Lightroom after post-processing the original RAW files).

Why would I do such a thing, you may ask?  There are several major reasons:

  • I don’t end up using the JPEG files: Shooting in RAW+JPEG had become a crutch for me.  I had been using this mode because I was afraid of not having JPEG versions of all my images, in case I decided post-processing the RAW files was too much work or if I wanted to share certain images right out of the camera.  But I’ve been realizing that I never share JPEGs right after shooting.  They just don’t look good enough for most professional work, so I need to post-process the good ones before delivering them to anyone.  You may have clients who need to see some rough JPEGs immediately after the shoot.  I know some wedding photographers who promise this immediate preview to their clients.  But I don’t have this requirement, so the JPEGs were just sitting on my hard drive, unused, forever.  And it’s so easy to export quick-and-dirty JPEG files from Lightroom shortly after the shoot.
  • Duplicate JPEG files slow down shooting: The RAW+JPEG mode tells the camera to write out two different formats for every image you shoot.  This slows down your shooting by bogging down the camera’s processor, and it also fills up the camera’s buffer more quickly, requiring a disruptively long wait to resume shooting.  It also fills up memory cards more quickly.  While JPEG sizes vary from image to image due to compression algorithms, I find they average about 1/3 to 1/2 the size of my camera’s RAW files.  That’s a lot of extra space on the memory card, so I have to stop shooting to change cards more often.
  • Duplicate JPEG files take up a lot of disk space: Even though my main laptop PC has a 1.5 TB hard disk drive, I find it is always filling up, which considerably slows down workflow and requires bothersome housekeeping to clean up.  Storing unneeded JPEG versions of my many tens of thousands of images wastes a lot of disk space.
  • Those JPEGs slow down workflow: Even though Lightroom has a useful option to import only the RAW version into your catalog, and it keeps track of the duplicate JPEG version of the same image, having both files on your hard drive still slows down post-processing and image maintenance tasks.

I know that some photographers really do need to have JPEG files of their images.  They may be delivering images right out of the camera via a wireless connection to a cloud server that supports only JPEG format.  They may not get to post-processing for some time after the shoot and want to remember what the image looked like with the camera’s settings applied (although here one should note that Lightroom and other RAW viewers will access your camera’s settings via the thumbnail image embedded within your image’s RAW file).  They may really love their camera’s black-and-white conversion tool or other in-camera editing tools, which work only with the JPEG format.  There are quite a few situations in which you may truly require a JPEG version of your images.  But I haven’t encountered these situations in my own recent work and don’t expect to in the foreseeable future.

So, that’s the backstory on why I’m moving from shooting RAW+JPEG to RAW only.  I’m even taking the drastic step of going back to recent shoot directories on my PC and deleting the original JPEG versions of the images.  I’ll report back in a few weeks to provide an update on how this works out for me.  In the meantime, if you’re shooting in RAW+JPEG mode, you may also want to think about whether doing so genuinely helps your workflow or simply is wasting your resources.

Do you shoot RAW+JPEG, RAW only, or some different format?  Why?  Please share your experiences here.

Want to read more posts about photographic techniques?  Find them all here: Posts on Techniques.


Focus on Turkey [Encore Publication]: Spectacular photographic opportunities abound in this troubled nation

In the fall of 2015, my wife and I traveled throughout Turkey on a 2.5-week journey that included adventures in Istanbul, Cappadocia, the Turquoise Coast, and Ephesus.  We traveled with Overseas Adventure Travel (OAT) in the company of a local Turkish trip leader, and we had a wonderful, safe experience.  In today’s post I share our experiences and some of my favorite images from this spectacular but troubled nation.

First, a few words about safety.   Even when we traveled in September and October of 2015, there were concerns about the safety of travel in Turkey.  We did not visit the far southeastern regions of Turkey due to the ongoing violence between various factions from ISIS, Kurdish separatist groups, and the Turkish government.  There was a bombing with many casualties in Ankara while we were visiting a different part of Turkey.  Since our trip, the situation has deteriorated as a result of an escalating crisis in and around the border with Syria, terrorist actions throughout the country, and the broad government crackdown in the wake of the attempted coup earlier this year.  OAT, the company we traveled with, has since suspended all of their trips to Turkey.  Tourism in Turkey is being devastated by the concerns of safety on the ground.

So why would anyone want to go to Turkey?  The cultural, historic, and natural appeals of this destination are undeniable.  It is a travel photographer’s paradise.  And safety is a relative term.  I’ve traveled in over 100 countries and many of them were considered “unsafe” when I visited, but my only two close encounters with real terrorism were in supposedly “safe” cities: a bombing in Tokyo and a mass shooting in Los Angeles.  I felt safer in Turkey late last year than I do in many other parts of the world.  That said, the situation on the ground has deteriorated since I visited, tours to Turkey are becoming hard to find, and only you can decide on your tolerance for risk.  So perhaps wait for more order to return to Turkey before traveling there to make your own images, but in any case you can enjoy my images from this fascinating and gloriously beautiful part of the world.

Our adventure began in Istanbul, an ancient city situated at the border between Europe and Asia.  Its place as a crossroads of history from Roman times through the Byzantine Era, the Ottoman Empire, and the modern Turkish republic is apparent as you stroll its winding streets and ply its crowded waterways.  The are opportunities to make great images everywhere in the city.

Istanbul’s Hagia Sophia, the foremost Byzantine church, is nearly 1500 years old.  When shooting grand architectural sites from up-close, it’s a challenge to try to avoid distortion due to perspective and the necessity of using a wide-angle lens.  Here I kept the horizon level with the ground to avoid excessive distortion.  Buy this photo

The best baklava in Istanbul?  Perhaps.  I certainly didn’t taste any better baklava in the city, and believe me, I tried a lot of baklava.  To make this portrait, I asked our trip leader to introduce me to the baker, who was happy to pose with his wares.  This was shot with natural light and just a touch of fill flash.  Buy this photo

View of the Galata Tower from across the Bosphorous.  Buy this photo

After Istanbul, we traveled to the central region of Cappadocia, famous for its “fairy chimneys,” natural spires formed by the erosion of soft tufa rock.  This region is a veritable dream for travel photographers!

Upon arriving in Cappadocia, we were thrilled to learn our hotel room was inside an ancient cave dwelling.  (Not to worry, it had been recently remodeled.)  When shooting interiors, it’s usually best to use a fast wide-angle lens and to compose the image carefully so as to gain the viewing perspective you want.  Buy this photo

The Goreme Open Air Museum comprises dozens of ancient Byzantine churches carved out of the tufa rock.  Remember to capture some images that include yourself and your travel companions.  Refer to this post for more practical tips about making great self-portraits while traveling: Post on Self Portraits.  To make this image, I set up the camera on a lightweight travel tripod, composed it by having my wife stand in front of the “fairy chimney” church, then joined her in the frame and triggered the camera using a remote release.  Buy this photo

The soft tufa stone formations look almost like sand dunes in the late afternoon glow.  I shot in RAW mode (as always!) and underexposed slightly to allow for a higher-contrast image during post-processing.  Careful cropping also helps a striking landscape really pop.  Buy this photo

We awoke at 5:30 AM to the sight out our cave-hotel’s window of hundreds of hot air balloons launching about the fairy chimneys.  I jumped out of bed, barely remembering to throw some clothes on, before running out the our balcony to set up a tripod and capture this amazing scene.  I exposed for the rock formations and allowed the balloons to be partially silhouetted.  Buy this photo

We visited a school in the region, always a favorite activity during our travels.  While I also made quite a few images in the classrooms with the kids and teachers, I like the unusual perspective in this image.  It was shot from outside the school building as the kids came to the windows to wave goodbye.  Buy this photo

We took a very memorable hot air balloon ride at dawn over Cappadocia’s otherworldly landscape.  I made this image looking down from our gondola at three other balloons in various stages of preparing to launch.  The amphitheaters of soft tufa rock can be seen in the middle-ground and the rising sun in the far background.  Buy this photo

At a rug-weaving cooperative, this woman enjoys a cup of Turkish coffee during her break.  I was drawn by her colorful clothes and enigmatic smile.  I asked our trip leader to introduce us and inquire if it was okay for me to make a portrait.  Shooting quickly with natural light only, no time to set up a tripod, and a too-slow lens mounted on the camera, I had to boost the ISO setting quite high.  Fortunately, I was able to reduce much of the noise in the image during post-processing.  Buy this photo

Hiking up to the top of Uchisar Castle, the highest elevation in Cappadocia.  Buy this photo

We had the chance to watch a whirling dervish ceremony.  The Samazens, followers of Mevlana Rumi, are a mystical Sufi order who practice the ritual we witnessed.  To capture the sense of motion, I used a slower shutter speed to blur the participants.  Buy this photo

The Mevlana Museum houses the monastery and tomb of Mevlana Celaleddin Rumi, the mystic who founded the “Whirling Dervish” sect.  This image captures the incredible workmanship on the interior of the monastery, especially around Rumi’s tomb.  Flashes and tripods are not allowed inside the tomb, so I had to use a fast lens and high ISO setting to handhold the camera.  Buy this photo

We departed Cappadocia and drove to Antalya, the gateway to the southern Mediterranean region known as the Turquoise Coast.  Antalya boasts an ancient Roman harbor and a fascinating archaeological museum.

We happened upon an interesting scene when several archaeologists and their students attempted to match a recently excavated statuary head to a body already in the museum.  Always be on the lookout for serendipitous scenes, which often make the most memorable images from a trip.  Buy this photo

These Lycian house-tombs were carved into the cliffs centuries before the Romans arrived at Myra.  Buy this photo

We boarded our gulet, a traditional Turkish wooden sailing yacht, for a four-day cruise along the Turquoise Coast.  Each day offered a wonderful photographic tapestry of great images, as we sailed, hiked, swam, and dined.

Kayakoy is a ghost town, a Greek village abandoned when the Turks expelled Greeks after their war for independence in the early 20th century.  Turks living in Greece were also expelled the same year.  Buy this photo

My wife Mary spotted this rare wildcat, which looked to us a bit like our local Californian bobcat, along one of our daily hikes.  I changed lenses very quickly while slowly approaching the cat, then captured this portrait using a medium telephoto just moments before he slipped into the brush.  Buy this photo

A riverboat took us from our gulet yacht to the ancient Lycian site of Caunos.  This image of a beautiful kingfisher along the side of the river was captured using a long telephoto lens and a fast shutter speed to allow for handholding the camera on a rocking boat.  Buy this photo

On our last full day in Turkey, we finally got to visit the splendid ruins of Ephesus, a major Roman city in the region.

The ruins at Ephesus include the incomparable Library of Celsus, pictured here in a self-portrait of my wife and me.  To achieve the broad depth-of-field required to ensure both the people and the buildings were in sharp focus, I used a small aperture (large F-stop number).  Major archaeological sites are often packed with other visitors, so try to find vantage points that allow the crowds to appear small in comparison to your main subjects.  Buy this photo

Throughout Turkey, the food was vibrant, simple, and delicious.  Our final day’s lunch, in a beautiful village in the mountains, consisted of course after course of delightful meze (appetizers).  Buy this photo

Turkey is a remarkable destination for travel photography.  Let us hope its current troubles will soon be a thing of the past and that safe and affordable travel will again be available there.

Have you visited Turkey?  What were your most memorable experiences there?  Please share your thoughts here.

Want to read more posts about travel photography destinations?  Find them all here: Posts on Destinations.

Camera as a Service? [Encore Publication]: A first look at Relonch’s artificial intelligence photography service

In the 150 or so years of its history, the camera has evolved rapidly as a result of the advent of new technologies, each promising to dramatically simplify the photographic process and improve the resulting images.  Just within my lifetime, there have been major upheavals via the introductions of the Kodak Instamatic, the Polaroid SX-70, and of course digital photography.  So perhaps it was inevitable that someone would develop an AI (artificial intelligence) to make photography as simple as pushing a single button.

A company called Relonch (https://relonch.com/) is developing such a system now.  Sometime in 2018, they expect to roll out a Camera as a Service for $99 per month.  You get a loaner of a brightly colored Relonch 291 camera (manufactured by Samsung), with a fixed focal length lens and only a single button, which is used to take the picture.  It doesn’t even have an LCD screen to review your images.  The purported value of the subscription price, of course, is not derived from the camera hardware, but rather from the service.  For this lofty price, your camera transmits your image files to Relonch, who then use algorithms to analyze and process the files.  The next day, they send the processed images that they consider to be your best photos back to your mobile device of choice.

Relonch 291
The Relonch 291 camera

The concept here is that most people are confused by all the settings on their camera, even if it’s a fairly simple point-and-shoot device, so their photos rarely come out the way they envisioned them.  Instead, let them use a simple camera with just a single button, but employ AI techniques to post-process the best images to make them look closer to the way the user intended.

I haven’t tried the camera and its wraparound service yet (the company’s headquarters and showroom are in Palo Alto, near to where I live, so perhaps I can do so soon), but based only on their description of the concept I share my thoughts here.

  1. Will users pay $1200 per year for this service?  I’m skeptical as to whether there is a broad market for the service at this price point.  “Serious” photographers, that is professional and enthusiast amateurs, already know how to use the manual controls on our cameras and enjoy the process of capturing images and enhancing them during post-processing to achieve the final results we want.  Are there enough users who don’t know how to use their cameras but are still willing to pay so much for better images?  Time will tell.
  2. Are people willing to leave the choice of which images they receive up to a software algorithm?  I wouldn’t want someone else, even a top professional photographer, deciding which of my images I get to see and permanently deleting the rest.  And I certainly wouldn’t want an AI to make this decision for me.
  3. Are users okay with waiting a day to see and share their images?  We’ve gotten pretty spoiled as a consumer class.  We expect instant gratification, and ever since the first Polaroid cameras came out in the 1940s, photographers have been able to see their images right away.  Waiting a day may not fly.
  4. Do people really want their photography to be mechanized?  For its whole history, photography has seen its reputation tarnished when compared to other visual art media because a part of this art form includes the use of a mechanical device, the camera.  Just as a great painter creates her art through her vision and her technique, so does a great photographer.  The gear we use is only incidental to the quality of the images we create.  I fear that by taking the craft out of the process and substituting an AI for the artist’s vision, the Relonch service will further degrade photography as an art form.  And let’s be honest here.  An AI can adjust color balance, sharpness, clarity, vibrance, and exposure to improve a raw image, but it can’t determine how to crop or selectively adjust parts of the image to make it artistically pleasing or to give it a story to tell.  And most important of all, no amount of post-processing can turn a poorly composed or an uninteresting image into one worth looking at.  An AI may soon be able to drive our cars from Point A to Point B, be we’re a long way from having an algorithm that can create true visual fine art.  I’ll leave you with the words of master landscape photographer Ansel Adams: “There’s nothing worse than a sharp image of a fuzzy concept.”

What do you think of the Camera as a Service concept?  Valuable evolution of photography that will bring its benefits to a wider range of humanity, or expensive gimmick that will degrade the artistic worth of the medium of photography?  Please share your thoughts here.

Want to read more posts about gear?  Find them all here: Posts on Gear.

Focus on CounterPulse Performing Diaspora [Encore Publication]: Performances that speak to cultural tradition and transformation

Recently I was privileged to be invited by CounterPulse to shoot their annual artist residency program, Performing Diaspora.  Located in San Francisco’s Tenderloin neighborhood, CounterPulse is an essential local arts organization that gives a voice to performing artists whose message would otherwise not be heard.  I’ve been a fan for a while, and this was my first opportunity to photograph one of their performances.

The program is comprised of two pieces, each designed and choreographed by an artist-in-residence and each presenting a theme related to the links between cultural tradition and transformation, between keeping tradition alive and assimilating.  I found both pieces to be very powerful and moving.  In this post, I share a few images from the event along with a few words describing the main themes I gleaned from the evening.  And of course there are some tips about how to make good images under these challenging shooting conditions.

The first piece, “silbihan,” was conceived, directed, and danced by Filipino-American artist Samantha “SAMMAY” Penaflor Dizon.  Layering dance with voiceover, music, and projected video, this piece traces a journey from the traditional culture of the Philippines to life today in the USA.  The key message I took away is that our cultural underpinnings are within each of us, and when the time is right we will discover how they inform and inspire us.

Artist SAMMAY dances in front of a projected video depicting traditional life in the Philippines.  To make this image, I used a fast portrait lens and high ISO setting to allow a reasonably fast shutter speed in the low light conditions of the theater.  Care needs to be taken in these situations to render the color balance acceptably in the mixed lighting conditions.  Buy this photo

Later in her piece, SAMMAY, now resplendent in bright traditional dance attire with cape, resolves the tension from the earlier segments in a whirl of color and motion.  Here it was important to find a suitable shutter speed that would freeze most of her motion but still allow some of her gestures to be captured as a blur.  Buy this photo

The second and final piece in the program is entitled “unending.”  Choreographed, danced, and directed by dana e. fitchett, the work also incorporates three additional dancers and music in a wide range of styles.  I enjoyed this piece for its sheer physicality and also for the message of tension giving rise to hope that we all can support each other regardless of our backgrounds.

Director dana e. fitchett expresses her themes through patterns of movement.  The mixed LED lighting was especially challenging in this piece, so in post-processing of my RAW image files I paid careful attention to color balance in an attempt to render colors as naturally as I could.  Buy this photo

The patterns established by artist dana early in her piece progress into larger patterns with the addition of several more dancers.  Themes I took away include tension resolving into acceptance and support.  Here I capture a particular moment when the performers are moving from opposition to synchronicity.  Buy this photo

To me, CounterPulse holds a special place in the vibrant and varied San Francisco Bay Area arts scene because they encourage experimentation and interpretation of cultural diversity.  Performing Diaspora 2016 is a terrific program featuring talented artists who deserve to be seen and heard.  As a photographer, I feel privileged when my work can further valuable causes such as theirs.  If you live in the SF Bay Area, please try to attend one of CounterPulse’s upcoming shows.

What performances move you?  Have you attended, or photographed, events that inspired you to open your mind to new ways of thinking?  Please share your thoughts here.

Want to read more posts about what to shoot while traveling or at home?  Find them all here: Posts on What to Shoot.


Cool, Calm, and Composed: All the technology in the world can’t replace your vision when composing images

Photographic composition is the process of determining which elements to include in the image and how to combine them in an artistically pleasing way.

What makes a great photograph?  You’ll hear many different answers to this question from different people, but to me a great photograph needs to integrate at least three of these four elements: compelling subject, beautiful light, flawless technical execution, and thoughtful composition.  Assuming we can find a great subject and either find or manufacture lovely lighting, the technology in modern cameras can assist us in certain technical matters such as exposure and focus.  But even the best of today’s AI technology can’t replace the artist’s vision when it comes to photographic composition.  For more of my musings on the application of AI to photography, see yesterday’s post: Post on AI and Photography.

Today’s post presents a quick primer on some of the guidelines that can help us compose our images.  But keep in mind that there are no hard-and-fast rules when it comes to composition.  The photographer must choose which “rules” to use when composing, and when to break some rules.

      • Rule of Thirds: One of the first compositional tools most beginning photographers learn is the so-called Rule of Thirds, which states that strong composition is achieved by placing key elements along the imaginary lines that divide the frame into thirds vertically and horizontally; better yet, try to place the most important parts of the subject at the intersection of a pair of these lines.  This portrait I made of two sisters in Arusha, Tanzania, places each sister’s dominant eye at an intersection point of two of the imaginary dividing lines.

Tanzania Buy this photo

          • Leading Lines: Another tool to aid in composing strong images is using the natural lines in the image to draw the viewer’s eye into the frame.  This landscape made while hiking part of the Sheep’s Head Way in southwestern Ireland incorporates the leading lines of the ancient stone wall, the rainbow, and the coastline to draw the eye down to the sea, over the rainbow, and across the coast.

 Buy this photo

          • Framing Elements: Using natural frames within the image to set off the main subject can be a useful technique.  Look for doors and windows in a population center, or for natural arches, trees, and other landforms in a natural setting.  This night landscape made in Yosemite National Park frames the Milky Way within a ring of trees and granite walls.

 Buy this photo

          • Point-of-View: Think about how the different elements in the image will appear in the perspective of your location.  I could have shot this portrait of a man with his duck at a street fair in San Francisco straight on with them both looking into the lens.  Instead, I chose a viewpoint that was very close to the duck’s head, shooting up from its perspective and relegating the human to the background and edge of the frame, nearly out of focus.  This changes the nature of the portrait to a more humorous and offbeat tone, which matched the occasion of the How Weird Street Faire.

USA Buy this photo

          • Background: Always be at least as aware of your background as your foreground subject matter.  Careful choice of background to support your image’s overall theme is one of the surest ways to elevate your image.  In many cases it is desirable to have a clean, uncluttered background, but for this image of the San Francisco Pride Parade, I wanted the background to support the theme of solidarity and strength in numbers.  While the main subject in the front is the only element in crisp focus, the layers of marchers with flags behind him supports the concept he is not alone.

 Buy this photo

        • Patterns: Composing an image around a recurring pattern can add considerable dramatic impact.  I framed this image of miners’ cottages in Svalbard, Norway by isolating the repeating pattern of houses, each in a different vivid color, against the stark white of the snow and bleak sky.

 Buy this photo

  • Symmetry: Images with symmetry along one or more dimensions are often striking and artistically pleasing.  The subject can have natural symmetry, such as in a face, or can be framed with its reflection to create symmetry.  I framed this image of a resting alligator with its reflection in the Louisiana bayou waters to create a dramatic symmetry.

 Buy this photo

Keep these guidelines in mind as you choose how to compose your images, but remember that which one(s) you apply will depend on the image, that its okay to break the rules, and that ultimately you are the artist and what you envision, not what the rules state, is correct for you.

What guidelines help you compose your best images?  Please share your thoughts here.

Want to read more posts about photographic techniques?  Find them all here: Posts on Techniques.