

I’ve posted repeatedly about the importance of understanding how to take manual control of your camera in order to make images that are properly exposed and focused. Whether you are using a professional DSLR, an advanced full-frame mirrorless ILC, a compact point-and-shoot, or the camera built into your smart phone, there is no way you will get consistently acceptable results if you leave the camera’s settings to its auto mode. See this post for an overview: Post on Beyond the Auto Mode.
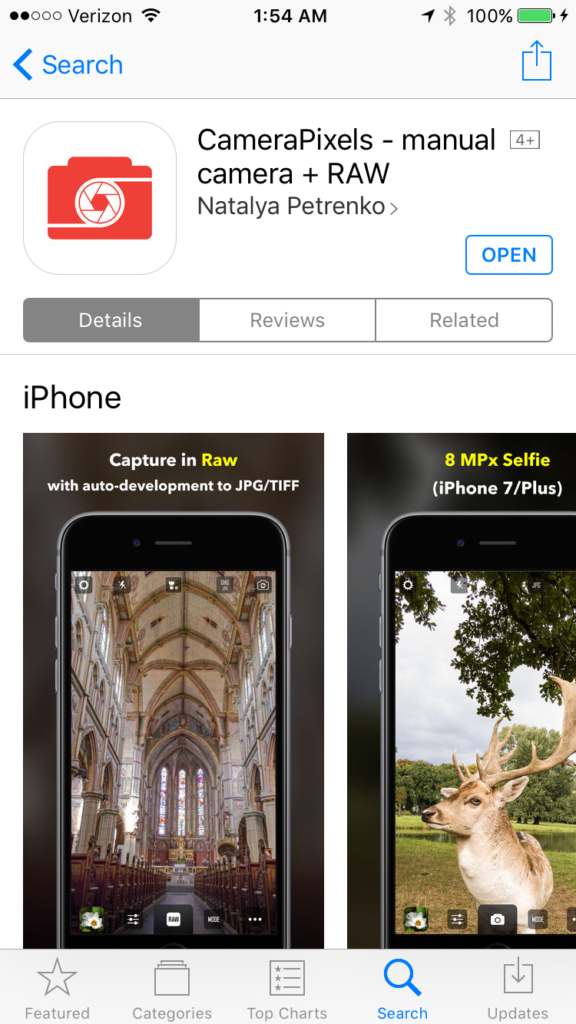
There are dozens of camera control apps available for the iPhone, and it can be confusing to figure out which one is right for you. In the past, I’ve reviewed the following apps: Manual (see post on Manual app), ProCam 4 (see post on ProCam 4 app), and Camera Pixels (see post on Camera Pixels app). In today’s post I offer a first look at a new app, Chromatica, from the same company that developed Camera Pixels.
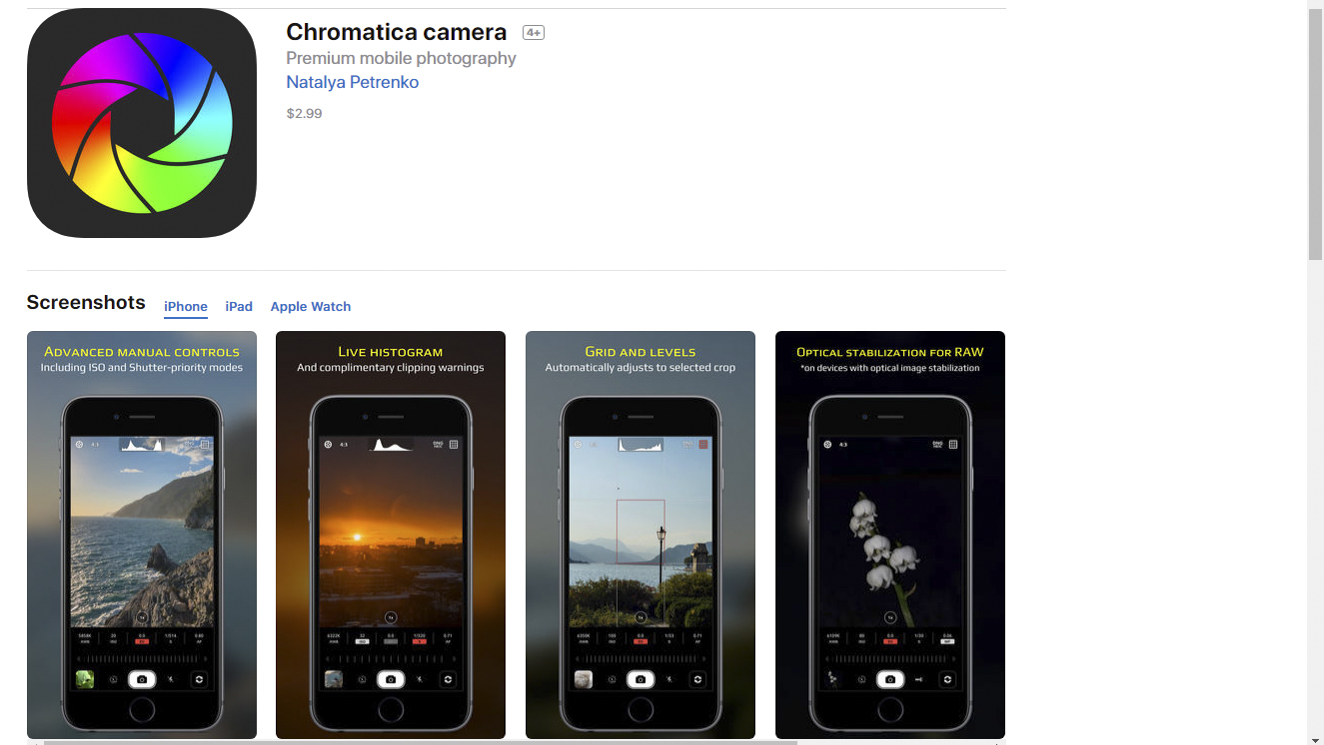
Chromatica, priced at an appealing $2.99 on the Apple App Store, is aimed for a middle market of photographers who want more manual control than the camera’s native (built-in) app can provide but without the complexity of more enthusiast-level apps, such as Camera Pixels or ProCam 5 (the successor to ProCam 4). It competes with other mid-level camera control apps such as Manual, though it is priced at $1 less. My initial testing of the new Chromatica app found it to be a very worthy tool for most users to take control of their iPhone photography without the expense or complexity of the more advanced apps. Chromatica has a very simple and intuitive interface, offers the ability to shoot in RAW mode for much higher quality images, and provides the basic required functionality to take manual control over your camera. It doesn’t offer the full suite of bells and whistles found in the more sophisticated apps, but it’s still a powerful tool that makes the iPhone camera act much more like a DSLR or mirrorless camera while providing a clean and simple user interface.
Chromatica’s features include the ability to shoot in either auto or one of several manual modes such as Shutter Priority and ISO Priority. It’s quite easy to realize which mode you’re in and to return to auto mode when you’re done taking manual control over the camera; the same cannot be said of some other camera control apps I’ve used. Another essential feature is the ability to separate the exposure and focus points, so that exposure can be set based on one part of the image while focus is set on another part. There doesn’t seem to be any user manual or in-app help function to explain this feature, so here’s how it works: simply touch the screen with two fingers and you’ll see a circle and a square appear. Move the circle to the point in the image where you want to set exposure, and move the square to the point where you want to set focus. Other useful features include an exposure histogram to show you the range of brightness levels in your shot, and exposure clipping to flag the areas of the image that are too bright or too dim. Chromatica includes full optical stabilization in RAW mode as well as focus peaking to aid in manual focus operations.
What you won’t find in Chromatica, but for most photo-making purposes won’t miss, are advanced image-editing tools (instead, find these in your favorite standalone image editing software such as Lightroom or Photoshop), exposure bracketing, and long-exposure camera control modes. Other more sophisticated apps do offer these and more features, but at the expense of higher cost and greater complexity.
In short, Chromatica does exactly what it’s designed to do: make it simple and quick to manually control your phone’s camera and make the most of it’s capabilities. For most casual and enthusiast photographers, this is good enough when using a phone’s camera. I typically shoot with professional DSLR gear costing many thousands of dollars when I need pro-level results, but I love the convenience and ease of grabbing some quick shots with my phone, and in the future I am likely to use Chromatica to control the phone’s camera when it’s a straightforward capture. I’ll continue to use Camera Pixels and ProCam 5 when I require more advanced features to control the phone.
Here’s the link to the Chromatica app on the Apple App Store: Chromatica app.
For reference, here are some popular iPhone camera control apps along with their price and brief notes:
- Native iOS Camera app (Free): Comes built-in with the iPhone. Does not allow RAW capture, manual control of the camera, or any advanced features, but does allow the separation of focus and exposure points.
- Camera Pixels Lite (Free): An entry-level version of Camera Pixels that offers basic camera control features but does not allow RAW capture.
- Manual ($3.99): Another entry-level app that is really starting to show its age. Offers basic camera control features including RAW capture, but lacks more advanced features and is difficult to use.
- Chromatica ($2.99): A great value and very easy to use, this app offers camera control features, RAW capture, and a few more advanced features.
- Camera Pixels ($3.99): A powerful manual control app with a very wide range of features, it remains quite intuitive to use.
- ProCam 5 ($5.99): A very powerful app with a wide range of camera control features plus more sophisticated functionality typically associated with DSLRs and mirrorless cameras. Also includes a full suite of image editing tools. It can be difficult to use. Note: I’ve only tested the older ProCam 4.
- Pro Camera ($5.99): A popular higher-end app with a full range of features. Note: I’ve not yet tested this app.
What app do you use to control your phone’s camera? What do you like and dislike about it? Please share your thoughts here.
Want to read more posts about photography gear? Find them all here: Posts on Gear.
